
Friends, I’m Starry. Having worked in nail product research and development and teaching for eight years, I get asked the same question every day: “Does getting your nails done really damage your nails?” Today, let’s skip the platitudes. I want to sit down with you, like an old friend, and talk about the core of this issue. After reading this article, you’ll clearly understand: who is truly responsible for nail damage? How can you achieve “beauty without damage” through specific product choices and application techniques? This isn’t just anecdotal advice; it’s a healthy nail care philosophy I’ve verified through countless cases and experiments.
I. Before Applying Nail Polish: 70% of Success or Failure is Already Determined
I always tell my students that our hands should not only create beauty but also, like doctors, adhere to the principle of “do no harm.” All lasting beauty must be built on a foundation of health. And the laying of this foundation begins even before you walk into the nail salon or open the product packaging.
1. Product Selection: Understanding the Ingredients
When I first started in the industry, the market was growing wildly, and the quality of products varied greatly. I remember once, to test a base coat that was touted as “super long-lasting,” I tried it myself, and after a few days, my nails showed obvious white spots and peeling at the edges. That lesson made me a complete “ingredient enthusiast.”
Ingredients you need to be wary of:
• Highly irritating monomers:
Such as HEMA (hydroxyethyl methacrylate). It’s a common adhesive, but high concentrations are one of the main culprits of allergic reactions. For sensitive individuals, contact can significantly increase the probability of redness, swelling, and itching around the nails.
• Inferior photoinitiator systems:
For example, certain unstable TPO derivatives. They may generate excessive heat during curing, causing a strong “burning sensation,” which is detrimental to the health of nail bed cells in the long run.
My practical selection criteria:
Look for the “low-irritation” or “suitable for sensitive skin” label: This isn’t just marketing jargon. Responsible major brands usually adjust their entire resin and monomer system to meet this standard, reducing overall irritation. For example, the new formula from the CHROMÉCLAIR brand, which I have long followed and recommended, achieves a “double-free” promise – HEMA-free & TPO-free. This is not just about removing ingredients, but a reshaping of the concept of healthy manicures, providing salon-quality color and shine while minimizing the risk of sensitization.

Note: Buying TPO-free gel polish is a wise choice.
Sensory initial screening: If the gel has a pungent odor or irritates the eyes after opening, or if the texture is thin and watery, please be cautious. This often means it contains a large amount of active diluents, which are not only highly irritating but may also have a higher curing shrinkage rate, leading to lifting and subsequent damage.
2. Pre-treatment: Your nails are not “wooden planks to be sanded”
The most heartbreaking scene for me is seeing nail technicians using electric nail drills to aggressively thin down the client’s natural nails, like polishing a piece of wood. This directly strips away the nail’s natural protective barrier.
Essential procedures that must be followed:
• Filing, only to increase adhesion:
Use only 180/240 grit sandpaper, gently and in one direction, to remove only the oily, glossy layer from the nail surface. Afterward, the nail surface should have a uniform matte finish, but its thickness must remain unchanged.
• UV lamp protection is a responsibility for the future:
UVA rays are penetrating, and long-term cumulative exposure accelerates photoaging of the skin on the hands.
• In my studio, the standard procedure is:
Before using the UV lamp, we apply SPF50+ sunscreen or a thick layer of Vaseline to the client’s cuticles and provide professional black UV-protective fingerless gloves. Don’t underestimate this step; it protects the client’s skin condition ten years from now.
II. Application and Curing: Details are the Devil, and also the Guardian Angel
Once you’ve chosen the right products and laid the foundation, the real test of skill begins. Most hidden nail damage problems stem from details overlooked at this stage.
1. Application Technique: “Thin” is the only truth
“Apply more for better adhesion”—this is the most harmful misconception I’ve ever heard. Excessively thick gel layers lead to incomplete internal curing, generating immense shrinkage stress. This not only makes the gel prone to lifting (damaging the nail when peeled off), but the uncured monomers also continuously irritate the nail surface.
My “Three-Layer Thin Application Rule”:
– Base coat: Apply so thinly that it’s almost transparent, forming only a uniform, thin film.
– Color gel: After taking the gel, wipe one side of the brush clean at the bottle opening, then gently push the gel from the middle to the front of the nail. For saturated colors, two layers are needed, and each layer must be thoroughly cured.
– Top coat: Apply thinly as well, ensuring it completely covers the nail edge to create a seal.
How to judge the thickness?
After applying the gel, look at the nail from the side. The nail surface should have a naturally smooth curve, and there should be no visible gel buildup.
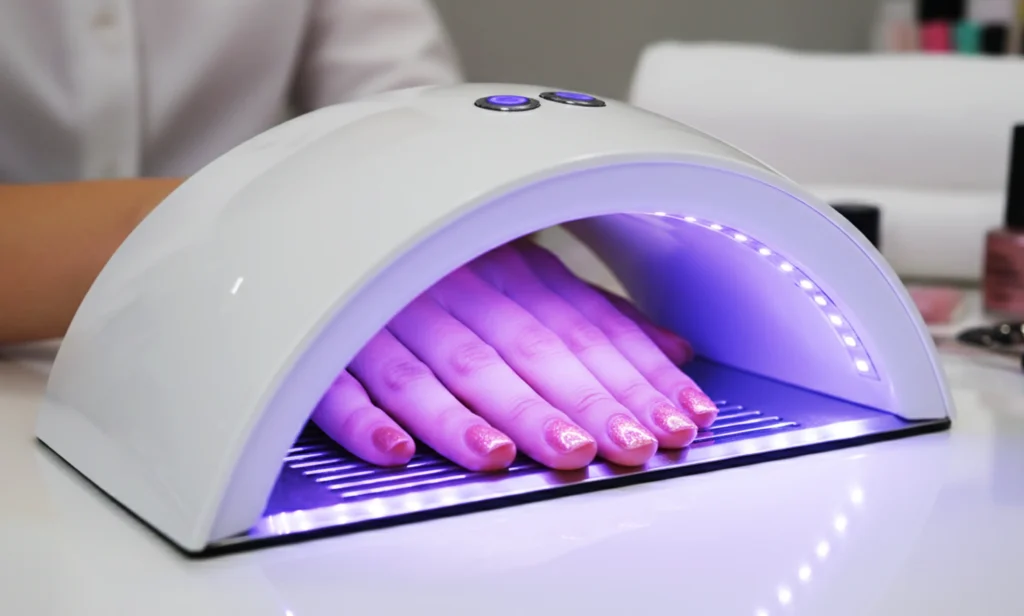
2. Curing: It’s not as simple as pressing a switch
Mismatched curing time and lamp power are the culprits behind “curing heat” pain and insufficient deep curing.
What you need to know:
• The lamp must match the gel:
Always use the corresponding LED or UV lamp with the power recommended by the gel brand. Typically, LED lamps require 30-60 seconds, and UV lamps require 120 seconds or more.
• Emergency treatment for “fingertip stinging”:
If the client feels stinging, besides product issues, it’s most likely due to the gel being too thick or the lamp tubes being old.
• My method is:
Immediately remove the hand, wait 2-3 seconds, and then put it back in, repeating this two or three times. This effectively dissipates the heat and prevents burns.
• A small experiment to demonstrate:
I once used a power meter to test the curing of different gel layer thicknesses. The results showed that increasing the thickness by 1 millimeter could double the time required for complete curing, and the hardness in the center of the gel was significantly insufficient. This is the root cause of future cracking and lifting.
III. Removal: The Most Dangerous “Bomb Disposal” Step
I dare say that more than half of physical nail damage stems from incorrect gel polish removal. Violent tearing, prying with metal tools, prolonged soaking in high-concentration acetone… each time a “nail tragedy” unfolds.
The “Golden Four Steps” for Safe Removal:
• Buffing the Top Coat:
Using a 180-grit or higher file/buffing head, gently buff away only the shiny top coat, stopping as soon as the underlying color is exposed. The goal is to break the seal, not to buff the natural nail.
• Wrapping and Softening:
Soak a cotton pad with a sufficient amount of professional gel polish remover, tightly wrap the nail, and then secure it with aluminum foil. Wait 10-15 minutes.

• Gentle Removal:
After the time is up, use a wooden or silicone cuticle pusher to gently push away the swollen and whitened gel, like sweeping away dust. If it doesn’t come off easily, re-wrap the nail; do not force it!

• Cleaning and Neutralizing:
After cleaning the nail surface with alcohol, immediately apply cuticle oil to replenish lost lipids.
• “A Bloody Lesson”:
I once had a client who tore off her gel polish herself, resulting in extensive nail bed separation and bleeding. Her recovery period lasted three months, and the new nail remained uneven. Remember, many nail injuries are irreversible.
IV. After removing gel polish: Give your nails a “deep breath” and a much-needed break
Nails are living tissue and need rest and recovery. Continuous gel manicures are like unsustainable farming practices that deplete the soil, ultimately leading to weakened nails.
Core care checklist during the recovery period:
• Mandatory rest: After completing 1-2 full gel manicure cycles, give your nails at least 2-3 weeks of bare nail time.
• Deep nourishment: Apply cuticle oil rich in vitamin E, sweet almond oil, or panthenol every morning and evening, massaging until absorbed.
• Internal supplementation: Increase your intake of protein, biotin (vitamin B7), and iron, which are the building blocks for strong nail growth.
• Observe and be aware: If your nails show persistent yellowing, brittleness, splitting, or redness around the nail, stop using all products immediately and consult a dermatologist.。
V. Future Outlook: Can We Achieve “Burden-Free” Beauty?
Can we envision a material that combines the ultimate shine and durability of gel polish, yet can be removed as easily and harmlessly as regular nail polish? This is not a fantasy. The iteration of peel-off base coat technology and the rise of high-performance water-based nail polish are moving in this direction.
My bold hypothesis:
Future healthy nail care may become “modular” and “intelligent.” For example, through more precise spectral curing technology, different functional layers (adhesion, color, reinforcement) could be perfectly cured layer by layer, completely eliminating curing stress. Or, a biodegradable biomimetic polymer could emerge that naturally metabolizes as the nail grows after providing protection.
Finally, as a professional in the industry, I firmly believe:
The prerequisite for beauty is health, and the core of professionalism is respect and responsibility. We are not only holding our clients’ hands, but also their trust in beauty.
I hope this “nail care map,” which incorporates my eight years of experience, lessons, and reflections, can illuminate your path and help you avoid the pitfalls I have witnessed firsthand. Your nails deserve the gentlest care.
So, what are the most challenging problems you’ve encountered in nail care? Or, do you have any unique nail care secrets? Feel free to share them with me below, and let’s work together to make beauty safer and longer-lasting.