When it comes to at-home manicures as well as professional nail art, gel polish has certainly become the rage in the beauty world, providing long-lasting wear, shine, and color payoff that surpasses the competition in the form of traditional nail polish. For the individual who enjoys changing up their nail color as well as self-expression, one question seems to come up time and time again: Can You Mix gel Polish Colors? The answer is a resounding yes, but mixing gel polish is not the same as mixing regular nail polish, requiring a great deal of care, precision, as well as knowledge in order to achieve perfect results. In this comprehensive guide, we will cover everything you need to know about mixing gel polish color, including step-by-step instructions as well as expert advice.
Why Mixing Gel Polish Is a Game-Changer for Nail Lovers
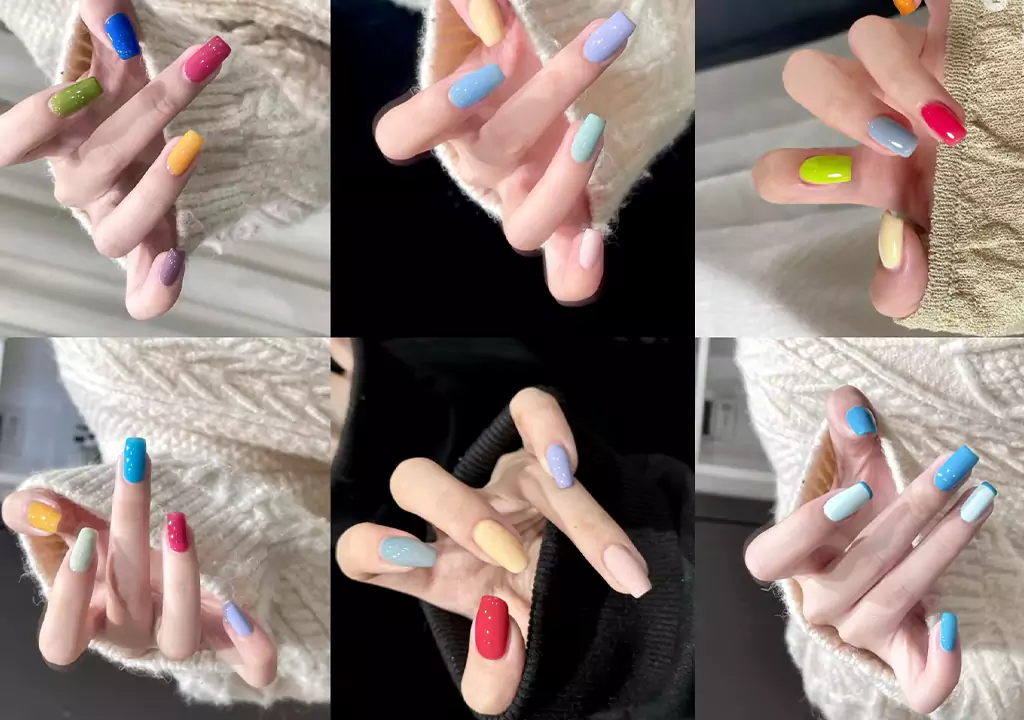
Nail art is all about being creative, and mixing gel polish is a way for you to think outside the boundaries of pre-made gel polish colors that are available in stores. You can make your own unique color that suits your mood, outfit, season, and so on. Whether you are a professional nail artist wanting to offer your customers a customized manicure experience or a beauty enthusiast wanting to take your DIY home manicure to the next level, mixing esmalte en gel is a way for you to unleash your creativity. Rather than spending money on multiple individual bottles of gel polish that may not necessarily have every color you want, mixing gel polish is a way for you to make new color out of existing gel polish that you may have accumulated over time that is no longer in trend.
Aside from cost savings and customization, another way mixing gel polish can be advantageous is in creating colors that complement your skin tone. While gel polish is readily available in various colors, it is not uncommon for such colors to look very different on different skin tones. By mixing your own gel polish, you can create your own undertones, be it warm, cool, or neutral, to complement your unique skin tone. Whether it is pastel colors for spring, jewel tones for winter, or neon colors for summer, mixing your own gel polish is sure to create a unique look just for you.
Can You Mix Gel Polish Colors?
To put it simply: yes, absolutely, you can mix your gel polish colors. In fact, this is what many professionals in the beauty industry do on a regular basis in their salons in order to achieve unique gradient, ombre, as well as plain color effects. With a little practice, this skill can easily be mastered by anyone at home. However, it is worth noting that gel polish is a very unique product, unlike regular air-dry polish, and if not handled carefully, it can result in a mess of a finish, which is not only bubbly and textured but also fails to cure under the lights.
Gel polish is a thicker and more pigmented product that is meant to cure and harden through exposure to a certain range of wavelengths of light. Regular nail polish, by contrast, dries through solvent evaporation. Because of this critical difference between these two products, one golden rule that you need to remember at all times is that you should never mix regular nail polish and gel polish. They have different chemical bases and mixing them will ensure that your gel polish fails to cure properly and that your nails will be sticky and tacky and prone to peeling and chipping.
Gel Polish vs. Regular Nail Polish Mixing: Key Differences
Both regular polish and gel polish have the capability to be mixed in order to produce a completely new color. However, the characteristics of both polishes make their respective mixing processes very different. Regular polish, being the lighter version, allows the mixing process to occur very easily. One can easily mix the color on a palette or even on the nails, as the chances of any bubbles forming are very low.
However, mixing gel polish requires a bit more finesse. The richness and creaminess of the gel polish require a more thorough mixing to ensure that the polish does not streak or have uneven color, and too much mixing may even cause air bubbles to develop in the polish, which may mar the smoothness of the finished manicure. Additionally, the mixed gel polish must be cured on a swatch stick to ensure the finished product color, as the gel polish may not have the same color in its wet state as it does in its cured, hardened state. Although it takes a longer amount of time to mix gel polish, the end result is well worth the effort to ensure a salon-quality finish that may last just as long as a regular gel polish finish.
Step-by-Step Guide to Mixing Gel Polish Colors Correctly
Follow these simple, professional steps to mix your gel polish perfectly every time, without bubbles, streaks, or curing problems:
Step 1: Prep a Clean, Non-Porous Mixing Surface
First, you need to prepare a clean, non-porous surface for mixing your gel polish. A non-porous surface is crucial in ensuring your gel polish formula remains stable. A suitable surface for mixing your gel polish includes a glass nail art palette, ceramic tile, silicone mixing mat, and even aluminum foil. You need to avoid using a paper plate or cardboard for mixing your gel polish, as it has a tendency to soak your gel polish, resulting in lint and debris in your polish. You need to clean your surface using isopropyl al cohol.
Step 2: Select Your Gel Polish Shades
Select two or more shades of gel polish that you wish to mix. For best outcomes, it is always best to stick to a single brand of gel polish. Mixing different brands of gel polish may, in some instances, cause separation of formula, inadequate curing, and a shorter product life. If you wish to mix different brands, it is always best to first make a small batch to test their compatibility. You may begin with simple shades and then proceed to more intricate shades of gel polish.
Step 3: Dispense and Mix Gently
Put a small amount of each esmalte en gel color on your mixing surface. Remember to put a small amount at the start to avoid wastage. You may use a clean nail art brush, orangewood stick, or gel polish mixing brush to mix your gel polish. Ensure that you mix the gel polish slowly and gently. You should never shake or whip your gel polish since it may trap bubbles in the polish. You should ensure that the gel polish color is well mixed and that there are no streaks or swirls of unmixed gel polish in the polish.
Step 4: Test the Cured Color
This is one of the most important steps in mixing your esmalte en gel. You will then dab a small amount of your mixed gel polish onto a nail swatch stick or foil, then cure it under your lamp, either UV or LED, for a standard curing time for your gel polish, usually ranging from 30 seconds to a minute for LED lamp curing, and 2 to 3 minutes for a UV lamp. You will then be able to see the actual color of your finished product, since a wet gel polish may appear lighter or darker than it is. You may then adjust the proportion of your gel polish colors accordingly.
Step 5: Apply Like Standard Gel Polish
After you’re satisfied with your custom-made mixed gel polish, you can now apply it to your nails in the same way as you apply regular gel polish. You start by applying a thin layer of base coat, curing it, and then applying one to two thin layers of your custom-made gel polish, curing it completely. You end by applying a high-shine top coat and curing it for a chip-resistant finish. The application is just the same as regular gel polish, so you won’t need any special tools for your custom-made polish.
Pro Tips for Perfectly Mixed Gel Polish
- Stick to one brand: As previously mentioned, using gel polish formulas from the same brand will allow for optimal curing, texture, and longevity. Generally, most gel polish formulas from a particular brand are compatible and can be mixed.
- Mix a small batch at a time: Because gel polish is a long-lasting product, you will need a small quantity for a single manicure. It is not advisable to mix a lot of gel polish at once since this will be a waste if you are not satisfied with the color.
- Get rid of air bubbles at all costs: It is recommended that you stir your gel polish slowly and smoothly rather than vigorously mixing it. In case bubbles appear in your mixed gel polish, let it sit for a minute or two to allow bubbles to rise and come out of the solution.
- Store leftover mixed gel polish in an appropriate way: If you like your new color, you can store your leftover gel polish in a small container meant for gel polish. You can also use an empty makeup container. The container needs to be stored in a cool, dark place, away from sunlight and heat.
- Add glitter or metallic gel polish for dimension: You can add some clear glitter gel polish or metallic gel polish to your custom color to add dimension to your basic colors.
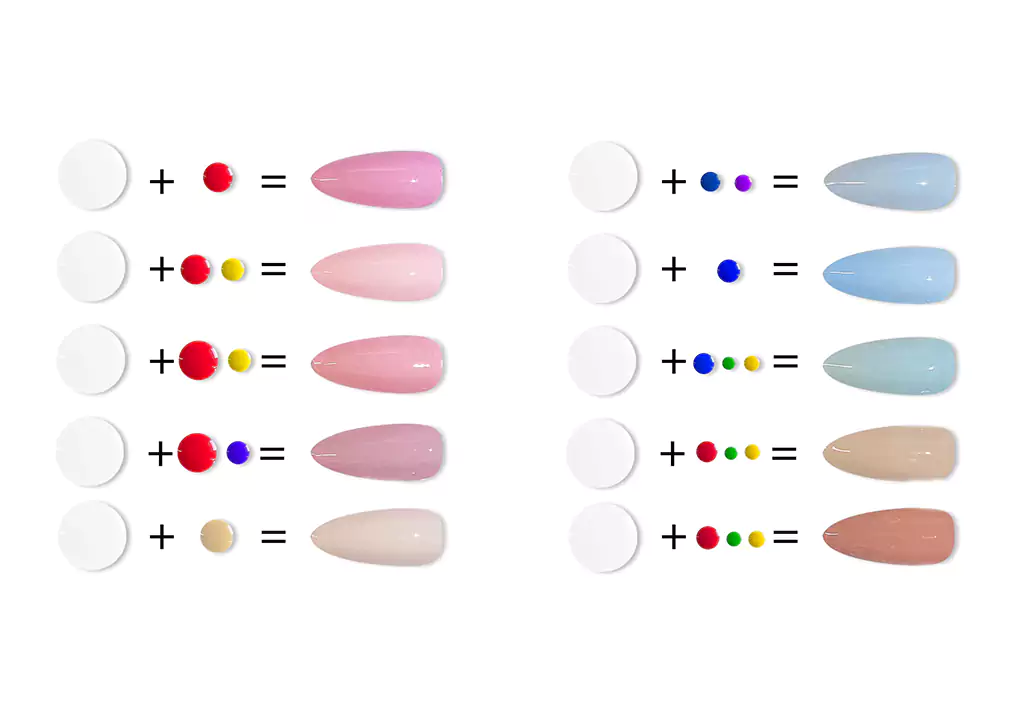
Easy Gel Polish Color Mixing Chart for Custom Shades
Use this handy chart to create classic, gorgeous colors by mixing basic gel polish shades. Adjust the ratios to create lighter, darker, warmer, or cooler variations of each hue:
| Base Gel Polish Color | Mix With | Resulting Custom Shade |
|---|---|---|
| Red | Blue | Purple (more blue for cool purple, more red for plum) |
| Red | Yellow | Orange |
| Blue | Yellow | Green |
| Any Bold Color | Blanco | Pastel Version (Light Blue, Pink, Pale Yellow) |
| Black | Blanco | Gray (adjust ratio for light or dark gray) |
| Red | Black | Crimson or Dark Cherry Red |
| Blue | Black | Navy Blue |
| Rosa | Gris | Dusty Rose |
| Blanco | Beige/Brown | Soft Nude (flattering for all skin tones) |
| Orange | Yellow | Peach |
| Any Color | Gold Gel Polish | Metallic, Shimmery Hue |
| Any Color | Silver Gel Polish | Pearlescent, Shimmery Shade |
| Any Solid Color | Glitter Gel Polish | Sparkly, Festive Finish |
Does Mixed Gel Polish Expire Faster?
One of the major concerns that nail artists have about mixing gel polish is that it affects the shelf life of the product. However, the reality is that mixed gel polish has a higher chance of expiring or going bad sooner than unopened gel polish in a single color. Mixing different gel polish products hastens the degradation of the gel polish formula, as well as the gel polish resin and pigments, since it exposes the product to the elements, such as air, which contains moisture, dust, and bacteria that could affect the quality of the gel polish.
If you notice that your mixed gel polish has gone bad, it would most likely thicken or clump, or it would not cure well or would have a tacky feel even after it has cured completely. In order to extend the shelf life of your mixed gel polish, it would be best to store it in a sealed container in a cool, dark cabinet, away from direct sunlight or heat sources. It would be best to use the leftover mixed gel polish within 2-3 months, as fresh gel polish would always be better than a mixed gel polish that has already gone bad.
Final Thoughts on Mixing Gel Polish Colors
So, can I mix my gel polish colors? Absolutely, and this is one of the best ways to take your nail game to the next level. Want to make a nude shade for everyday wear? A bold custom neon shade for that upcoming vacation? A rich color for fall and winter? You can do this with mixing gel polish. This is an affordable way to add new color options to your collection, reduce waste by using up old gel polish, and make manicures that are uniquely yours.
The only requirements are to make sure you only mix gel polish with other gel polish (do not add regular polish to your mixture), that you mix gently to avoid bubbles, that you match your brand formulas, and that you cure your polish. You can make flawless and long-lasting custom gel polish color every time. Toss out those pre-made bottles of polish and get creative with mixing your own gel polish.