

Friends, I’m Starry. Having worked in nail product research and development and teaching for eight years, I get asked the same question every day: “Does getting your nails done really damage your nails?” Today, let’s skip the platitudes. I want to sit down with you, like an old friend, and talk about the core of this issue. After reading this article, you’ll clearly understand: who is truly responsible for nail damage? How can you achieve “beauty without damage” through specific product choices and application techniques? This isn’t just anecdotal advice; it’s a healthy nail care philosophy I’ve verified through countless cases and experiments.
I. Antes de aplicar el esmalte de uñas: 70% del éxito o el fracaso ya está determinado
I always tell my students that our hands should not only create beauty but also, like doctors, adhere to the principle of “do no harm.” All lasting beauty must be built on a foundation of health. And the laying of this foundation begins even before you walk into the nail salon or open the product packaging.
1. Selección de productos: Comprender los ingredientes
When I first started in the industry, the market was growing wildly, and the quality of products varied greatly. I remember once, to test a capa base that was touted as “super long-lasting,” I tried it myself, and after a few days, my nails showed obvious white spots and peeling at the edges. That lesson made me a complete “ingredient enthusiast.”
Ingredientes de los que debe desconfiar:
- Monómeros altamente irritantes:
Such as HEMA (hydroxyethyl methacrylate). It’s a common adhesive, but high concentrations are one of the main culprits of allergic reactions. For sensitive individuals, contact can significantly increase the probability of redness, swelling, and itching around the nails.
- Sistemas fotoiniciadores inferiores:
For example, certain unstable TPO derivatives. They may generate excessive heat during curing, causing a strong “burning sensation,” which is detrimental to the health of nail bed cells in the long run.
Mis criterios prácticos de selección:
Look for the “low-irritation” or “suitable for sensitive skin” label: This isn’t just marketing jargon. Responsible major brands usually adjust their entire resin and monomer system to meet this standard, reducing overall irritation. For example, the new formula from the CHROMÉCLAIR brand, which I have long followed and recommended, achieves a “double-free” promise – HEMA-free & TPO-free. No se trata sólo de eliminar ingredientes, sino de remodelar el concepto de manicura saludable, proporcionando color y brillo de calidad de salón y minimizando al mismo tiempo el riesgo de sensibilización.

Nota: Comprar esmalte en gel sin TPO es una sabia elección.
Exploración sensorial inicial: Si el gel tiene un olor acre o irrita los ojos después de abrirlo, o si la textura es fina y acuosa, tenga cuidado. Esto suele significar que contiene una gran cantidad de diluyentes activos, que no solo son muy irritantes, sino que también pueden tener una mayor tasa de contracción de curado, lo que provoca levantamientos y daños posteriores.
2. Pre-treatment: Your nails are not “wooden planks to be sanded”
The most heartbreaking scene for me is seeing nail technicians using electric nail drills to aggressively thin down the client’s natural nails, like polishing a piece of wood. This directly strips away the nail’s natural protective barrier.
Procedimientos esenciales que deben seguirse:
- Limar, sólo para aumentar la adherencia:
Utilice únicamente papel de lija de grano 180/240, suavemente y en una sola dirección, para eliminar sólo la capa aceitosa y brillante de la superficie de la uña. Después, la superficie de la uña debe tener un acabado mate uniforme, pero su grosor debe permanecer inalterado.
- La protección de las lámparas UV es una responsabilidad de futuro:
Los rayos UVA son penetrantes, y la exposición acumulada a largo plazo acelera el fotoenvejecimiento de la piel de las manos.
- En mi estudio, el procedimiento estándar es:
Before using the UV lamp, we apply SPF50+ sunscreen or a thick layer of Vaseline to the client’s cuticles and provide professional black UV-protective fingerless gloves. Don’t underestimate this step; it protects the client’s skin condition ten years from now.
II. Aplicación y Curación: Los detalles son el Diablo, y también el Ángel de la Guarda
Once you’ve chosen the right products and laid the foundation, the real test of skill begins. Most hidden nail damage problems stem from details overlooked at this stage.
1. Application Technique: “Thin” is the only truth
“Apply more for better adhesion”—this is the most harmful misconception I’ve ever heard. Excessively thick gel layers lead to incomplete internal curing, generating immense shrinkage stress. This not only makes the gel prone to lifting (damaging the nail when peeled off), but the uncured monomers also continuously irritate the nail surface.
My “Three-Layer Thin Application Rule”:
– Base coat: Apply so thinly that it’s almost transparent, forming only a uniform, thin film.
– Color gel: Después de coger el gel, limpie un lado del pincel en la abertura del frasco y, a continuación, empuje suavemente el gel desde el centro hacia la parte delantera de la uña. Para los colores saturados, se necesitan dos capas, y cada capa debe estar bien curada.
- Capa superior: Aplique también una capa fina, asegurándose de que cubre completamente el borde de la uña para crear un sellado.
¿Cómo juzgar el grosor?
Después de aplicar el gel, mire la uña de perfil. La superficie de la uña debe tener una curva naturalmente suave, y no debe haber acumulación visible de gel.
2. Curing: It’s not as simple as pressing a switch
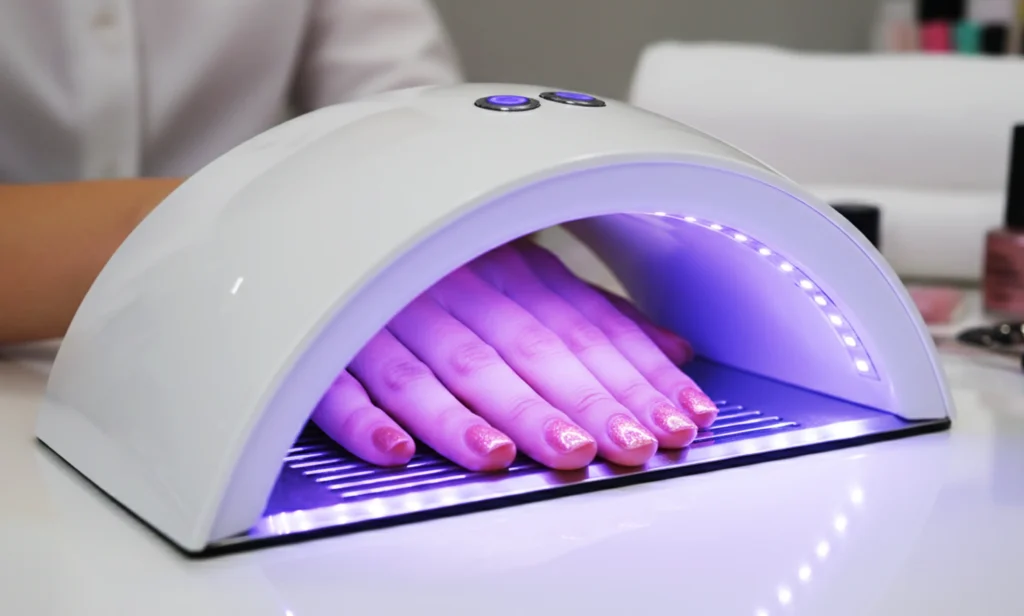
Mismatched curing time and lamp power are the culprits behind “curing heat” pain and insufficient deep curing.
Lo que hay que saber:
- La lámpara debe coincidir con el gel:
Utilice siempre la lámpara LED o UV correspondiente con la potencia recomendada por la marca del gel. Normalmente, las lámparas LED requieren entre 30 y 60 segundos, y las lámparas UV, 120 segundos o más.
• Emergency treatment for “fingertip stinging”:
If the client feels stinging, besides product issues, it’s most likely due to the gel being too thick or the lamp tubes being old.
- Mi método es:
Retire inmediatamente la mano, espere 2-3 segundos y vuelva a introducirla, repitiendo esta operación dos o tres veces. Así se disipa eficazmente el calor y se evitan las quemaduras.
- Un pequeño experimento para demostrarlo:
Una vez utilicé un medidor de potencia para probar el curado de diferentes grosores de capa de gel. Los resultados mostraron que aumentar el grosor en 1 milímetro podía duplicar el tiempo necesario para el curado completo, y la dureza en el centro del gel era significativamente insuficiente. Esta es la causa principal de futuros agrietamientos y levantamientos.
III. Removal: The Most Dangerous “Bomb Disposal” Step
I dare say that more than half of physical nail damage stems from incorrect gel polish removal. Violent tearing, prying with metal tools, prolonged soaking in high-concentration acetone… each time a “nail tragedy” unfolds.
The “Golden Four Steps” for Safe Removal:
- Pulir el Top Coat:
Con una lima de grano 180 o superior, retira suavemente sólo la capa superior brillante, dejando de hacerlo en cuanto quede al descubierto el color subyacente. El objetivo es romper el sello, no pulir la uña natural.
- Envolver y suavizar:
Impregne un disco de algodón con una cantidad suficiente de quitaesmalte de gel profesional, envuelva bien la uña y fíjela con papel de aluminio. Espere de 10 a 15 minutos.

- Eliminación suave:
After the time is up, use a wooden or silicone cuticle pusher to gently push away the swollen and whitened gel, like sweeping away dust. If it doesn’t come off easily, re-wrap the nail; do not force it!

- Limpieza y neutralización:
Tras limpiar la superficie de la uña con alcohol, aplicar inmediatamente aceite de cutícula para reponer los lípidos perdidos.
• “A Bloody Lesson”:
I once had a client who tore off her gel polish herself, resulting in extensive nail bed separation and bleeding. Her recovery period lasted three months, and the new nail remained uneven. Remember, many nail injuries are irreversible.
IV. After removing gel polish: Give your nails a “deep breath” and a much-needed break
Las uñas son tejido vivo y necesitan descanso y recuperación. Las manicuras de gel continuas son como prácticas agrícolas insostenibles que agotan el suelo y, en última instancia, debilitan las uñas.
Lista de control de cuidados básicos durante el periodo de recuperación:
- Descanso obligatorio: Después de completar 1-2 ciclos completos de manicura de gel, deje sus uñas al menos 2-3 semanas sin manicura.
- Nutrición profunda: Aplicar aceite para cutículas rico en vitamina E, aceite de almendras dulces o pantenol cada mañana y cada noche, masajeando hasta que se absorba.
- Suplementos internos: Aumente su ingesta de proteínas, biotina (vitamina B7) y hierro, que son los componentes básicos para un crecimiento fuerte de las uñas.
- Observa y sé consciente: Si sus uñas muestran amarilleamiento persistente, fragilidad, división o enrojecimiento alrededor de la uña, deje de usar todos los productos inmediatamente y consulte a un dermatólogo.。
V. Future Outlook: Can We Achieve “Burden-Free” Beauty?
¿Podemos imaginarnos un material que combine el brillo y la durabilidad definitivos del esmalte de gel, pero que pueda retirarse con la misma facilidad e inocuidad que el esmalte de uñas normal? No es una fantasía. La iteración de la tecnología de esmalte base peel-off y el auge de los esmaltes al agua de alto rendimiento van en esta dirección.
Mi atrevida hipótesis:
Future healthy nail care may become “modular” and “intelligent.” For example, through more precise spectral curing technology, different functional layers (adhesion, color, reinforcement) could be perfectly cured layer by layer, completely eliminating curing stress. Or, a biodegradable biomimetic polymer could emerge that naturally metabolizes as the nail grows after providing protection.
Por último, como profesional del sector, creo firmemente:
The prerequisite for beauty is health, and the core of professionalism is respect and responsibility. We are not only holding our clients’ hands, but also their trust in beauty.
I hope this “nail care map,” which incorporates my eight years of experience, lessons, and reflections, can illuminate your path and help you avoid the pitfalls I have witnessed firsthand. Your nails deserve the gentlest care.
So, what are the most challenging problems you’ve encountered in nail care? Or, do you have any unique nail care secrets? Feel free to share them with me below, and let’s work together to make beauty safer and longer-lasting.
 English
  Spanish
  German
  French
  Italian
  Dutch
Dutch