Even beginners can easily get exquisite nail art.
Want to have a cool and sweet nail art? Today, I will show you how to unlock the magic of French leopard print and bow nail art. The steps are so detailed that even beginners can make no mistakes. Get your tools ready and start doing it~
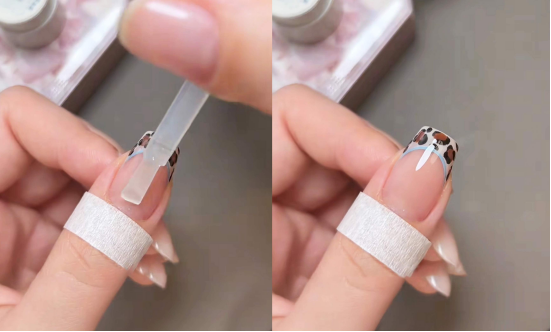
Step 1: Lay a foundation to create a clear base color
Take out CHROMÉCLAIR No. 13 nail polish, dip the brush into the nail polish, and apply evenly from the base of the nail to the fingertip.
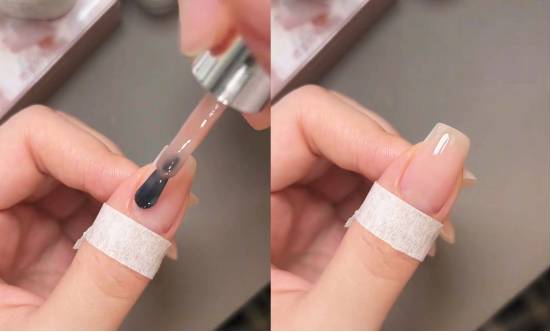
This nail polish is very clear and can make subsequent patterns more “breathable”. After application, use a baking lamp to accelerate curing, laying a solid foundation for subsequent manicures.
Step 2: Apply French stickers for precise shaping
Use tweezers to pick up the French stickers, aim at the front edge of the nail (the “French white edge” you want to keep), and gently apply it, smoothing the edges of the stickers to avoid warping. The stickers are like “rulers in the nail art world”, which can help us to make the curvature and width of the French edge fit perfectly.

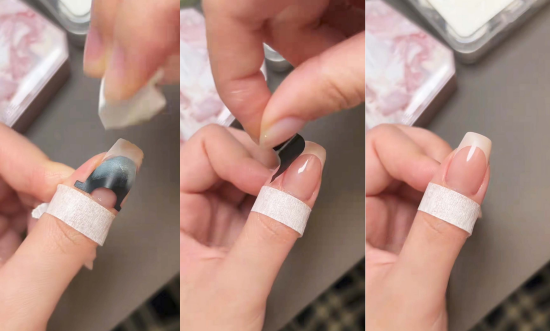
Step 3: Pat the French edge to create a layered look
Open the concealer pat glue, dip the matching pat tool (or sponge) into the nail glue, and pat it gently on the area where the sticker is pasted. Note that the patting force should be even, so that the color can be naturally blended to create a gradient French edge effect. After patting, carefully tear off the sticker, and a clean and neat French edge is born.
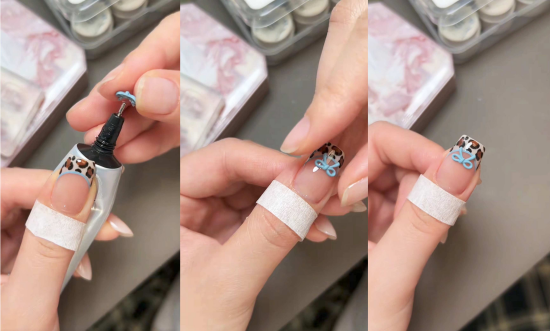
Step 4: Draw leopard prints to inject wild charm
Take brown nail polish: Use a dotting pen to dip a proper amount of brown nail polish, and dot “leopard dots” of varying sizes on the nails (you can refer to the distribution of real leopard dots, just be random);
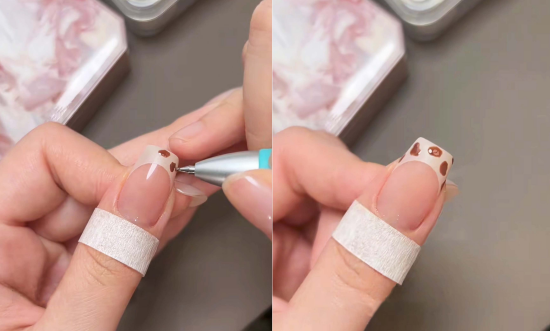
Outline the edge of the leopard print: Use a very fine nail art pen dipped in black glue, and draw lines along the edges of the brown spots to make the outline of the leopard print clearer and more three-dimensional, instantly injecting soul.

Step 5: Draw a haze blue border + seal layer to lock in exquisiteness
Take Cherry Life Haze Blue Patting Glue and use the same “patting” method to add a layer of haze blue French border on the edge of the nail to make the color richer and more layered.
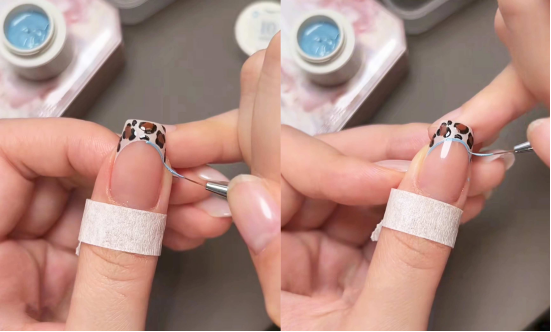
Then apply a layer of sealing glue and put it under the nail lamp to dry (refer to the instructions of the sealing product for the lighting time). This step can make the manicure more wear-resistant and more shiny.
Step 6: Make a bow to add a sweet element
Prepare the “haze blue mixed with transparent mold glue” and the bow mold:
– Filling glue: Use a small brush or needle to fill the mold glue into the groove of the bow mold, making sure every corner is filled;
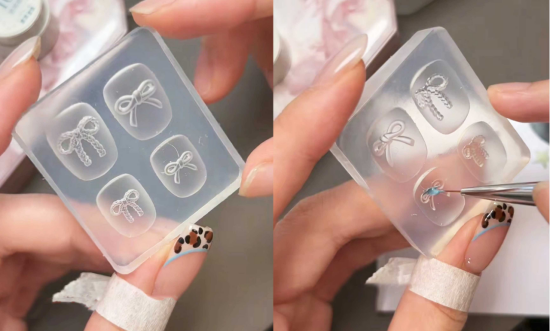
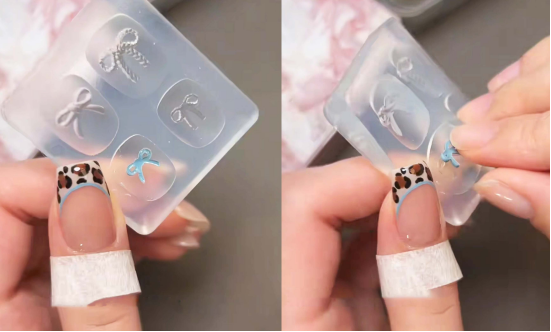
– Curing: Put the mold filled with glue into the baking lamp for curing
– Take out the bow: After curing, gently pick out the bow in the mold, and a three-dimensional and transparent nail accessory is ready.
Step 7: Paste the bow and finish
Apply a little nail glue to the appropriate position of the nail, gently press the finished bow on, and wait for the glue to fix. At this point, a manicure that combines French elegance, leopard wildness, and bow sweetness is completely completed.
Finally, I recommend CHROMÉCLAIR nail polish products: focus on safety, low irritation, environmental protection, no harmful ingredients, reduce the risk of allergies (TPO-free & HEMA-free), a variety of colors, cater to mainstream aesthetics, designed for sensitive skin users, care for healthy nails, and ensure that every consumer’s experience is safe and secure.
Friends who are interested can go to the website to browse the
WEB: https://chromeclair.com/
Follow the steps step by step, and even a novice can become a nail art master! Quickly do this sweet and sexy nail art, and let your fingertips become the focus of attention~ If you find the tutorial useful, don’t forget to like and collect it, and you can always refer to it next time you want to do a nail art.