
Anche i principianti possono facilmente ottenere una nail art squisita.
Volete avere una nail art fresca e dolce? Oggi vi mostrerò come svelare la magia della nail art con stampa leopardo e fiocco. I passaggi sono così dettagliati che anche le principianti non potranno commettere errori. Preparate i vostri strumenti e iniziate a farlo~
Fase 1: stendere una base per creare un colore di fondo chiaro
Portate fuori CHROMÉCLAIR Smalto per unghie n. 13, immergere il pennello nello smalto e applicarlo uniformemente dalla base dell'unghia fino alla punta delle dita.
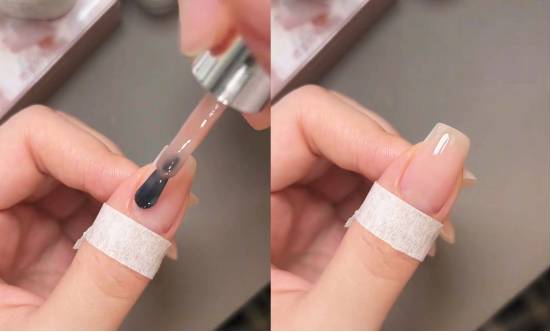
Questo smalto è molto chiaro e può rendere i modelli successivi più "traspiranti". Dopo l'applicazione, utilizzare una lampada da forno per accelerare l'indurimento, creando una solida base per le manicure successive.
Passo successivo consigliato
Crea il kit per un look di nail art
Per realizzare un tutorial di bellezza non basta una boccetta di colore. Scegli il colore, il dettaglio artistico, la tecnica di trasferimento o l'applicazione dell'adesivo e il top coat, tutto in un unico kit.
- Scegli il colore principale o il set.
- Aggiungi il dettaglio artistico: adesivo, gel per trasferimento, magnete o pennello.
- Sigilla il risultato finale con uno strato di top coat.
Kit per nail artVedere il gel di trasferimentoConfronta tutte le routine
Fase 2: Applicare gli adesivi francesi per una modellatura precisa
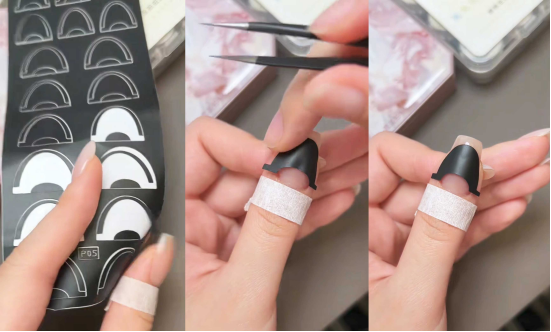
Con una pinzetta prendete gli adesivi French, puntate sul bordo anteriore dell'unghia (il "bordo bianco French" che volete mantenere) e applicateli delicatamente, lisciando i bordi degli adesivi per evitare che si deformino. Gli adesivi sono come "righelli nel mondo della nail art", che possono aiutarci a far combaciare perfettamente la curvatura e la larghezza del bordo french.
Fase 3: picchiettare il bordo francese per creare un aspetto a strati.
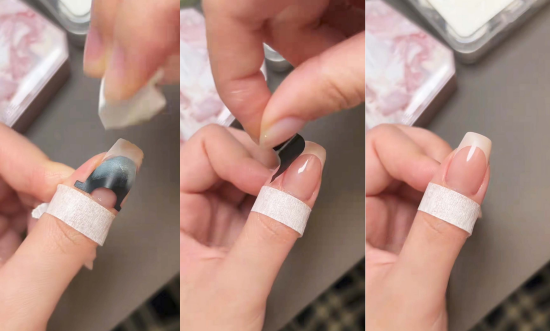
Aprire la colla per correttore, immergere l'attrezzo corrispondente (o la spugna) nella colla per unghie e picchiettarla delicatamente sull'area in cui è stato incollato l'adesivo. Si noti che la forza di picchiettatura deve essere uniforme, in modo che il colore possa essere naturalmente miscelato per creare un effetto sfumato. Dopo aver picchiettato, strappare con cura l'adesivo per ottenere un bordo french pulito e ordinato.
Fase 4: Disegnare stampe leopardate per conferire un fascino selvaggio
Prendete uno smalto marrone: Con una penna per puntini intingete una quantità adeguata di smalto marrone e applicate sulle unghie dei "puntini leopardati" di dimensioni variabili (potete fare riferimento alla distribuzione dei veri puntini leopardati, ma siate casuali);
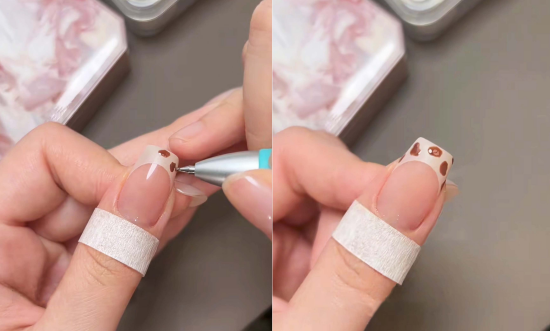
Delineare il bordo della stampa leopardata: Con una penna per nail art molto fine intinta nella colla nera, tracciate delle linee lungo i bordi delle macchie marroni per rendere il contorno della stampa leopardata più netto e tridimensionale, conferendo immediatamente un'anima.
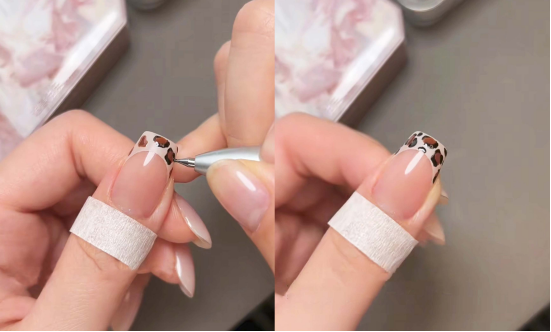
Fase 5: disegnare un bordo blu foschia + sigillare il livello per bloccare la squisitezza
Prendete la Cherry Life Haze Blue Patting Glue e utilizzate lo stesso metodo di "tamponamento" per aggiungere uno strato di French border blu haze sul bordo dell'unghia per rendere il colore più ricco e stratificato.
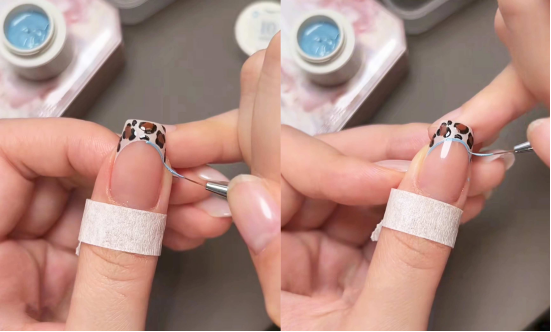
Applicare quindi uno strato di colla sigillante e metterlo sotto la lampada per unghie per farlo asciugare (consultare le istruzioni del prodotto sigillante per il tempo di illuminazione). Questo passaggio può rendere la manicure più resistente all'usura e più lucida.
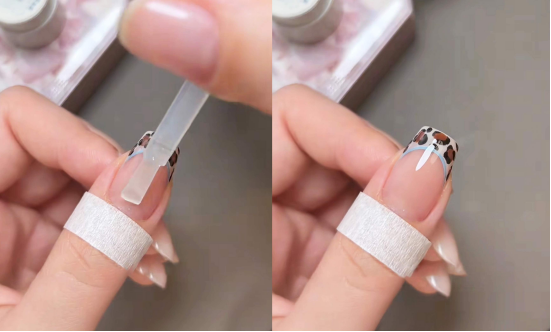
Fase 6: Fare un fiocco per aggiungere un elemento di dolcezza
Preparare il "blu foschia mescolato con colla trasparente per stampi" e lo stampo per archi:
- Riempimento della colla: Con un pennello o un ago piccolo, riempire la colla per stampi nella scanalatura dello stampo per archi, assicurandosi che ogni angolo sia riempito;
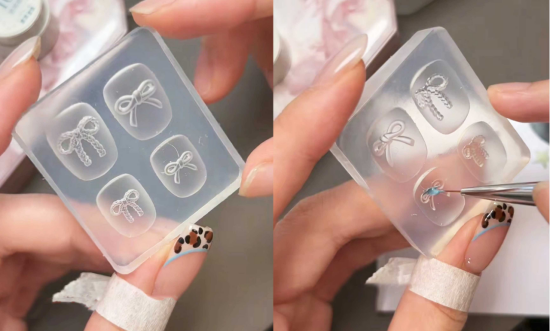
- Polimerizzazione: Mettere lo stampo riempito di colla nella lampada da forno per l'indurimento.
- Estrarre il fiocco: Dopo l'indurimento, prelevare delicatamente il fiocco nello stampo: un accessorio per unghie tridimensionale e trasparente è pronto.
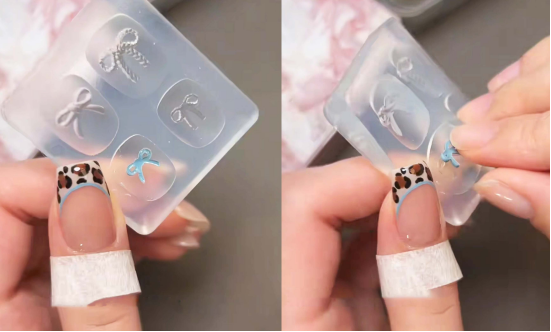
Fase 7: Incolla l'arco e rifinisci
Applicare un po' di colla per unghie nella posizione appropriata dell'unghia, premere delicatamente il fiocco finito e attendere che la colla si fissi. A questo punto, una manicure che unisce eleganza francese, selvatichezza leopardata e dolcezza del fiocco è completamente completata.
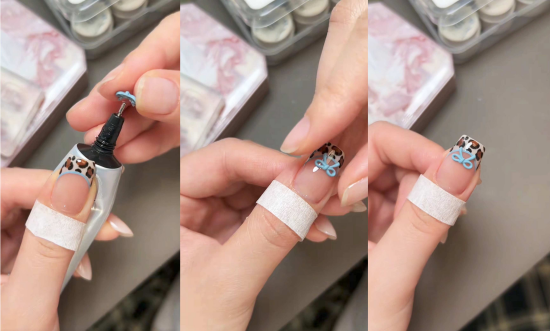
Infine, vi consiglio i prodotti per unghie CHROMÉCLAIR: attenzione alla sicurezza, bassa irritazione, protezione dell'ambiente, assenza di ingredienti nocivi, riduzione del rischio di allergie (TPO-free & Senza HEMA), una varietà di colori, soddisfano l'estetica mainstream, sono progettati per gli utenti con pelle sensibile, curano le unghie sane e assicurano che l'esperienza di ogni consumatore sia sicura e protetta.
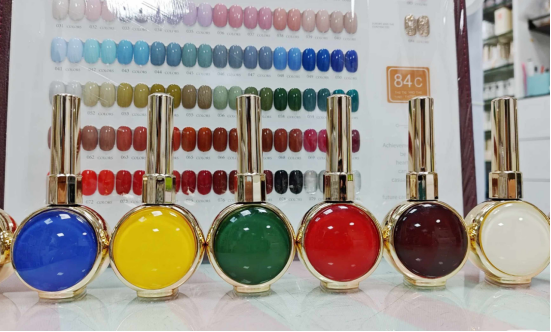
Gli amici che sono interessati possono andare sul sito web per sfogliare il sito
WEB: https://chromeclair.com/
Seguite i passaggi passo dopo passo e anche una principiante potrà diventare una maestra di nail art! Realizzate rapidamente questa nail art dolce e sexy e lasciate che i vostri polpastrelli diventino il centro dell'attenzione~ Se il tutorial vi è stato utile, non dimenticate di mettere "mi piace" e di raccoglierlo, così potrete sempre farvi riferimento la prossima volta che vorrete realizzare una nail art.
 English
  Spanish
  German
  French
  Italian
  Dutch
Dutch