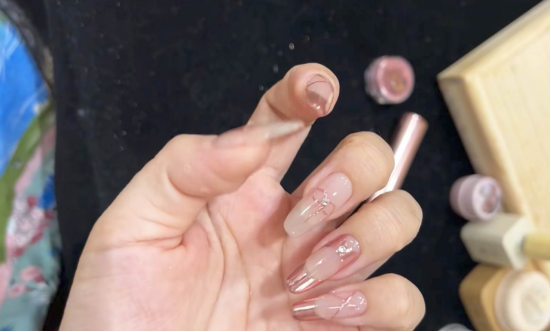
Today, I’m sharing a super beautiful ballet-inspired nail art tutorial. The overall style revolves around ballet elements, using color, lines, and decorations to create elegant and delicate nail art that resembles ballet shoes. The steps are clearly explained, making it suitable for enthusiasts who want to try unique nail art.

Step 1: Base color and base coat treatment
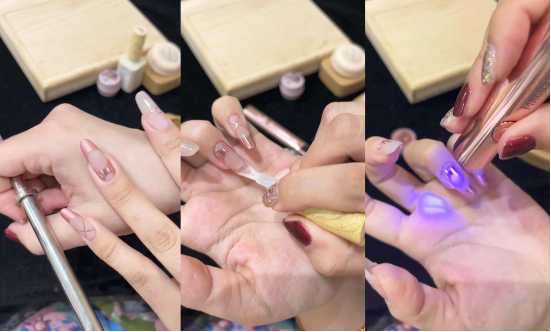
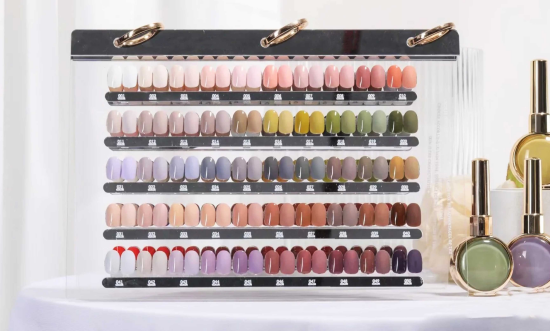
First, choose a nude-colored nail polish (here we used CHROMÉCLAIR’s Hema Free Gel Polish No. 13, which has good flow, is easy for beginners to apply evenly, and is non-toxic and healthy). Apply two thin coats to the nail surface, cover evenly, and cure under a lamp. This step is the base coat, which makes the subsequent colors more vivid and long-lasting.
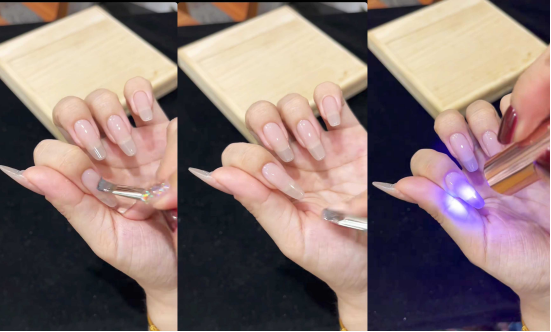
Next, apply a special sealing coat for glitter powder. After curing under a lamp, the nail surface forms a base suitable for the adhesion of mirror powder, preparing for the sparkling French tip.
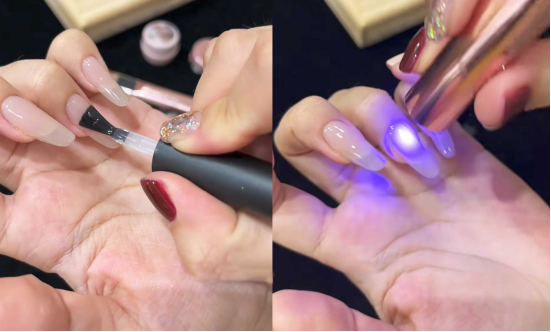
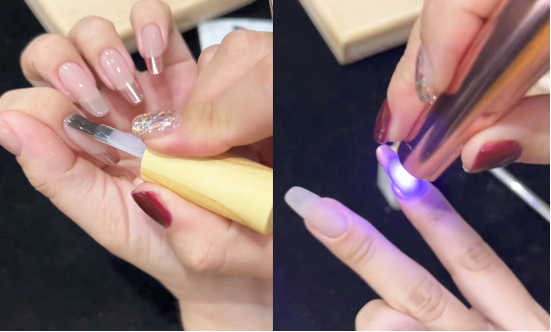
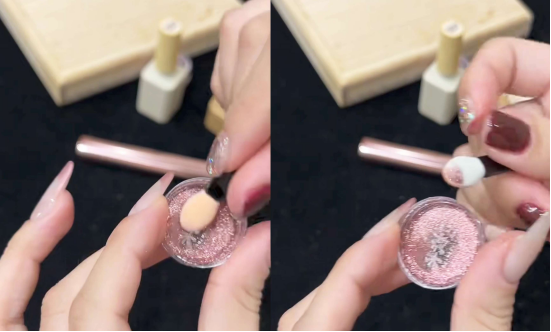
Step 2: A dreamy combination of French tips and magic mirror powder
Apply French tip stickers to mark the position, take some light pink magic mirror powder, and gently rub it onto the French tip edges covered by the stickers. The magic mirror powder’s delicate sparkle will instantly shine!
Moreover, the stickers can be reused. After applying the powder, wrap the mirror powder area with mochi adhesive (to protect the glitter and increase durability).
After shining the light, brush on a non-stick powder sanding sealant, which acts as a “powder barrier” to prevent powder from sticking in subsequent steps and affecting the texture.
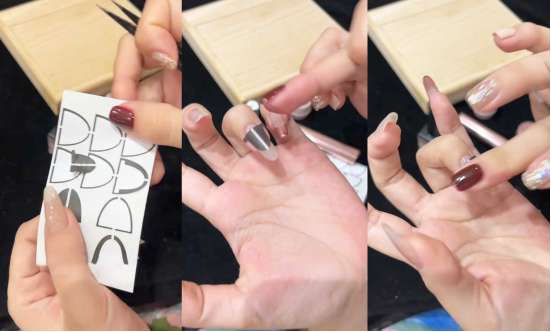
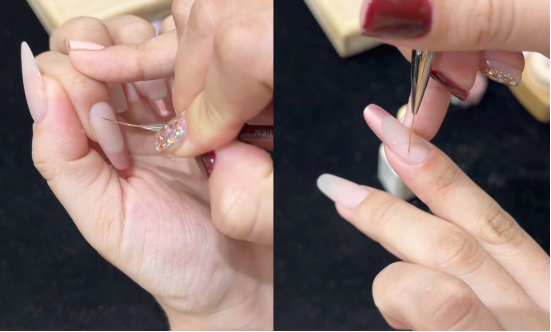
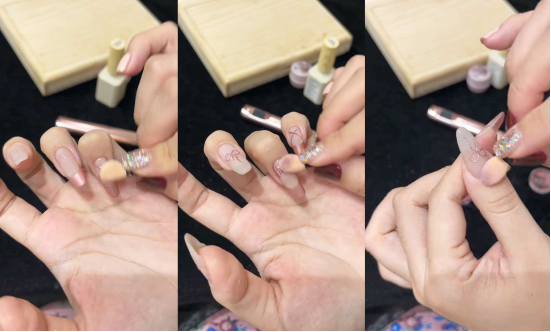
Step 3: Delicate rendering of lines and shapes
Replace the silk cover, dip the line pen in the ink, and draw fine lines on specific areas of the nail surface (refer to the points in the video). Hold the line pen slightly upright to draw finer, more delicate lines. Connect the two ends of the lines to instantly create a delicate look!
Use semi-solid modeling clay to draw a bow with your middle finger: first locate the center point, then outline symmetrical wings, and add details to make the bow three-dimensional. At the same time, draw two ribbons to add liveliness.
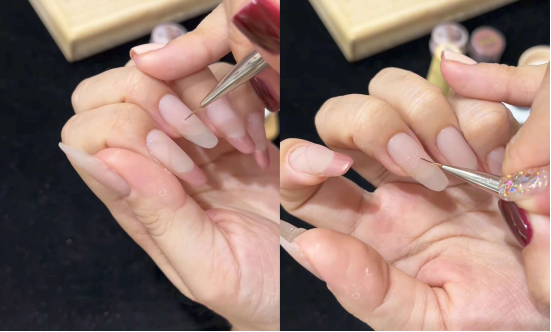
The ring finger has a more stylish design: first draw a small arc at the back edge, then draw a slightly larger semicircle symmetrically, connecting it to the French tip. Fill the blank space with sealing glue, and the layers will instantly become more rich.
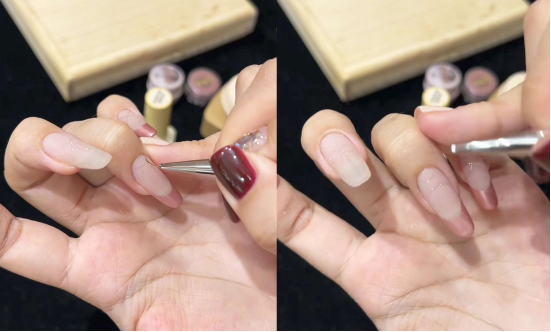
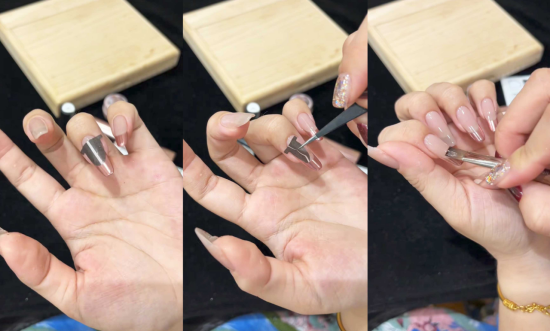
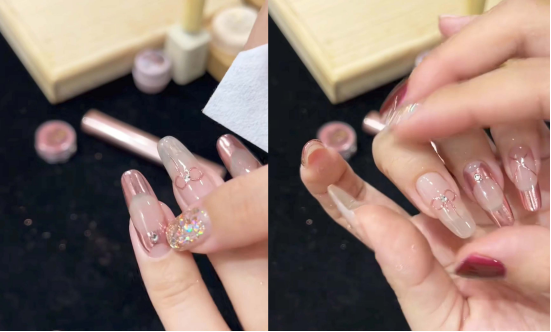
Step 4: Finish with glitter and a top coat
After turning off the lights (after the lighting stage is complete), apply rose gold mirror powder.
The powder application process is super relaxing, and it also gives your nails a ballet shoe-like shine!
After removing loose powder, wrap the magic mirror powder area with mochi adhesive base, brush on the sealing layer, and cure under a lamp to make the entire structure more secure.
Finally, add small round diamonds to the ring finger and middle finger to complete the ballet-themed manicure with a touch of elegance.
After completing this process, your fingertips will feel like they’re in a ballet theater, elegant and dazzling! Try it out and you’ll be the “ballet princess” of the nail art world! If you find the steps too complicated, you can simplify them by choosing your favorite parts and easily achieve the same beautiful look.
Friendly reminder:
When applying nail polish, pay attention to the curing time under the UV lamp. Different lamps may have slightly different power levels, but generally, 30–60 seconds is sufficient. Ensure that each layer is fully cured for better durability.
Good stuff to share:
In the tutorial, I used CHROMÉCLAIR nail polish gel. Their products focus on safety, low irritation, environmental protection, and are free of harmful ingredients, reducing the risk of allergies (HEMA-free gel polish). They nurture healthy nails, offer a wide range of colors to suit mainstream aesthetics, and ensure that every consumer’s experience is both safe and reassuring.
If you encounter any problems during the process, you can watch the video tutorial below. If you find the tutorial useful and like it, remember to give it a thumbs up, save it, and subscribe to me. See you next time!