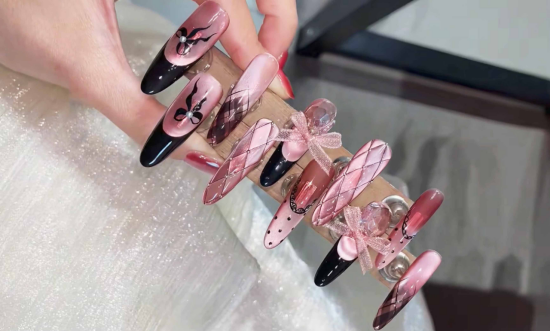
Today, I’m sharing a tutorial for the incredibly popular diamond-shaped cat-eye manicure. It’s both sophisticated and sophisticated, and even clumsy nail artists can easily pull it off!

Materials:
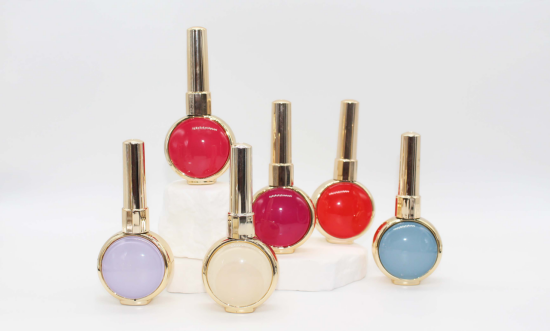
– Soft bean paste cat’s eye gel (I used CHROMÉCLAIR Hema Free Gel Polish No. 804, a treasured shade for brightening the skin)
– Painted black gel, black brushed gel, and a hard topcoat
– Point pen, cat’s eye magnet, light therapy lamp, small steel balls, and other tools
Step breakdown:
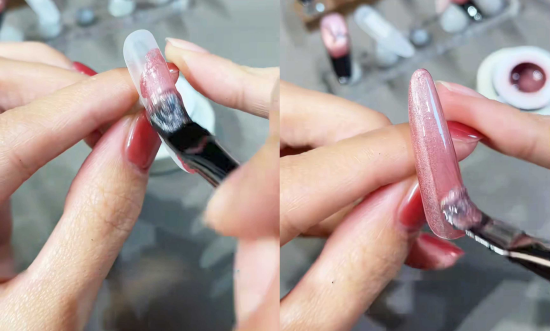
Create a base color
First, evenly coat the entire nail with cat-eye gel. This color has a delicate and unique pink hue that makes the nail appear brighter whether applied thinly or thickly, instantly enhancing the texture of the nail.
Creating a Cat’s Eye Effect
Take the cat’s eye magnet and move it left and right to draw in a wide beam of light. This will create a shimmering, wide-angled sheen on your nails.
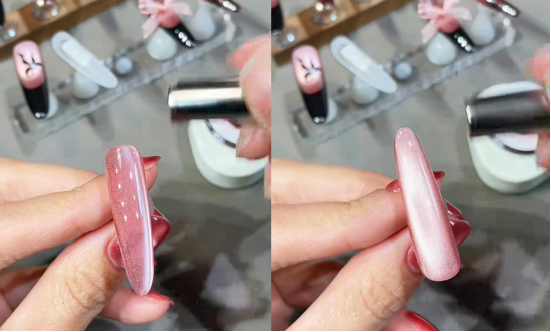
Then push from back to front to create a French gradient. This series of magnetic powder is very fine and shiny after being absorbed. It is high-end and versatile.
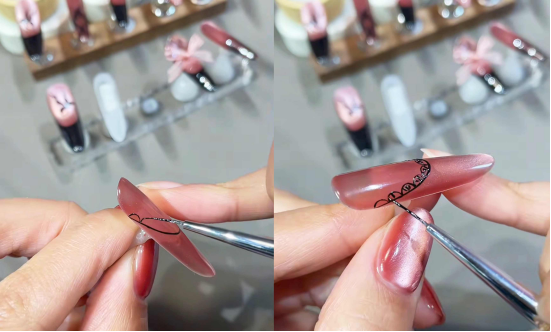
French & Lace Details (Style 1)
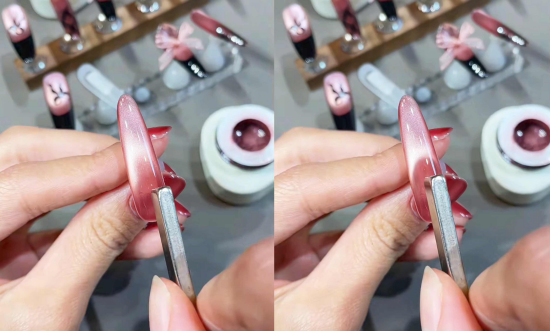
Draw the French Line:
Use painted vinyl to draw a thin line along the “natural French border” created by the cat’s eye for a crisp and clear look.
Add lace edges:
Follow the French line and use a very fine brush tip to draw the lace pattern, which instantly increases the exquisiteness;
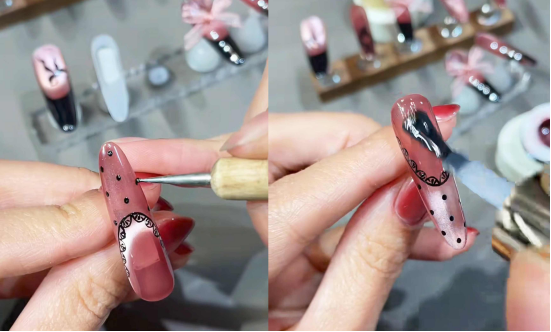
Dot black polka dots:
Dip a ballpoint pen into black glue on the lower part, and dot small polka dots in a staggered pattern, which is retro and playful;
Sealing layer reinforcement:
Apply a layer of sealing layer on the whole to lock these details firmly.
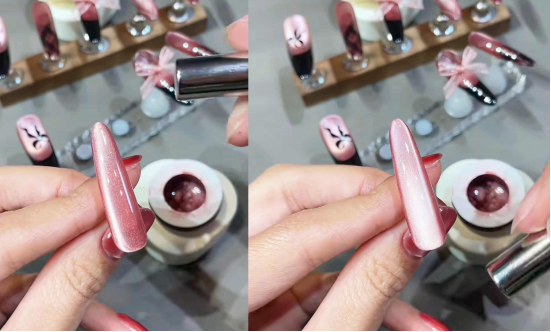
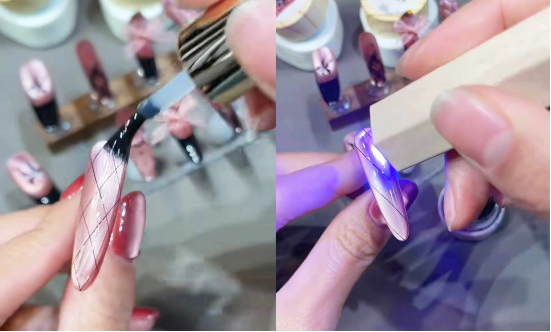
3D Diamond Pattern (Style 2)
Broad Gloss Primer:
Apply No. 23 Cat’s Eye Gel first, then use a magnet to apply a broad glow to create a translucent, cat’s eye effect.
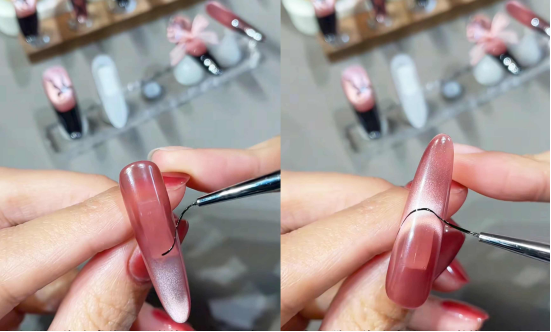
Draw black lines:
Change to black drawing glue and draw thin lines along the diagonal line of the nail surface (if you are afraid of failure, you can draw one side first under the light to solidify, and then draw the other side. The lines should be as thin as possible to make them more delicate!);
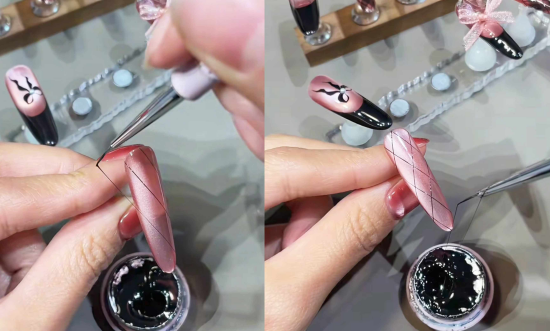
Sealing layer shaping:
After the lines are drawn, apply the sealing layer and shine the light to make the diamond frame more solid;
Grid filling:
Hard sealant comes into play! Use it to fill each small grid with glue. This step requires patience. Don’t apply glue outside the lines of each grid. After applying each grid, light it once to cure.
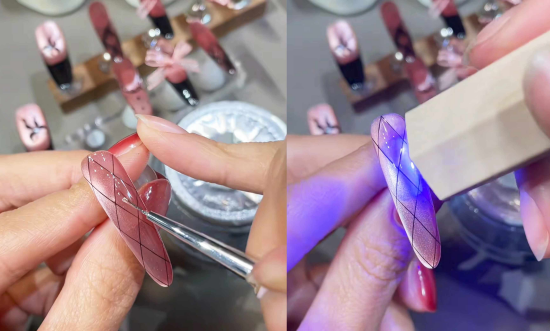
Decorate with steel balls:
Finally, stick the small steel balls on. Remember to use a hard seal to keep the steel balls firmly in the grid, so that the exquisiteness is maximized.

After the completion, I was completely captivated by the beauty! Whether it is the gentle French lace style or the advanced three-dimensional diamond style, novice friends don’t be afraid, just follow the steps slowly, the failure rate is almost zero! If you like this style, hurry up and try it, you will be the nail art master in your circle of friends after the completion.
In the tutorial, I used CHROMÉCLAIR gel polish. Their products focus on safety, low irritation, environmental protection, and do not contain harmful ingredients, reducing the risk of allergies (Hema Free Gel Polish). They protect healthy nails and have a variety of colors to cater to mainstream aesthetics, ensuring that every consumer has a safe and secure user experience.
If you encounter any problems during the process, you can watch the video tutorial below. If you find the tutorial useful, remember to like, collect it, and subscribe to me~ I will arrange more amazing styles for you in the next issue!