This time, we’re trying our hand at creating a golden, elegant short nail design, completing a unique style step by step from the base coat to the decorations.
Step 1: Apply a base coat
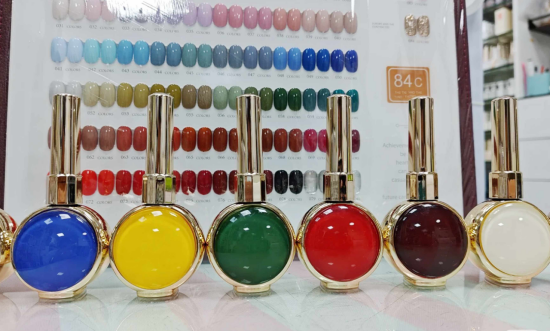
First, apply a layer of nude gel polish as a base coat (the tutorial uses CHROMÉCLAIR’s Hema Free Gel Polish No. 13, which has a sophisticated, high-quality color, good fluidity, is easy for beginners to apply evenly, and is non-toxic and healthy). After evenly covering the nail surface, wait for it to dry. This step lays the foundation for the subsequent effect, making the overall texture softer.
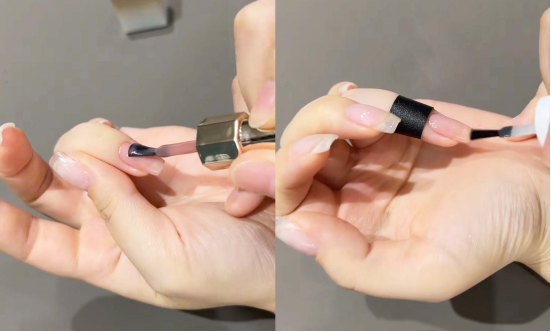
Once the base coat is completely dry, apply a layer of powder sealing glue, which will help the mirror powder adhere better and increase the durability of the manicure.
Step 2: Apply Golden Magic Mirror Powder
Take some Golden Magic Mirror Powder, gently dip your brush into it, and evenly apply it to the top coat. This golden shade exudes a sense of luxury, and once applied, it will give off a dazzling metallic sheen, creating a visually striking “high-end” look.
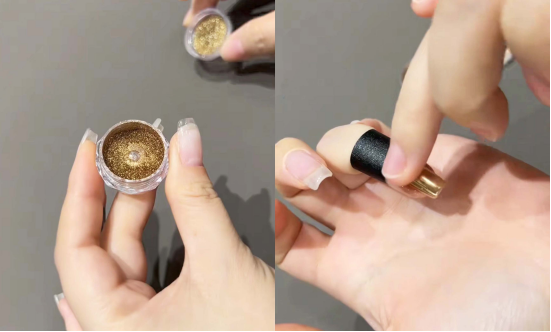
Use Magic Mirror Powder and powder adhesive to coat the nail surface, which serves to reinforce and isolate it. Then apply a layer of matte top coat to give the nail surface a matte finish (although this step is not recorded, make sure to apply it evenly when doing so).
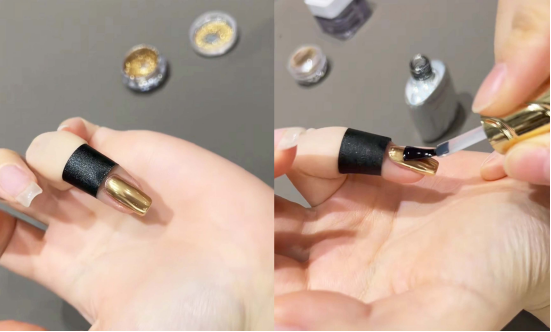
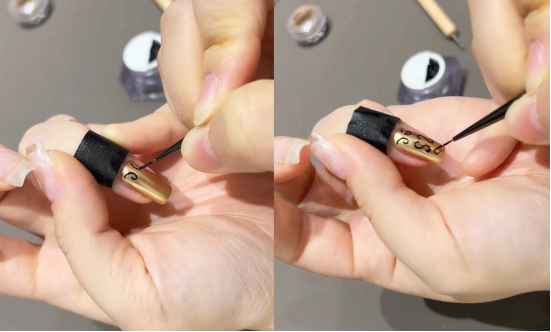
Step 3: Draw the pattern
Use a fine brush to draw the pattern on the matte top coat. When drawing, make sure both sides are as symmetrical as possible to make the pattern more neat. The lines can be designed in a retro style to add detail to the nail art.
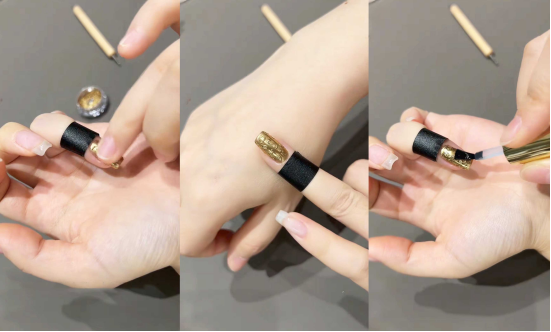
Step 4: Second coat of gold and reinforcement
After curing under the lamp, apply another coat of golden mirror powder to give the texture a metallic sheen. Then, wrap it again with powder adhesive to prevent subsequent decorations from falling off.
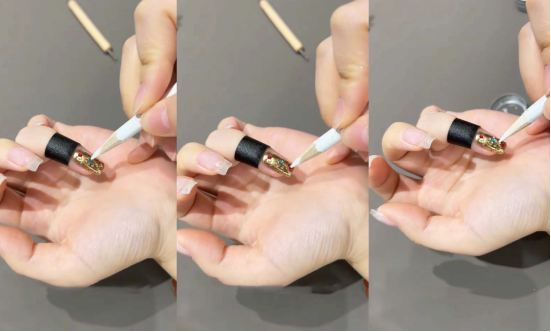
Step 5: Apply rhinestones and pearl decorations
Select red and blue flat-backed rhinestones and small pearls. Use a rhinestone applicator to apply adhesive to the appropriate positions on the nail surface, enhancing visual depth while adding a touch of elegance.
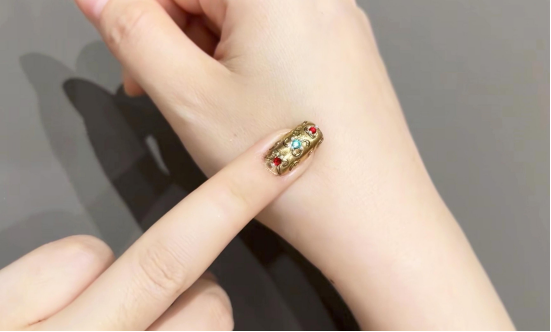
Finally, apply a layer of sealing gel to cover all the decorations, which will not only make the nail art last longer, but also give the overall finish a more uniform shine.
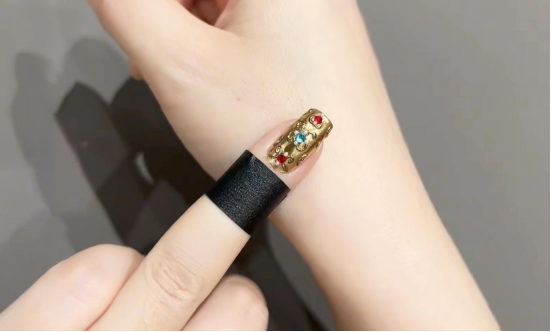
Conclusion
Once completed, you can see that short nails can also have rich details and a luxurious feel, making them suitable for both everyday wear and special occasions. This short nail art design is now complete!
In the tutorial, I used CHROMÉCLAIR gel polish. Their products focus on safety, low irritation, environmental protection, and are free of harmful ingredients, reducing the risk of allergies (HEMA-free Gel Polish). They protect healthy nails, offer a wide range of colors to suit mainstream aesthetics, and ensure that every consumer’s experience is both safe and reassuring.
If you encounter any problems during the process, you can watch the video tutorial below. If you find the tutorial useful and like it, remember to give it a thumbs up, save it, and subscribe to me. See you next time!