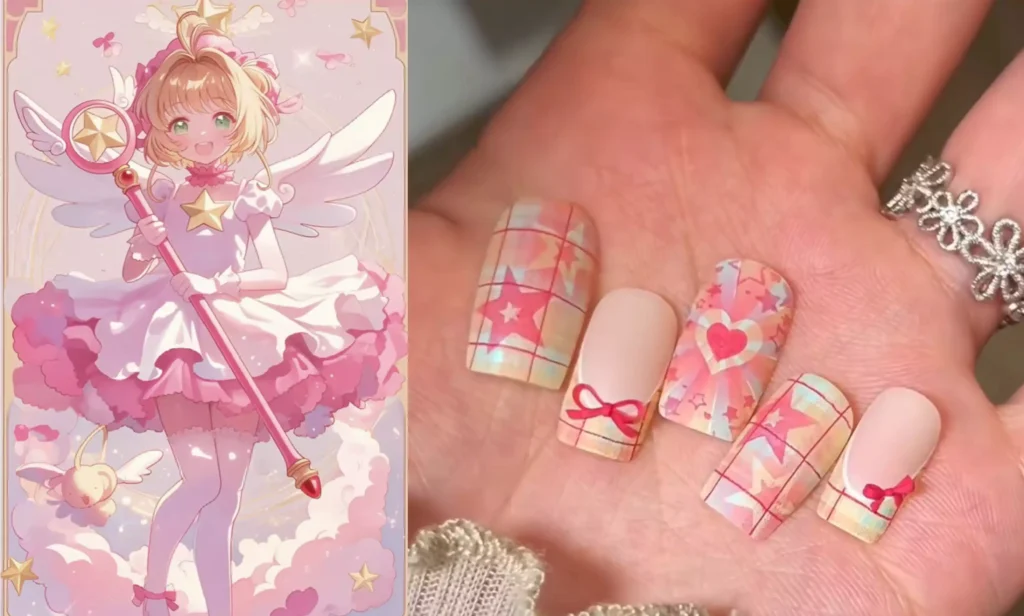
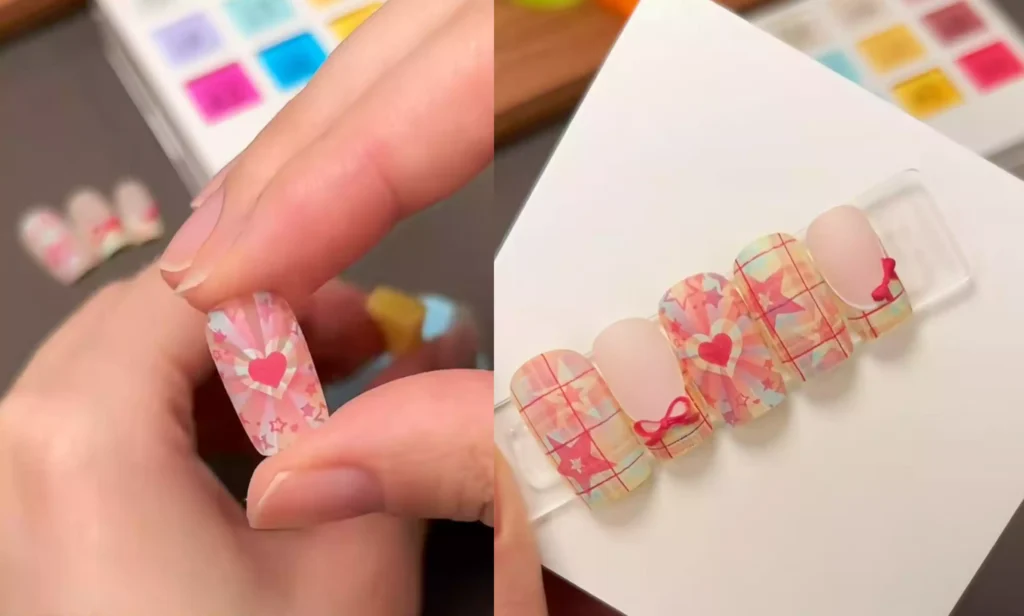
Who could resist a set of nails that radiates girlish charm?
Hello everyone! I’m a star employee at CHROMÉCLAIR, a brand of hema free gel polish.
Today, we’ll guide you through creating an immersive magical girl-style manicure. From the base color to the patterns, every step is meticulously detailed. If you like it, give it a try yourself!
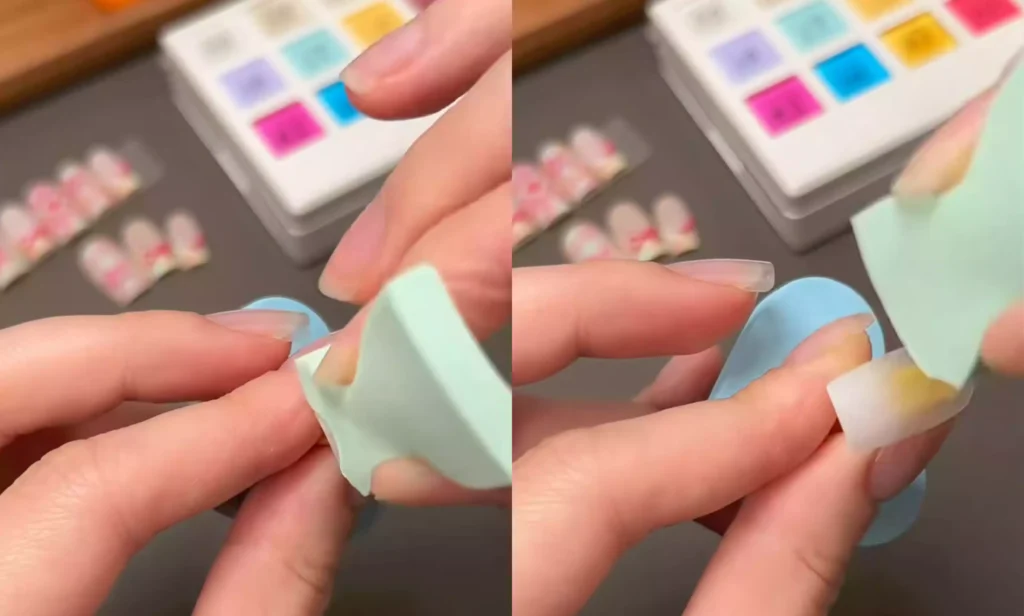
Step 1: Base Coat
First, we’ll apply the base color. Take white gel polish and gently dab it onto your fingertips with a sponge to create a gradient effect. This skillfully conceals any free edge lines, establishing a clean foundation for subsequent nail art. After dabbing, cure under a UV/LED lamp.
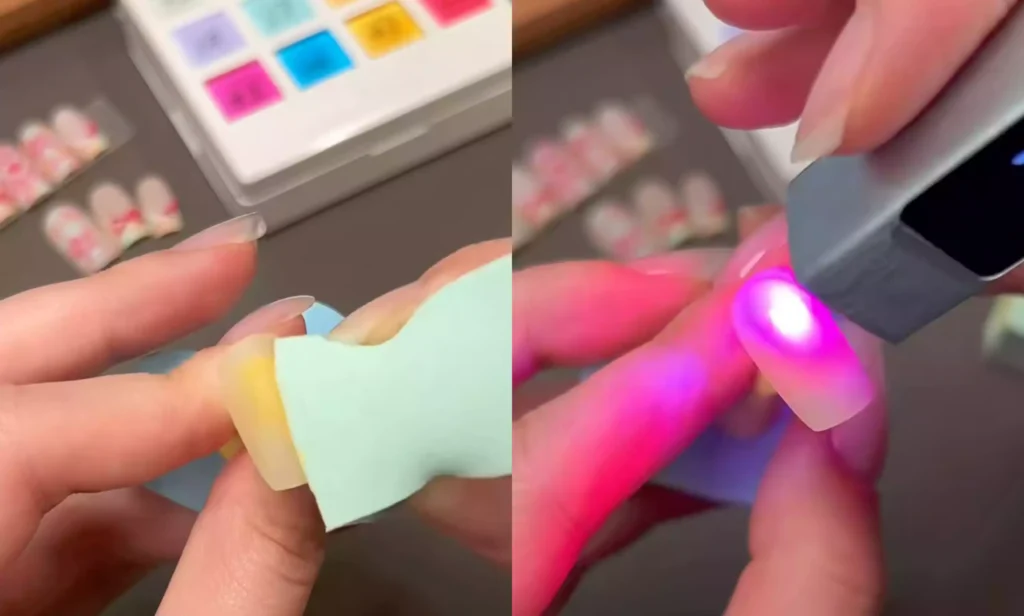
Next, apply a thin layer of creamy yellow gel polish across the entire nail surface to create a soft, milky base color—as if the warm spring sun were infused into your nails. Cure under a UV/LED lamp after application.
Step 2: Design Transfer
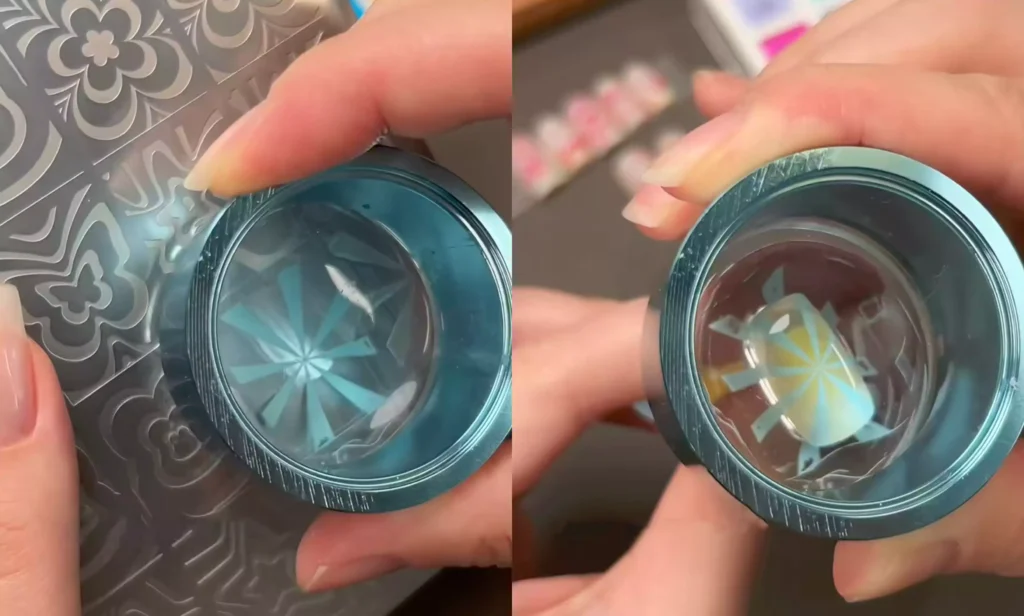
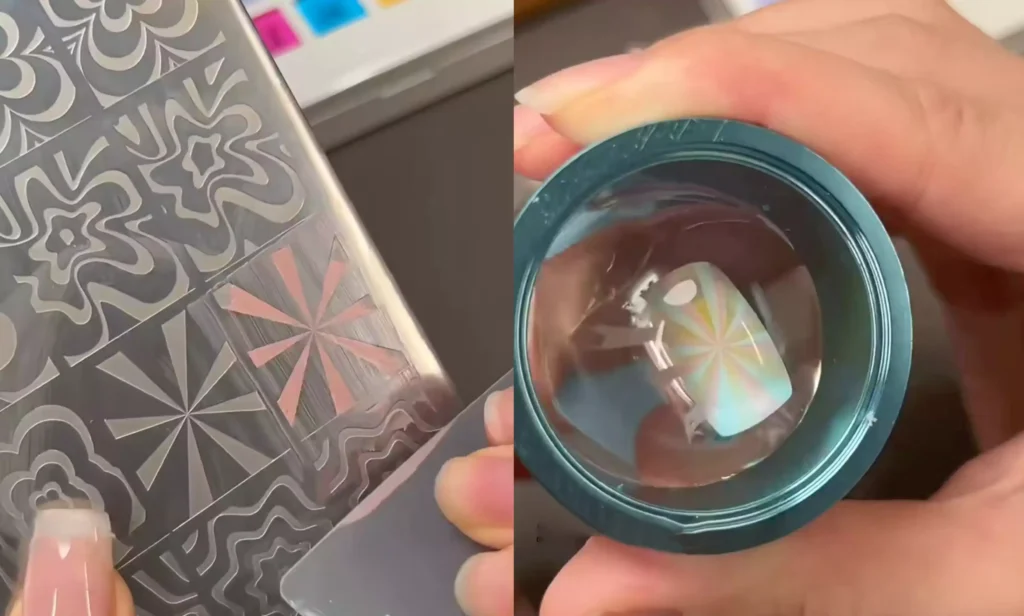
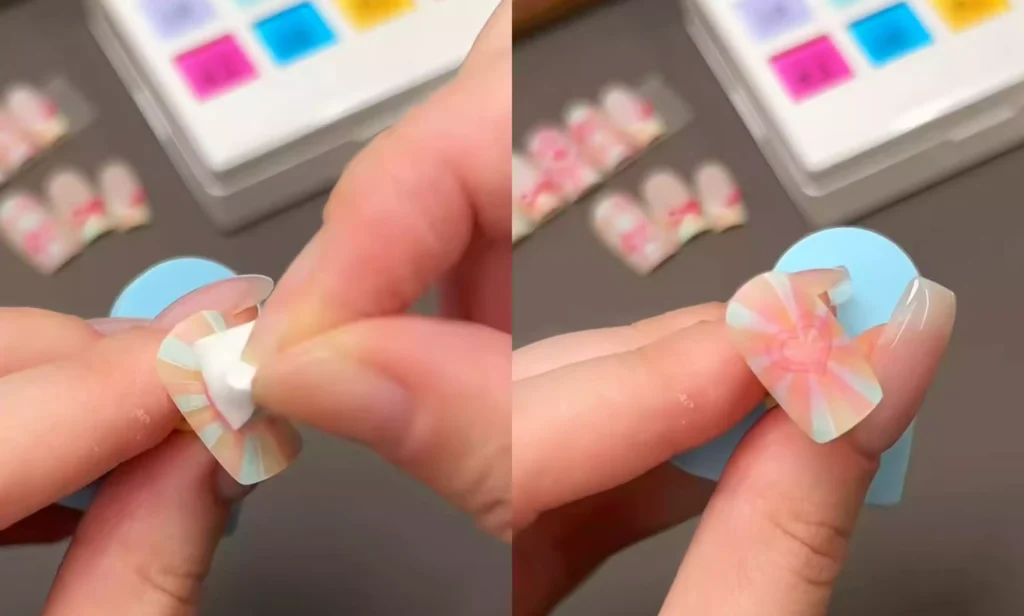
Once the base color is complete, it’s time for the design transfer process. Take out the nail art transfer plate and blue transfer gel.
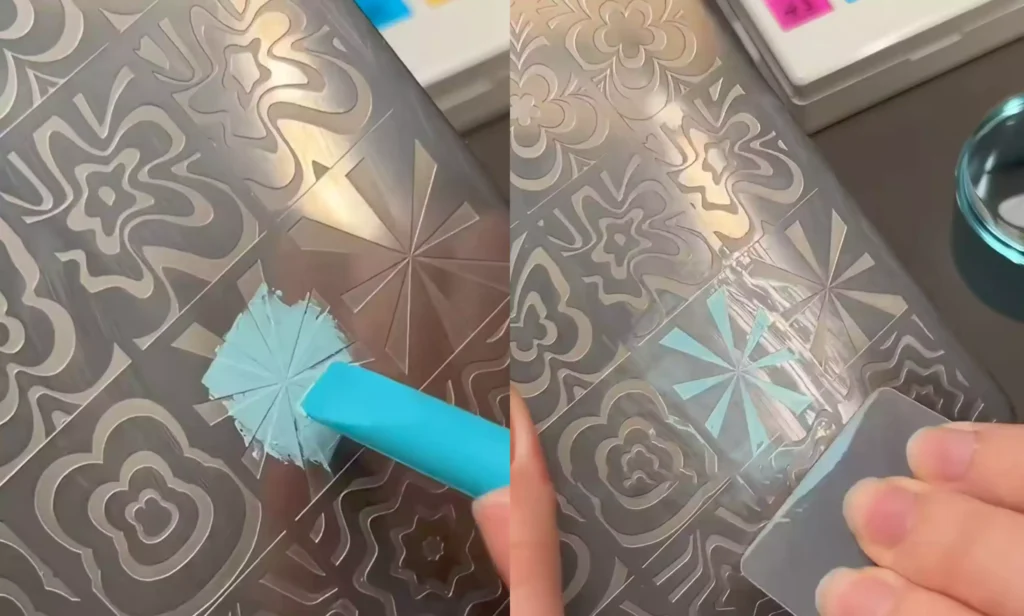
Transferring the blue radiating pattern onto the nails, this design carries an aura reminiscent of a magical array, instantly infusing the manicure with a fantastical atmosphere.
To enhance the richness of the colors, we overlay a layer of honey pink. The interplay of the two shades creates an instantly dreamy effect.
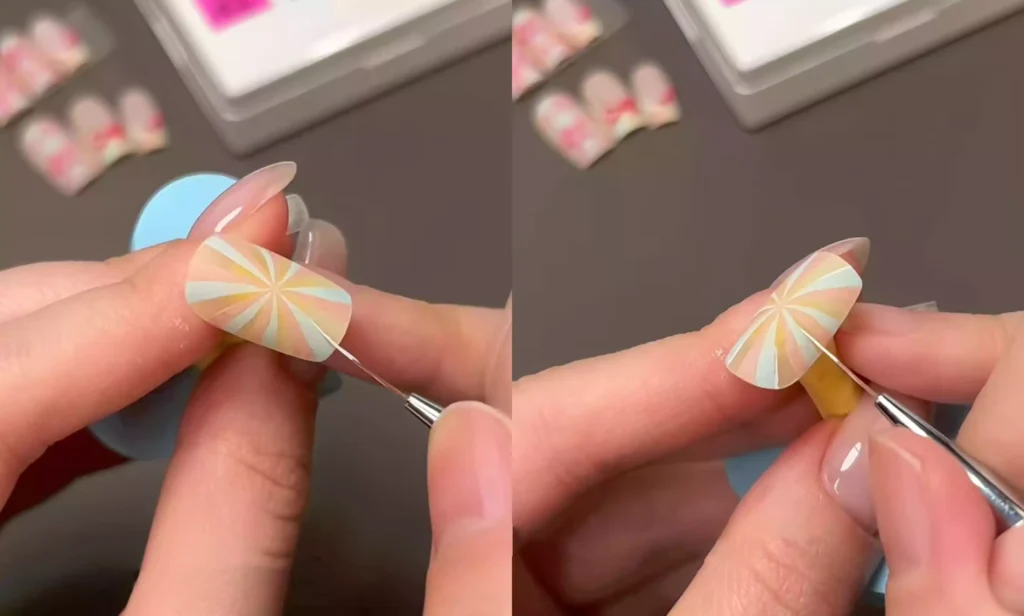
Next, use white patting gel to gently outline some lines with extremely fine strokes. These lines resemble traces of a magic spell, enriching the details of the nail art. After outlining, cure under the lamp.
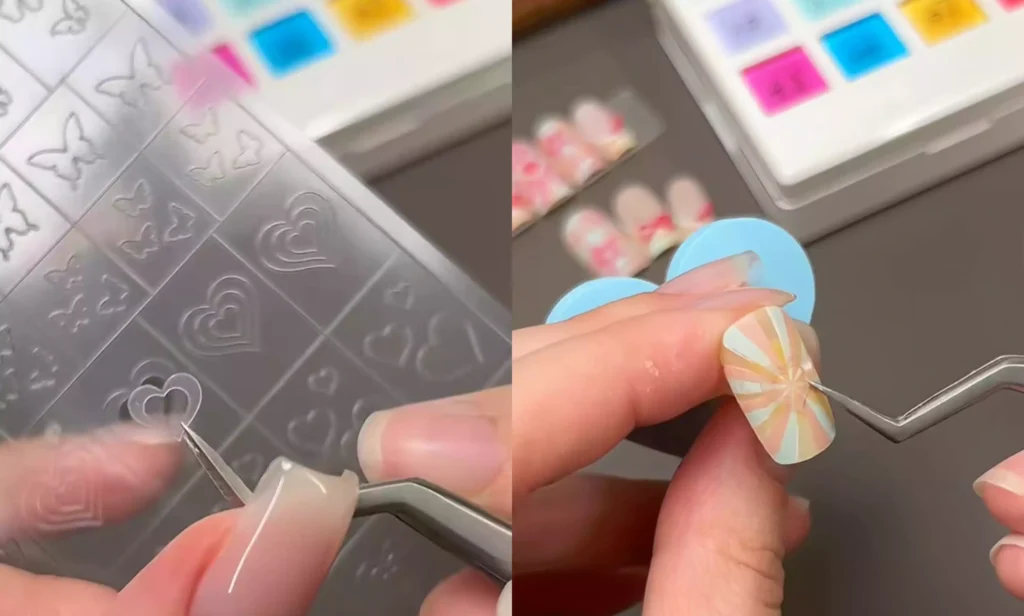
Step 3: Details and Decorations
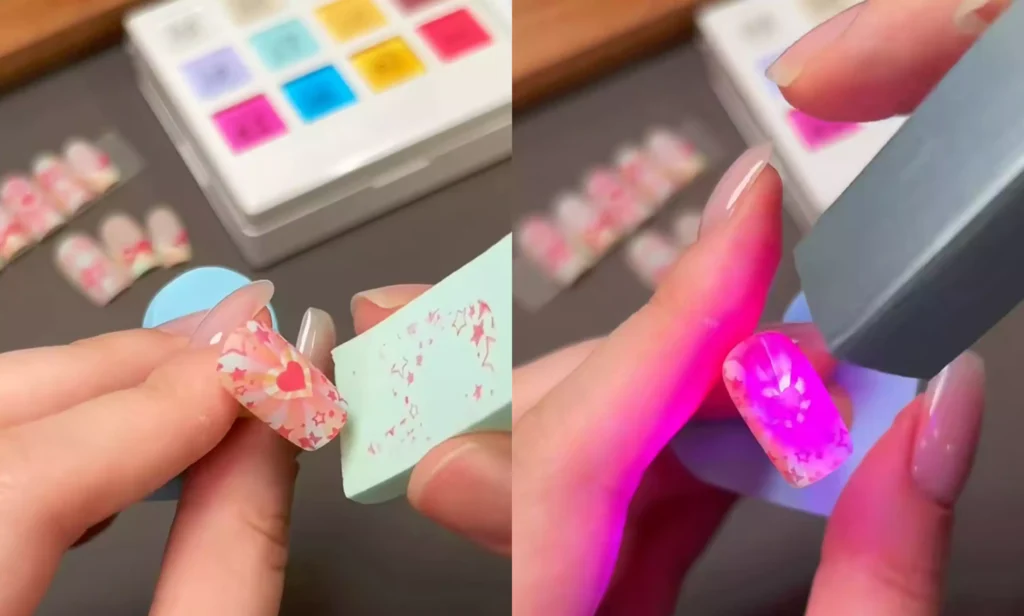
Next comes creating the heart elements. Use tweezers to pick up the heart-shaped cutout sticker and precisely place it at the center of the nail.
Select the Strawberry Bear color stamping pad and stamp red ink onto the openwork areas.
Then add another layer of depth to the central heart area, enhancing its three-dimensional effect and color gradation—as if a sweet heart-shaped candy were embedded on your fingertip.

Process the borders around the edges, transfer the star pattern onto the borders,
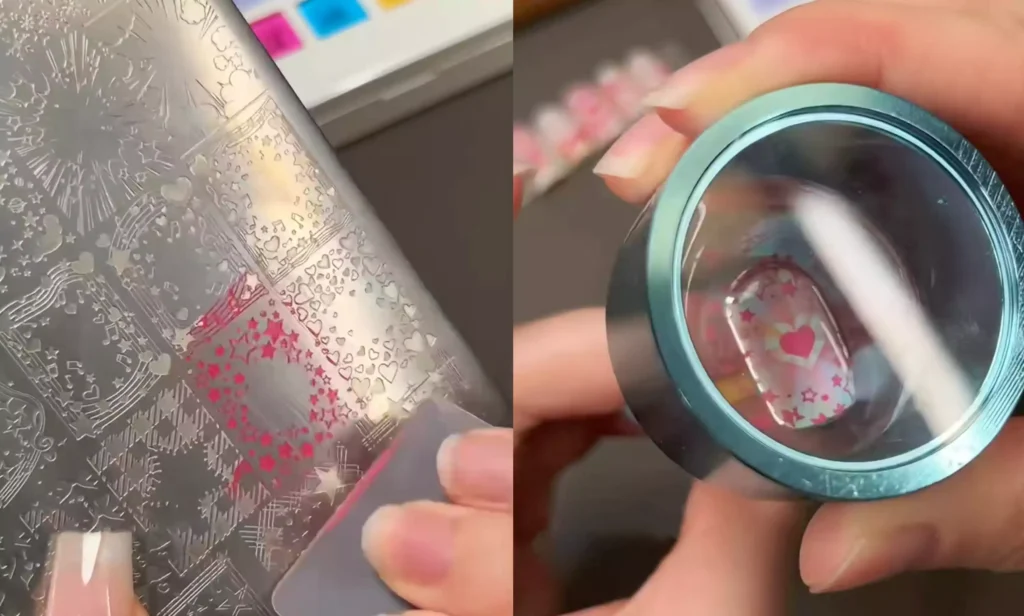
Using a sponge to create a gradient effect on the nails, the addition of star elements adds a touch of whimsy to the entire design, as if gathering the entire starry sky around your fingertips.
Look, a magical girl-inspired nail art set is complete! The pink color scheme paired with hearts and stars creates a sweet, girly vibe. Whether you’re running errands or going on a date, this design will make you the center of attention. Follow the steps and let your fingertips sparkle with magical charm~
Lastly, I highly recommend CHROMÉCLAIR’s HEMA-free Gel Polish. Their products prioritize safety above all—not only are they low-irritation and eco-friendly (HEMA-free & TPO-free), but they also minimize harmful ingredients, significantly reducing allergy risks while gently nurturing nail health. With an extensive color range and long-lasting wear (approximately 21-35 days), every user can enjoy a product that delivers both safety and peace of mind.
Having trouble with the steps? Be sure to check out the video tutorial below! If you found this helpful, feel free to give it a thumbs-up and save it ⭐. Subscribe to my channel, and see you in the next tutorial!