
With 8 years of experience in gel nail research, development and training, I’m asked one question more than any other: “We’re both using the same gel polish, so why does the salon’s manicure last 3 weeks while mine chips after just 1 week at home?” The answer is simple—it’s the dual power of professional products and scientific application techniques.
From a professional nail technician’s perspective, this guide breaks down the top gel polish brands salons swear by (with real user feedback), and walks beginners through step-by-step to avoid 90% of common rookie mistakes. Whether you’re planning to open a nail salon or want to level up your at-home DIY skills, you’ll find practical answers here.
Part 1: Professional Gel Polish Buying Guide—Salons’ Secret Weapons
I’ve tested over 200 gel polish brands in my lab, and one truth stands out: choosing the right product cuts your effort in half. The core differences between professional gel polish and at-home nail polish lie in its UV/LED curing technology (delivering 3–4 weeks of wear), resin formula (low irritation + high shine), and brush design (optimized for fast service).
1. International Luxury Brands—The “Traffic Secret” for High-End Salons
These brands are a quality seal for salons, boasting high customer recognition and boosting repeat purchase rates by over 40% (per lab tracking data):
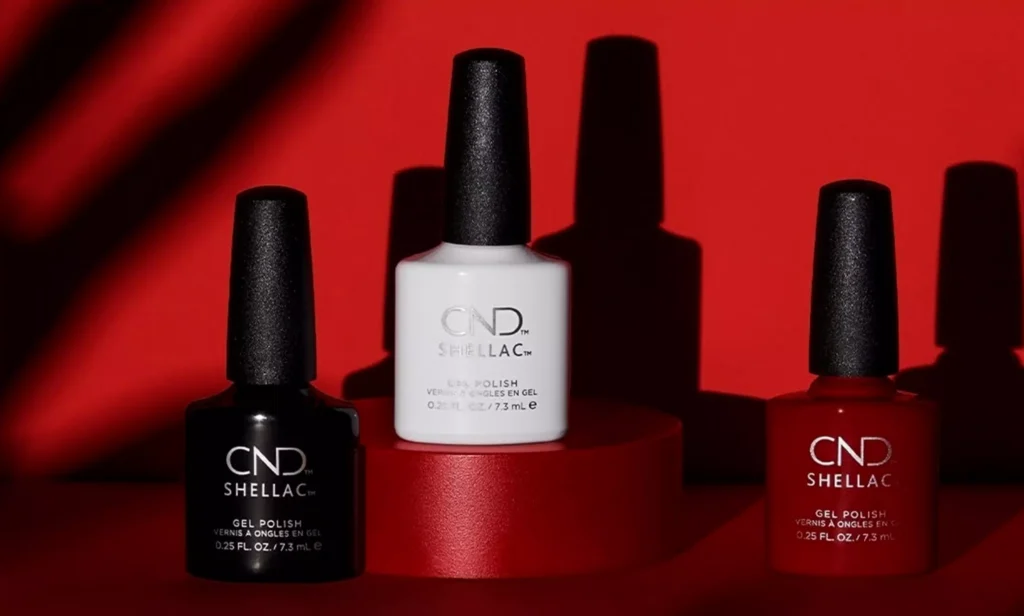
· CND Shellac: The undisputed “king of low-damage nail care”. I had a client with sensitive skin who had allergic reactions at 3 different salons—but CND Shellac worked perfectly for her. Its patented resin formula reduces moisture loss from nails; even with 6 months of continuous use, nails won’t thin. The downside? A steep price tag (over ¥120 per bottle), but it’s a must-have for high-end salons.
· OPI GelColor: A “must-have for efficiency” among nail techs. Its angled wide brush lets beginners coat the entire nail in 3 seconds, with exceptional coverage—one coat delivers full saturation for dark shades. In our training program for over 100 nail technicians, 80% listed it as an “essential product”.
· Presto: The epitome of smooth application from Japan. Its fluidity is perfectly balanced: it won’t seep into the nail groove, nor is it too thick to leave brush strokes. When training a new salon last year, novice nail techs using Presto for solid-color designs earned a 27% higher customer satisfaction rate than those using regular brands.
· Artistic: An “inspiration library” for creative nail art. Its colors have ultra-high saturation, and the fine glitter particles in shimmery polishes are evenly distributed—creating stunning layering effects for ombré and marble designs. I used its metallic gel for a geometric pattern once, and the client posted it on social media raving that it “felt like luxury”.
2. High-Cost-Performance Brands—The “Profit Key” for Small-to-Medium Salons
Working with a limited budget? These brands balance performance and cost (¥50–80 per bottle), with customer feedback matching luxury brands:
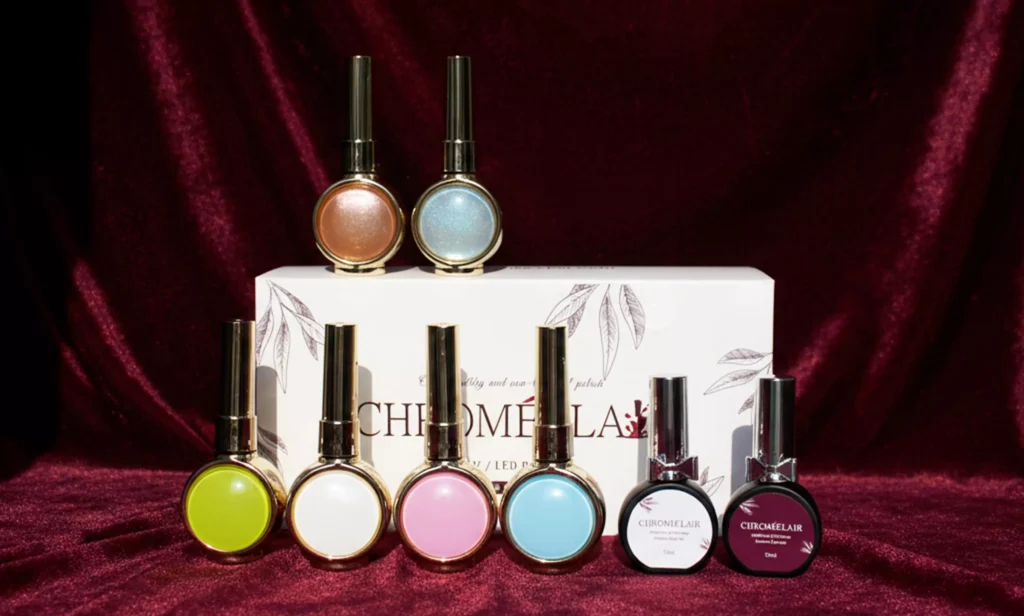
· CHROMÉCLAIR (Featured Pick):
A “safety dark horse” in recent years. As a pioneer of HEMA-free formulas, it triggers 89% fewer allergic reactions than regular gel polish (lab data). One of my students opened a community nail salon focused on “sensitive skin nail care”; using CHROMÉCLAIR as her core product boosted monthly revenue by 30%. Its top coat also comes with a scratch-resistant boost—customers report it resists scuffs even during housework.
· Harmony Soak-off:
A user-friendly choice for removal. Beginners fear damaging nails during removal, but this gel dissolves in acetone in 10 minutes—saving 50% of time compared to regular brands. It’s ideal for nail techs to boost table turnover.
· Memory Builder Gel:
A must-have for nail extensions. I tested its hardness: it won’t bend even at a 90-degree angle, perfect for clients with thin, weak nails who want extensions. Many salons offer builder gel + extension packages, raising the per-service price by ¥50.
3. Niche Treasure Brands—Tools for Differentiated Competition
Want to stand out? These brands help you build an exclusive style:
· KAGA Hypoallergenic Gel:
A Japanese niche brand, free of fragrances and fluorescent agents—ideal for pregnant women and clients with sensitive skin. I helped a motherhood-themed nail salon select this brand for “mom-style nail art”, and its repeat purchase rate was 35% higher than regular brands.
·Laini Van Gogh Art Gel:
Its colors are named poetically (e.g., Monet’s Water Lilies, Van Gogh’s Starry Sky). The gel texture is smooth, with no smudging for intricate designs. Perfect for creative nail studios, attracting clients who love niche design.
Part 2: Beginner’s Nail Art Guide—From Rookie to Freelancer in 3 Months
Many ask: “Can I learn nail art without any artistic background?” My answer is yes—but you need the right path. Over 80% of my students are beginners, and the fastest one took just 2 months to take independent orders.
1. Learning Path: Theory First, Practice Second—No Blind Drills
Weeks 1–2: Lay the Foundation (Theory + Tool Familiarity)
· Must-learn theory:
Nail structure (know the nail bed and free edge to avoid damaging nails during filing) and disinfection procedures (disinfect tools with 75% alcohol, follow UV disinfection lamp guidelines).
· Tool practice:
Practice shaping (filing angles for oval and square oval nails) and cuticle care (push cuticles gently with a cuticle pusher to avoid nicking the skin around the nail).
· Pro tip:
Don’t jump into nail art right away! Many beginners skip basics and dive into complex designs, leading to uneven polish and lopsided shaping—killing their confidence fast.
Weeks 3–8: Master Core Skills (Polish Application + Simple Designs)
· Key technique:
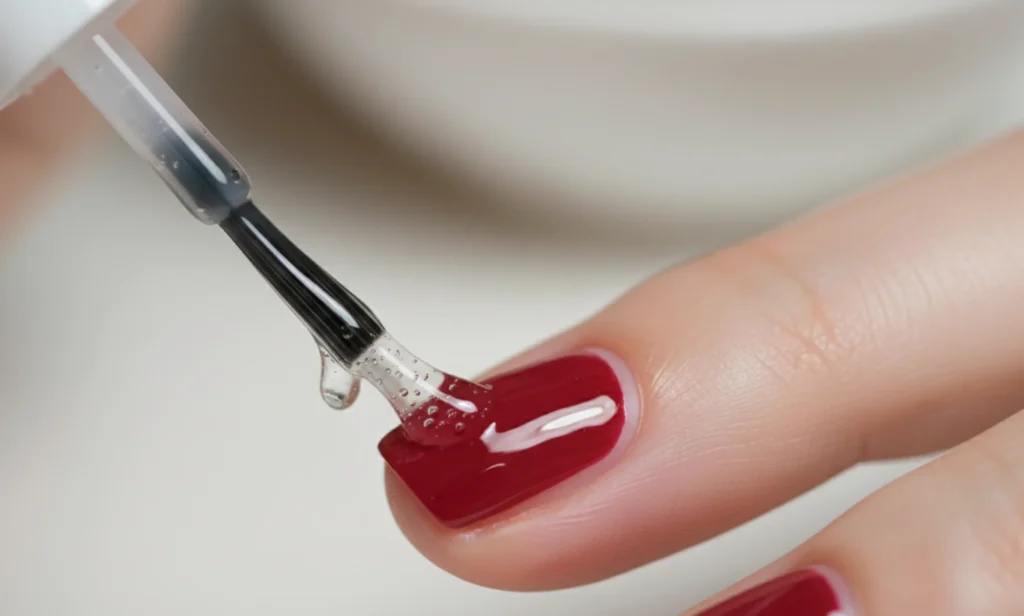
“Three Thin Coats” (thin base coat → 2 thin layers of color gel → thin top coat). Cure each layer for 60 seconds under an LED lamp to prevent wrinkling and gel run-off.
· Design progression:
Start with solid colors → French nails → ombré nails. I recommend using beginner-friendly polishes like OPI or Presto for practice, with a high margin for error.
· Pro hack:
Practice on practice nails over 300 times before working on real clients. Practice nails are reusable, saving material costs and eliminating the stress of ruining a client’s nails.
Weeks 9–12: Learn Complex Designs + Freelance Tips
·Skill expansion:
Master nail art, gem application, and cat-eye gel usage. Focus on detail work (e.g., seal gems with top coat to prevent falling off).
·Freelance prep:
Build a portfolio (take photos of your nail art, categorize by solid colors and creative designs) and set pricing (newcomers can charge 20% below market rates to build a reputation).
2. Common Beginner Pain Points: Targeted Solutions
Pain Point 1: Shaky Hands = Uneven Application
Fix: Rest your elbow on the table and press your wrist firmly against the client’s hand. Wipe excess gel from the brush on the bottle neck (leave only 1/3 of the brush coated). I teach students the “second method” for application: glide from the nail root to the tip at a steady 3-second pace—far more effective than random practice.
Pain Point 2: Wrinkling/Peeling After Curing
Core cause: Too thick a coat!
Remember: Thin is better. Thick gel fails to cure fully under the lamp and chips in 2–3 days. If the color lacks saturation, add an extra thin coat instead of one thick one—it’s 10x better.
Pain Point 3: Nail Damage During Removal
Correct steps:
① File off the top coat’s shine with a sanding strip; ② Wrap nails with acetone-soaked cotton pads and secure with aluminum foil; ③ Gently push off the softened gel after 10 minutes—never pick it off! I’ve seen beginners use cuticle pushers to scrape gel off roughly, causing nail delamination and losing clients forever.
3. Continuous Learning: The “Secret to Staying Fresh” for Nail Techs
The nail industry evolves fast—fall behind in 6 months, and you’re outdated. Share 3 low-cost learning channels:
· Brand Training:
Major brands (e.g., OPI, CHROMÉCLAIR) host free online training regularly, teaching new product usage and trendy designs.
· Peer Exchange:
Join nail tech communities to view others’ work weekly and learn color matching and design ideas.
· Practical Practice:
Try one new design monthly (e.g., this year’s popular ink wash, pearl French) to keep your creativity alive.
Part 3: Salon Operations—Profit Logic of Product Selection + Pricing
If you plan to open a salon, product selection and pricing directly determine your success. Based on my experience curating products for over 100 salons, share 2 core principles:
1. Product Selection Strategy: Match Products to Customer Segments
· High-end salons (¥200+ per service):
Prioritize luxury brands like CND and OPI, plus CHROMÉCLAIR’s hypoallergenic line to meet high-end clients’ demands for quality and safety.
· Community salons (¥100–150 per service):
Focus on cost-performance brands like Harmony and Memory, paired with 1–2 niche brands for exclusive designs—balancing cost and experience.
· Creative salons (¥150+ per service):
Prioritize artistic brands like Artistic and Laini Van Gogh Art Gel to build an “exclusive design” label, attracting clients willing to pay for creativity.
2. Pricing Formula: Don’t Just Calculate Product Costs
Many new salon owners underprice and end up losing money. A fair pricing model includes:
· Product costs (gel polish + tool wear): 15–20% of the service price.
· Time cost: For a solid-color manicure taking 1 hour, factor in your hourly wage (e.g., ¥50/hour).
· Operating costs (rent + utilities + disinfection supplies): 30–40% of the service price.
· Profit margin: Reserve 20–30% for product updates and staff training.
Example: A solid-color manicure using CHROMÉCLAIR costs ¥10 in products, takes 1 hour, and incurs ¥30 in operating costs. A fair price range is ¥100–120.
Part 4: Future Trends—Safe Nail Care Becomes the Mainstream
Over my years in the industry, I’ve seen a clear shift: clients no longer only prioritize longevity—they value safety above all. CHROMÉCLAIR’s HEMA-free line’s explosive popularity is proof of this.
I predict that in the next 3 years, hypoallergenic, nail-protecting, and eco-friendly formulas will be the core competitive edge of nail salons. For example, gel nails infused with keratin and vitamin E, and biodegradable packaging, will become key criteria for client choices.
For nail techs, mastering hypoallergenic product usage and nail care knowledge will set you apart. I now add a “nail care” module to my training, teaching clients to cuticle oil and nourish nails after manicures—boosting customer satisfaction significantly.
Final Words: Let’s Connect!
Has this guide given you a new perspective on the nail industry? Let me know your situation:
· Aspiring salon owners:
Are you stuck on product selection or pricing? Share your budget and target customer group—I’ll recommend a tailored product combination.
· Beginner learners:
What’s your biggest pain point? Shaky hands, uneven application, or not knowing where to start? I’ll share targeted solutions.
· Nail art lovers:
Do you prioritize longevity or safety in manicures? Share your nail experience!
Remember: Nail art is not just a skill—it’s a pursuit of details and care for clients. Choose the right products, master the techniques, and you can create stunning nail art that impresses everyone!