Hello, friends who want to do manicure, today I bring you a simple and beautiful manicure tutorial, teaching you how to create exquisite and elegant metallic sapphire cat’s eye manicure. Follow the step-by-step instructions, and even beginners can easily create their own unique manicure.
Step 1: Black Primer and Curing
First, choose black nail polish as your base color (I used CHROMÉCLAIR HEMA free Gel Polish products No. 03; it’s clear, fluid, and non-toxic!). Apply the black polish evenly over your nails. Once applied, place your nails under a nail lamp to dry and set the first coat of black polish.
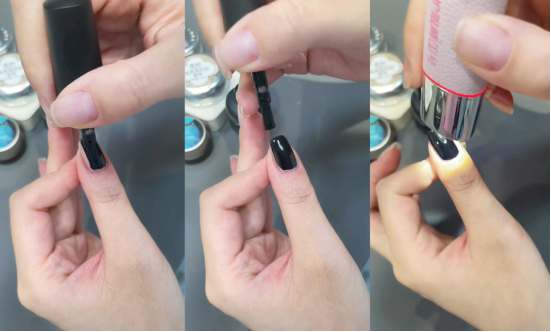
After the first layer is completely dry, take the black nail polish again and apply a second coat on the nails to ensure that the black base color is fuller and more uniform. After applying, use the nail lamp again to dry this layer to lay a good foundation for subsequent nail art steps.
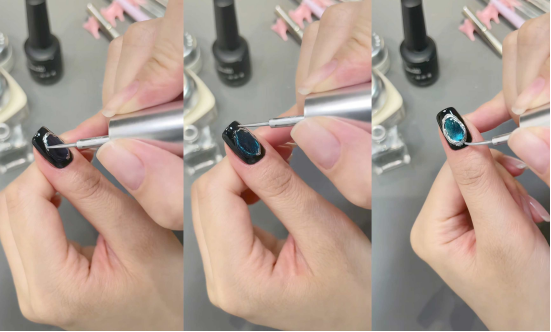
Step 2: Draw a circle with blue cat’s eye glue
After the black base coat has completely cured, prepare blue cat’s eye glue (I used CHROMÉCLAIR No. 433). Using a nail art tool, apply a suitable amount of blue cat’s eye glue and carefully draw a circle in the center of the nail, creating a distinctive decorative area on the black base coat.

Step 3: Use a magnet to create a glass bead effect
After drawing the blue cat-eye gel circle, take out a nail art magnet and hold it close to the area where the blue cat-eye gel was drawn. The magnet’s magnetic field creates a special “glass bead”-like texture on the blue cat-eye gel. This step adds texture and visual interest to your manicure.
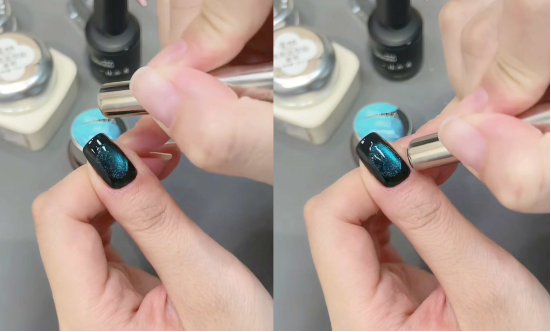
After completing the shaping of the glass bead effect, place the nails under the nail lamp again to dry them so that the blue cat-eye glue layer is completely fixed to ensure that there will be no displacement or deformation during subsequent operations.
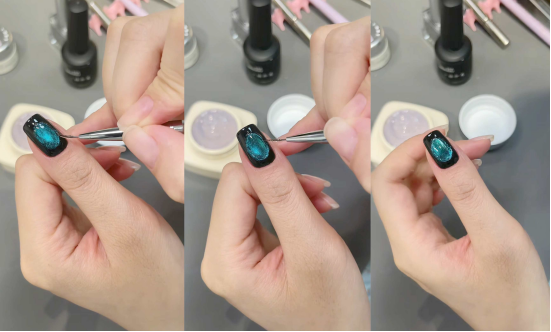
Step 4: Use clear modeling glue to create an irregular border.
After the blue cat-eye glue layer has dried, apply clear modeling glue. Dip a fine-tipped nail art pen into the clear modeling glue and draw an irregular border around the blue cat-eye glue. This irregular design adds a casual and stylish touch to your manicure, making the overall look more unique.
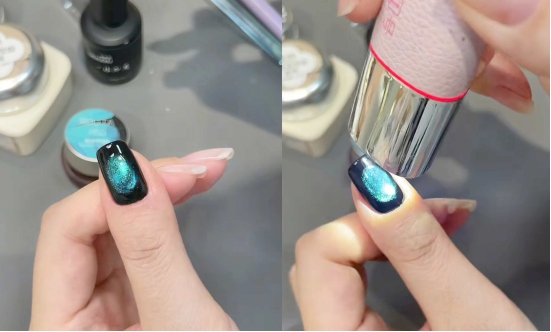
Step 5: Outline with Silver Metallic Liquid
After the border created with the clear gel has dried, prepare the silver metallic liquid.Dip a thinner brush into the silver metallic gel polish and carefully create a border following the outline of the clear gel. This instantly adds a delicate metallic sheen and layered texture to the manicure, enhancing the overall look.
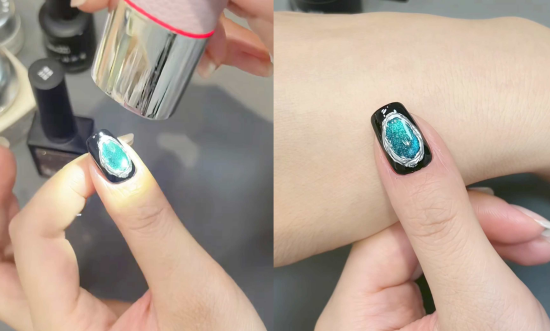
Step 6: Topcoat
After the silver metallic liquid has dried naturally, begin the topcoat. Apply topcoat glue evenly to the nail surface (you can apply more topcoat glue in the center of the blue cat-eye glue to create a more three-dimensional effect). Topcoat not only makes the nail color last longer but also improves the overall gloss and wear resistance.

After applying the topcoat, place your nails under a nail lamp for a final drying. This cat-eye manicure, with its metallic texture and jewel-like sheen, is now complete.
For a more intuitive guide to the details during the process, you can also click on the YouTube video link:
Follow the step-by-step instructions in the video to easily achieve beautiful nails. I hope everyone can create their own dream manicure!
Finally, I recommend CHROMÉCLAIR nail polish products: focus on safety, low irritation, environmental protection, no harmful ingredients, reduce the risk of allergies ( HEMA-free & TPO-free), a variety of colors, cater to mainstream aesthetics, designed for sensitive skin users, care for healthy nails, and ensure that every consumer’s experience is safe and secure.
