This tutorial demonstrates the process of creating iridescent glass nail art, breaking down the entire process from base coat to top coat, and using layered techniques to achieve a translucent iridescent effect.
Step 1: Apply a matte base coat
First, apply a matte base coat to the nail surface. The matte base allows for more delicate colors and prevents a “oily” appearance after coloring, which is the foundation for creating a transparent gradient.
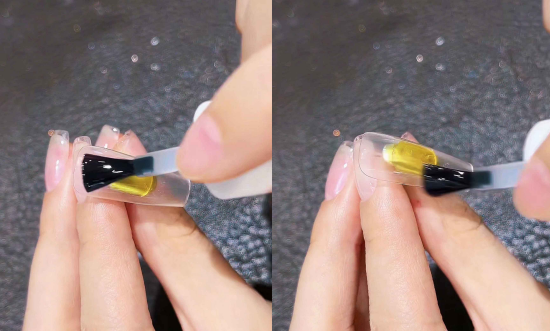
Step 2: Select colors and paint color blocks
Select a transparent nail polish (I used CHROMÉCLAIR’s Hema Free Gel Polish CL series, which is perfect for this tutorial, flows well, and is easy for beginners to apply evenly). Use a small brush to paint different colors (such as pink, yellow, blue, etc., which are similar or contrasting colors) in the diagonal areas.
Recommended next step
Build the Nail Art Look Kit
Tutorial looks need more than a color bottle. Choose the color, art detail, transfer or sticker step, and a top coat as one look kit.
- Choose the main color or set.
- Add the art detail: sticker, transfer gel, magnet, or brush.
- Seal the finished look with top coat.
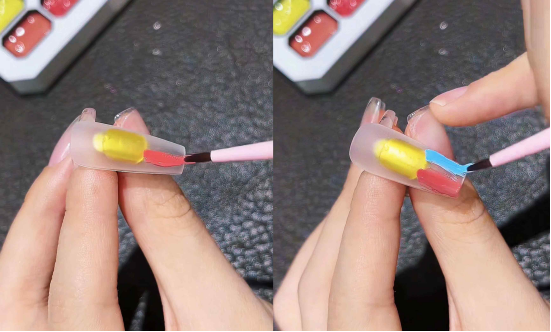
Multi-color zoning is the visual premise of Changhong’s gradient effect. The boundaries of color blocks do not need to be overly blurred, leaving room for blurring in the later stages.
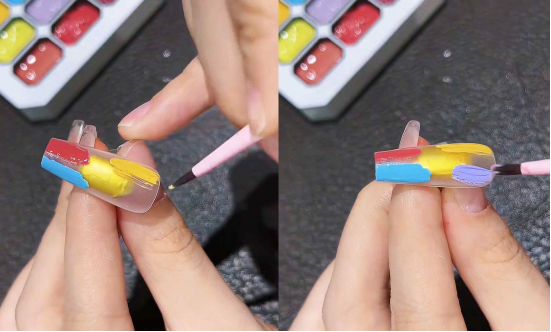
Step 3: Blend the color blocks with a sponge
Take a clean sponge (a nail art sponge or thinly torn makeup pad) and gently tap the nail surface to blend the color blocks. Apply even pressure to create a natural gradient. Tap about two times until the colors blend smoothly, creating a soft, watercolor-like effect.

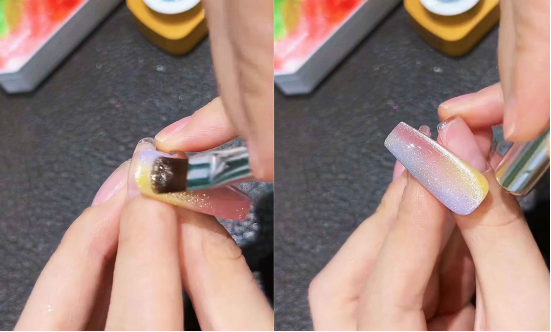
Step 4: Apply Aurora/Cat’s Eye Gel in Layers
Apply a thin layer of Aurora gel, then use a magnet to sweep and pull in the direction of the arc to create fine sparkles or streamlined light bands. This step is the core of the “Rainbow Glass” effect—using magnetic attraction to arrange the fine sparkles into a translucent light effect, simulating the refraction of glass.
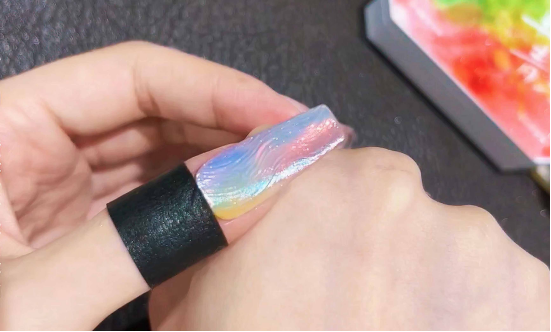
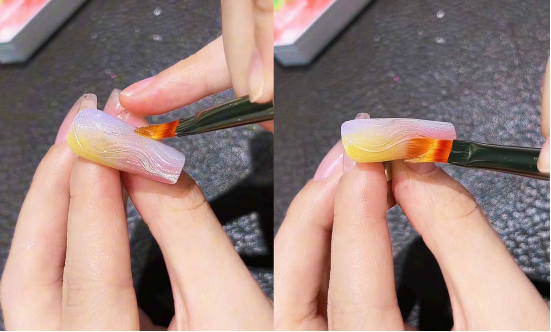
Step 5: Apply a thick layer of styling gel + draw water ripple patterns
Apply a layer of solid styling gel (no-rinse type), and use a stiff brush to draw water ripple patterns: lightly press the brush tip and drag it in an arc to create three-dimensional patterns similar to “glass ripples.”
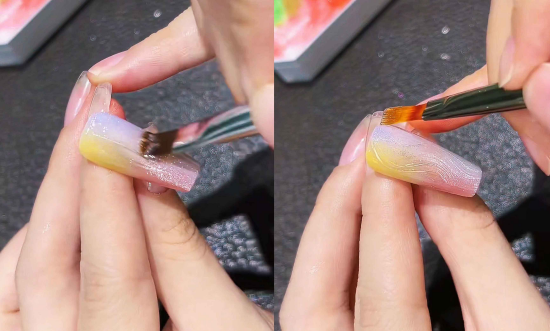
The modeling glue must be thick enough to give the corrugation a relief effect, and its no-wash properties eliminate the need for wiping off excess glue.
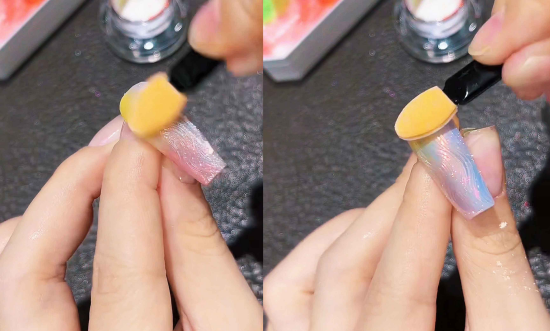
Step 6: Apply glitter + seal coat for finishing touches
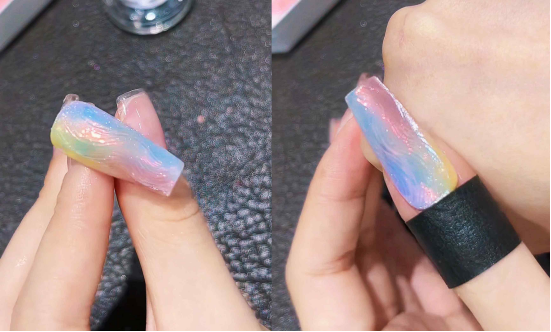
After curing the modeling gel under the lamp, apply Aurora glitter/neon glitter (using a sponge or powder puff to gently apply), allowing the iridescent colors to show through the ripples; finally, sweep away any excess glitter, use base gel to “seal the glitter” for reinforcement, then apply a seal coat to enhance the overall brightness.
Once completed, the nail surface features a translucent rainbow gradient effect combined with a three-dimensional light effect created by wave-like refraction, replicating the dreamlike texture of “rainbow glass.” By following the steps, even beginners can achieve a clear and sophisticated manicure.
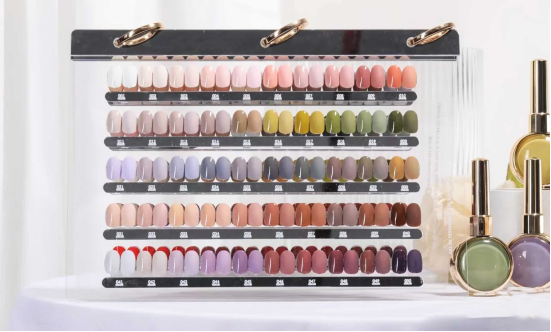
This tutorial uses CHROMÉCLAIR’s HEMA-free Gel Polish. The brand places particular emphasis on safety, offering low irritation, environmental friendliness, and no harmful ingredients such as HEMA, which greatly reduces the risk of allergies and gently protects nail health. It also comes in a wide range of colors that keep up with popular aesthetics, allowing every user to enjoy the nail art process with peace of mind and comfort.
If you have any questions during the process, the video tutorial below provides detailed answers. If you find it useful, don’t forget to like and save it, and subscribe! See you next time!