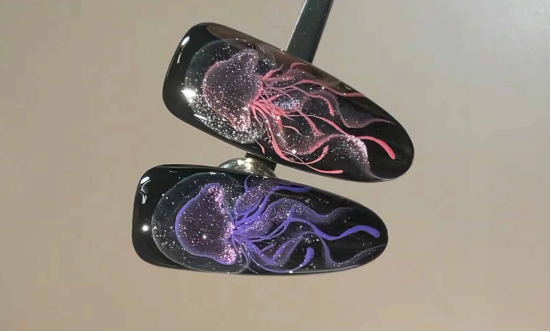
Want to capture the romance of the deep sea on your fingertips? Don’t miss this cat-eye jellyfish manicure! A black base with purple jellyfish accented with platinum glitter creates a captivating look, perfect for everyday dates. Follow the steps to easily achieve the same look!
Equipment Needed:
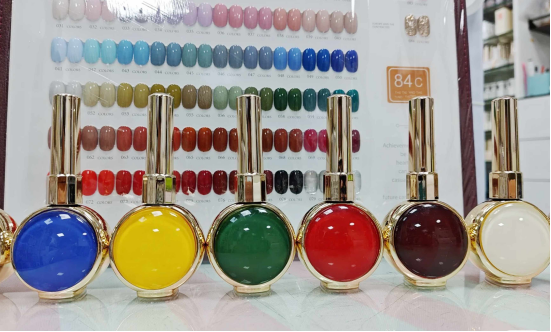
Black gel polish, purple paint gel, white paint gel, purple, colorless cat’s eye gel polish, platinum gel, reinforcing glue, sealer, nail art brushes (including fine-tipped paint pens), UV/LED lamp, magnet, and other tools.
(The gel polish and cat’s eye gel polish used in this tutorial are made with CHROMÉCLAIR’s Hema-Free Gel Polish. Every color is beautiful, non-toxic, and healthy, with excellent flowability, allowing even beginners to apply evenly.)
Step 1: Primer
Recommended next step
Build the Nail Art Look Kit
Tutorial looks need more than a color bottle. Choose the color, art detail, transfer or sticker step, and a top coat as one look kit.
- Choose the main color or set.
- Add the art detail: sticker, transfer gel, magnet, or brush.
- Seal the finished look with top coat.
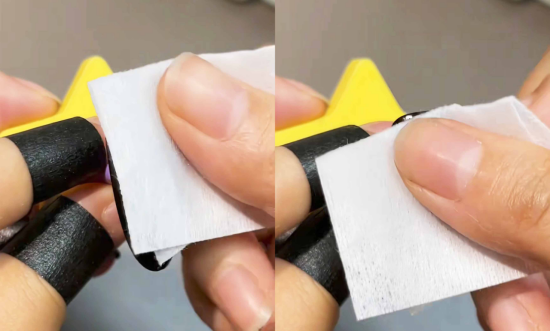
Take black gel polish and evenly apply it to your nails. Apply two coats and dry under a nail lamp.
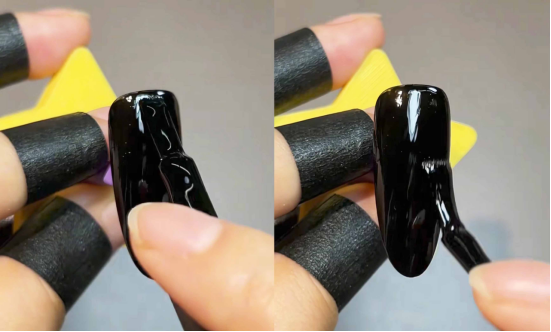
After the nail glue has solidified, use a clean cotton pad dipped in cleaning liquid to gently wipe off the floating glue on the nail surface, leaving the nail surface dry and non-sticky, laying the foundation for subsequent pattern drawing.
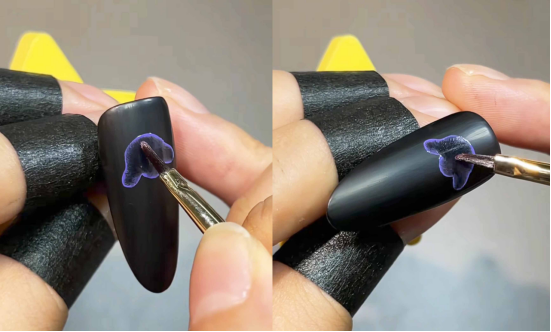
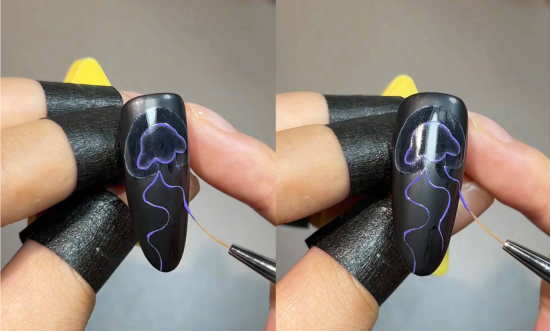
Step 2: Draw the outline of the jellyfish head (purple)
Use a fine-tipped marker pen in purple paint glue and draw the outline of the jellyfish head on the desired location on the nail.
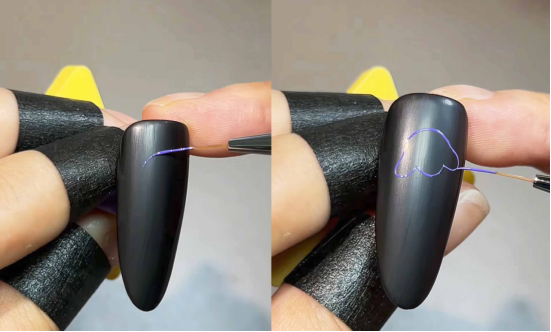
After drawing the outline, use a small paintbrush, dip it in a small amount of purple paint glue, and gently blend the inner edge of the outline to make the outline more natural and soft. After the blending is completed, place the nail art in the nail lamp to dry and fix the pattern of this layer.
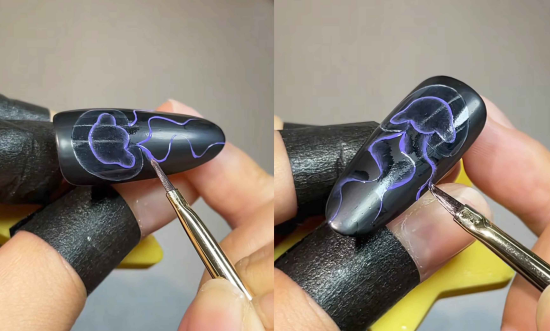
Step 3: Draw the white outline and transition
Use white painting glue to carefully draw a white outline around the jellyfish head you drew previously.
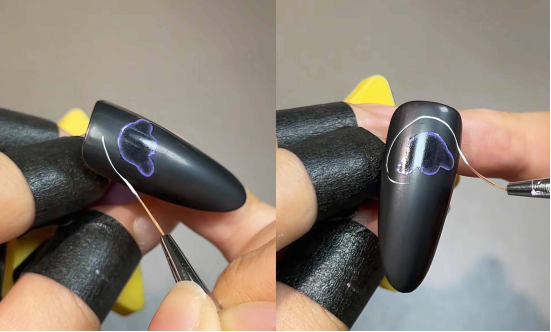
Next, using the same method as the purple inner outline in step 2, use a small paintbrush to blend the edges of the white inner outline to better blend the white outline with the black base and the purple jellyfish head. Once the blending is complete, place the manicure under a nail lamp to dry.
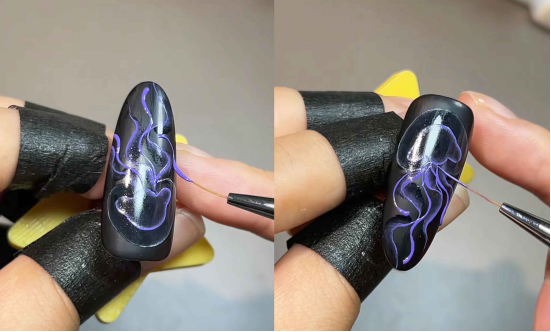
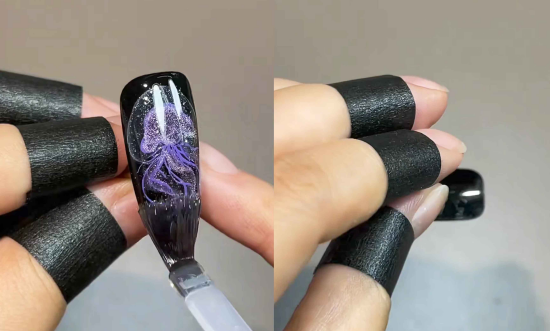
Step 4: Draw the jellyfish tentacles (purple) and blur them
– Using purple painting glue, draw the basic shape of the jellyfish tentacles on the nail in a figure-eight pattern. Blur the edges of the tentacles to make them appear more dynamic.
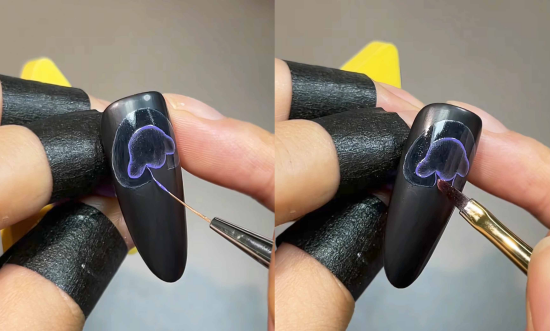
– Next, draw the three tentacles without shining a light on them.
According to the shape of the tentacles, use a small painting pen to blur the edges of the tentacles on the left and right. After processing, put the manicure into the nail lamp to dry.
– Dip the nails in purple painting glue and draw some thin lines of varying lengths to add details to the jellyfish’s tentacles. Once the nails are done, place them in a nail lamp to dry.
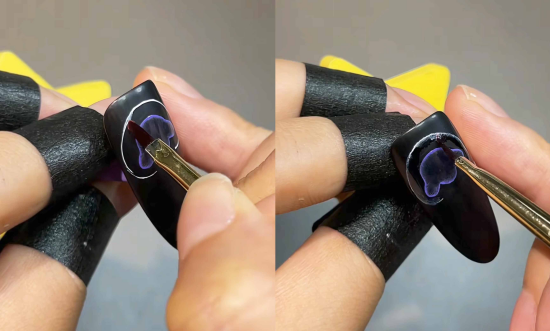
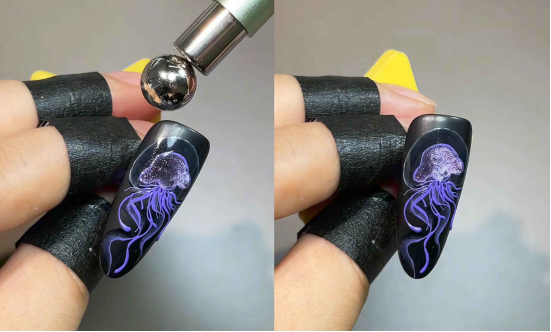
Step 5: Use cat’s eye gel to create the jellyfish head and tentacles.
– Take purple cat’s eye gel and apply it evenly to the jellyfish head area.
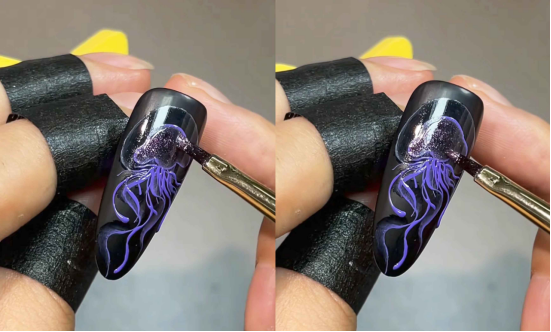
Then use a magnet to get close to the nail surface and suck out the cat-eye effect. After getting the ideal effect, put the nail art into the nail lamp to dry.
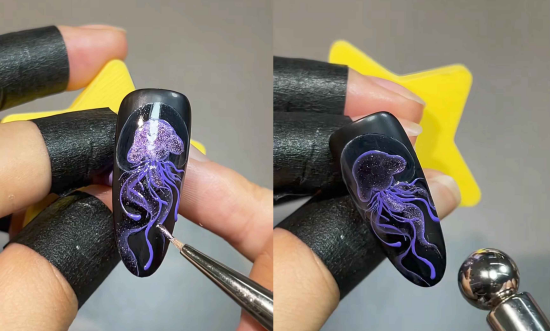
– Following the previously blurred tentacle shapes, apply purple cat-eye glue to the tentacle locations, one on each side. After applying, use a magnet to create the cat-eye effect. Then, place the nail under a nail lamp to dry. Repeat this process for the other tentacle locations, drying them one by one.

– Dip the brush into the purple cat’s eye gel again and paint on the tentacles. Use a magnet to draw out the cat’s eye effect and let it dry. Repeat this method for all three tentacles.
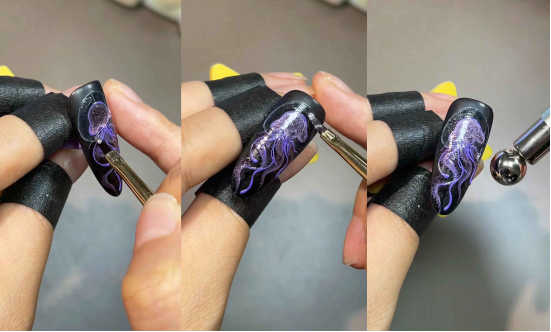
Step 6: Create a cat-eye effect and embellish the white circle.
Take colorless cat-eye glue and apply it to the white circle you created earlier. Be careful to apply only a small amount. Then, use a magnet to create the cat-eye effect and place the nails under a nail lamp to dry.
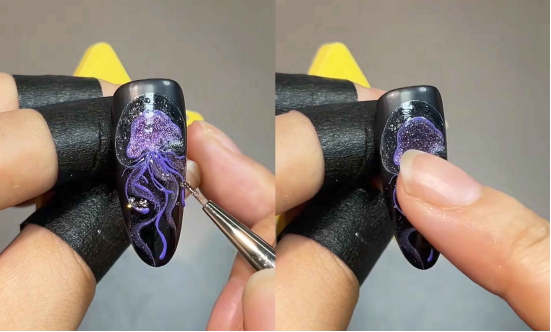
Afterwards, apply platinum glue on appropriate locations on the nail surface, and gently pat the platinum glue with your fingers to create a dotted effect. After patting, place the manicure in a nail lamp to dry.
Step 7: Reinforcement and Topcoat
– Apply reinforcing glue to the entire nail. After application, turn the nail upside down to allow the glue to naturally level the nail surface. Then, place the nail under a nail lamp to dry and enhance its durability.
– After the reinforcing glue has dried, apply a top coat to the entire nail. Apply it evenly and place it under a nail lamp to dry, so that a shiny and wear-resistant protective layer will form on the surface of the nail.
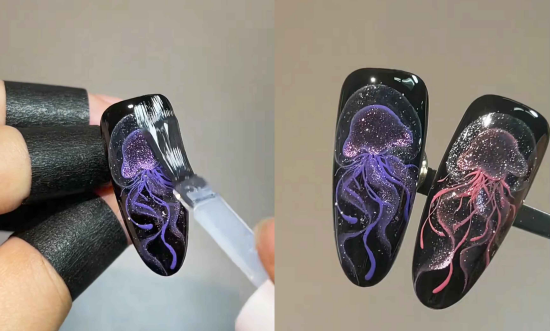
With this, your dreamy jellyfish manicure is complete. The black base contrasts beautifully with the purple and pink (if pink), jellyfish patterns. Combined with the dreamy sheen of cat’s eye gel and touches of platinum gel, the manicure creates a dreamlike effect, reminiscent of jellyfish swimming in the deep sea.
In the tutorial, I used CHROMÉCLAIR gel polish. Their products focus on safety, low irritation, environmental protection, and do not contain harmful ingredients, reducing the risk of allergies (HEMA-free Gel Polish). They protect healthy nails and have a variety of colors to cater to mainstream aesthetics, ensuring that every consumer has a safe and secure user experience.
Having trouble with the operation? Remember to watch the video tutorial below. If you find it useful, please like and collect it ⭐, and subscribe to me! See you in the next tutorial!