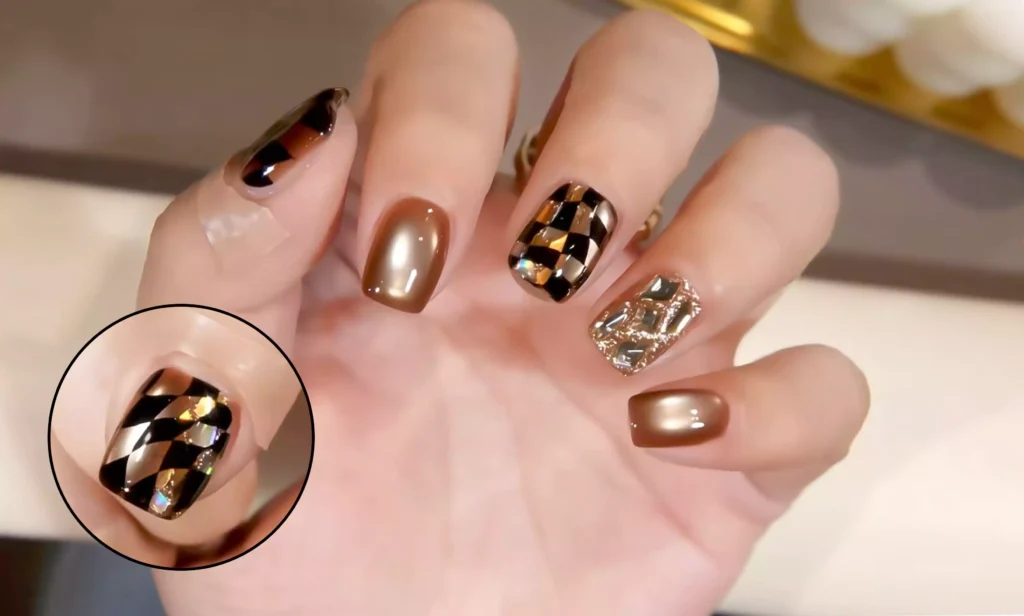
L'attrait du nail art réside dans la fusion du détail et de la créativité. Ce motif de diamant éblouissant combine des effets de dégradé, des accents d'œil de chat et des techniques de transfert de plaque d'acier pour créer un impact visuel d'une texture saisissante.
Voici les étapes spécifiques de la demande :
Étape 1 : Couleur de base dégradée et application des paillettes
Tout d'abord, appliquez le gel platine uniquement sur la moitié centrale de l'ongle. Balayez ensuite le gel horizontalement pour créer un effet dégradé.
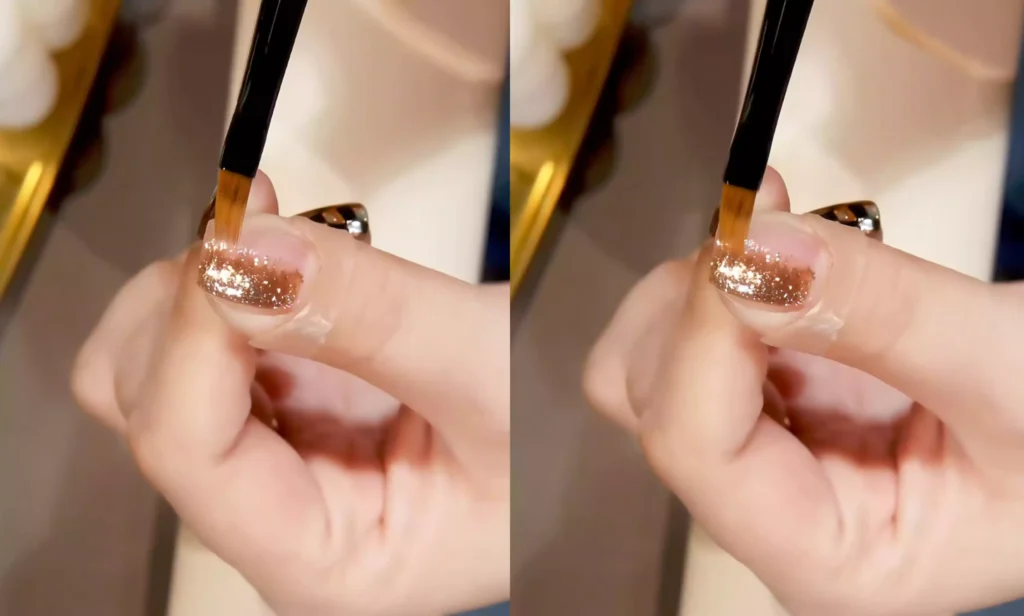
Appliquez ensuite les paillettes sur les ongles, en veillant à ne pas les placer trop densément. Laissez un peu de gel platine sous-jacent apparent pour créer un effet diamant scintillant.
Après avoir terminé l'application des paillettes, procédez à un léger durcissement.
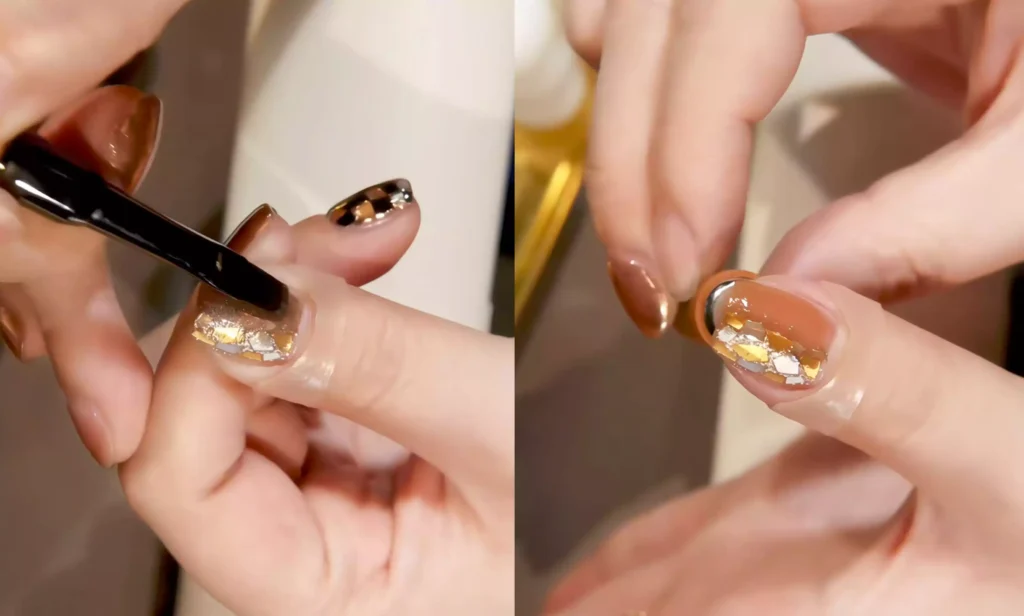
Appliquer une couche de gel renforcé à haute transparence pour encapsuler les décorations pailletées. Après un nouveau durcissement sous la lampe, polir la surface de l'ongle pour obtenir une finition plus lisse. Cette étape permet d'accentuer la profondeur de l'effet de la couleur de base de l'œil-de-chat.

Étape 2 : Créer l'effet œil de chat
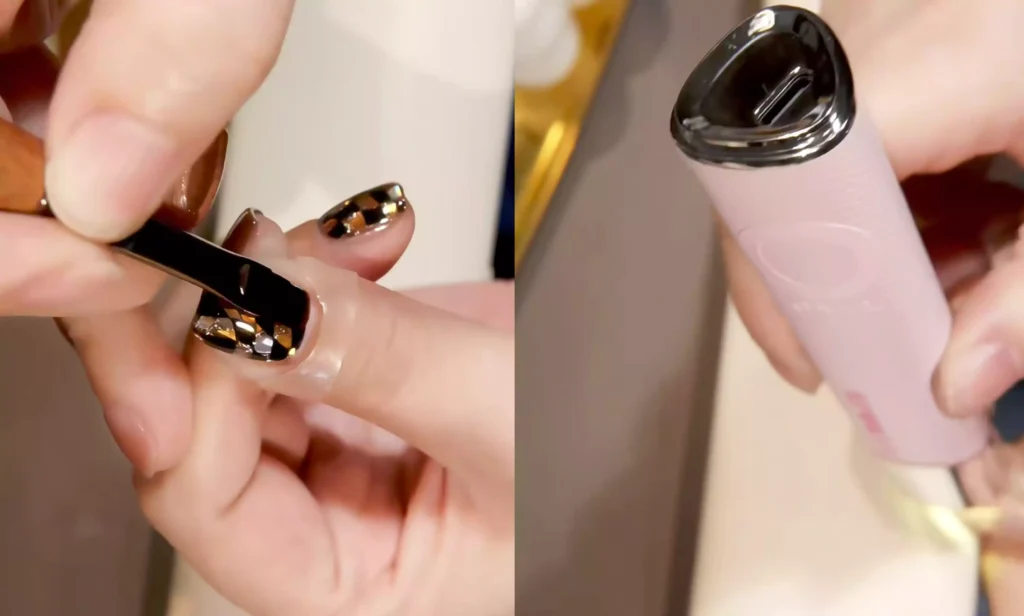
Appliquer la première couche de vernis gel yeux de chat (J'ai utilisé le produit de CHROMÉCLAIR Gel Polonais sans Hema CE-07-la couleur convient parfaitement à ce style, a une bonne fluidité et est facile à appliquer uniformément pour les débutants).
Utilisez un aimant pour enlever la poudre magnétique, puis appliquez une autre couche après avoir éclairé le stylo. (Nettoyer le stylo avant d'appliquer la deuxième couche)
Balayez ensuite délicatement le centre de l'ongle pour créer un dégradé. Utilisez l'aimant pour dessiner l'effet œil de chat, qui approfondira la couleur de base. Une fois l'effet œil de chat dessiné, durcir immédiatement sous la lampe.
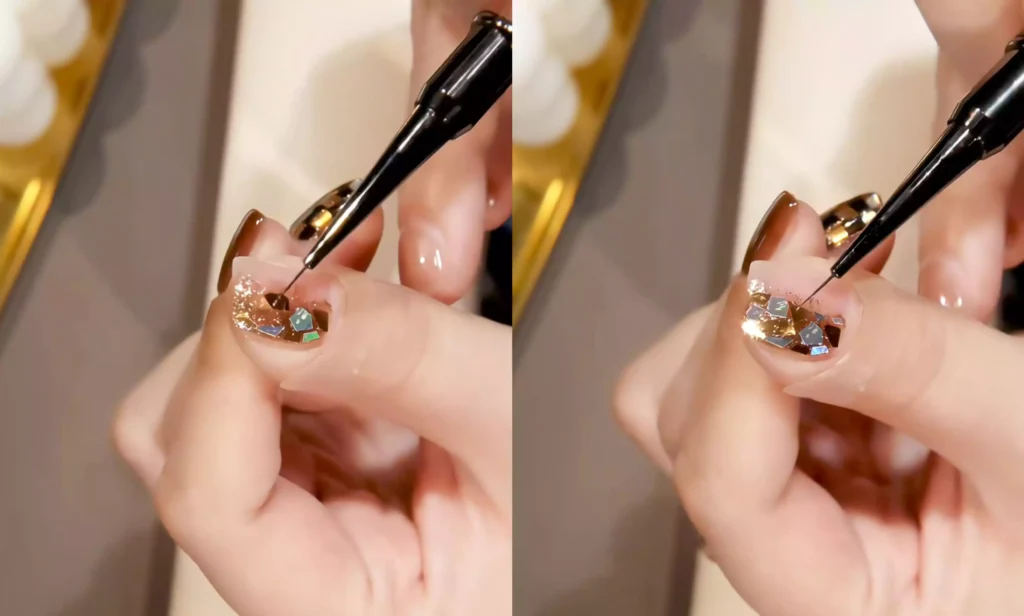
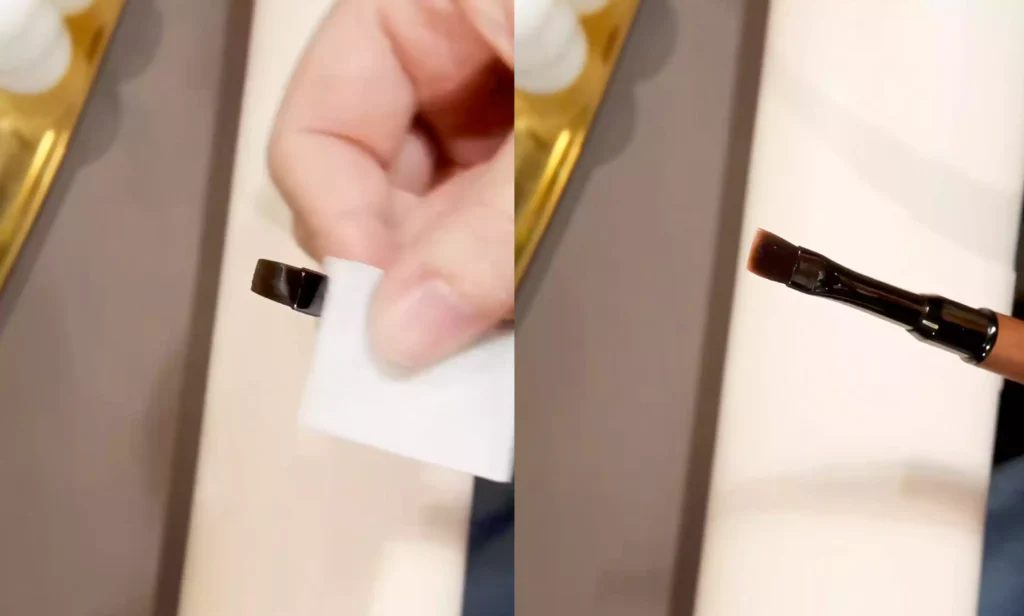
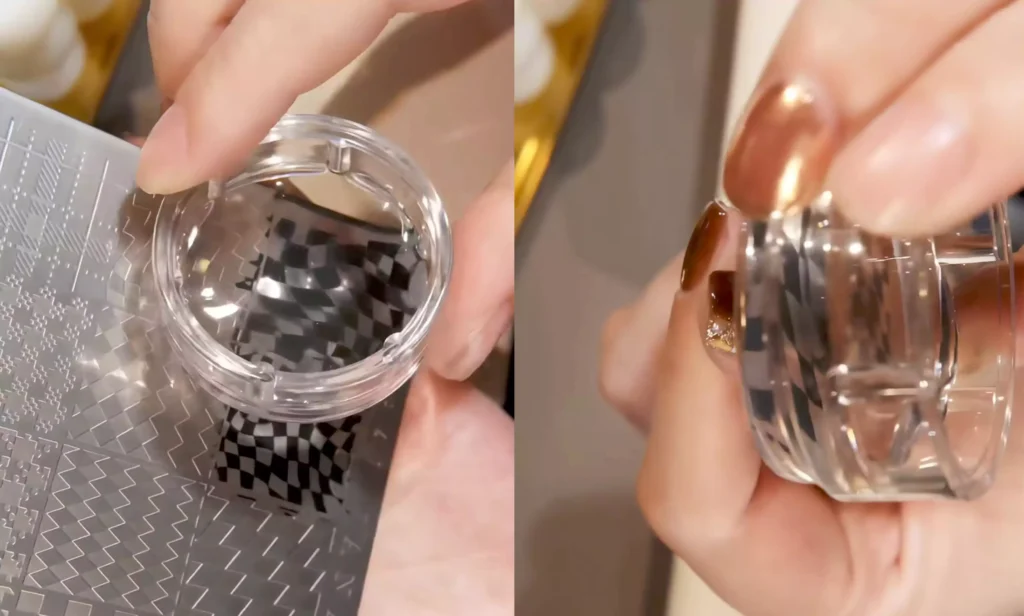
Étape 3 : Transfert du modèle de tôle d'acier
Pour le majeur, choisissez un motif abstrait plus petit pour le transfert ; pour le pouce, choisissez un motif abstrait plus grand.
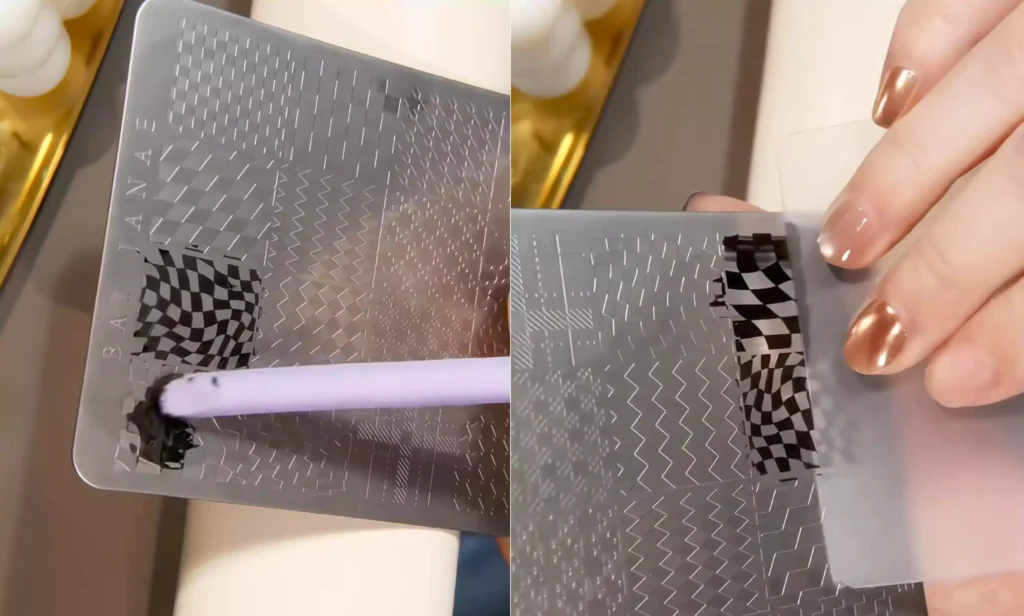
Lorsque vous transférez des motifs, utilisez un gel d'estampage pâteux. La texture granuleuse du gel pâteux permet au tampon d'absorber plus efficacement le motif. Pour l'appliquer, appuyez doucement le tampon sur le gel, puis soulevez-le lentement pour transférer clairement le motif. Ensuite, alignez le motif sur l'endroit désiré de votre ongle et appuyez fermement. Cette technique simple permet de créer un motif abstrait en forme de grille.
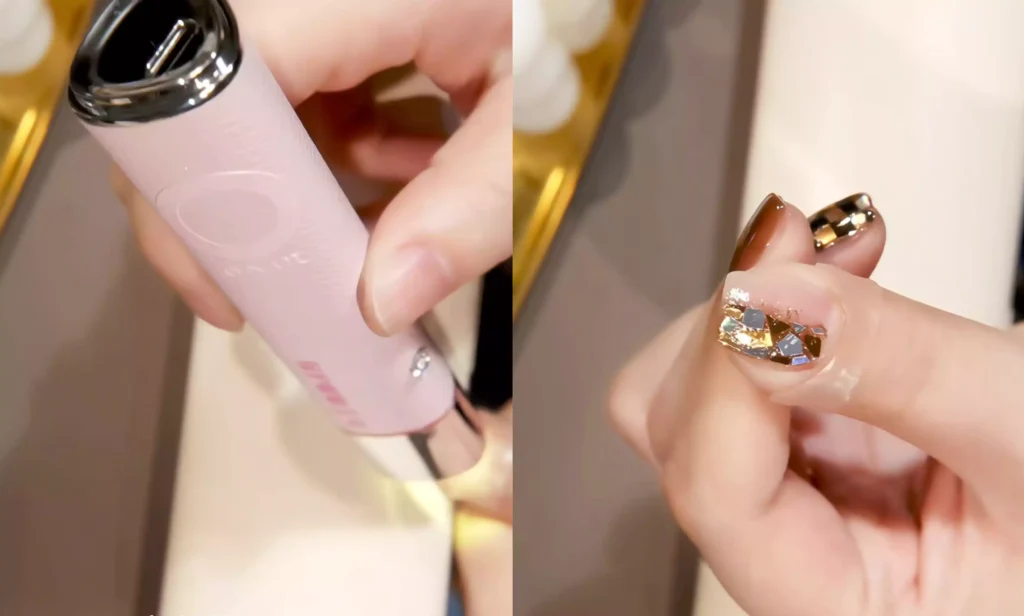
Étape 4 : Top Coat et Final Effect
Appliquer une couche de finition améthyste non jaunissante et très transparente pour une finition cristalline. Durcir sous une lampe UV/LED pour parfaire le look !
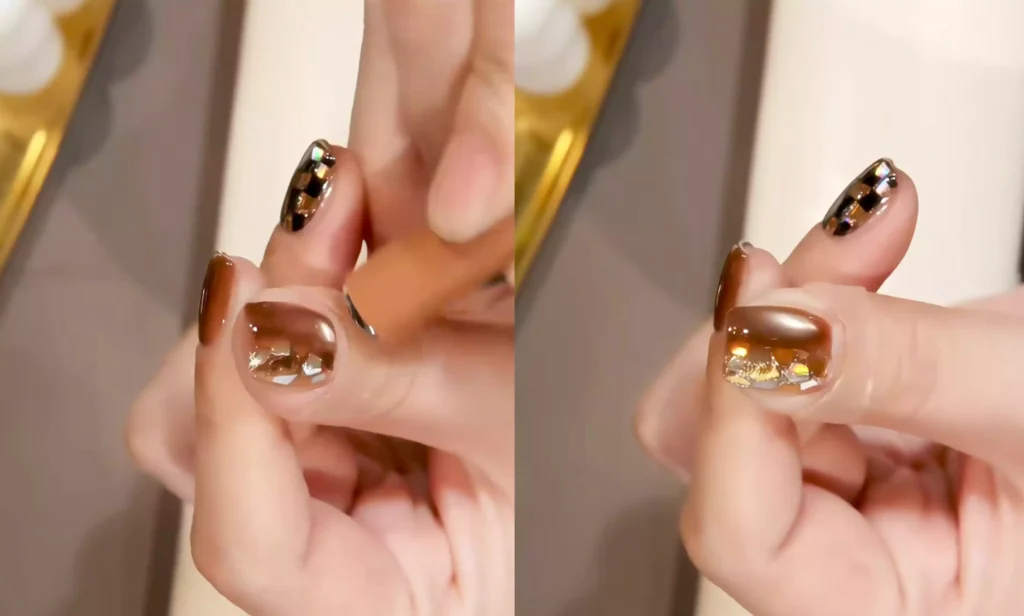
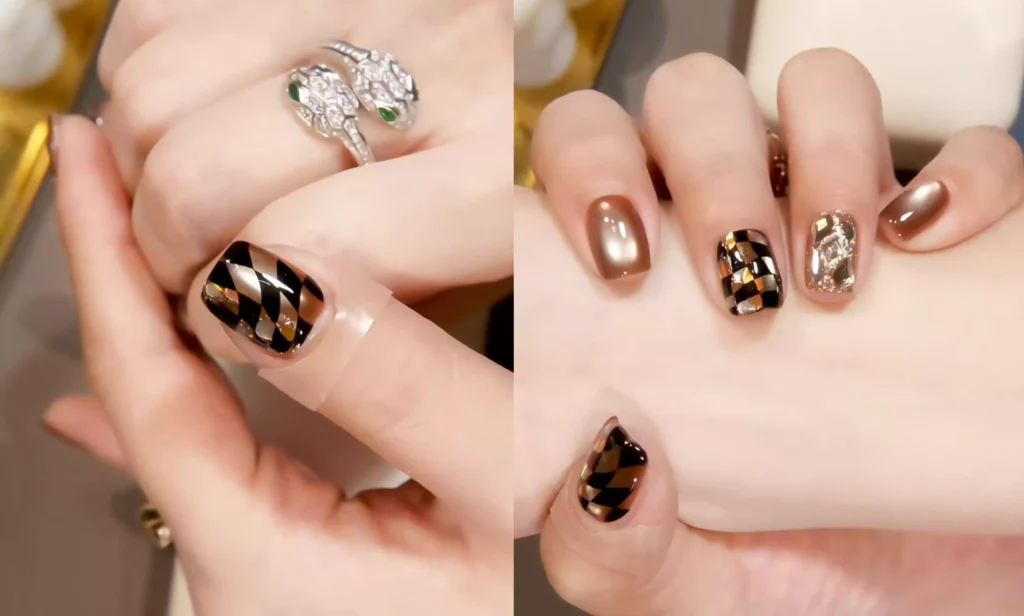
Une fois terminé, on peut d'abord examiner les détails complexes du motif en diamant, puis voir la main entière avec les ongles parfaitement coordonnés. Vous pouvez également faire pivoter votre main pour admirer l'attrait éblouissant de ces dessins de nail art en forme de diamant sous tous les angles.
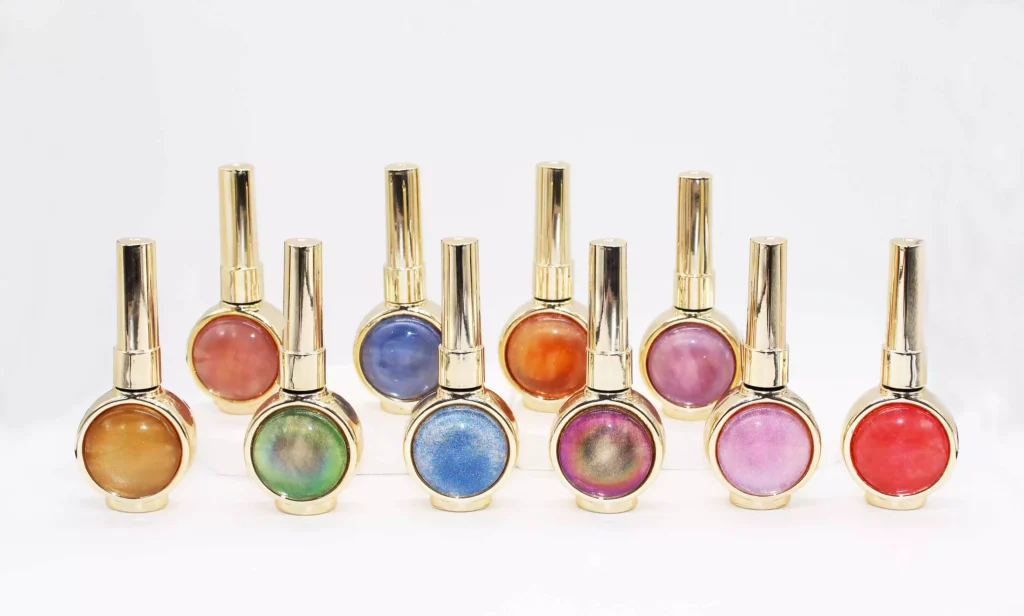
Dans ce tutoriel, j'utilise l'outil de CHROMÉCLAIR Gel Polish sans HEMA. Non seulement il est peu irritant et respectueux de l'environnement, mais il est également exempt d'ingrédients nocifs (sans HEMA ni TPO), ce qui protège la santé de vos ongles. Avec une gamme de nuances incroyablement large, une tenue longue durée (environ 21 jours) et des motifs toujours à la mode, vous pouvez avoir l'esprit tranquille et obtenir des résultats époustouflants !
Vous avez des difficultés à suivre les étapes ? N'hésitez pas à consulter le tutoriel vidéo ci-dessous ! Si vous avez trouvé cela utile, n'hésitez pas à lui donner un pouce en l'air et à le sauvegarder ⭐. Abonnez-vous à ma chaîne, et rendez-vous dans le prochain tutoriel !