If you are trying to figure out how long should a gel polish be cured, then you need not worry because this is one of the reasons why the gel polish comes off or chippies earlier than required. The answer to how long should a gel polish be cured lies in your knowledge on how long should a gel polish be cured to get perfect looking nails. Here is how long should a gel polish be cured:
| Type de manteau | Temps de durcissement des LED | Temps de durcissement aux UV |
|---|---|---|
| Couche de base | 45 secondes | 90 secondes |
| Couche de couleur | 60 secondes | 2 minutes |
| Top Coat | 60 à 90 secondes | 2 minutes |
As long as you follow all these tips on how long to cure gel polish, there won’t be any chipping or dulling of your nails. If you don’t do things correctly and just guess how long to cure gel polish, it can cause some issues. You need to know how long to cure gel polish for professionally looking nails.
Principaux enseignements
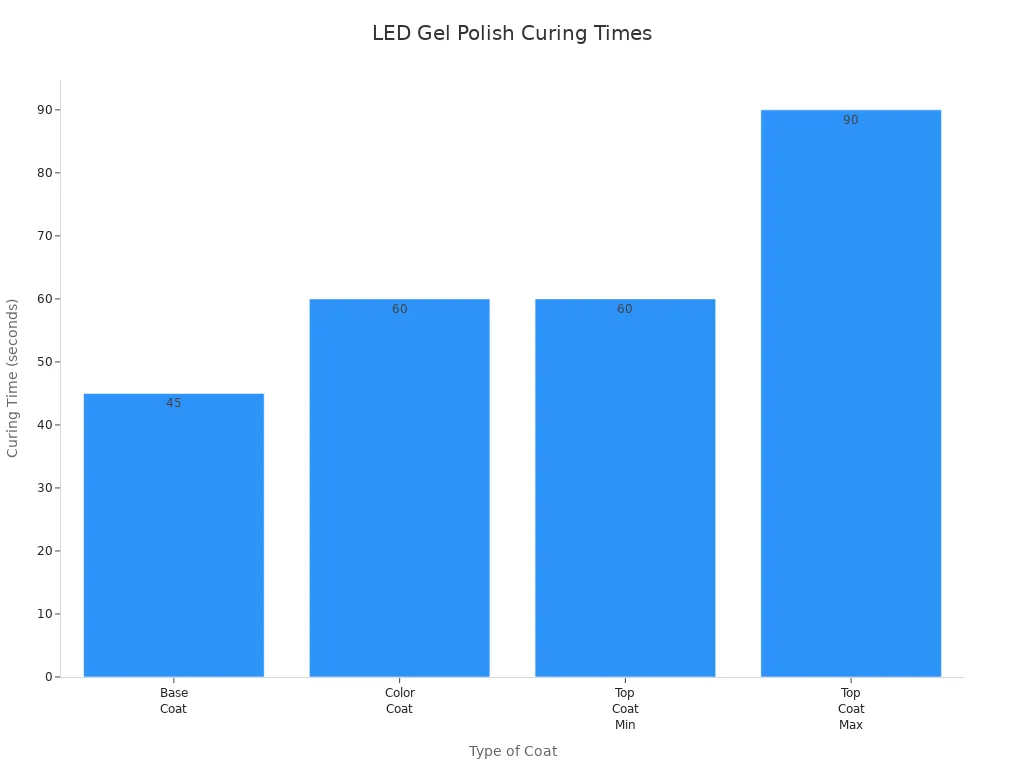
- Ensure that each coat is cured properly and in accordance with the advised time period to prevent any issues such as chipping and peeling off. Use 45 seconds for curing base coat and 60 seconds for curing color coat under LED lamps.
- Remember to use thin layers while applying gel polish. It takes more time to cure thick layers of gel polish, and this causes lifting and wrinkling.
- Make sure to set a timer for every curing process. This allows you to maintain the drying time accurately, ensuring a long-lasting manicure.
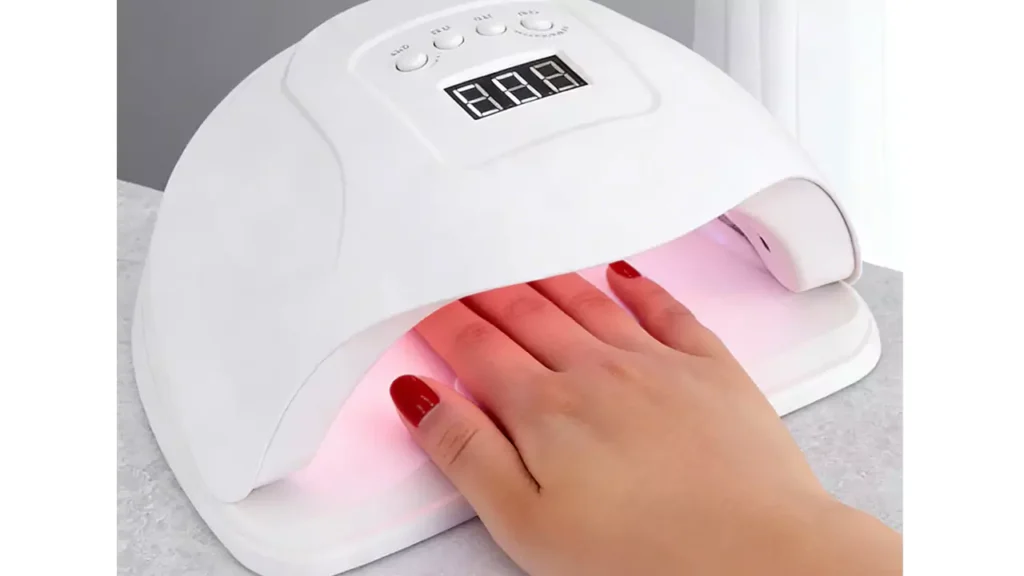
- Know what lamp you are using. LEDs dry gel polish much faster than UV lights, which you should keep in mind when curing your manicure.
- Take note of whether your nails have dried correctly. They will be smooth, solid, shiny, and free of air bubbles.
Combien de temps faut-il pour sécher le vernis gel sous les lampes LED et UV ?
Curing Times for Base Gel, Color, and Top Gel Coats
If you wish to have a durable gel manicure, the most important aspect would be to understand the curing times for each coat of gel polish. For the base gel, color gel, and top gel coats, there is required curing time that cannot be overlooked.
Voici un tableau récapitulatif pour vous aider à vous souvenir des meilleurs temps de séchage :
| Type de manteau | Temps de durcissement des LED | Temps de durcissement aux UV |
|---|---|---|
| Couche de base | 45 secondes | 90 secondes |
| Couche de couleur | 60 secondes/couche | 2 minutes/couche |
| Top Coat | 60 à 90 secondes | 2 minutes |
Vous devez respecter ces délais pour chaque couche. Si vous sautez ou raccourcissez le processus, votre vernis risque de rester collant ou de s'écailler trop rapidement. En respectant les délais recommandés, vous obtiendrez des ongles brillants et qui dureront plus longtemps.
Recommended next step
Smooth, Long-Lasting Gel Routine
Bubbling, peeling, shrinkage, and dull wear are usually system problems. Build the manicure with prep, base, color, and top coat together.
- Prep the nail plate before color.
- Use a base coat that matches the gel system.
- Finish with a compatible top coat for wear and shine.
Shop long-lasting routine kitSee no-wipe top coatCompare all routines
Différences entre les lampes LED et les lampes UV
It is natural for you to ask what significance this lamp holds. Both LED and UV lamps cure gel polish. However, the process of curing is quite different with both types of lamps. An LED lamp uses a limited spectrum, while a UV lamp uses a wide spectrum.
Voici une comparaison simple :
| Type de lampe | Temps de durcissement | Plage de longueurs d'onde |
|---|---|---|
| Lampe UV | Plus lent | 320 à 400 nm |
| Lampe LED | Plus rapide | 370 à 380 nm |
With an LED lamp, you will complete your manicure faster. If you have to cure your nails using a uv light, then you should allow more time for every coat. Depending on the lamp used, the curing time varies; hence, one should check the lamp being used before applying any product.
Pourquoi les temps de séchage exacts sont-ils importants ?
Maybe you feel like a few seconds don’t matter, but they do. That is why you must stick to the exact curing times for each layer and lamp:
Curing correctly prevents you from having tacky or sticky nails.
Each layer takes its unique amount of time due to differences in viscosity, formula, and light sources.
Insufficient curing can lead to lifting and chipping of your nail polish.
Excessive curing results in the polish becoming very hard and causes it to not stay on your nail anymore.
Inconsistency with the proper schedule can result in larger complications. It may lead to chipping, peeling, and discoloration. Skin irritation and allergies are common if the polish is not dried properly. Dusting due to poorly cured nails can lead to inflammation and even the loss of your nail.
TIP: Set a timer for each coat. This will help you keep track of how long you need to cure the gel polish and give you perfect-looking nails.
If you do everything correctly, you’ll have beautiful, durable nails. You’ll be free from all kinds of issues like chipping and peeling. This is why understanding how long to cure gel polish is so important.
Pourquoi le temps de séchage affecte la durée de vie du vernis à ongles gel
Durabilité et brillance
You will want your gel nails to appear shiny and remain that way for many weeks. This is possible only when you cure each layer of the gel nails for the correct curing time period. What importance does this have? The curing process fixes the color of the nail and gives strength to the nail. When it is done incorrectly, you will face some issues.
- Un temps de séchage adéquat solidifie le gel et fixe la couleur, pour un fini durable et brillant qui résiste à l'usure quotidienne.
- Un durcissement insuffisant peut entraîner un écaillage ou un effritement, tandis qu'un durcissement excessif peut provoquer une fragilité ou une décoloration.
- Une finition brillante après durcissement indique que le vernis gel est complètement sec, tandis qu'une surface mate signifie que vous devez prolonger le temps d'exposition sous la lampe.
A proper curing process initiates a reaction known as polymerization that results in the hardening of the polish. If the process is not done right and the timings are not accurately gauged, there is a possibility that the polish will peel off or appear dull.
Santé et sécurité des ongles
However, when getting your nails done, you may never think about their well-being. Scientific evidence proves that prolonged exposure to UV lights can be detrimental to both nails and skin. For example, a relatively safe period of time would be four minutes. Longer periods of UV light can lead to cellular damage and even increase the risk of developing skin cancer.
In case your nail polish is not cured well, there may be uncured chemicals left behind that can come into contact with your skin, causing allergies. This will cause some to experience symptoms such as itching and redness. Others might end up losing their nail plates because of weakened nails. Such problems can be avoided by curing your nail polish adequately.
Prévenir l'écaillage et le décollement
Your manicure should be lasting; therefore, avoid chips and peels within a few days. The only secret to having this is the curing process. When thick coats are used, when curing time is short, and when one does not cap the free edge, the chances of the polish lifting up or chipping are increased.
Chipping and peeling could also result from thick coats, inadequate curing, and failure to cap the free edge during the application of the gel polish.
When one takes time curing his or her gel polish properly, the outcome will be perfect nails.
Risques liés à un durcissement incorrect : sous-durcissement ou surdurcissement du vernis à ongles gel
Signes d'un vernis gel insuffisamment durci
Your nails may seem perfectly cured right after curing, but not properly curing your nail polish means you will have obvious signs soon after. Not leaving your gel long enough to cure can make you regret spending time doing your nails.
- There will be wrinkling on top of the cured polish.
- You may spot bubbles underneath the cured polish.
- Your nails will feel bumpy due to too much gel polish.
If you notice any of these problems, then your gel polish hasn’t cured completely, and you will have to correct this problem before applying further layers.
Conseil de pro : Make sure that you apply thin layers and cure them for the prescribed time period. That will help you avoid these common problems.
Problèmes liés à un durcissement excessif
You may assume that having your nails exposed to the light for slightly more time will be okay. Well, it won’t. Excessive curing will be just as bad as insufficient curing. These are some things that could happen when you over-cure your nails:
- They will become too dry and fragile.
- The gel polish will begin to peel off the nail plate.
- The color of the polish will fade or turn out unevenly applied.
What happens is that by over-curing, the gel becomes too rigid. It is unable to stay flexible and attach to your nail properly. If you want the manicure to remain on for longer, you should make sure you are not over-curing your nails.
Impact sur la longévité des ongles
Un durcissement incorrect n'altère pas seulement l'apparence immédiate de vos ongles. Il affecte également la durée de votre manucure. Si vous ne durcissez pas correctement votre vernis gel, vous remarquerez des problèmes plus tôt que vous ne le pensez.
- Les couches insuffisamment durcies restent molles et instables. Elles se décollent rapidement.
- Les couches épaisses empêchent la lumière d'atteindre toutes les couches. Cela laisse un point faible à côté de votre ongle.
- Si vous ne respectez pas le temps de séchage recommandé, votre manucure sera moins résistante. Elle ne tiendra pas aussi longtemps.
Si vous voulez des ongles solides, beaux et durables, vous devez bien sécher votre vernis gel. En respectant le temps de séchage recommandé, votre manucure restera impeccable et vous éviterez les éclats, les écaillures et autres problèmes.
Facteurs qui modifient le temps de séchage du vernis à ongles gel
It is possible that you may ask yourself why your gel manicure either dries quickly or takes ages to dry. Here are some considerations which determine this. For you to be able to understand how long it takes for gel nail polish to dry, there are a number of issues you need to consider.
Puissance et type de lampe
The drying time varies depending on your lamp. There are lamps available in various wattages, which have an effect on the drying time of gel nail polish. Those with low wattage will be slow and may fail to provide proper curing, leaving the nails soft. The high wattage ones are fast, although they may heat up when rushed.
| Niveau de puissance | Temps de durcissement | Problèmes potentiels |
|---|---|---|
| Faible | Longer (UV: ~2 min, LED: >30 sec) | Ongles insuffisamment durcis, mous et fragiles |
| Haut | Plus rapide | Pics de chaleur, durcissement irrégulier, risque de dommages |
The right lamp would be one which has the entire range of wavelengths from 365 to 405 nm. This will allow curing of all types of gel in an effective manner. The best lamps for home use are those ranging from 24 to 36W. There are mini lamps for travel, medium size for one-hand operation, and large lamps for two hands.
Formule gel et couleur
The composition and coloring of the polish you use also affect the drying process. Certain gels require additional curing due to their high level of energy consumption, which may vary according to the mixing of different gel brands. Variations in the curing process may result in some nails becoming harder than others. Gel with dark color or pigments requires more time for curing or an enhanced intensity of light to do so effectively.
- Lamps should have sufficient wattage depending on your gel polish.
- Always use one brand of gel polishes including the base coat, top coat, and color.
- Dark colored gels require a bit more time.
- Always apply a thin coat of the gel.
Épaisseur d'application
The application process is equally important as the lamp and the polish. Thick applications mean it will take longer to dry, causing it to chip or peel. Thin applications mean quicker drying time and smoother application. When thick applications are used, you run the risk of having wrinkled nails. To avoid wrinkling and peeling, apply a thin layer, leaving space from your cuticle area.
- Thin layers are essential for proper curing.
- Thick layers require more time and may lead to issues.
- It is important to allow every layer to dry completely before applying another one.
Considering all these points, you will understand precisely how much time it takes for gel nail polish to dry. This way, you’ll achieve better results.
Comment garantir des temps de séchage précis pour le vernis à ongles gel
Conseils pour un séchage adéquat à domicile
The first thing that you should do is to follow the correct procedure in order to achieve perfection with regard to your nails. It is important that you take care in order to ensure that your gel manicure stays in good condition for long. So why is all of this important? Here is how you can succeed:
- Before you begin, clean and file your nails.
- Buff your nails and get rid of the shine.
- Push your cuticles back to ensure that the gel coats just your nails.
- Wipe your nails using alcohol to remove the oils present.
- Put an even and thin layer of gel base coat on your nails. Thick layers cure slower and might have difficulties.
- Cover up the free edge of your nails with each coat. This is to prevent the polish from lifting.
- Cure your nails under the lamp for the specified period of time. Do not estimate the time; set a timer instead.
- Remove any gel that is on your skin before curing the layers.
Conseil : suivez toujours les instructions relatives à votre lampe et à votre vernis. Cela vous aidera à respecter les temps de séchage exacts et à éviter les erreurs.
Comment vérifier si le gel est complètement durci
Vous voulez savoir si votre vernis gel est prêt. Voici comment vous pouvez le savoir :
- La surface est lisse et dure, elle n'est ni collante ni adhésive.
- La couleur est brillante et uniforme.
- Il n'y a pas de bulles, de plis ou de points mous.
- Le vernis ne bouge pas et ne se raye pas lorsque vous le tapotez doucement.
Si vous constatez l'absence de l'un de ces signes, il se peut que le temps de durcissement soit insuffisant. Il vaut mieux vérifier après chaque couche plutôt que de corriger les erreurs par la suite.
Tableau de référence rapide pour les temps de durcissement
Vous ne voulez pas avoir à deviner combien de temps il faut pour faire sécher chaque couche. Utilisez ce tableau pour vous rappeler les meilleurs temps de séchage pour votre vernis à ongles gel :
| Type de manteau | Durée de vie des lampes LED | Durée d'utilisation de la lampe UV |
|---|---|---|
| Base Gel Polish Coat | 45 secondes | 90 secondes |
| Vernis gel couleur | 60 secondes | 2 minutes |
| Top coat pour vernis gel | 60 à 90 secondes | 2 minutes |
Pourquoi utiliser un tableau ? Il vous aide à éviter les erreurs courantes telles que le séchage insuffisant ou excessif. En respectant ces temps de séchage, vous obtiendrez des ongles solides, brillants et durables.
You definitely want the longevity and beauty of your manicure. This is why you must adhere to the correct curing times for normal gel nail polish. Why? Because:
- Correct curing gives you an enduring, chiplees finish.
- Not adhering to proper steps will give you peeling or chipped nails, or worse, an allergic reaction.
- Over curing your regular gel nail polish will make it fragile and difficult to take off.
- The proper timing is key to the correct photochemical process.
Always make sure to read your lamps and gel nail polish directions. By curing your layers correctly, you can ensure that not only are you safe, but you also look great. You can have professional-grade nails without even going to the salon!
FAQ
Pourquoi faut-il laisser sécher chaque couche de vernis à ongles gel pendant un certain nombre de minutes ?
Vous devez faire durcir chaque couche pendant le nombre de minutes indiqué afin de fixer la couleur et la résistance. Si vous vous précipitez, le vernis à ongles gel reste souple. Si vous attendez trop longtemps, il devient cassant. Le bon timing permet à votre manucure de durer plus longtemps.
Pourquoi ne pas simplement laisser sécher le vernis à ongles gel quelques minutes de plus, par mesure de sécurité ?
Vous pourriez penser que plus de minutes signifient de meilleurs résultats. Ce n'est pas vrai. Si vous prolongez le temps de séchage, le vernis à ongles en gel peut se fissurer ou s'écailler. La formule fonctionne mieux lorsque vous respectez le temps de séchage recommandé pour chaque couche.
Pourquoi le type de lampe modifie-t-il le nombre de minutes nécessaires pour faire durcir le vernis à ongles gel ?
Différentes lampes utilisent différentes lumières. Les lampes LED durcissent plus rapidement, vous avez donc besoin de moins de minutes. Les lampes UV prennent plus de minutes pour durcir chaque couche. Vérifiez toujours votre lampe et respectez le temps de durcissement indiqué pour obtenir les meilleurs résultats.
Pourquoi un temps de séchage trop court pose-t-il des problèmes avec le vernis à ongles gel ?
Si vous ne laissez pas sécher suffisamment longtemps, le vernis à ongles gel restera collant ou mou. Il s'écaillera ou se décollera rapidement. Il est préférable de laisser sécher pendant toute la durée indiquée afin que vos ongles restent solides et brillants.