Vous avez encore du mal à suivre les étapes compliquées du nail art peint à la main ?
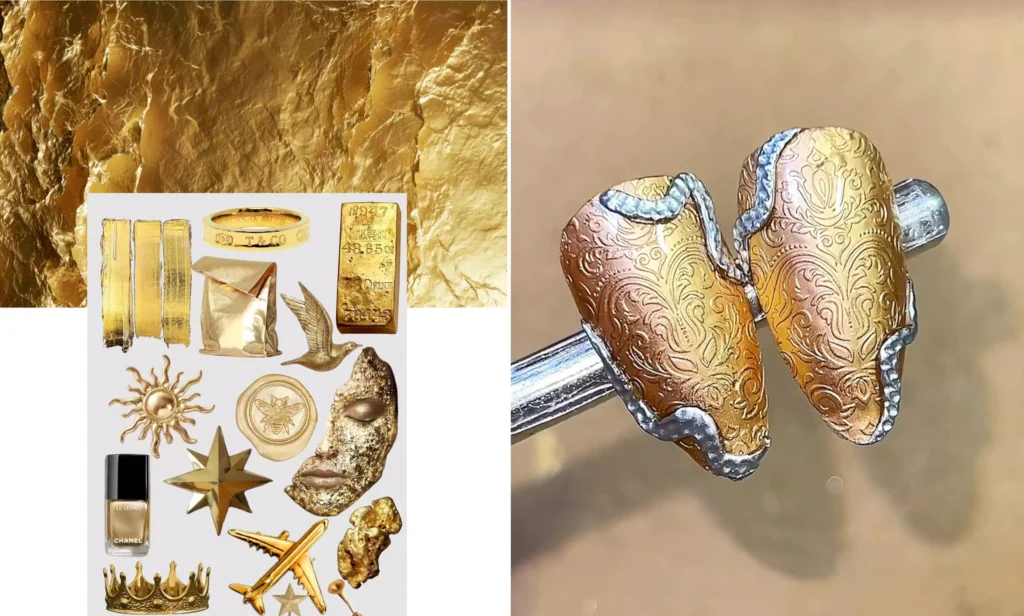
Bonjour à tous ! Je suis une employée vedette chez CHROMÉCLAIR, une marque de vernis en gel sans ammoniaque et sans TPOAujourd'hui, nous vous présentons un tutoriel de nail art qui permet d'obtenir des effets de ciselage métallique exquis sans aucun dessin à la main, ce qui vous permet de réaliser sans effort un nail art sophistiqué qui rayonne de luxe.
Étape 1 : Appliquer la couche de base
Tout d'abord, appliquez un couche de base uniformément sur la surface de l'ongle. Cette étape permet au nail art suivant de mieux adhérer à l'ongle et protège également l'ongle naturel.
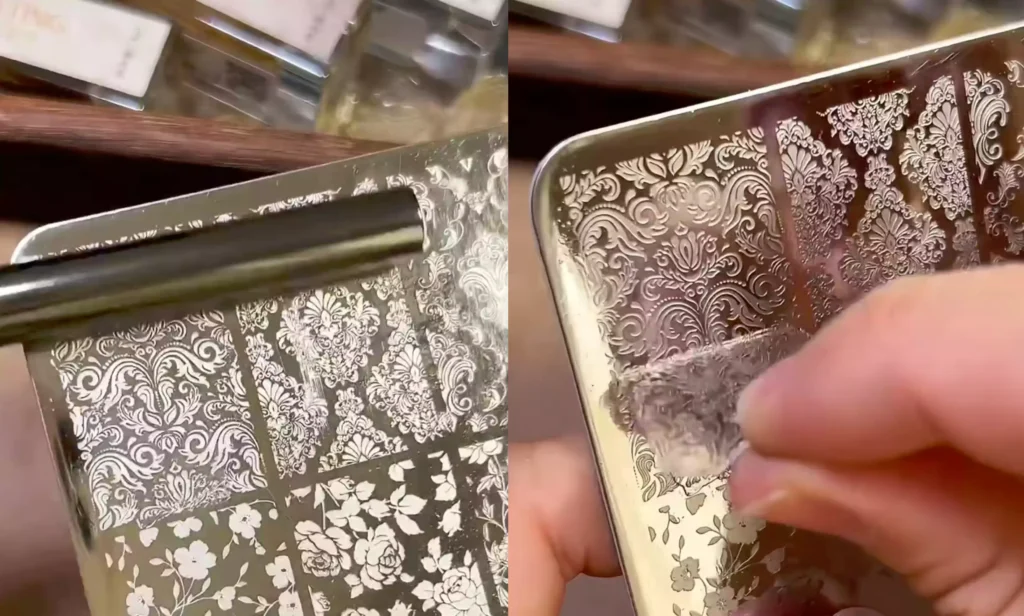
Étape 2 : Créer le motif d'impression
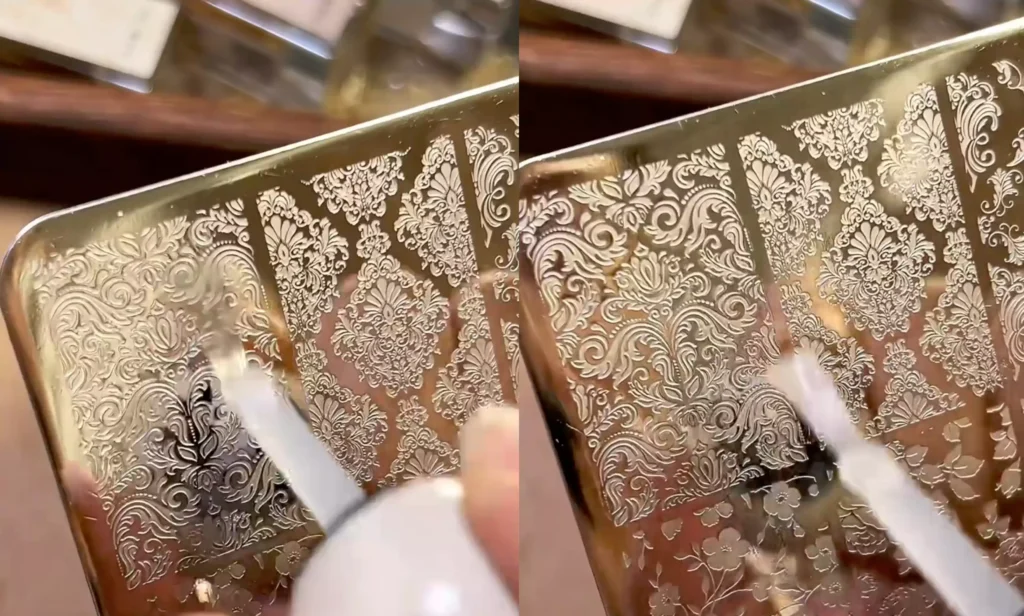
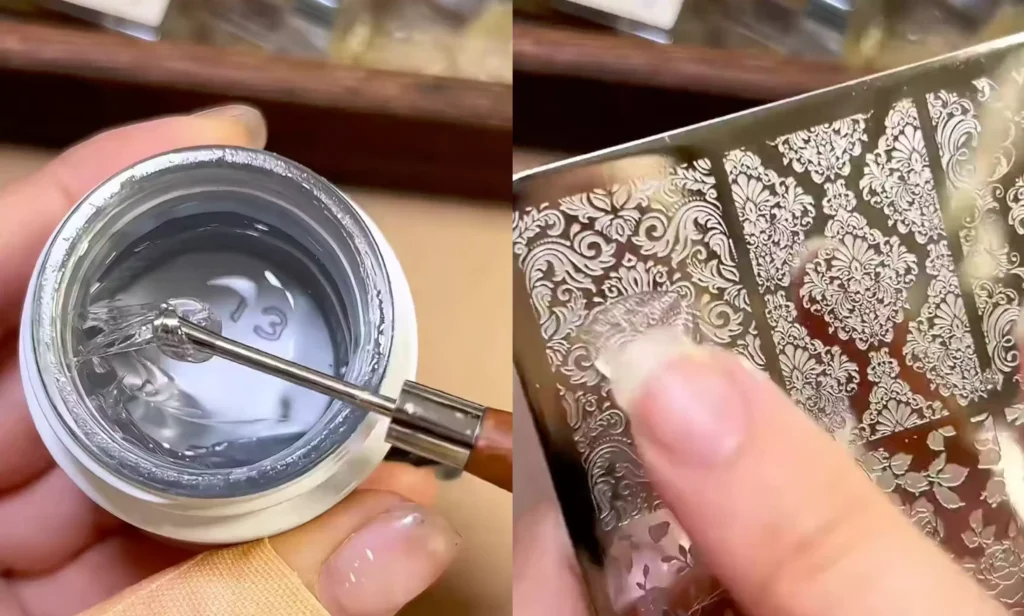
– Choisissez un motif d'impression sur plaque d'acier de style chinois et appliquez une fine couche d'huile pour les doigts sur le motif.
Prochaine étape recommandée
Kit de création de nail art
Pour réaliser un maquillage complet, il vous faut plus qu'un simple flacon de peinture. Choisissez la couleur, les détails artistiques, l'étape de transfert ou d'autocollant, et une couche de finition pour un look complet.
- Choisissez la couleur principale ou l'ensemble.
- Ajoutez le détail artistique : autocollant, gel de transfert, aimant ou pinceau.
- Scellez le tout avec une couche de finition.
Kit de nail art disponible en magasinVoir gel de transfertComparer toutes les routines
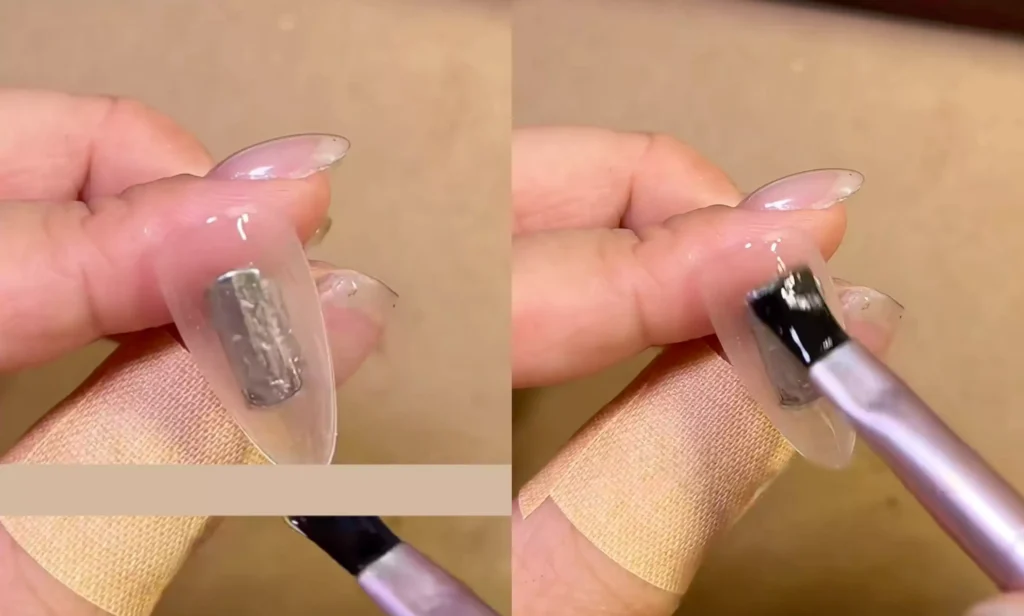
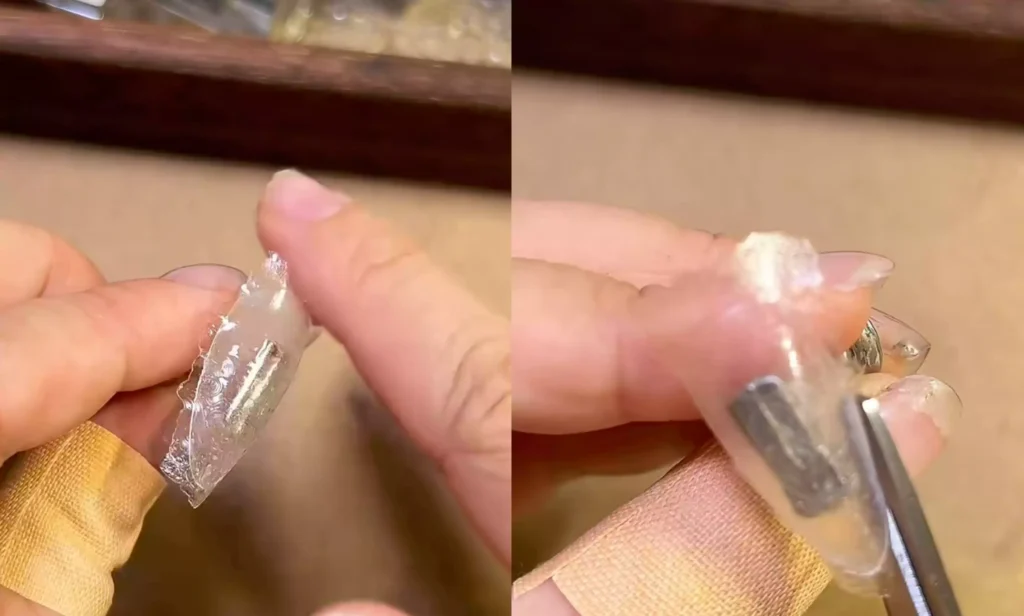
– Prenez un morceau de pâte à bonbons molle et placez-le sur le motif enduit d'huile pour les doigts. Commencez par l'aplatir avec votre main,
Utilisez ensuite la tige du stylo de luminothérapie pour l'enrouler finement, puis procédez à l'exposition à la lumière.
Une fois la lampe terminée, il suffit de décoller un bord à la main pour que la feuille adhésive à motifs se détache facilement. Vous constaterez que le motif imprimé est d'une netteté exceptionnelle.
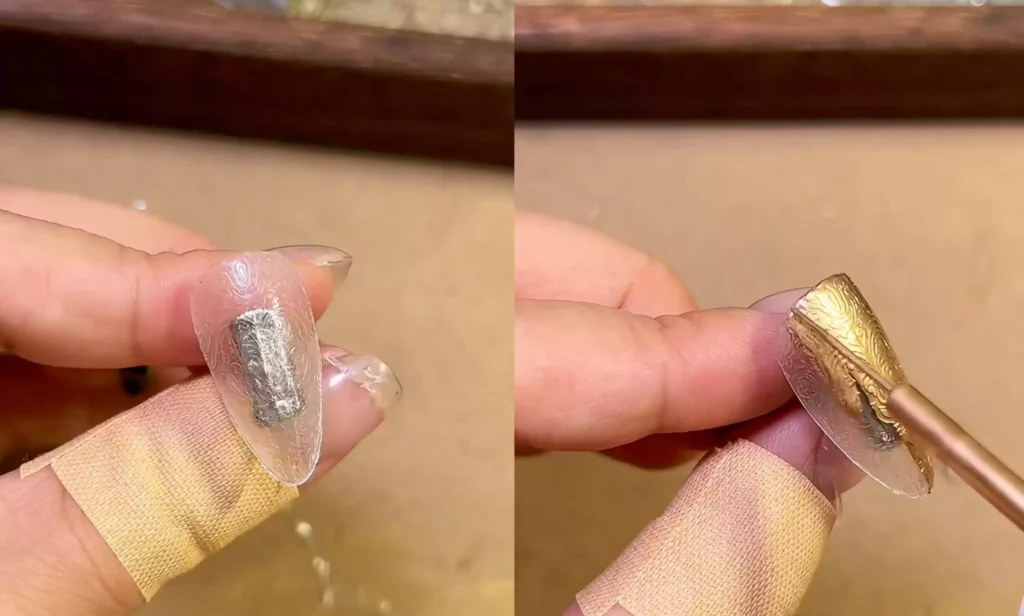
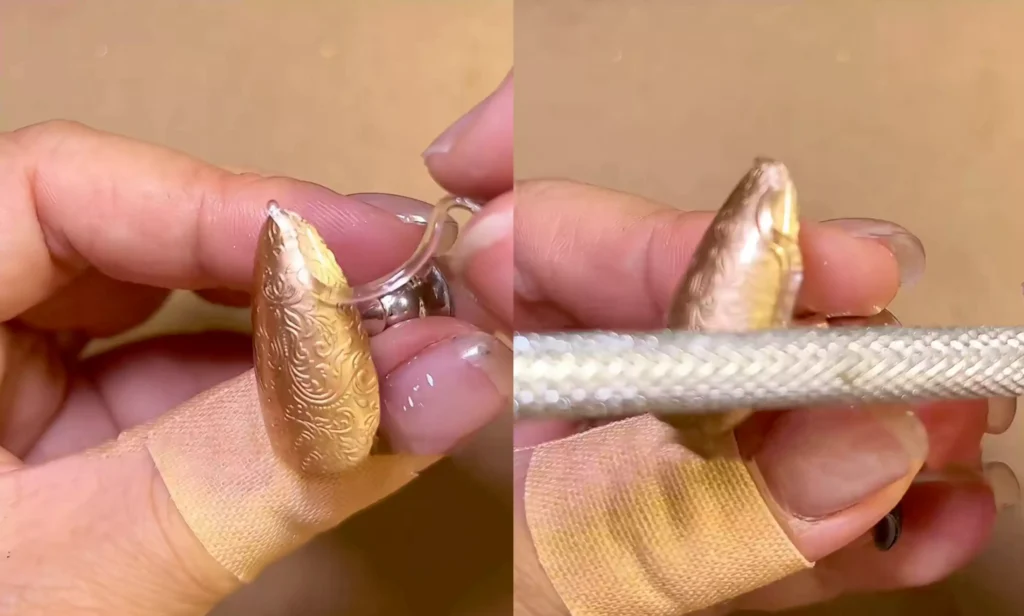
Étape 3 : Appliquer et découper le motif
Placez le côté lisse de l'autocollant en gelée à motifs sur la surface de l'ongle et ajustez la position du motif.

Trempez ensuite vos doigts dans l'alcool et appuyez fermement le motif sur la surface de l'ongle. Ensuite, coupez l'excédent de matière sur le bord de l'ongle à l'aide de ciseaux.
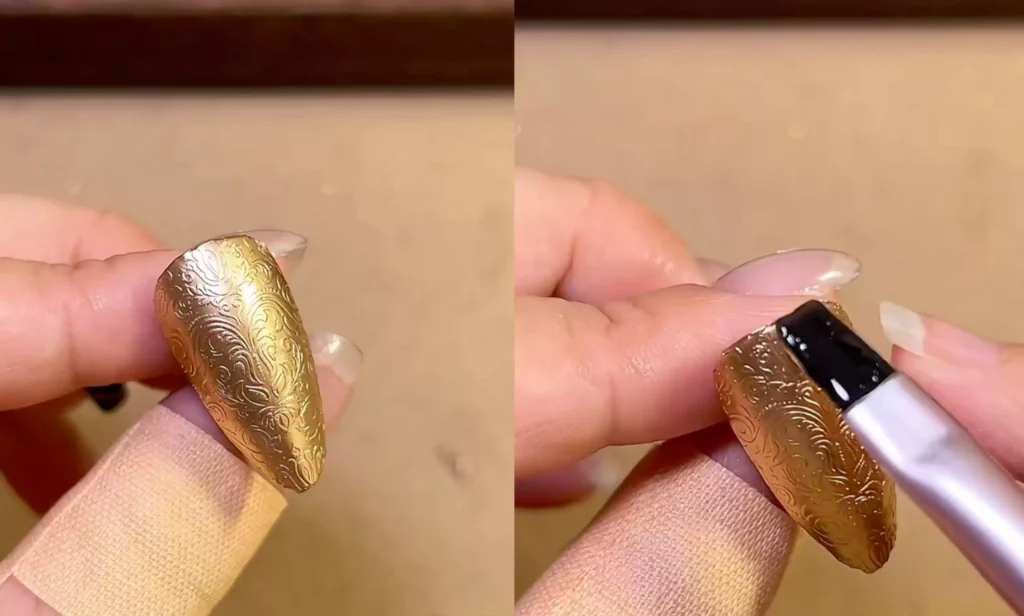
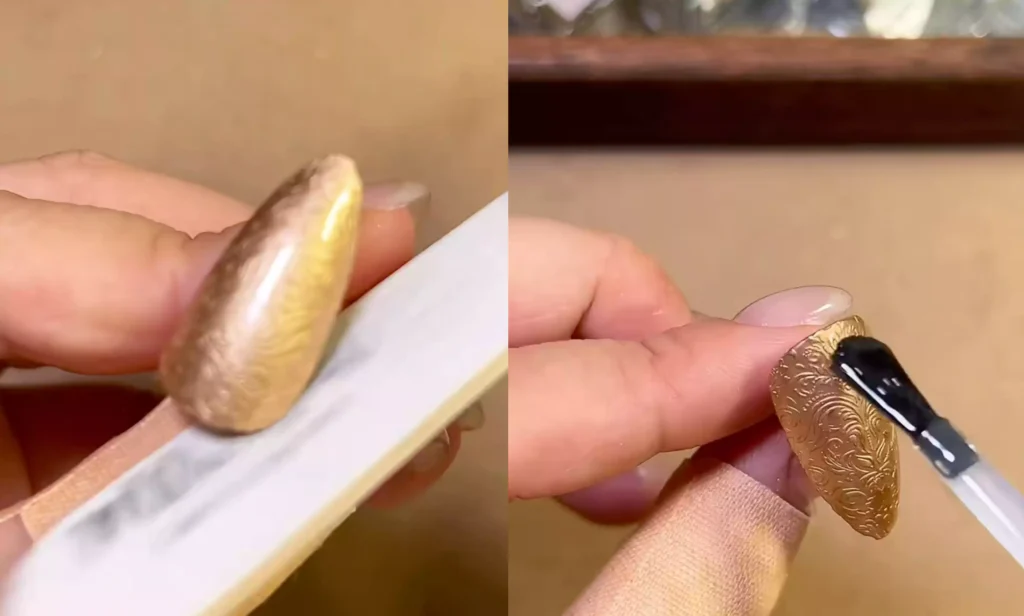
Quatrième étape : Ombrage métallique et renforcement
Choisissez la teinte bronze parmi les solutions métallisées et appliquez-la sur l'ongle. Après application, attendez environ 15 secondes que la solution sèche à l'air libre. L'effet ciselé sera alors visible.
Appliquez une base sur l'ongle. Une fois appliquée, la solution à dégradé métallique paraîtra plus brillante.
Pour éviter les déformations, poncer les bords après durcissement sous la lampe, puis appliquer une couche d'adhésif de renforcement avant de sceller.
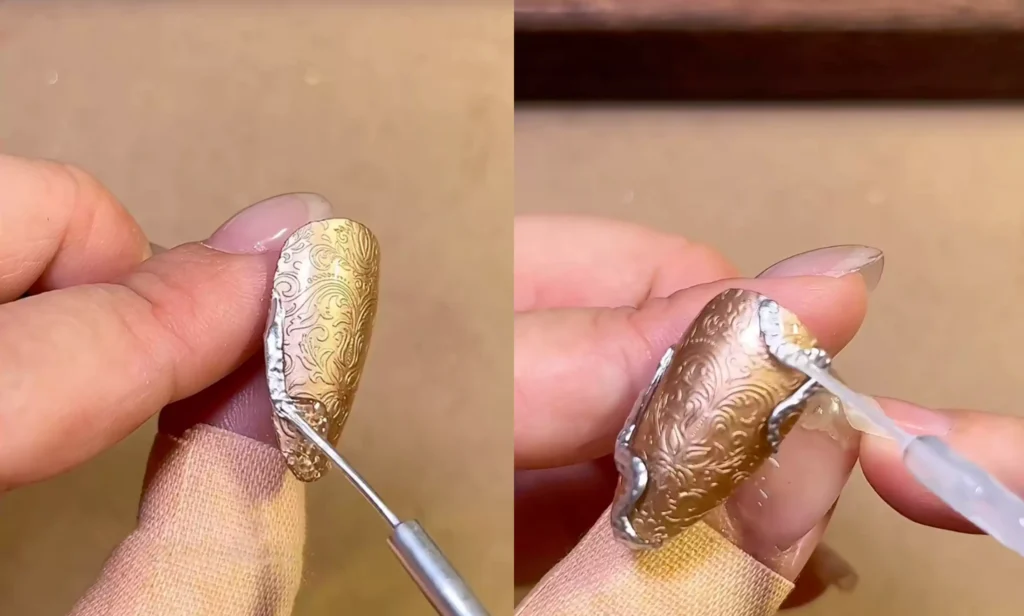
Étape 5 : Décoration des bords
Roulez le fondant en une longue bande et appliquez-la sur la surface de l'ongle. Après avoir ajusté la forme, utilisez le rouleau en acier pour y presser un motif.
Ensuite, appliquez la solution métallisée argentée sur le soft gel polish. Enfin, scellez la solution métallisée avec une couche de couche de finition. Ceci complète le design métallique de l'ongle ciselé.
Alors, n'est-ce pas super facile ? Suivez les étapes sans plus attendre et laissez vos doigts profiter de cette élégante finition métallique !
Enfin, nous recommandons les produits CHROMÉCLAIR. Gel Polish sans HEMA. La marque privilégie la sécurité, avec des formules hypoallergéniques et respectueuses de l'environnement (sans HEMA ni TPO) qui réduisent considérablement les risques d'allergie tout en préservant la santé des ongles. Grâce à une large gamme de teintes et une longue tenue (environ 21 à 35 jours), chaque utilisatrice peut profiter d'un produit à la fois sûr et rassurant.
Si vous avez des questions pendant le processus, le tutoriel vidéo ci-dessous vous apportera des réponses détaillées. Si vous le trouvez utile, n'oubliez pas de liker, d'ajouter à vos favoris et de vous abonner ! À bientôt pour de nouveaux tutoriels !