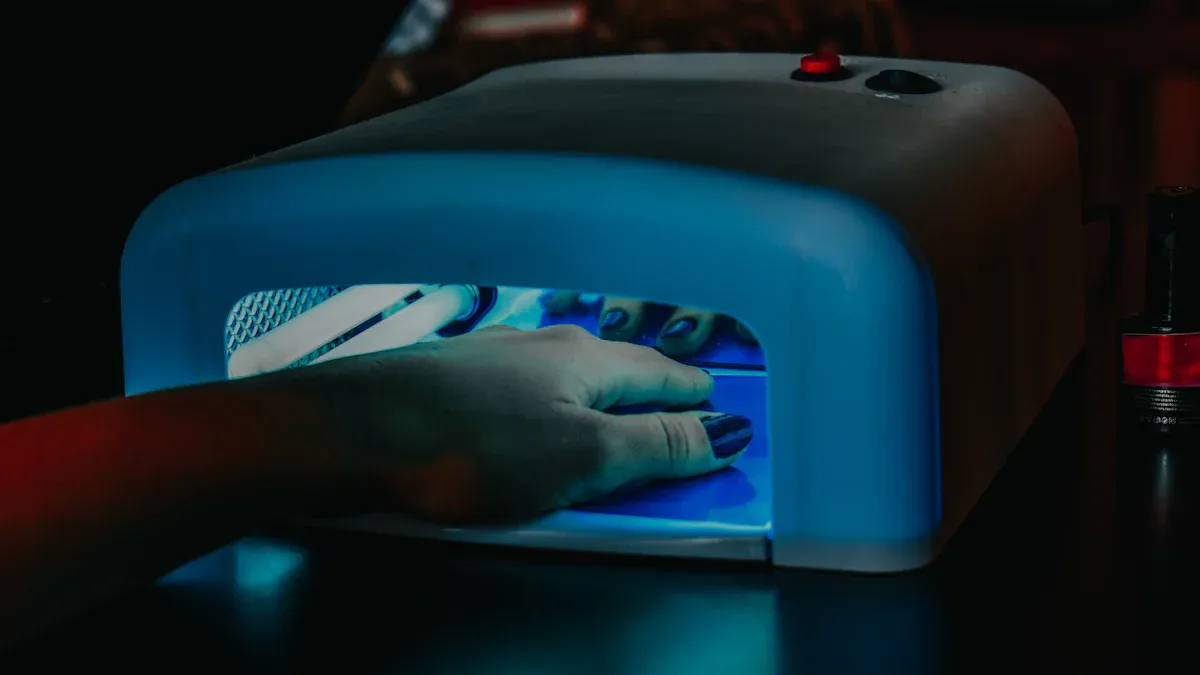
You might wonder how long you need to cure gel polish for a strong, glossy finish. The answer depends on your lamp and the layer you apply. Check out the typical curing times:
| Layer Type | LED Lamp Time | UV Lamp Time |
|---|---|---|
| Base Coat | 45 seconds | 2–4 minutes |
| Color Coat | 60 seconds per layer | 2–4 minutes |
| Top Coat | 60–90 seconds | 2–4 minutes |
When you cure gel polish properly, you get a manicure that resists peeling and chipping. If you rush or use thick layers, your nails might not last as long.
Key Takeaways
- Cure gel polish under an LED lamp for 30-60 seconds or a UV lamp for 2-4 minutes for best results.
- Always apply thin layers of gel polish. Thin coats cure faster and help prevent peeling or chipping.
- Check your lamp’s wattage. A lamp with at least 36 watts ensures thorough curing and stronger nails.
- Look for signs of proper curing: a hard, glossy finish without sticky spots means your polish is set.
- Follow the recommended curing times for each layer to avoid under-curing or over-curing, which can damage your nails.
Cure Gel Polish Timing
When you want a long-lasting manicure, understanding how to cure gel polish is key. The timing depends on your lamp, the type of gel, and how you apply each layer. Let’s break down why these factors matter and how you can get the best results.
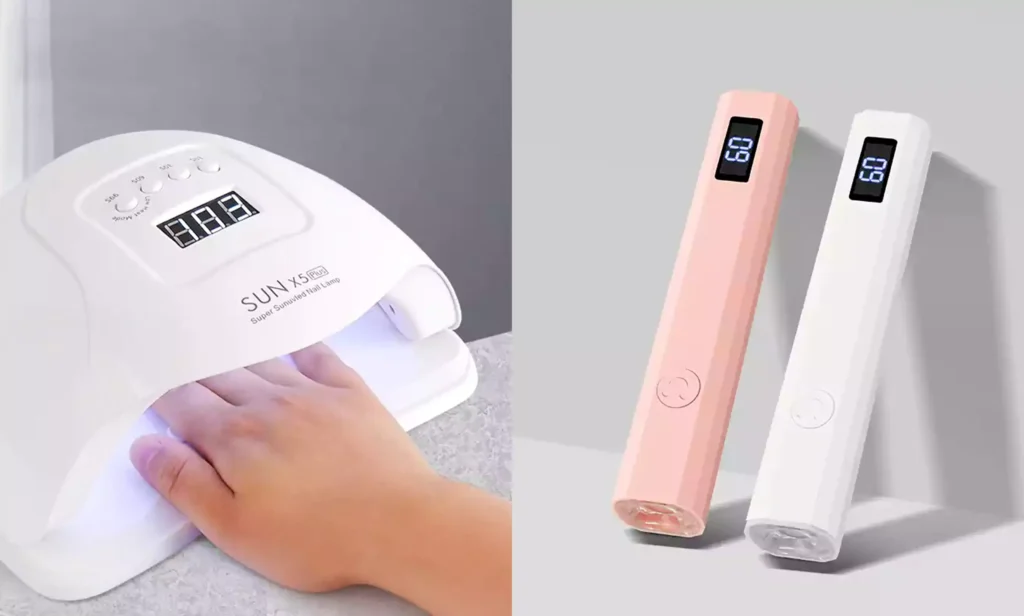
LED Lamp Timing
LED lamps have changed the way you cure gel polish. They use advanced technology to speed up the process, making them a favorite for busy people. Most leading brands recommend curing each coat for about 30 seconds under an LED lamp. Some high-end salon models can cure a layer in as little as 20 seconds, while portable mini dryers usually take 30–60 seconds.
- LED lamps typically cure gel polish in approximately 30 seconds per coat.
- Newer LED lamps can deliver a quick, touch-dry finish in just 30–60 seconds.
- The instant drying feature means you spend less time waiting and more time enjoying your nails.
Tip: Always check your lamp’s wattage. Using an LED lamp with at least 36 watts helps you cure gel polish thoroughly. If your lamp has low wattage, your nails may feel soft or chip easily.
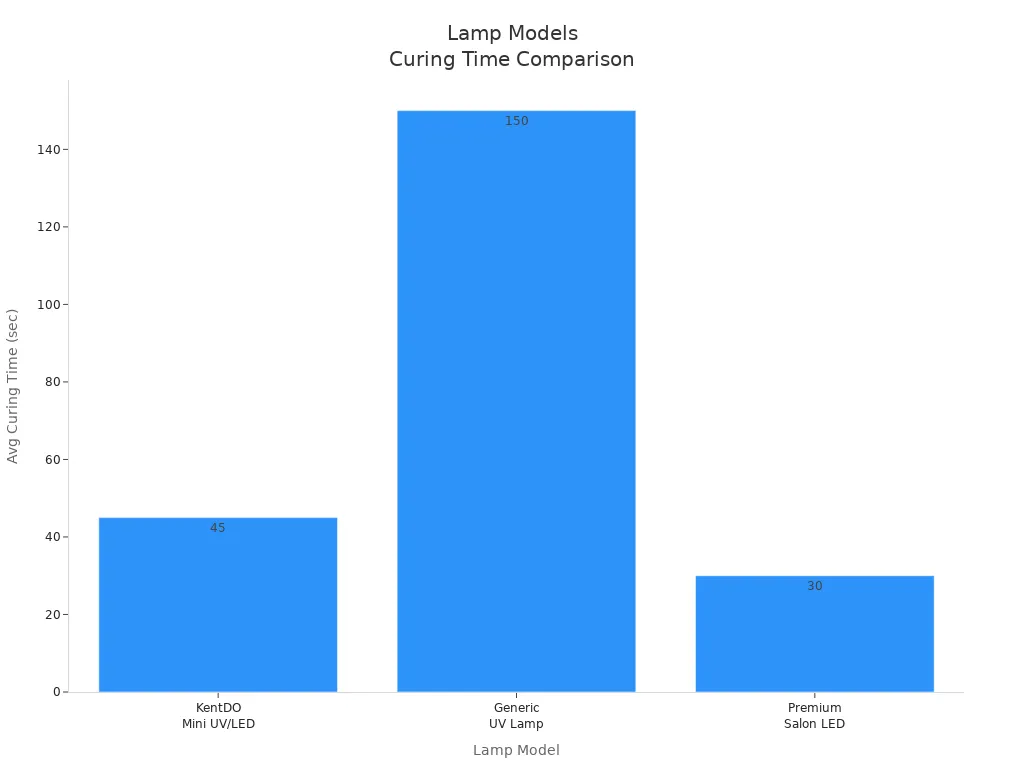
Here’s a quick look at how different lamp models compare:
| Model | Curing Time | Light Type | Portability | Price Range |
|---|---|---|---|---|
| KentDO Mini UV/LED Dryer | 30–60 sec | Dual LED/UV | ✅ | $$ |
| Generic UV Lamp | 2–3 min | UV only | ❌ | $ |
| Premium Salon LED Lamp | 20–40 sec | LED only | ❌ | $$$ |
UV Lamp Timing
UV lamps have been around longer and work a bit slower than LED lamps. Most brands say you need to cure each layer for 2–3 minutes under a UV lamp. This longer time happens because UV bulbs are less powerful and take more time to activate the chemicals in gel polish.
- Gel polish typically cures under a UV lamp within 2-3 minutes, depending on the brand and lamp wattage.
- UV lamps generally take 2-3 minutes to cure each layer of gel polish.
If you use a UV lamp, you might spend more time on your manicure, but you can still get a strong, glossy finish. Just remember, the wattage of your lamp matters here too. Lower wattage means longer curing and a higher risk of under-cured nails.
Layer Timing (Base, Color, Top)
Each layer of gel polish needs its own curing time. Why? Every coat has a different formula and thickness, so they react differently under the lamp. Here’s a table to help you see how long each layer takes:
| Coat Type | LED Curing Time | UV Curing Time |
|---|---|---|
| Base Coat | 45 seconds | 90 seconds |
| Color Coat | 60 seconds/layer | 2 minutes/layer |
| Top Coat | 60–90 seconds | 2 minutes |
If you want the best results, apply thin, even layers. Thick coats take longer to dry and can cause peeling or chipping. Thin coats cure faster and give you a smooth finish. Always cure each layer fully before adding the next one.
Note: For a full gel manicure, you’ll spend about 3–4 minutes curing with an LED lamp and 6–8 minutes with a UV lamp. This includes the base, two color coats, and the top coat.
Recent advancements in curing technology have made the process even faster. Modern lamps can cure gel polish in just 30–60 seconds, which is perfect if you want salon-quality nails at home without the wait.
Why Timing Matters
You might wonder why you can’t just cure gel polish for a random amount of time. If you under-cure, your nails stay soft and may peel or chip. Over-curing can make the polish brittle or dull. That’s why following the right timing for your lamp and each layer is so important.
When you know how long to cure gel polish, you get nails that look great and last longer. You also avoid common problems like wrinkling, lifting, or smudging. So, take your time with each step, and you’ll love the results!
Factors Affecting Curing
Lamp Type and Wattage
You might wonder why your lamp matters so much when you cure gel polish. The answer comes down to how different lamps work and how powerful they are.
- LED lamps cure gel polish in just 30–60 seconds. UV lamps take longer, usually 2–3 minutes.
- The wattage of your lamp is important. If your lamp has low wattage, it may not cure your polish all the way through.
- For LED lamps, you should look for at least 36 watts. Lamps with 36 to 48 watts give you the best results.
- LED lamps make less heat, so you feel more comfortable. UV lamps can get hotter, especially if you use thick layers.
If you use the right lamp and wattage, you get nails that last longer and look better.
Gel Polish Formula
Not all gel polishes are the same. The way a gel polish cures depends on what is inside the bottle. Some gels have more pigment, which means they have more color. Others are clear or have less color. The formula also includes things like how thick the gel is and what chemicals help it harden under light.
Gels with lots of color or thicker formulas can take longer to cure. Clear gels or those with fewer pigments often cure faster. The type of chemicals in the gel also changes how quickly it hardens. That’s why you should always check the instructions for your specific polish.
Application Thickness
How thick you apply each layer makes a big difference. If you put on a thick layer, the top might cure, but the bottom can stay soft. This happens because the light cannot reach all the way through the gel. The top layer gets too much light, while the bottom does not get enough.
When you use thin layers, the light can pass through and cure the gel evenly. You get a smooth, strong finish that lasts. If you want to avoid peeling or chipping, always apply thin coats and cure each one before adding the next.
Tip: Transparent gels usually cure faster than colored ones. If you want a quick manicure, try using a clear gel or a light color.
Check If Gel Polish Is Cured

Signs of Proper Curing
You want your manicure to last, so knowing when your gel polish is cured makes a big difference. When you cure gel polish the right way, your nails look shiny and feel smooth. Here are some signs that show your gel polish is fully cured:
- The surface feels dry and hard when you touch it.
- The polish looks glossy and even, with no sticky spots.
- You can press lightly on the nail, and it does not leave a dent.
- The color stays bright and does not smudge.
If you notice any tacky or soft areas, your polish needs more time under the lamp. Sometimes, the top coat stays a little sticky even after curing. This is normal because you need to wipe off the sticky layer with alcohol after finishing your manicure.
Tip: Always check each nail before moving to the next step. This helps you avoid problems like peeling or chipping later.
Under- and Over-Curing Risks
Why does curing time matter so much? If you under-cure your gel polish, your nails stay soft and may peel or chip quickly. Over-curing can cause other problems. When you leave your nails under the lamp too long, you risk damaging your nail health and appearance.
Here’s what can happen if you over-cure gel polish:
- Nails become dry and dehydrated.
- White patches or spots may appear.
- Increased brittleness and nail splitting.
- Peeling and flaking.
- Easy breakage and loss of natural shine.
- Nails feel sensitive and develop ridges or uneven surfaces.
| Effect on Nail Health | Description |
|---|---|
| Nail Thinning | Nails get thinner after repeated gel polish use. |
| Weakness | Nails become weak and break easily. |
| Brittleness | Nails split and become brittle. |
| Pseudoleukonychia | White spots show up on the nail surface. |
| Onychoschizia | Layers of the nail start to separate. |
You want strong, healthy nails, so always follow the recommended curing times. Checking your nails after each layer helps you avoid these risks and keeps your manicure looking fresh.
Tips for Best Results
Step-by-Step Curing
If you want your manicure to last, you need to follow the right steps every time you cure gel polish. Here’s how you can get salon-quality nails at home:
- Prep Your Nails
Start by cleaning your nails. Remove any old polish. Push back your cuticles and buff the surface lightly. This helps the gel stick better. - Shape and Clean
Use a nail file to shape your nails. Wipe them with isopropyl alcohol to remove oil and dust. - Apply a Thin Base Coat
Hold your brush flat and start near the cuticle. Push gently toward the cuticle, then pull down in one smooth motion. Keep the layer thin and even. Cure under your lamp for the time listed in the instructions. - Paint Thin Color Layers
Apply the first coat in a thin, even layer. Leave a tiny gap around the cuticle and sides. Cure completely before adding the next coat. If you use a tricky color, try a thin white base first. - Seal with Top Coat
Finish with a top coat. Don’t forget to cap the edge of your nail. Cure fully and wipe off any sticky layer if needed.
Tip: Always use a lamp with the right wattage for your gel polish. Test if your nails are set by tapping them—they should feel hard and look shiny.
Common Mistakes
You might wonder why your gel manicure sometimes peels or chips. Many people make the same mistakes:
- Applying thick layers of gel polish. Thick coats don’t cure evenly and can wrinkle.
- Letting gel touch your cuticles. This causes lifting and peeling.
- Skipping nail prep. If you don’t clean, buff, and shape your nails, the polish won’t stick well.
- Using the wrong lamp or not checking if it works. Low wattage or broken bulbs lead to soft nails.
- Over-curing or under-curing. Too much time makes nails brittle, while too little leaves them sticky.
Note: Always follow the recommended curing times and use thin, even coats. This helps you avoid bubbles, chips, and dull spots.
When you know why each step matters, you get a manicure that lasts and looks great every time.
You want your manicure to last and look great. That’s why you need to cure gel polish for the right amount of time. Using the correct lamp, applying thin layers, and checking for a hard, glossy finish help you avoid peeling and chipping. If you follow the manufacturer’s instructions, you lower your risk of lifting, allergic reactions, and other nail problems.
Quick tip: Prep your nails, use thin coats, and always cure each layer fully. These steps make your nails stronger and your polish shine longer.
FAQ
Why do you need to cure gel polish under a lamp?
Curing gel polish under a lamp makes the polish hard and shiny. The light helps the chemicals in the gel set. If you skip this step, your polish stays soft and peels off quickly.
Why does the lamp wattage matter for curing gel polish?
Lamp wattage affects how fast and well your gel polish cures. High wattage gives you a strong, even finish. Low wattage can leave your nails sticky or cause chipping.
Why should you apply thin layers of gel polish?
Thin layers let the light reach every part of the gel. Thick coats stay soft underneath and peel off. You get smoother, longer-lasting nails with thin layers.
Why does gel polish sometimes stay sticky after curing?
Gel polish can feel sticky because of the top coat’s tacky layer. You need to wipe it off with alcohol after curing. This step gives you a glossy, finished look.
Why do some colors take longer to cure than others?
Dark or highly pigmented colors block more light. These shades need extra time under the lamp. Lighter or clear gels cure faster because light passes through them easily.