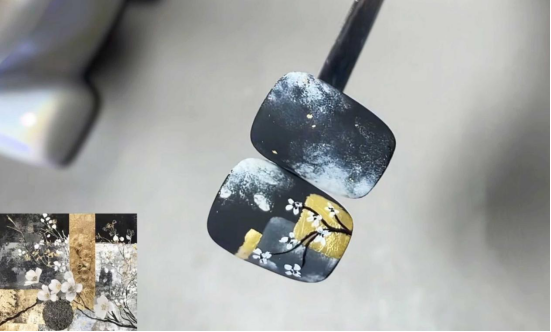
This black and gold floral manicure combines traditional artistic conception with modern nail art techniques. The steps are clear and easy to use. Let’s create fingertip art with unique oriental aesthetics together!
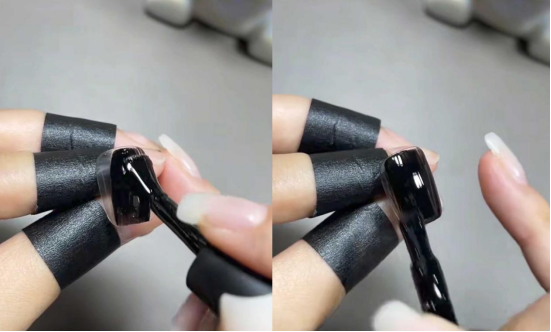
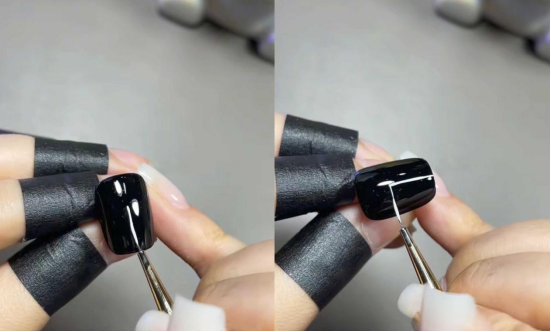
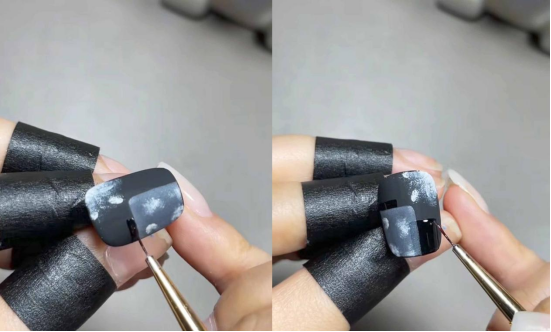
Step 1: Black Primer and White Frame
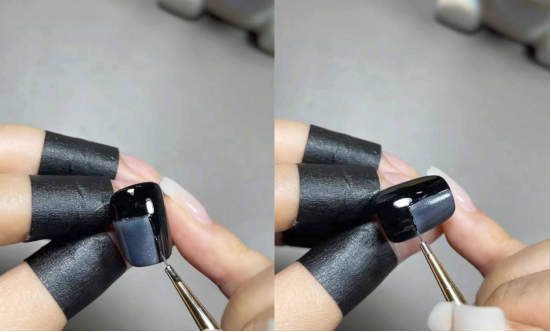
First, apply black gel polish to the entire nail (I used CHROMÉCLAIR Hema Free Gel Polish No. 811; the color is perfect for this style and flows well, allowing even beginners to apply it evenly). Apply two coats and then cure under a lamp.
Then use a drawing pen to dip into white pat glue and draw a frame on the nail surface (no need to use a light) – this step is to make the basic layout for subsequent gradients and layers. The lines do not need to be absolutely straight, and retaining the handmade feel has more Chinese style.
Step 2: Blend and Set with Light
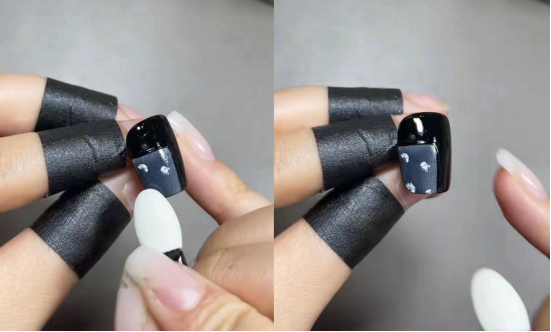
Use an eyeshadow applicator to gently blend the eyeshadow within the white frame to create a natural blending effect. (Don’t worry if the application is uneven; it will create a more hazy effect later.) After applying, hold the eyeshadow under light to set the color.
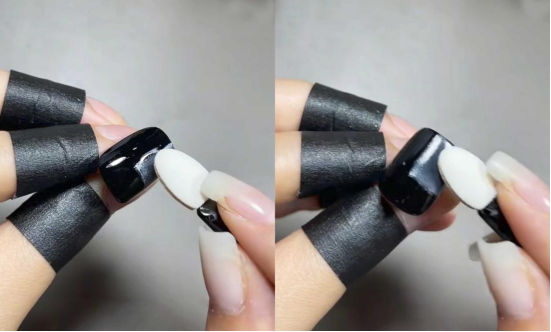
Step 3: Outlining and Layering
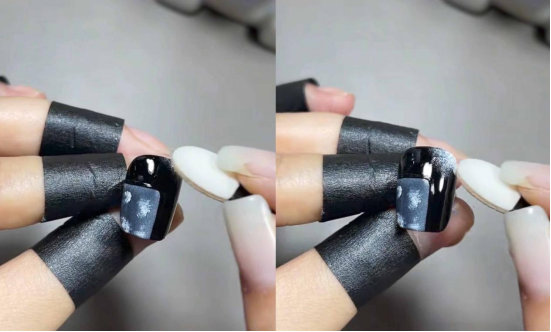
Use black gel polish (or painting glue) to outline the edges of the white frame, creating a more defined silhouette.
Then use white or light grey to create a mottled effect within the frame, simulating the shading layers of traditional ink painting.
Then use white glue to pat the upper right corner of the nail surface to embellish it, creating a “white space” atmosphere, and then light it up when completed.
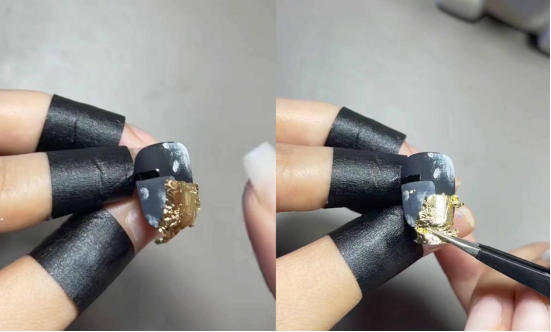
Step 4: Matte Topcoat and Gold Foil Transfer
Apply a matte topcoat to the entire nail. This will create a matte finish when illuminated (this step is key to achieving the hazy, traditional Chinese style effect).
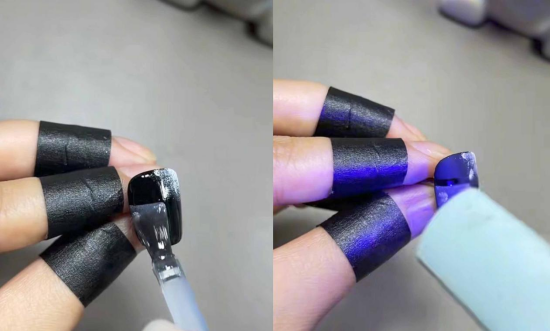
Then use a drawing pen to take the transfer glue and draw a frame on the area where you want to lay the gold foil.
After shining the light, apply gold foil and use tools to tear off the excess gold foil – the metallic luster of the gold foil collides with the matte background, instantly enhancing the sense of luxury.
Step 5: Reinforcement and Leveling
Apply reinforcement glue to the entire nail. Turn the nail upside down to level the nail surface (this will make the nail surface smoother for subsequent painting). Then, illuminate the nail.

After applying the gel polish, use a cotton pad to wipe off any loose glue from the surface, which will make the texture of the nail surface more delicate. Then apply a layer of matte top coat to the entire nail to enhance the matte finish.
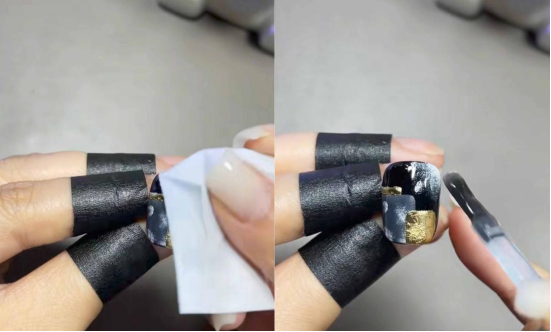
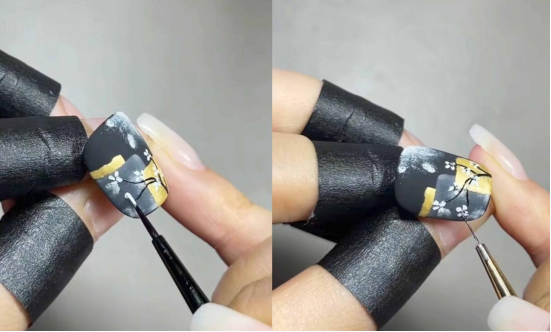
Step 6: Second Sanding and Hand-Painting the Flowers
Use washable black paint to draw the branches (using a relatively fine brush), following the direction of the gold leaf to blend in the natural curves of the branches. Curl under a light.
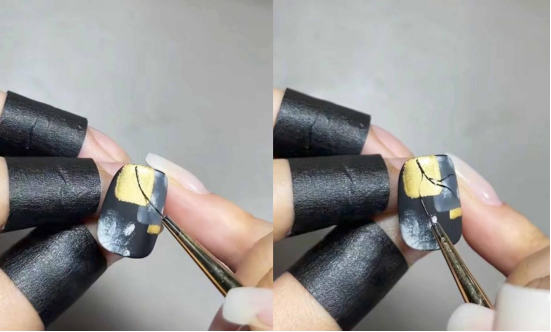
Then change to white wash-free painting glue, and dot the flower shapes around the branches (they can be small flowers such as plum blossoms and cherry blossoms). After shining the light, use black to dot the flower core to make the flowers more vivid.
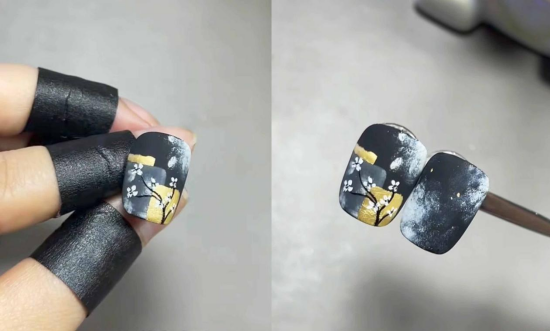
Step 7: Final Lighting and Finished Product
After all the hand-painting steps are complete, light the nails again to solidify. Now, a traditional Chinese-style manicure is complete, blending a black and gold color scheme, gradient shading, gold foil accents, and hand-painted florals!
(Tip: Follow the gel polish instructions for each step; when hand-painting branches and flowers, keep your brushstrokes light and natural, emulating the freehand feel of traditional Chinese painting.)
Watching the black and gold blossoms bloom on your fingertips, it’s as if you’re holding an ink painting scroll and the elegance of gold foil in your hands. The unique charm of traditional Chinese manicure unfolds in these details.
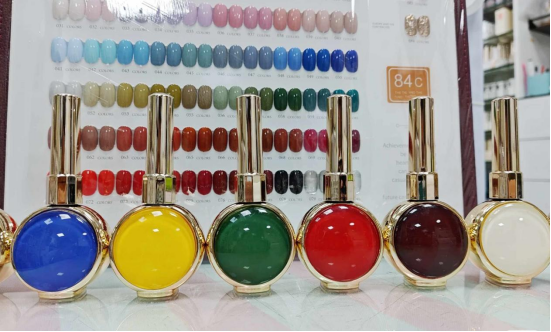
In this tutorial, I used CHROMÉCLAIR’s HEMA-free Gel Polish. This product is safe, hypoallergenic (HEMA-free, TPO-free), and eco-friendly, free of irritants and harmful ingredients to protect nail health. With a wide selection of shades that stay current with trendy aesthetics, you can be confident in your nails while looking great!
If you encounter any problems during the process, you can watch the video tutorial below. If you think the tutorial is useful, please like and subscribe to me. See you next time.