You might be wondering how to remove gel nails? While it may seem easy, doing it incorrectly can damage your nails. Many people make mistakes during the process, such as using pharmacy brand acetone or crinkling foils, which only slow things down. Check out this table to see the most common mistakes when figuring out how to remove gel nails?
| Mistake | Explanation |
|---|---|
| Using pharmacy brand acetone | This type of acetone is weaker and often mixed with other ingredients, making it take longer to remove gel nails. |
| Not using an abrasive file | Soft buffers don’t roughen the gel enough for acetone to soak in, making it harder to remove gel nails. |
| Crinkling foils | Wrinkled foils don’t seal properly, so the acetone dries out and the removal process takes longer. |
| Letting hands get cold | Cold hands slow down the process when you’re learning how to remove gel nails. |
| Removing all foils at once | Taking off all foils at the same time lets the acetone dry up, so the gel stays on your nails. |
If you’re curious about how to remove gel nails?, learning the correct method is key to keeping your nails healthy. Gel polish itself doesn’t harm your nails—damage happens when you rush or skip important steps. Try new products and always use safe techniques when you want to know how to remove gel nails? and protect your nails.
Key Takeaways
- Use professional-grade acetone to remove gel nails well. Do not use pharmacy brands because they are not as strong. Pharmacy brands also take more time to work.
- Always soak your nails the right way before you take them off. If you skip soaking, your nails can get dry and break easily. You might also get painful splits in your nails.
- Be gentle and take your time when you remove gel nails. If you rush, you can really hurt your natural nails.
Common Mistakes When Removing Gel Nails
Peeling or Picking Off Gel
You might feel tempted to peel or pick at your gel polish when it starts to lift. It seems quick, but this habit can really hurt your nails. When you peel off gel, you actually pull away layers of your natural nail. This makes your nails thin, weak, and uneven. You may notice rough spots or white patches. Your nails can even start to crack or break more easily.
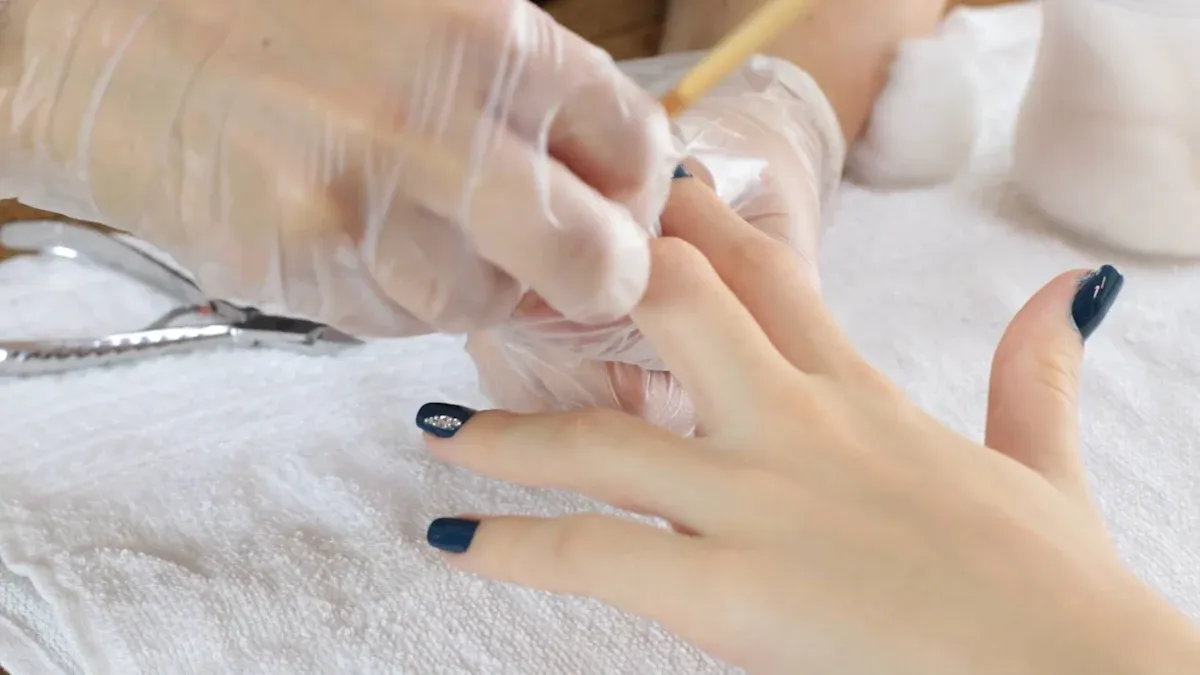
Picking at your gel manicure is really bad for your nails. It not only peels away the polish, but the top layer of your nail too. This damages it, weakening the nails, so they are more prone to rough textures and white patches. It also makes them more susceptible to cracking and breaking. The best thing to do is always visit a professional who can remove them with minimal damage.
Recommended next step
Smooth, Long-Lasting Gel Routine
Bubbling, peeling, shrinkage, and dull wear are usually system problems. Build the manicure with prep, base, color, and top coat together.
- Prep the nail plate before color.
- Use a base coat that matches the gel system.
- Finish with a compatible top coat for wear and shine.
Shop long-lasting routine kitSee no-wipe top coatCompare all routines
If you want healthy nails, avoid picking or peeling. Try to see a professional or follow safe steps at home.
Skipping Proper Soaking
Some people try to rush by scraping off gel polish without soaking. This shortcut can cause a lot of problems. If you skip soaking, your nails can become dry and brittle. The nail plate gets thinner, and you might see white spots or feel pain if your nails split.
- Skipping soaking dehydrates your nails, making them dry and prone to peeling.
- Your nail plate can thin out, which weakens your nails.
- You may notice white patches and uneven texture, which means your nails are losing keratin.
- Painful nail splitting can happen if layers peel off during removal.
Always soak your nails with acetone and a lint-free cloth. Patience helps protect your nail health.
Using Metal Tools
You might think metal tools will make removing gel nails faster. In reality, metal tools can be too harsh. They can scrape or gouge your natural nails, leaving them damaged and sensitive. Experts say you should avoid using metal tools or rough files. Instead, use a wooden stick or a gentle tool to push off softened gel.
- Do not use excessive force with metal tools or rough files during removal.
- Avoid picking or peeling off gel polish to protect your natural nails.
Gentle tools and a soft touch keep your nails safe.
Filing Too Hard
Filing the top coat is important, but filing too hard can do more harm than good. If you press down or use a coarse file, you can thin out your nail plate. This makes your nails weak and more likely to break. Use a gentle file and only remove the shiny top layer. Let the acetone do the hard work.
- Filing too hard can thin your nails and cause damage.
- Always use a gentle file and avoid rough movements.
Rushing the Process
You might want to finish quickly, but rushing can lead to serious nail problems. If you try to force off gel before it softens, you risk damaging your nails. Rushing can make your nails brittle and cause white spots. Sometimes, you can even get infections if you hurt your nail bed.
- Rushing the gel nail removal can damage the natural nails, leading to brittleness and a condition called pseudoleukonychia.
- Chemicals like acetone can dry out your nails and skin.
- The removal process can cause nail injuries, which may lead to infections.
- Wearing false nails for too long can create a place for fungus to grow.
Take your time when removing gel nails. Patience keeps your nails healthy and strong.
If you avoid these common mistakes, you give your nails the best chance to stay healthy. Remember to use patience, gentle tools, and proper soaking every time.
How to Remove Gel Nails?
Gather the Right Tools
Before you start, make sure you have everything you need for proper removal. Here’s a quick list to help you get ready:
- Professional-grade acetone
- Foil wraps or soak-off clips
- Nail buffers and files with the right grit
- Lint-free cloth or acetone-soaked cotton
- Cuticle oil and strengthening treatments
You want good ventilation, too. This keeps you safe from strong acetone fumes. Having the right tools makes diy removal much easier and safer.
File the Top Coat
Start by filing the top coat of your gel polish. Use a coarse nail file and gently move from the cuticle to the tip. Don’t use a back-and-forth motion. Work on each nail until the surface is no longer shiny. This step helps the acetone soak in and soften the gel.
Soak with Acetone and Wrap
Now, soak in acetone. Place an acetone-soaked cotton ball on each nail. Wrap your fingertips with foil or use soak-off clips. Let your nails soak for about 30 minutes. Check after 20 minutes to see if the gel starts to flake. If not, soak a little longer. Patience is key when you want to know how to remove gel nails?.
Gently Push Off Gel
After soaking in acetone, gently remove product with a wooden stick or cuticle pusher. If the gel does not slide off, re-wrap and soak again. Never force or scrape. These techniques help soften the gel and protect your nails. You can repeat the process if needed. This is the safest way for how to remove gel nails?.
Tip: Always moisturize your nails after you gently remove product. This keeps them healthy and strong.
If you follow these steps, you’ll know how to remove gel nails? without damage. Take your time and use gentle tools for the best results.
Preventing Nail Damage
Be Gentle During Removal
You want to keep your nails strong and healthy, so always use a gentle touch when removing gel polish. Rushing or using too much force can cause serious damage. If you peel or scrape, you risk thinning your nails and making them weak. Instead, let the acetone do most of the work. When you use a gentle approach, you help with protecting the natural nail and avoid painful splits or cracks.
Tip: If the gel doesn’t slide off easily, soak your nails a bit longer. Never force it!
Avoid Harsh Tools
Harsh tools like metal scrapers or coarse files can lead to nail damage. These tools often cause scratches and thin out your nail plate. Stick to wooden sticks or soft pushers. You should also avoid filing too much, since over-filing can weaken your nails and make them more likely to break.
- Gel nails can make your natural nails thinner over time, especially if you use harsh tools.
- Scraping or filing too hard during removal is a common reason for damage.
- Moisture loss and dehydration from acetone can leave your nails dry and brittle.
Let Acetone Work
Patience is your best friend here. Let the acetone soak for at least 20-30 minutes. This helps soften the gel so you can remove it without causing damage. If you rush, you might scrape or peel, which leads to more harm. Remember, frequent gel removal can weaken nails, so try to wait about three weeks between sessions to give your nails a break.
A gentle removal routine and regular breaks help prevent nail damage and keep your nails looking their best.
Aftercare After Removing Gel Nails
Moisturize and Nourish
Your nails need special care after you take off gel polish. You should put lotion on your hands and nails right away. Gel removal can make your nails dry and brittle. Use cuticle oil to help your nails get moisture back. Then, use a thick hand cream to keep them soft. This helps your nails stay healthy.
After a gel manicure, your nails might feel harder. You should use moisturizing creams to keep your nails hydrated. Hydrated nails are less likely to get damaged. Any moisturizing cream works, but one with antioxidants is even better.
It helps to keep lotion near every sink at home. This way, you remember to use it often. Rubbing lotion into your fingertips can help blood flow and healing. If your nails feel weak, try using a nail strengthener in your routine.
Give Nails a Break
Let your nails rest before getting another gel manicure. This break gives your nails time to heal. If you see any damage, wait until your nails look and feel better. Sometimes, a nail expert may tell you to wait longer if your nails were filed too much or had other problems.
If your nails were hurt by too much filing or wrong steps, a nail technician may tell you to let your nails heal before your next visit. How long you wait depends on how healthy your nails are and what damage happened.
Resting your nails helps them get stronger and makes your next manicure look nicer.
Watch for Damage Signs
Check your nails for signs of damage. Look for things like:
- Splitting
- Ridges
- Striations
If you notice these problems, be gentle with your nails and ask a professional for help if needed. Taking good care of your nails after removing gel can stop bigger problems. Always pay attention to your nails and give them the care they need.
You want your nails to be strong and healthy. Stay away from common mistakes when you take off gel nails. Always use gentle ways to remove them. Put on lotion after you finish. Studies say you should protect your skin from UV lamps. You can use petroleum jelly before using acetone. Try wrapping your nails with cotton soaked in acetone and cover with plastic wrap. This helps get the best results. Taking care of your nails is important!
FAQ
How often should you do gel-x removal at home?
You should wait at least three weeks between each gel-x removal. This gives your nail time to recover and stay strong.
Can you remove gel-x nails without acetone?
You can try, but acetone works best for gel-x removal. Other methods may damage your nail or make removal harder. Always use safe products.
What should you do if your nail feels weak after gel-x removal?
You can use a nail strengthener and cuticle oil. Moisturize your nail every day. Take a break before you remove gel-x nails again.