Builder gel nails help you make strong and pretty nails. The formula is flexible, so it moves with your nails. You can use builder gel as a base or as a color. This protects your real nails and helps them grow. Builder gel nails are different from other nail products. They give a smooth surface for nail art. You can pick the shape and length you want. They do not feel heavy on your fingers. Many people like builder gel nails for a few reasons. They do not smell strong. They stick well to your nails. They are easy to take off and do not hurt your nails.
| Advantage | Description |
|---|---|
| Lower Fume Exposure | Has a light smell, so it is nicer for people and workers. |
| Flexible Formula | Bends with your nails, so it does not crack or lift easily. |
| Soak-Off or Gentle Filing | Gets soft with acetone wraps, so it comes off easier and does less harm. |
| Strong Bond | Sticks close to your real nail, so it does not lift soon. |
| Custom Length and Shape | Lets you pick many shapes and lengths, but does not feel heavy like acrylics. |
| Eye-Catching Nail Art | Has a smooth top for cool designs, and works for simple or bold styles. |
Key Takeaways
- Builder gel nails are strong and bend easily. They are good for people who want tough and pretty nails. The gel hardens under UV or LED light. This makes a strong layer that lasts a long time. Builder gel has a smooth surface for nail art. You can try many designs and styles. You can remove builder gel with acetone. This helps protect your real nails from damage. Builder gel is safer than some other nail products. You need to prepare your nails the right way. Good application helps builder gel nails look their best.
Builder Gel Nails Overview
What Is Builder Gel
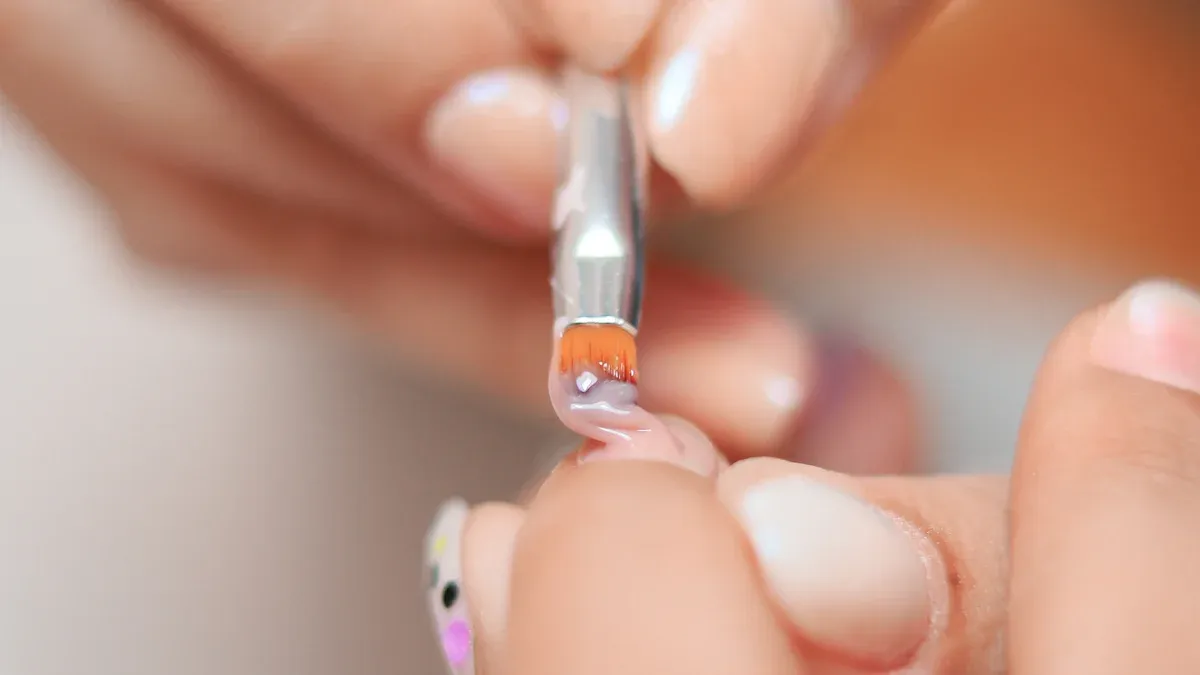
Builder gel is a special nail product. It helps you make strong and pretty nails. You use it to add thickness and shape to your nails. The gel is thick and sticky. You put it on in layers. Each layer needs to be cured under a UV or LED lamp. This makes the gel hard and tough. Builder gel uses photoinitiators and a polymerization process. When you cure it, the gel turns from soft to hard. It becomes a strong, protective layer.
Tip: Builder gel is good if you want to grow your nails or keep them from breaking.
You can use builder gel as a base or as the main color. This makes it very useful. It gives your nails a smooth surface. This is great for nail art or simple looks.
Here is a table that shows how builder gel and traditional gel polish are different:
| Feature | Builder Gel | Traditional Gel Polish |
|---|---|---|
| Composition | Photoinitiators and polymerization processes | Acrylic monomers and oligomers |
| Curing Method | Cures under UV or LED light | Dries through solvent evaporation |
| Durability | Lasts weeks without chipping | More prone to chipping within days |
| Texture | Semi-hard gel that transforms to a hard layer | Liquid formula that becomes a flexible film |
Builder gel nails give you a strong and lasting finish. The gel is thick, so it makes your nails stronger and helps them stay healthy.
Builder Gel vs. Other Nail Enhancements
There are many ways to make your nails look better. Builder gel nails are special because they are thick, strong, and bendy. The gel is thicker than regular gel polish. You can use it to build up your nail or make it longer. You can shape the gel to make an apex. This gives your nails more support.
Here is a table to help you see the differences between types of gels:
| Type of Gel | Viscosity Level | Characteristics |
|---|---|---|
| Low-viscosity | Almost liquid | Feels flexible and natural. |
| Medium-viscosity | Balanced | Works for many uses. |
| High-viscosity | Very thick | Gives great structure and strength for long nails. |
| Top coat | Thinner | Used for color, not like builder gels. |
| Base coat | Thinner | Used to help gel stick, not like builder gels. |
Builder gel is usually medium or high in viscosity. This means it is thicker and good for making strong nails. You can use it for overlays or to make your nails longer.
When you look at builder gel nails and acrylic nails, you will see some differences:
| Nail Type | Durability | Longevity |
|---|---|---|
| Acrylic | Longest-lasting, strongest | High durability |
| Builder Gel | Strongest for natural nails | Great longevity |
| Hard Gel | Flexible, glossy, durable | Moderate longevity |
Builder gel nails are very strong. They are good if you want to keep your natural nails healthy. Acrylic nails are the strongest, but they can feel heavy. They might hurt your real nails after a while.
The way you put on builder gel is also different. You shape and buff your nails first. Then you put on the gel in layers. You cure each layer under a lamp. This takes more time, but it makes your nails strong and smooth. Dip powder nails use a different way. You dip your nails in powder and use an activator to make them hard. This is faster and does not need a lamp. But dip powder is not as strong or flexible as builder gel.
- Builder gel is thick and sticky, used to build or shape nails.
- It adds thickness, strength, and sometimes length.
- Builder gel is made to last and protect your nails.
Builder gel nails are strong, bendy, and look natural. You can use them for overlays, extensions, or as a base for nail art. This is why many people like builder gel nails if they want nails that last and look nice.
How Builder Gel Nails Work
Curing Process
When you use builder gel nails, you need to cure the gel to make it hard and strong. Curing means you expose the gel to a special light. You can use either a UV lamp or an LED lamp. The light starts a chemical reaction inside the gel. This reaction makes the gel turn from soft and sticky to solid and tough.
The curing process uses photoinitiators in the gel. These react with the light and create a strong crosslinked structure.
You should know that the type of lamp and the time you use it matter. LED lamps work faster because they give off stronger UV light. UV lamps take longer. Most experts recommend LED lamps with dual wavelength technology (365nm and 405nm). These lamps work well with many gel products. A power output of 36 to 48 watts gives you the best results.
Here is a table that shows how long you need to cure builder gel under different lamps:
| Lamp Type | Curing Time |
|---|---|
| LED | 60–90 seconds |
| UV | 2–3 minutes |
You cure each layer of gel separately. The base coat needs less time than the color or top coat. For example:
- Base coat: LED – 45 seconds, UV – 90 seconds
- Color coat: LED – 60 seconds, UV – 2 minutes
- Top coat: LED – 60–90 seconds, UV – 2 minutes
If you do not cure the gel long enough, it stays soft and may not last. If you cure it too long, it can get brittle. Always follow the instructions for your lamp and gel.
Nail Extension and Adhesion
Builder gel nails let you make your nails longer and stronger. You apply the gel directly onto your natural nail. You can also use forms or tips to help shape the extension. After you put on the gel, you cure it under the lamp. The gel becomes hard and sticks tightly to your nail.
- Builder gel creates a strong and durable extension. You do not need to file or drill much.
- You can shape and sculpt the gel easily. It bends with your nail, so it does not crack.
- Builder gel feels light on your fingers. It is not heavy like acrylics, but it still protects your nails.
You can use builder gel for overlays, which means you add a layer to your natural nail for extra strength. You can also use it for full extensions if you want longer nails. The gel holds nail art well. You can paint designs, add gems, or use stickers. The smooth surface makes your nail art look neat.
Tip: Builder gel nails work well if you want strong nails that look natural and last a long time.
Builder gel nails give you flexibility and durability. You can choose the length and shape you like. The gel sticks closely to your nail, so it does not lift or peel easily. This makes builder gel a popular choice for people who want healthy, beautiful nails.
Builder Gel Nails: Benefits
Nail Strength and Protection
Builder gel nails give your natural nails a strong shield. You get a layer that protects your nails from daily bumps and scratches. This layer helps stop your nails from splitting or breaking. If you have weak or brittle nails, builder gel lets them grow longer without breaking. The gel forms a barrier that keeps your nails safe from trauma, breakage, and peeling.
- Acts as a protective shield against daily wear and tear
- Prevents splitting and breaking of weak nails
- Allows brittle nails to grow longer without breaking
- Creates a protective layer that shields natural nails from trauma, breakage, and peeling
Versatility for Nail Art
You can use builder gel nails to create many different looks. The gel has a thick texture, so you can shape your nails in many ways. You can make them longer or try new styles. The smooth surface works well for nail art. You can add designs, gems, or even sculpted shapes. Builder gel gives you a base for simple or detailed nail art. Dip powder does not work as well for complex shapes or long extensions.
- Builder gel offers excellent versatility for nail art and shaping.
- Its thicker consistency allows for creating various nail shapes, including extensions of different lengths and styles.
- Provides a smooth base for intricate nail art designs, including embedded embellishments or sculpted elements.
- Dip powder is less suited for complex shaping or creating significant extensions beyond the natural nail length.
Easy Removal
You can remove builder gel nails without much trouble. The process takes less time than removing dip powder nails. You soak your nails in acetone for about 10-15 minutes. This softens the gel so you can gently push it off. Experts suggest you first file down the top coat, then wrap your nails with acetone-soaked wipes and foil. After waiting, you check if the gel has softened and push it away with a cuticle pusher. This method helps protect your natural nails.
Tip: Always use gentle tools and avoid scraping too hard to keep your nails healthy.
Applying Builder Gel Nails
Preparation and Tools
You need the right tools to apply builder gel nails successfully. Professionals recommend these essentials:
- Builder gel of your choice
- UV or LED lamp
- Nail files and buffers
- Nail dehydrator
- Acid-free primer
- Builder gel brush
- Nail forms or tips
- Gel top coat
- Nail cleanser or isopropyl alcohol
- Cuticle pusher and nippers
- Nourishing cuticle oil
- Protective gloves
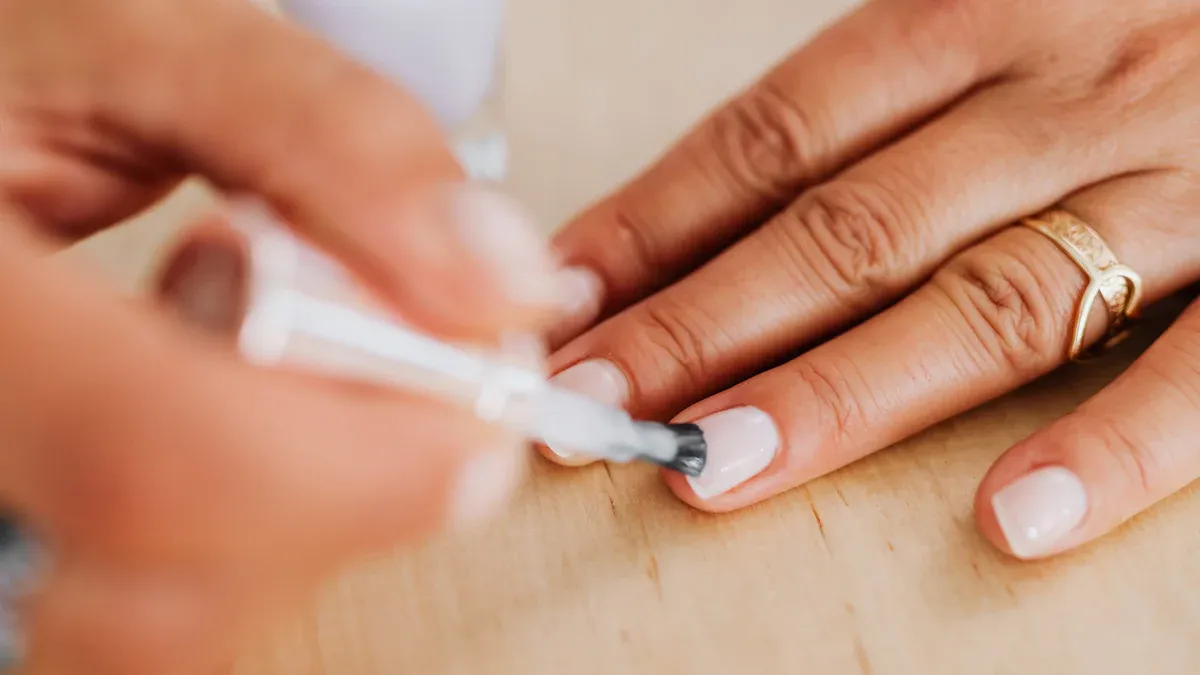
Start by pushing back your cuticles. Remove the shine from your nail surface with a buffer. Clean your nails and use a dehydrator to remove oils. Apply a thin layer of primer to help the gel stick.
Proper nail preparation helps builder gel adhere well and last longer. Without cleaning and buffing, the gel may lift or peel.
Application Steps
Follow these steps for a smooth application:
- Attach nail forms under your natural nails if you want extensions.
- Apply a thin coat of primer, avoiding your skin.
- Use a small amount of builder gel to create a slip layer on your nail and form. Cure this layer under your lamp.
- Sculpt the extension by placing a bead of builder gel at the free edge. Shape it to your desired length. Cure each layer.
- Remove the nail forms gently.
- Wipe away the sticky inhibition layer with nail cleanser or alcohol.
- File and shape your nails for a smooth finish.
- Apply gel polish and a top coat. Cure both layers.
- Cleanse your nails and finish with cuticle oil.
Tip: Handle your nails gently for the first 24 hours. Avoid hot showers or swimming to help the gel harden.
Common mistakes include skipping prep, applying gel too thick, and using acrylic techniques. Always use thin layers and prep tips for best results.
Safe Removal
Remove builder gel nails safely by following these steps:
- File down the top coat gently.
- Soak your nails in acetone in a ventilated area.
- Protect your skin with cuticle oil or Vaseline before soaking.
- Use a plastic or wooden pusher to remove softened gel.
- Stop if you feel pain or irritation.
- Hydrate your nails with cuticle oil after removal.
Never pry or peel off gel. Let your nails rest between applications to keep them healthy.
Choosing Builder Gel Products
Selecting the Right Gel
You can find many builder gel products in stores and online. Each gel has special features that suit different nail types and goals. When you choose a builder gel, look for these important qualities:
- Viscosity: Medium or high thickness helps you control the gel and stops it from dripping.
- Curing Time: Most builder gels cure in 30–60 seconds under a strong LED lamp.
- Adhesion: Good gels stick well without needing harsh primers.
- Flexibility: A flexible gel moves with your nail and lowers the chance of cracking.
- Lamp Compatibility: Make sure the gel matches your lamp’s wavelength, usually 365–405 nm.
- Shrinkage & Lifting Resistance: High-quality gels do not shrink or lift after curing.
- Odor Level: Low-odor formulas work best for home use or sensitive people.
Popular brands offer builder gels with unique features. Here is a table that shows what sets them apart:
| Brand | Key Features |
|---|---|
| OPI | Vegan, cruelty-free, high shine, scratch resistance |
| CHROMÉCLAIR | HEMA free & TPO free,Vegan ,Self-leveling, strong adhesion, professional quality |
| CND Plexigel | Lightweight, hybrid formula, easy soak-off |
| Kiara Sky | Odor-free, non-toxic, glossy finish |
| Young Nails | Flexible, strong, easy soak-off |
| IBD | Durable, minimal shrinkage, good for sculpting |
| Modelones | Affordable, self-leveling, beginner-friendly |
You can also find builder gels in bottles, like Builder In A Bottle™, which make application easier for beginners.
Tips for Beginners
If you are new to builder gel nails, you may face some challenges. You can overcome these with patience and practice. Here are some helpful tips:
- Keep your tools and workspace clean.
- Use a nail dehydrator to remove oils before applying gel.
- Apply thin layers and cure each one fully.
- Choose self-leveling gels for easier control.
- Avoid touching your skin or cuticles with the gel.
- Finish with cuticle oil to keep nails healthy.
- Do not skip nail prep. Clean and dry nails help the gel stick better.
- Mistakes happen. You can fix them and learn from each set.
Tip: Take your time and enjoy the process. Builder gel lets you be creative and improve your skills with every application.
Beginners often struggle with picking the right product and mastering techniques. Start with trusted brands and focus on one technique at a time. You can build confidence and create strong, beautiful nails.
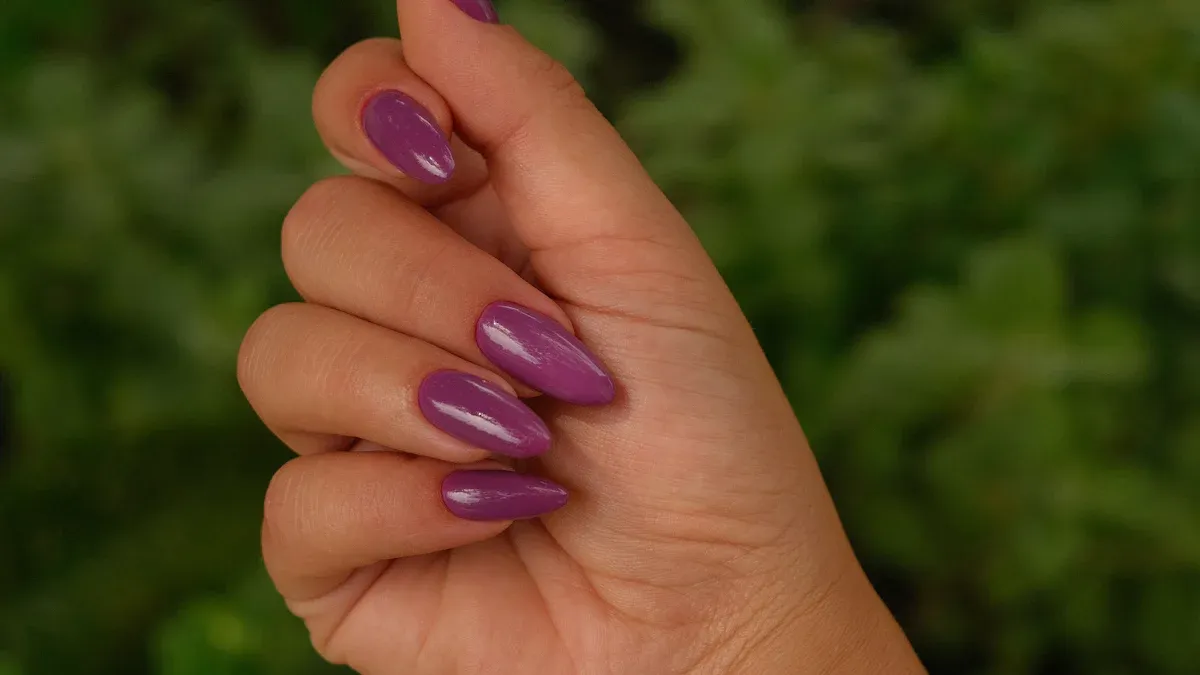
Builder gel nails help you have strong and flexible nails. They also look nice and pretty. The finish does not chip and can last for weeks. You can shape your nails in many ways. The steps to put them on are easy to follow. People who are new or have done nails before both like builder gel. It is simple to use and lets you be creative.
| Advantage | Builder Gel Nails |
|---|---|
| Durability | Stays on for three to five weeks |
| Strength | Makes your nails stronger and safer |
| Flexibility | Looks natural and does not crack |
You should try builder gel nails if you want strong nails. They are stylish and easy to put on.
FAQ
What is the main purpose of builder gel nails?
Builder gel nails help you create strong, long-lasting nails. You can use them to add length, shape, and protection to your natural nails. They also give you a smooth surface for nail art.
What tools do you need for builder gel nails?
You need a builder gel, a UV or LED lamp, nail files, a buffer, a gel brush, nail forms or tips, and a top coat. These tools help you apply and shape the gel for the best results.
What makes builder gel different from acrylic nails?
Builder gel feels lighter and more flexible than acrylic. You cure builder gel under a lamp, while acrylic hardens in the air. Builder gel also has a softer smell and is easier to remove.
What should you do if builder gel lifts or peels?
If your builder gel lifts or peels, check your nail prep. Clean and buff your nails before applying gel. Avoid touching your skin with the gel. Always cure each layer fully for the best hold.