Summer always brings to mind the sweetness of juicy fruit. Today, we’ll teach you how to “weld” this refreshing touch onto your nails. This time, we’ll provide tutorials for four crystal 3D fruit manicures: green apple, cherry, blueberry, and golden pear.
The steps are detailed enough for novices to follow, so get your tools ready and follow along!
Green Apple Manicure:
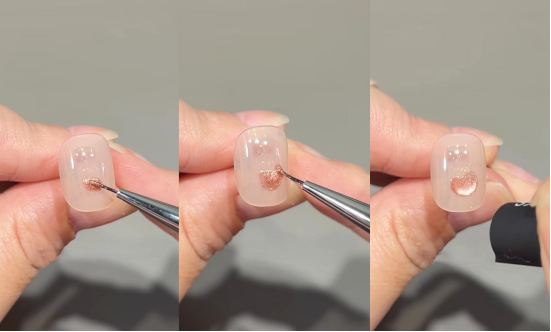
1.Base Color and Shaping: Choose a green cat’s eye gel (I used CHROMÉCLAIR’s HEMA-free Gel Polish products No. 809; the color is clear, fluid). Use a fine brush to draw a smooth circle on your nail (this will be the outline of the apple). Immediately after drawing, use a magnet to hold the “cat’s eye” in place for a concentrated and smooth effect. After applying, cure under a light.
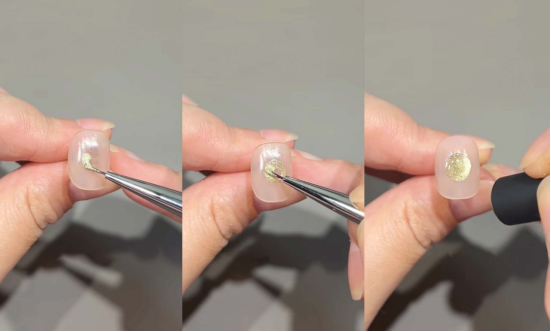
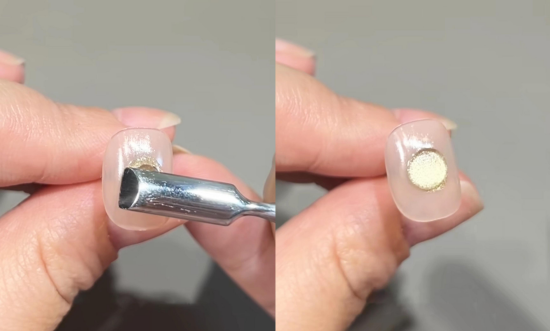
2.Three-dimensional texture: After shining the light, take “soft candy glue” (the texture is elastic and easy to shape), pinch a small piece and gently press it on the cat’s eye circle, use your fingers to press the edges flat, so that the soft candy glue and the nail surface fit naturally.
Recommended next step
Build the Nail Art Look Kit
Tutorial looks need more than a color bottle. Choose the color, art detail, transfer or sticker step, and a top coat as one look kit.
- Choose the main color or set.
- Add the art detail: sticker, transfer gel, magnet, or brush.
- Seal the finished look with top coat.
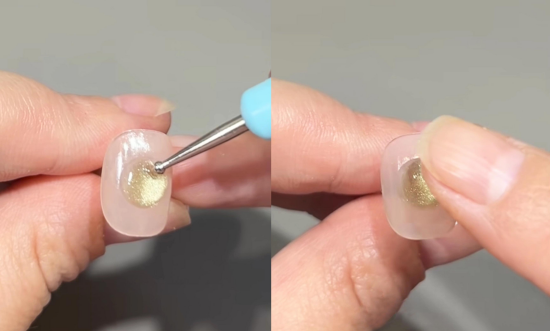
3.Detailed carving: Use a ballpoint pen to gently poke the center of the soft candy to create a natural “concave” feeling in the apple; then use your fingers to tap and adjust the shape to make the apple more realistic.
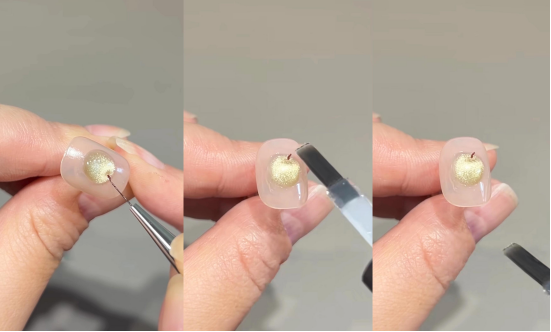
4.Finishing touch: After shining the light again, use brown painting glue to draw “branches”. The lines should be thin and natural. Finally, the sealing layer is completed.
Cherry Manicure:
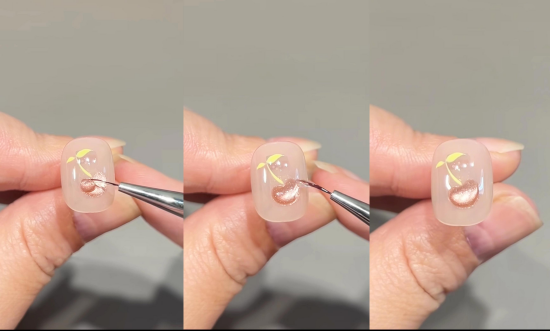
1.Outline: Draw a “tipless heart” on the nail (resembling a cherry shape). Choose a pink cat-eye gel with shimmer for a translucent effect! After applying the cat-eye, shine it under a light.
2.Branch embellishment: Use a drawing pen dipped in yellow painting glue to draw the “branches” of the cherry and two small leaves. The smoothness of the lines determines the degree of refinement. After painting, seal the layer normally and solidify.

3.Three-dimensional upgrade: Finally, apply the “hard seal” and gently outline and adjust the shape along the edge of the cherry to create a crystal-like three-dimensional bulge. After the whole thing is illuminated, a plump and translucent cherry is born.
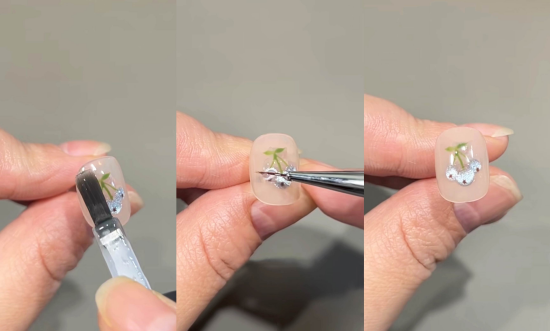
Blueberry Manicure:
1.Stacking Circles: Use light blue cat’s eye glue. First, draw a small circle. Blend the cat’s eye and light it to solidify. Then, draw the next circle next to it. (Important: Each blueberry should be individually glued and lighted to ensure each one is sparkling.)
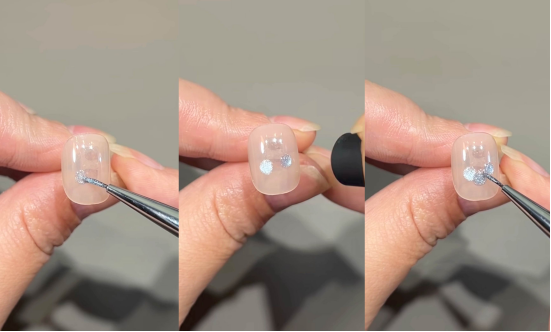
2.Extra points for details: After shining the light, use brown to draw a “small five-pointed star” at the bottom of each blueberry (to simulate the depression of the blueberry); then use green to draw “branches” to string the blueberries together, and add two small leaves to make it more vivid.
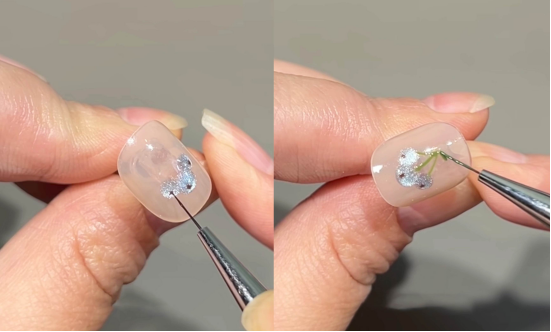
3.Three-dimensional seal: After the regular seal is cured, apply a hard seal to create a crystal three-dimensional effect. After each blueberry is finished, shine a light immediately to firmly lock in the transparent feeling.
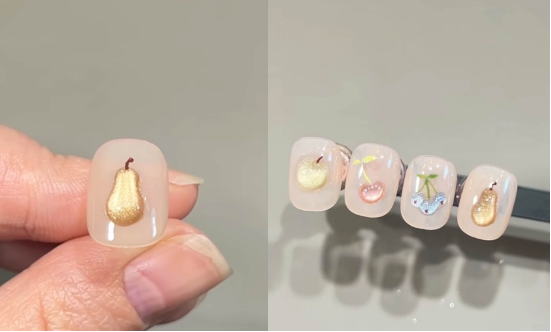
Golden Pear Manicure:
The steps are almost identical to the green apple manicure: Use golden cat’s eye glue to draw a circle → Apply a bright cat’s eye light → Use fondant glue to shape the shape → Use a ballpoint pen to poke indentations → Draw brown branches → Top with a topcoat. When you’re done, you’ll find the golden pear has the three-dimensionality of a green apple, but with a luxurious touch. A side note: it’d also be super cute on your toenails!
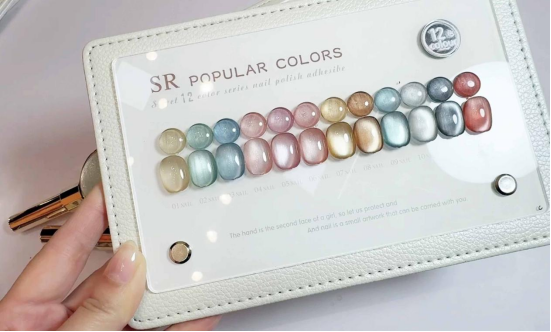
Finally, I recommend CHROMÉCLAIR’s HEMA-free Gel Polish products: focus on safety, low irritation, environmental protection, no harmful ingredients, reduce the risk of allergies ( HEMA-free & TPO-free), a variety of colors, cater to mainstream aesthetics, designed for sensitive skin users, care for healthy nails, and ensure that every consumer’s experience is safe and secure.
Finishing Tips
– When applying cat-eye glue, hold the magnet 1-2mm from the nail surface and hold for 3-5 seconds for a more concentrated cat-eye effect.
– When applying shaping glue like soft candy glue and hard topcoat, be gentle and quick to prevent the glue from drying out and becoming difficult to shape.
– To make the fruit appear more “hydrated,” apply a thin layer of clear scrub topcoat before applying. After curing, wipe away any excess glue with a cleaning solution to maximize the translucency.
Follow these steps and your nails will be covered in sweet, refreshing fruit. Whether paired with a mini skirt or shorts, this will be a truly eye-catching summer creation! If the steps seem overwhelming, start with a single fruit and then master the full set. Go ahead and give it a try! If you like this tutorial, don’t forget to like and save it. I’ll show you how to create a sea of flowers on your nails next time!