This time, I would like to share a traditional Chinese-style carved nail art design that combines traditional elements with nail art. The classic red and green color scheme creates a retro yet elegant look for your fingertips.
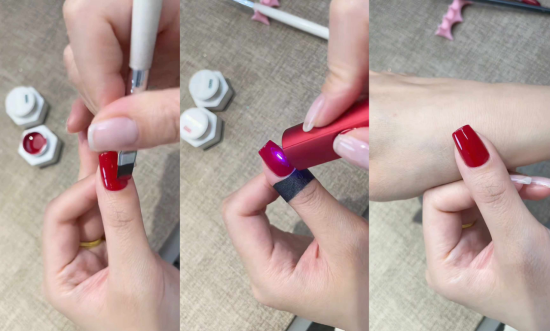
Step 1: Apply a red base coat to establish a solid foundation
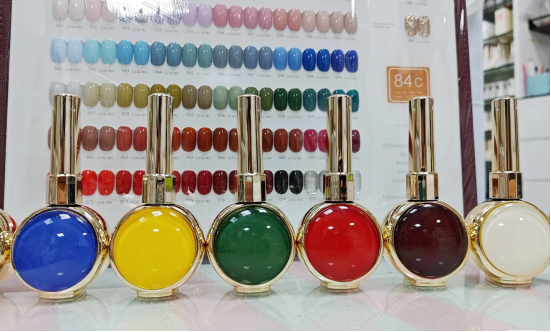
First, choose a red gel polish as the base color (here, we used CHROMÉCLAIR’s Hema Free Gel Polish No. 39, which has a sophisticated color, good flow, and is non-toxic and healthy). Apply it evenly to the nail surface and cure it under a lamp. Repeat the application a second time to make the red color more vibrant and rich, then cure it again under the lamp. A double base coat will make the subsequent patterns more vivid and give the nail surface a smoother texture.
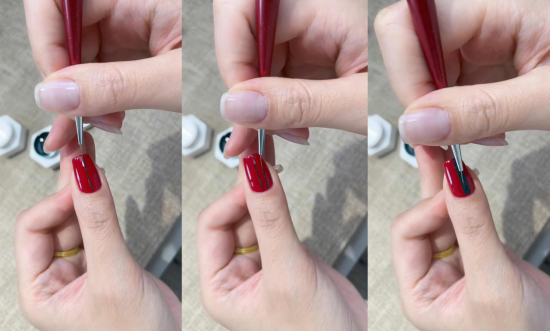
Step 2: Draw green lines to outline contrasting colors
Once the base color is dry, take green gel polish (here we used CHROMÉCLAIR’s Hema Free Gel Polish No. 41) and use a fine brush to draw two parallel straight lines on the nail surface, then fill in the area between the lines with green. When filling in the color, make sure the edges are neat. After filling in the color, cure it under a lamp to ensure that the green color blocks adhere firmly.
Recommended next step
Build the Nail Art Look Kit
Tutorial looks need more than a color bottle. Choose the color, art detail, transfer or sticker step, and a top coat as one look kit.
- Choose the main color or set.
- Add the art detail: sticker, transfer gel, magnet, or brush.
- Seal the finished look with top coat.
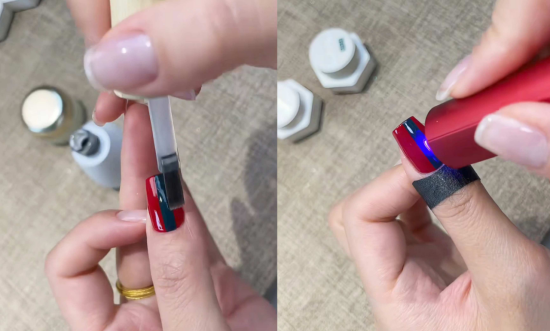
Step 3: Apply a matte finish coat to create a velvety texture
Once the green area has dried under the lamp, apply a layer of velvety matte finish coat and cure it quickly under the lamp. The matte texture gives the manicure a retro vibe and serves as a “matte canvas” for the subsequent stamping process.
Step 4: Add Chinese-style prints to add detail and depth
Take a small amount of gold transfer gel polish and apply it evenly to the Chinese-style patterned steel plate template. Use a scraper to quickly smooth it out so that the gold fills the steel plate pattern. Then press the steel plate with a transparent stamp.
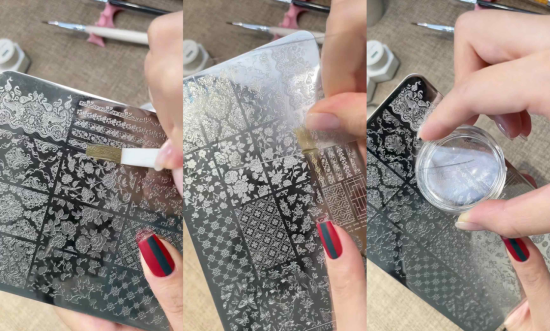
Transfer the pattern onto the stamp; finally, align the stamp with the green area of the nail surface and press down.
Transfer the golden pattern onto the nail surface, remove any excess color with a scraper, and cure the pattern under a lamp.
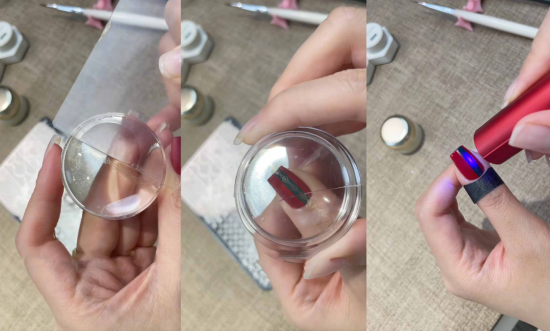
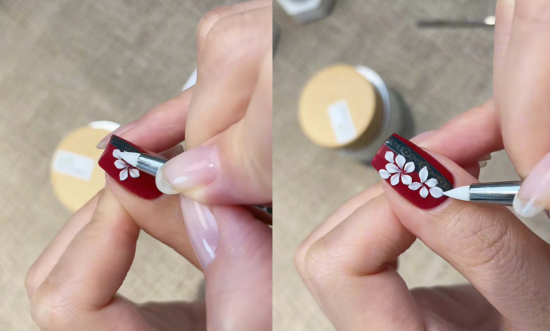
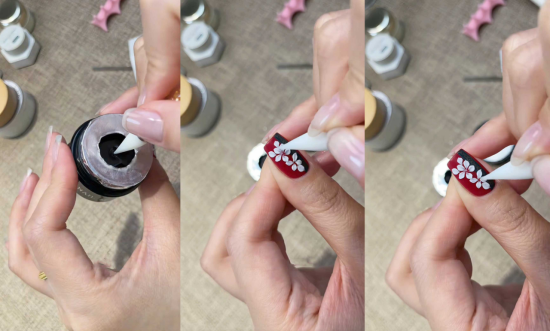
Step 5: Elastic sculpting to create three-dimensional petals
Roll the elastic sculpting glue (it is important that it does not collapse easily!) into sesame seed-sized balls and gently place them on the blank areas of the nail surface. Use a small silicone pen to press the balls, flattening the round balls into “petal shapes.”
You can also deliberately create a three-dimensional effect to make the petals more vivid.
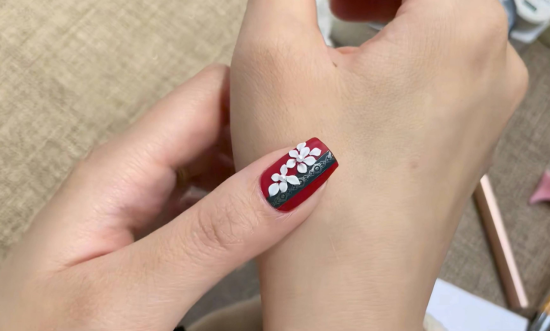
Add a few scattered petals around the main flower to enhance the natural look. Once everything is carved, cure under a lamp.
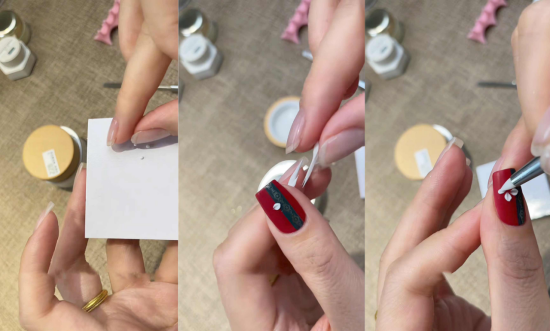
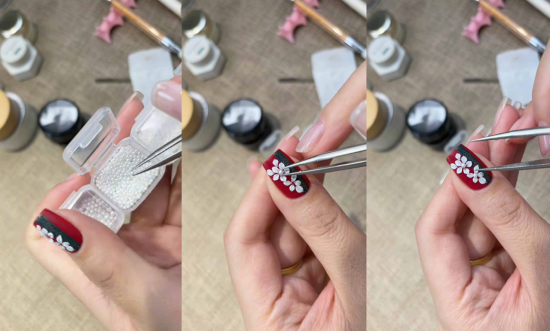
Step 6: Add rhinestones to highlight the details of the flower center
Apply elastic rhinestone glue to the center of each flower, then use tweezers to pick up small pearls and stick them onto the glue.
Gently press to secure; shine a light on the adhesive to dry it completely, ensuring the pearl is firmly “attached” to the center of the flower.
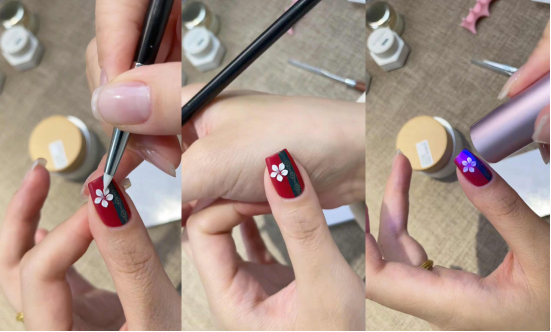
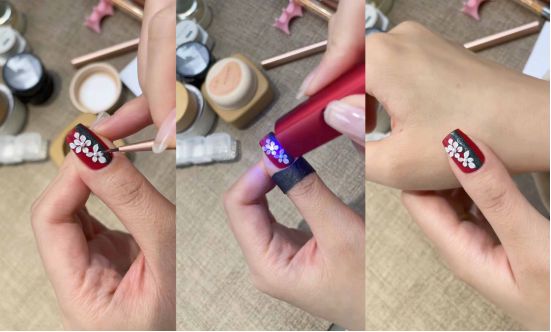
Step 7: Apply a hard top coat to reinforce overall durability
Finally, apply a layer of hard top coat, focusing on thinly coating the petals and pearl areas. This will protect the three-dimensional carvings and pearls while making the nail surface more wear-resistant. After curing under a lamp, this “red and green Chinese-style carved nail art” is complete!
Conclusion: Traditional aesthetics, blossoming at your fingertips
From the base color to the carvings, from the contrasting lines to the Chinese-style prints, every step is a tribute to traditional aesthetics. The collision of red and green, the liveliness of the three-dimensional petals, and the elegance of the golden patterns turn your fingertips into a mobile exhibition of Chinese-style art. If you like Chinese-style nail art, try it now!
In the tutorial, I used CHROMÉCLAIR gel polish . Their products focus on safety, low irritation, and environmental friendliness, and do not contain harmful ingredients, reducing the risk of allergies (HEMA-free gel polish). They protect healthy nails, come in a variety of colors to suit mainstream aesthetics, and ensure that every consumer has a safe and secure experience.
If you encounter any problems during the process, you can watch the video tutorial below. If you find the tutorial useful and like it, remember to give it a thumbs up, save it, and subscribe to me. See you next time!