Hello, everyone! I’m Star, an employee at CHROMÉCLAIR.
Stuck on what nail design to try this early fall? Today we’ve got a fiery and edgy Croatian-inspired nail tutorial just for you, perfect for those who love bold styles. The steps are clear and easy to follow—just copy along to get the look effortlessly!

Step 1: Base Coat and Crochet Heart Design
Apply a milky white gel polish as your base coat. Remember to let the first layer dry completely before applying the second layer to prevent wrinkling.

Take out the fine-tip liner pen and begin sketching the basic outline of the croissant shape. Start by drawing a horizontal line across the center of the nail. Then add two short horizontal lines, one above and one below the central line.
Recommended next step
Build the Nail Art Look Kit
Tutorial looks need more than a color bottle. Choose the color, art detail, transfer or sticker step, and a top coat as one look kit.
- Choose the main color or set.
- Add the art detail: sticker, transfer gel, magnet, or brush.
- Seal the finished look with top coat.
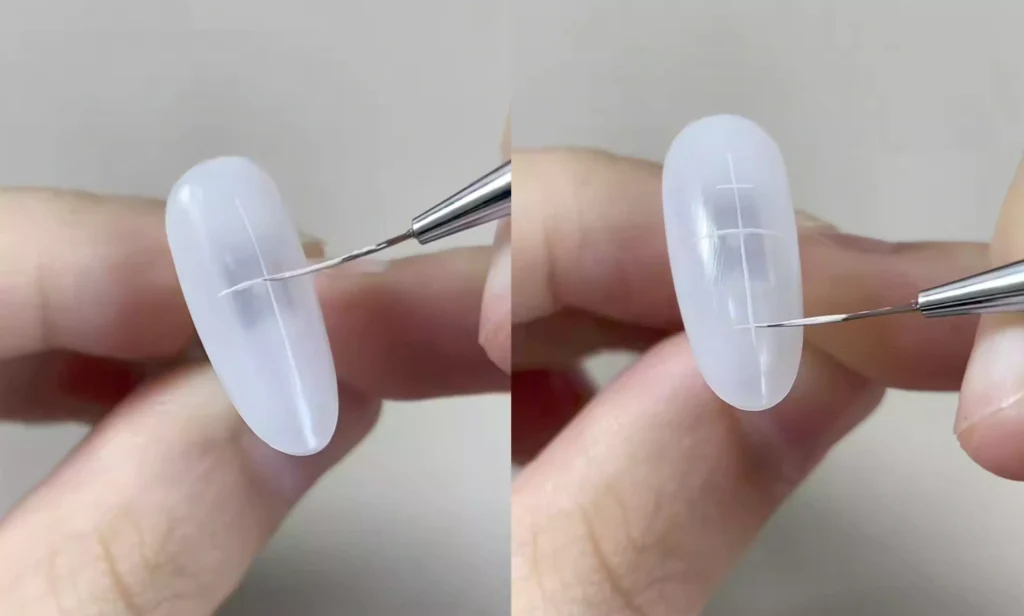
Ensure the upper short horizontal line is positioned closer to the central horizontal line, maintaining symmetrical lengths on both sides to establish the contour of the heart shape.

Step 2: Refine the Crochet Pattern and Secure It
Building upon the foundational horizontal lines, continue adding lines with a drawing pen. Interlace horizontal and vertical lines to form the structure
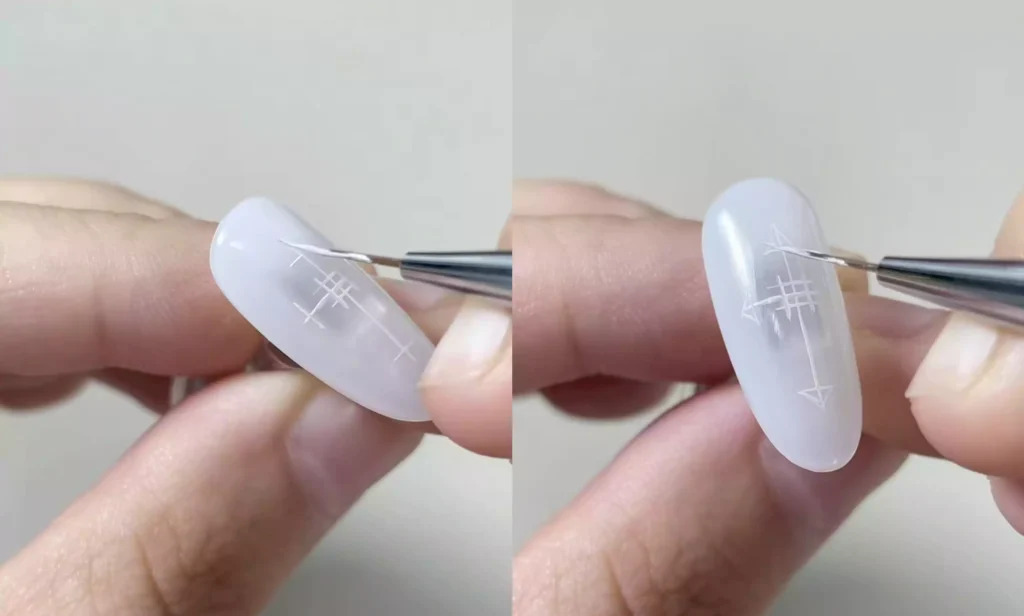
First, draw short vertical lines upward and downward from both ends of the horizontal base line. Then connect the ends of the lines at the four corners, while adding short lines in the central area to complete the Krosin pattern.
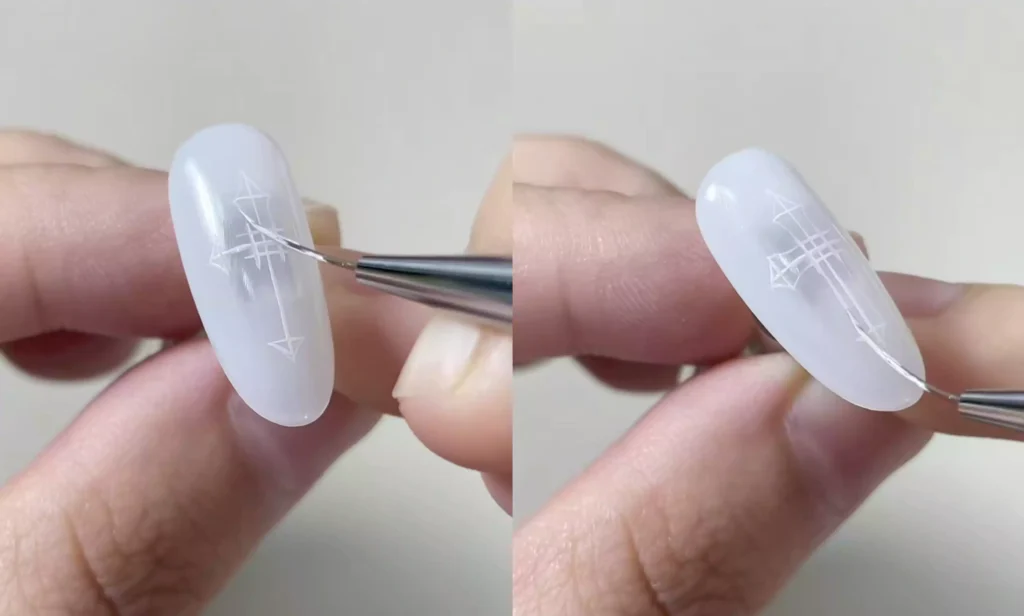
After outlining the design, carefully fill in the Krosh pattern with color, taking care to stay within the lines. If minor imperfections occur, use a cotton swab dipped in nail polish remover to correct them. Finally, place the nail under the UV lamp and cure for 30-60 seconds to fully set the design.

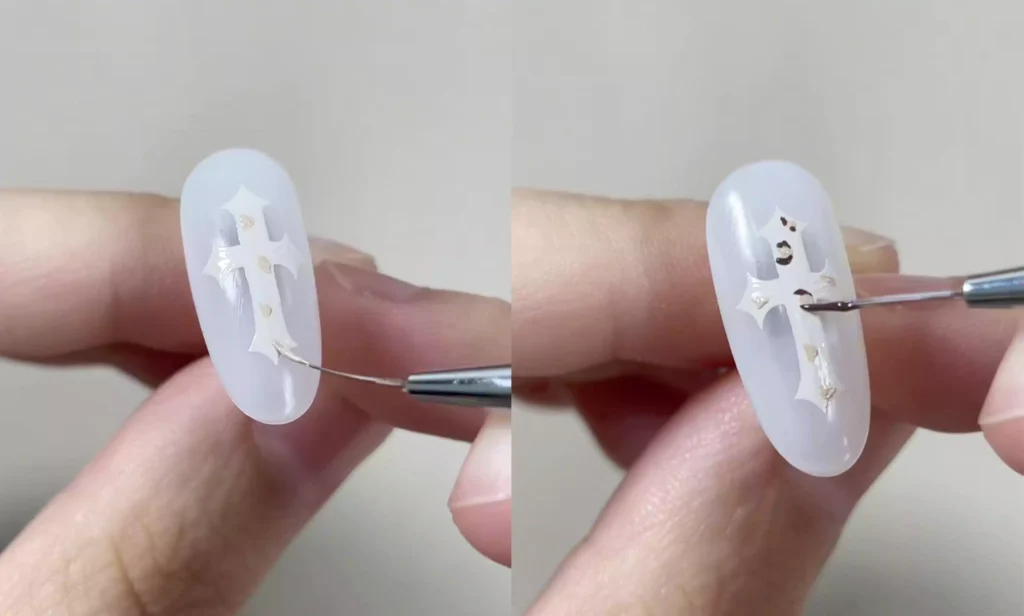
Step 3: Create Leopard Print and Accent Details
Using a dark brown gel polish (I used CHROMÉCLAIR’s Hema Free Gel Polish SR-17, which perfectly matches this style with its smooth flow and even application—great for beginners), dip a dotting tool into the polish and place randomly sized oval spots across the blank areas of your nails. These form the base of the leopard pattern. Avoid perfect symmetry—a natural, scattered arrangement looks best.
Once the brown spots are fully dry, dip a line art brush into black gel polish. Draw 1-2 short curved lines along the edge of each oval spot to mimic the leopard’s stripes, adding dimension to the pattern.
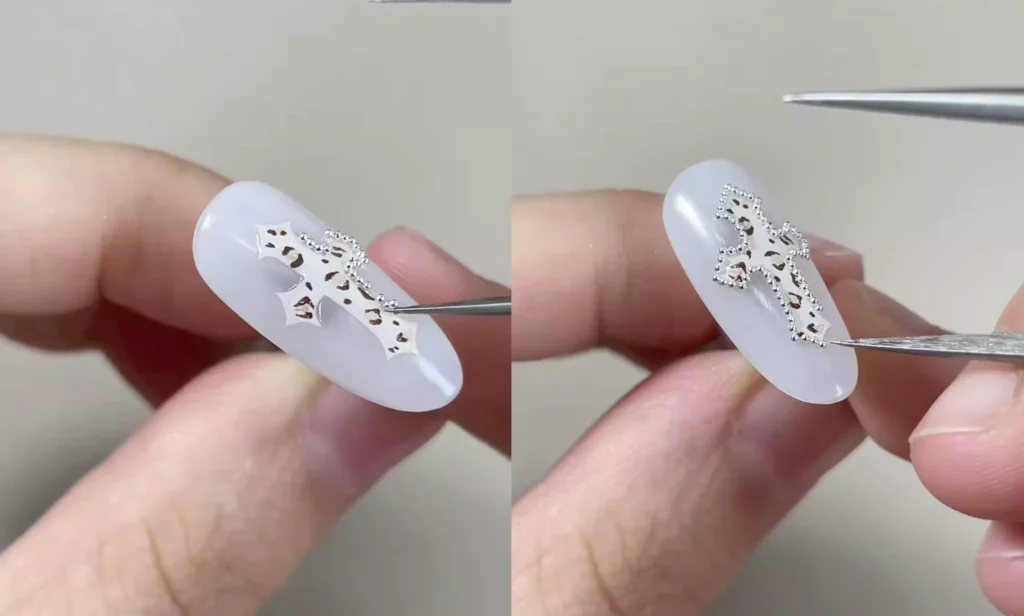
Finally, place a few silver steel beads around the nail edges or leopard print pattern. Use tweezers to gently pick them up and adhere them, pressing firmly for a few seconds to secure. Apply a thin top coat to protect the design and beads. And there you have it—your leopard print nails are complete!
Step 4: Creating Brown Cat Eye Nails
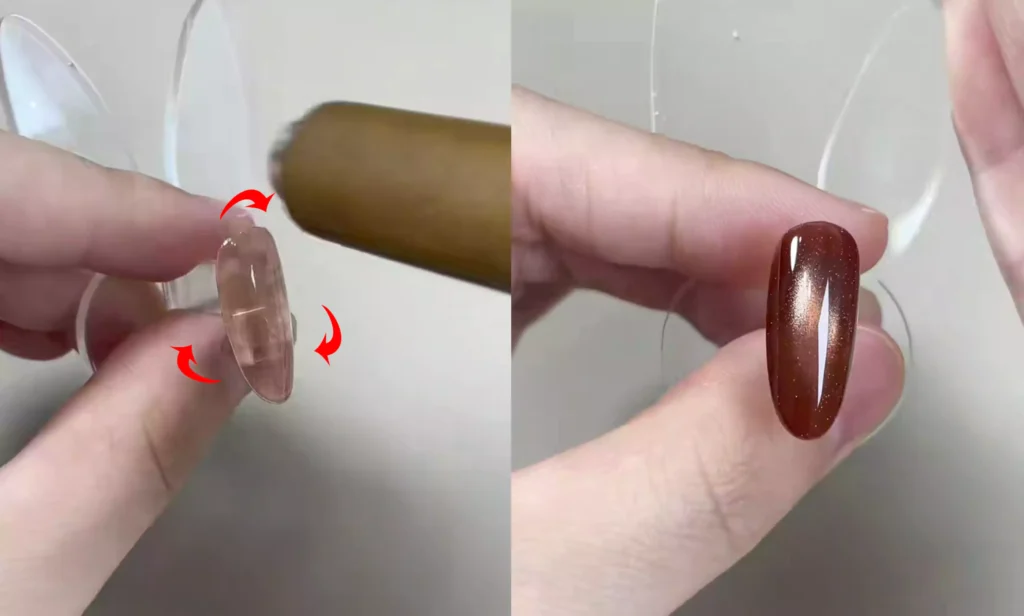
For the other set of nails, apply a base coat and cure it. Then apply two even coats of brown cat eye gel polish (CE-03). When applying the second coat, ensure the polish thickness is uniform to avoid uneven color patches.
Take out the nail magnet and hold it close to the nail surface (without touching it) for 5-10 seconds to create a wide-gloss effect.
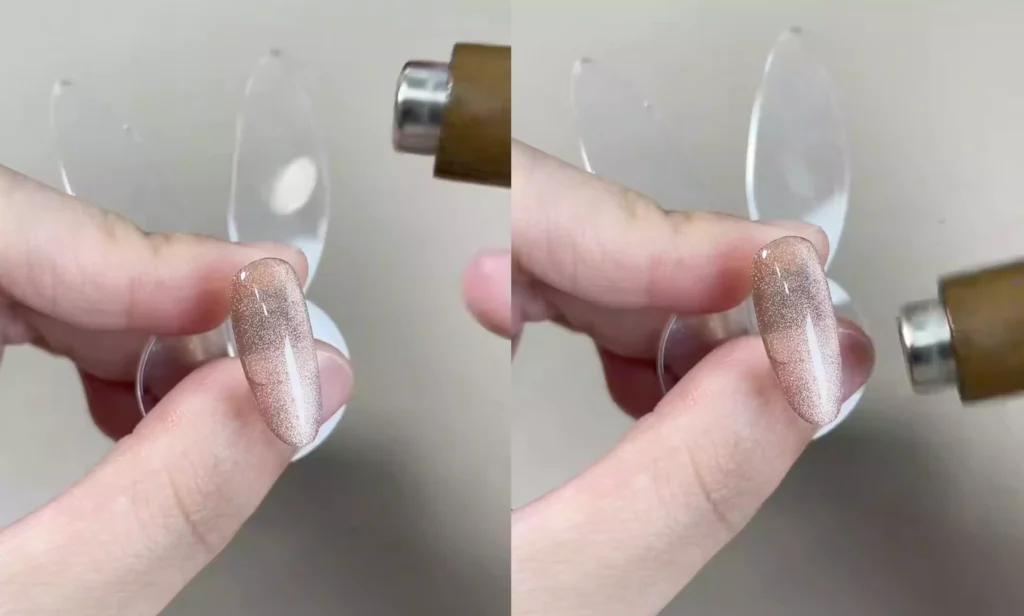
Slowly move the magnet from the base of the nail toward the tip, drawing out the light-tracking pattern. This creates the natural cat’s eye effect after one layer. Cure under the lamp and set aside.
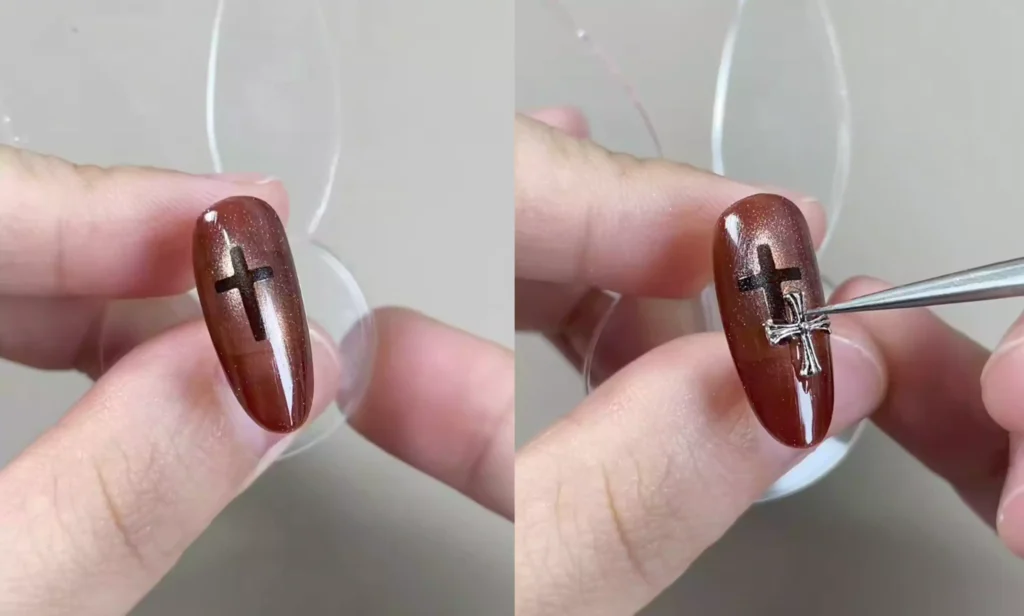
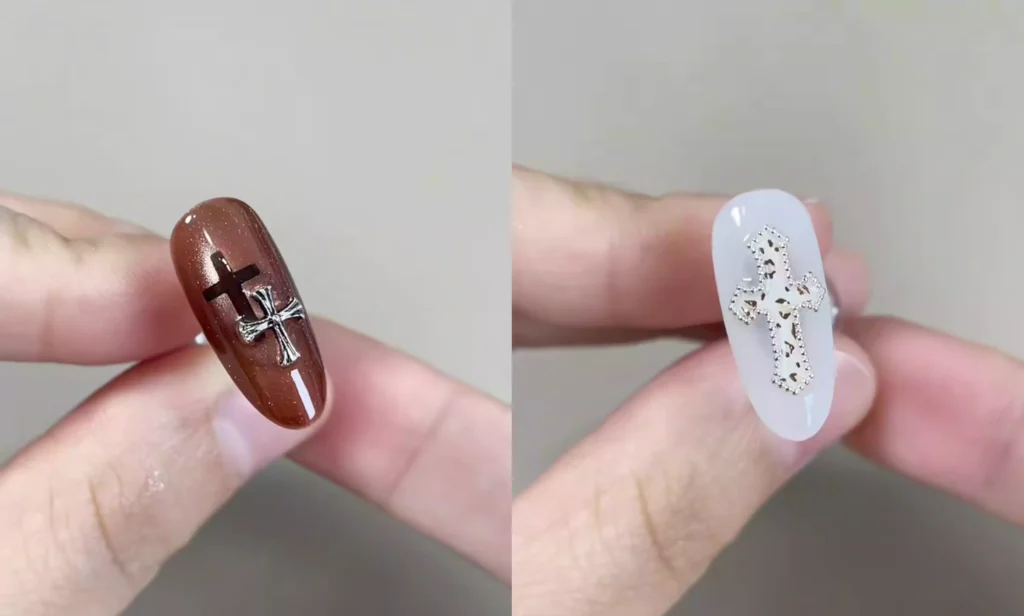
Step 5: Decorating and Sealing the Finish
Once the cat-eye gel polish is fully dry, take out the small cross stickers prepared earlier. Trim them to fit your nail size, then gently place them at the center or slightly off-center of the cat-eye nail. Use tweezers to press down the edges of the sticker, ensuring it adheres smoothly without bubbles.
Take a small amount of black gel polish and place it on a palette. Dip a sponge dabbing tool into the polish and gently dab around the sticker to create a gradient effect, unifying the overall look.

Apply a small metallic-finish heart-shaped charm above the sticker or along the nail edge. Finish with a thin layer of top coat covering the entire nail. Cure under the lamp for 60 seconds to ensure your manicure stays durable and scratch-resistant.
This early fall Croc Heart leopard print manicure combines the edgy vibe of Croc Heart with the retro, sassy flair of leopard print. It makes your skin look super fair and pairs perfectly with everyday hoodies or leather jackets. If you love unique styles, don’t hesitate—grab your nail tools and give it a try!
In this tutorial, I’m using CHROMÉCLAIR’s HEMA-free Gel Polish. Their products prioritize safety and low irritation (HEMA-free & TPO-free), are eco-friendly, and free from harsh or harmful ingredients to protect nail health. With an extensive color selection and long-lasting wear (around 21 days), they stay on-trend with modern aesthetics—giving you both peace of mind and beautiful results!
Having trouble with the steps? Be sure to check out the video tutorial below! If you found this helpful, feel free to give it a thumbs up and save it ⭐. Subscribe to my channel, and see you in the next tutorial!