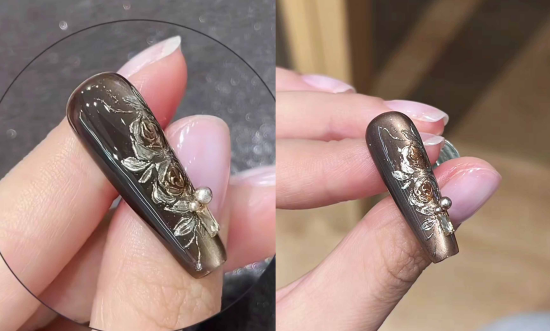
Ce tutoriel présente un tutoriel de nail art "floral 3D rétro", de la couleur de base au motif floral 3D et à la couche de poudre, en utilisant des instructions étape par étape pour recréer une texture luxueuse.
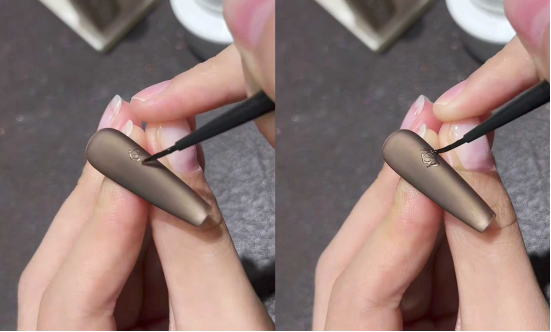
Étape 1 : Créer la couleur de base pour l'œil de chat
Appliquer une fine couche de vernis gel yeux de chat gel to the entire nail (I used CHROMÉCLAIR’s Gel Polonais sans Hema No. 807, qui a une couleur sophistiquée et de haute qualité et qui est non toxique et saine).
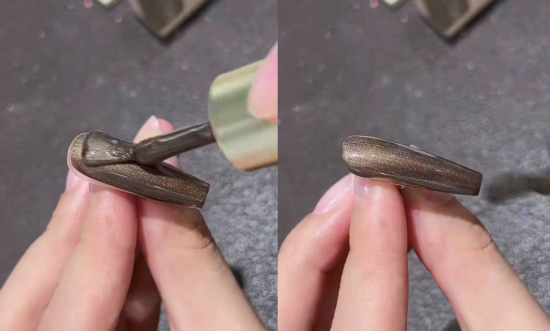
Use a magnet to sweep back and forth on one side of the nail surface to create a noticeable side glow. This cat’s eye gel magnetic powder is densely concentrated, so even a quick sweep can give the nail surface a metallic luster, laying a luxurious foundation for a retro look.
Etape 2 : Scellant mat à la russe + sculpture tridimensionnelle
Recommended next step
Build the Nail Art Look Kit
Tutorial looks need more than a color bottle. Choose the color, art detail, transfer or sticker step, and a top coat as one look kit.
- Choose the main color or set.
- Add the art detail: sticker, transfer gel, magnet, or brush.
- Seal the finished look with top coat.
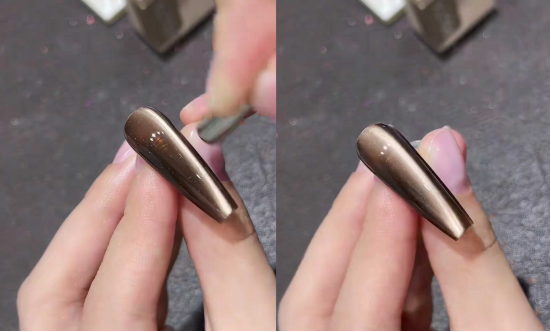
– First apply Russian-style matte sealant: the matte texture makes the subsequent carving more three-dimensional and avoids the sticky feeling of a glossy finish.
– Take some “non-collapsible modeling clay” and use a fine brush to draw the petals using a “light touch – heavy pressure – light lift” technique: starting from the center of the flower and working outward.
Des triangles irréguliers sont utilisés pour représenter les plis naturels des roses anciennes, qui sont superposés de l'intérieur vers l'extérieur et du plus grand au plus petit, ce qui permet à la texture des pétales d'être claire et de ne pas s'effondrer.

– Decorate with leaves: Draw leaf shapes next to the flowers, one next to the other.
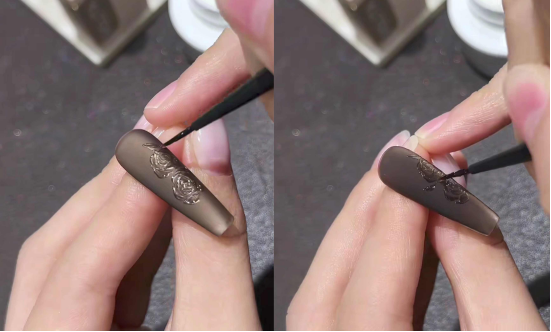
Les coups de pinceau suivent de près les bords des pétales, simulant ainsi le modèle de croissance des vraies fleurs.
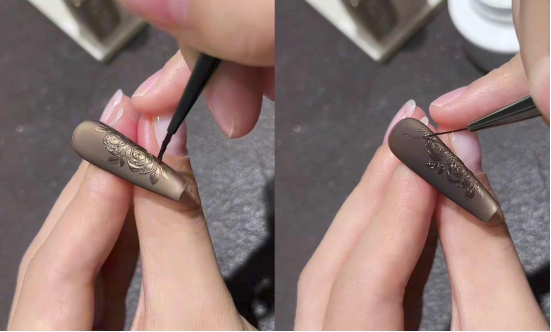
Étape 3 : Poudre d'or rose + coloration détaillée
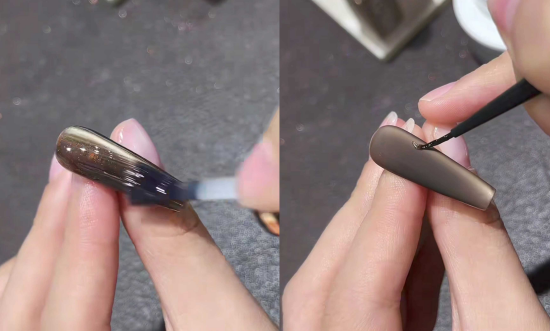
– After curing the modeling glue under a lamp, take some rock gold powder and lightly rub it onto the carved areas with a sponge.
Balayer les restes de poudre. La poudre dorée se mêle à la base mate pour créer un look subtil et luxueux.
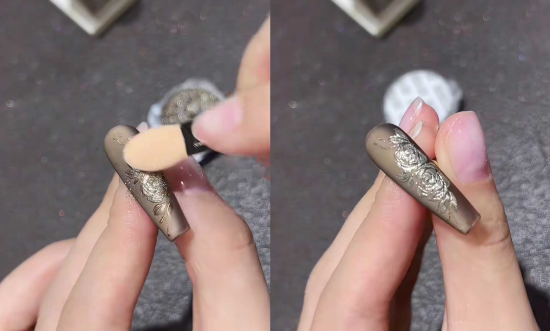
– Apply (807 color glue)to the center of the flower, use a magnet to remove some of the cat’s eye magnetic powder, and allow the center of the flower to appear “amber-colored,” naturally blending from the center to the edges to enhance the vintage layers.
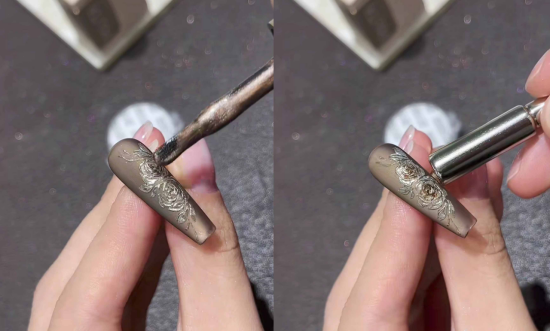
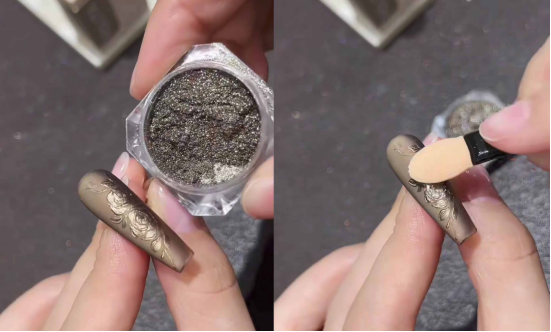
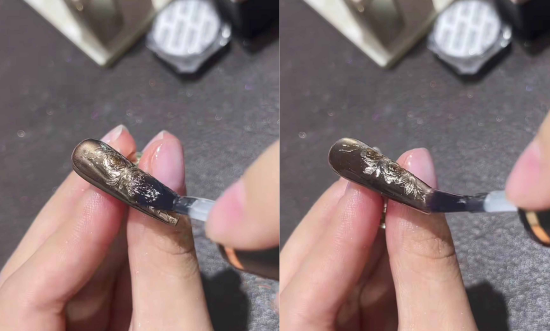
Étape 4 : Scellement et décoration
– Apply a layer of Magic Mirror Powder to cover the entire nail. This will fix the gold powder in place, protect the carving, and restore the translucent luster of the nail surface.
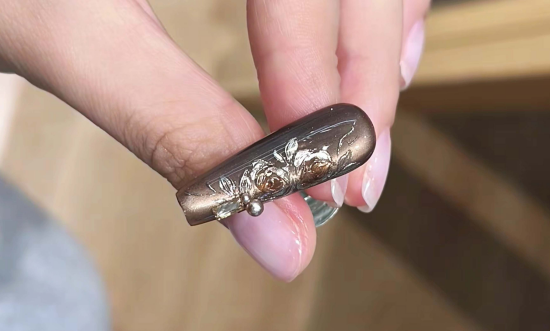
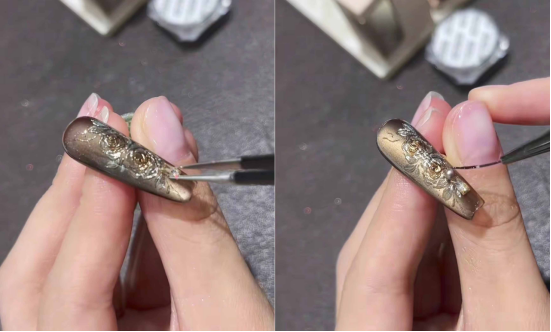
– Apply exquisite metal/pearl accessories to flowers or blank areas of the nail surface, secure with base glue, and complete the retro look.
Conclusion
Once completed, the nail surface will have both the shimmering texture of cat’s eyes and the vintage elegance of three-dimensional carvings, making it a sophisticated match for any style of clothing. By following the steps, even beginners can recreate luxurious and elegant nails.
In the tutorial, I used CHROMÉCLAIR’s Gel Polish sans HEMA. Their products are safe and hypoallergenic (HEMA-free & TPO-free), environmentally friendly, and free of irritating and harmful ingredients, protecting the health of your nails. There is a wide range of colors to choose from, keeping up with the latest trends, so you can use them with confidence and look good!
Si vous rencontrez des problèmes au cours du processus, vous pouvez regarder le tutoriel vidéo ci-dessous. Si vous trouvez ce tutoriel utile et que vous l'aimez, n'oubliez pas de lui donner un pouce en l'air, de le sauvegarder et de vous abonner. À la prochaine fois !