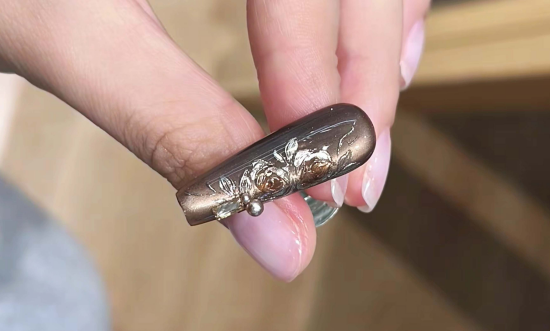
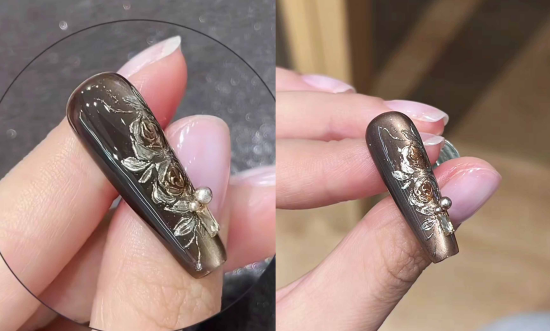
Questo tutorial condivide una nail art "retro 3D floreale", dal colore di base al disegno floreale 3D e alla verniciatura a polvere, utilizzando istruzioni passo-passo per ricreare una texture lussuosa.
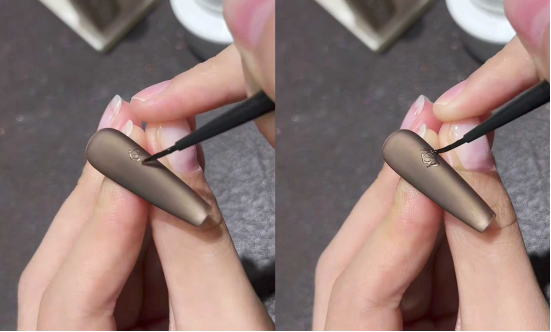
Fase 1: Creare il colore di base per l'occhio di gatto
Applicare uno strato sottile di vernice color rame smalto gel occhi di gatto gel su tutta l'unghia (ho usato CHROMÉCLAIR'S Smalto gel senza ema N. 807, che ha un colore sofisticato e di alta qualità ed è atossico e salutare).
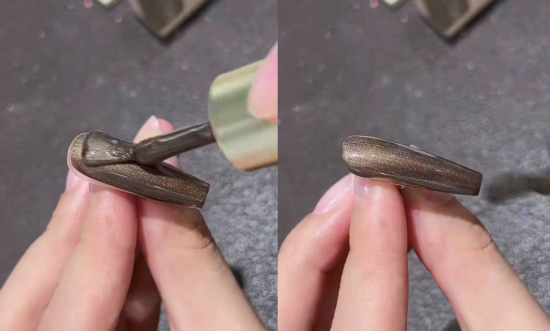
Utilizza una calamita e passala avanti e indietro su un lato dell'unghia per creare un bagliore laterale evidente. Questa polvere magnetica effetto occhio di gatto è altamente concentrata, quindi anche una passata veloce può donare alla superficie dell'unghia una lucentezza metallica, creando una base lussuosa per un look retrò.
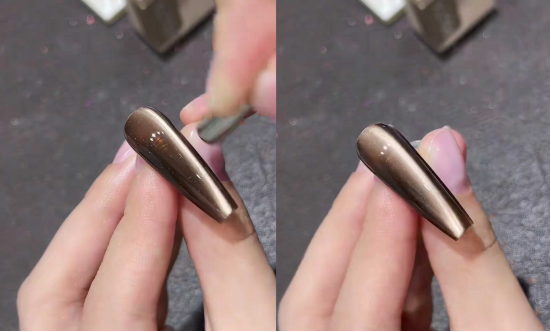
Fase 2: sigillante opaco alla russa + intaglio tridimensionale
Passo successivo consigliato
Crea il kit per un look di nail art
Per realizzare un tutorial di bellezza non basta una boccetta di colore. Scegli il colore, il dettaglio artistico, la tecnica di trasferimento o l'applicazione dell'adesivo e il top coat, tutto in un unico kit.
- Scegli il colore principale o il set.
- Aggiungi il dettaglio artistico: adesivo, gel per trasferimento, magnete o pennello.
- Sigilla il risultato finale con uno strato di top coat.
Kit per nail artVedere il gel di trasferimentoConfronta tutte le routine
– Per prima cosa, applicare un sigillante opaco in stile russo: la texture opaca conferisce maggiore tridimensionalità all'incisione successiva ed evita la sensazione appiccicosa di una finitura lucida.
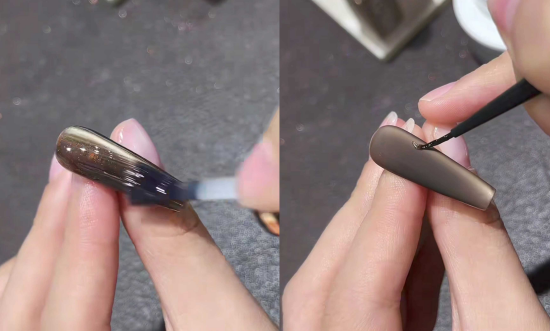
– Prendete della “pasta modellabile non collassabile” e usate un pennellino sottile per disegnare i petali con la tecnica “tocco leggero – pressione forte – sollevamento leggero”: iniziate dal centro del fiore e procedete verso l'esterno.
I triangoli irregolari sono utilizzati per rappresentare le pieghe naturali delle rose d'epoca, che sono stratificate dall'interno verso l'esterno e da grandi a piccoli, consentendo alla texture dei petali di essere chiara e non collassare.

– Decora con le foglie: disegna delle forme di foglie accanto ai fiori, una accanto all'altra.
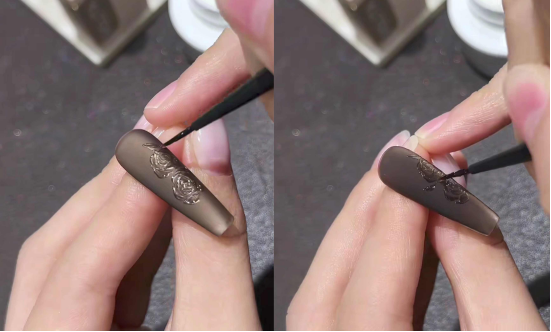
Le pennellate seguono da vicino i bordi dei petali, simulando il modello di crescita dei fiori reali.
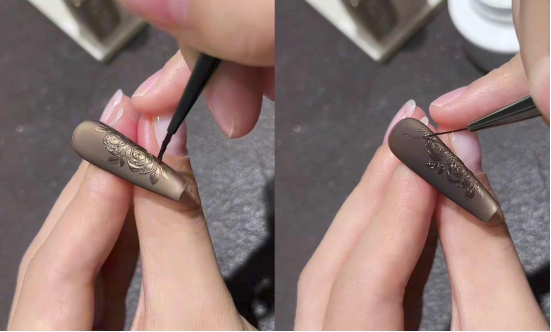
Fase 3: polvere d'oro di rocca + colorazione dettagliata
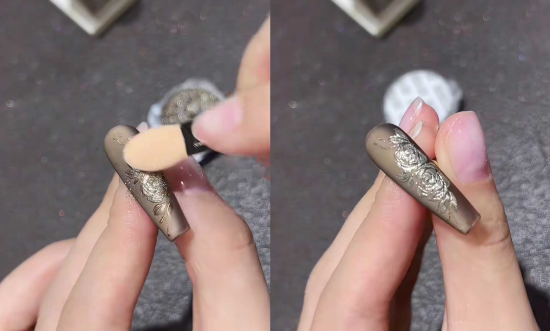
– Dopo aver fatto indurire la colla per modellismo sotto una lampada, prendete un po' di polvere di oro rosa e strofinatela delicatamente sulle zone intagliate con una spugna.
Spazzare via ogni residuo di polvere. La polvere dorata si fonde con la base opaca per creare un look sottile e lussuoso.
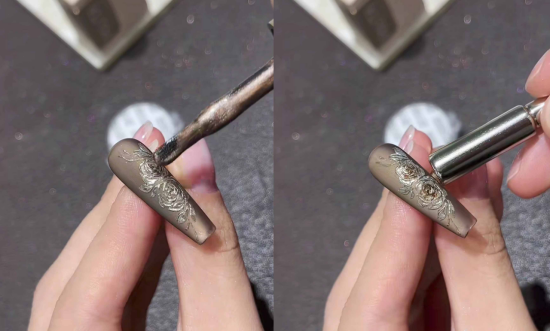
– Applicare la colla (colore 807) al centro del fiore, utilizzare una calamita per rimuovere parte della polvere magnetica occhio di gatto e lasciare che il centro del fiore appaia color ambra, sfumando naturalmente dal centro verso i bordi per esaltare gli strati vintage.
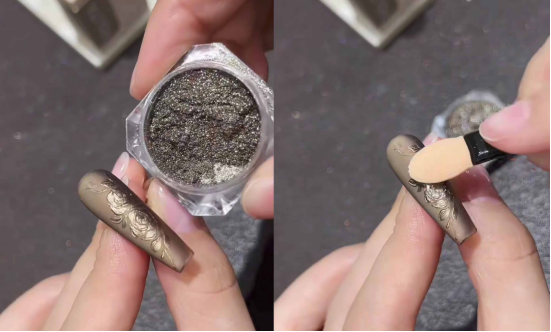
Fase 4: sigillatura e decorazione
– Applicare uno strato di Magic Mirror Powder per coprire l'intera unghia. Questo fisserà la polvere dorata, proteggerà l'incisione e ripristinerà la lucentezza traslucida della superficie dell'unghia.
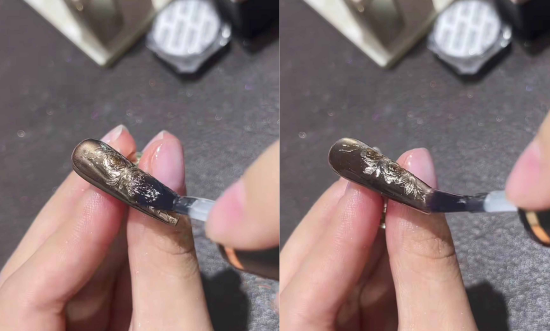
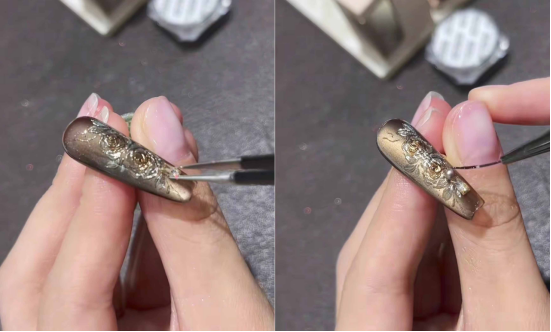
– Applica raffinati accessori in metallo/perle sui fiori o sulle zone vuote della superficie dell'unghia, fissali con la colla di base e completa il look retrò.
Conclusione
Una volta completata, la superficie dell'unghia presenterà sia la texture scintillante dell'occhio di gatto che l'eleganza vintage delle decorazioni tridimensionali, risultando un abbinamento sofisticato per qualsiasi stile di abbigliamento. Seguendo i passaggi, anche i principianti potranno realizzare unghie lussuose ed eleganti.
Nel tutorial ho utilizzato CHROMÉCLAIR Smalto gel senza HEMA. I loro prodotti sono sicuri e ipoallergenici (senza HEMA e senza TPO), ecocompatibili e privi di ingredienti irritanti e dannosi, proteggendo la salute delle tue unghie. È disponibile un'ampia gamma di colori, sempre al passo con le ultime tendenze, per un utilizzo sicuro e un look impeccabile!
Se riscontrate qualche problema durante il processo, potete guardare il video tutorial qui sotto. Se il tutorial vi è stato utile e vi è piaciuto, ricordatevi di dare un pollice in su, di salvarlo e di abbonarvi a me. Alla prossima!