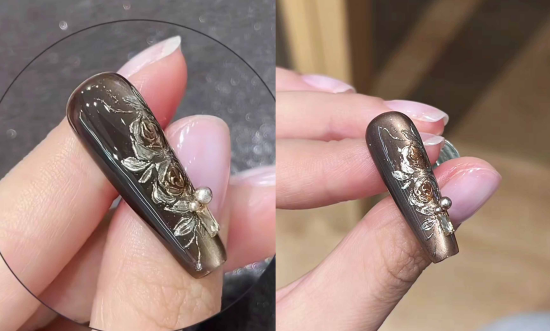
Este tutorial comparte un tutorial de nail art "floral 3D retro", desde el color base hasta el diseño floral 3D y el recubrimiento en polvo, utilizando instrucciones paso a paso para recrear una textura lujosa.
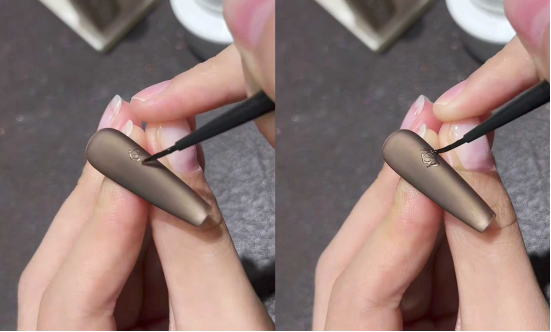
Paso 1: Crear el color base para el cat eye
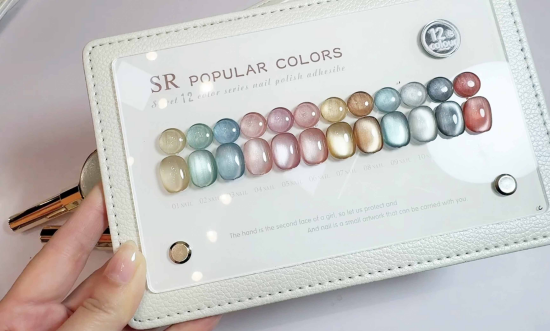
Aplique una fina capa de esmalte en gel cat eye gel to the entire nail (I used CHROMÉCLAIR’s Esmalte en gel sin hema Nº 807, que tiene un color sofisticado y de alta calidad y no es tóxico ni saludable).
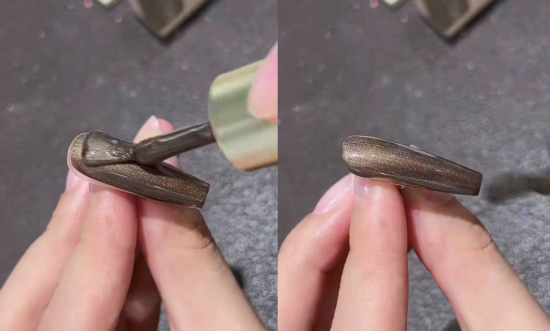
Use a magnet to sweep back and forth on one side of the nail surface to create a noticeable side glow. This cat’s eye gel magnetic powder is densely concentrated, so even a quick sweep can give the nail surface a metallic luster, laying a luxurious foundation for a retro look.
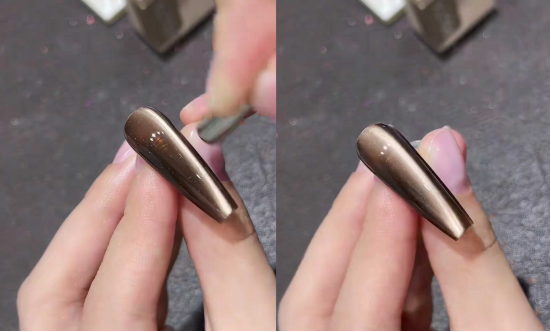
Paso 2: Sellador mate al estilo ruso + talla tridimensional
Recommended next step
Build the Nail Art Look Kit
Tutorial looks need more than a color bottle. Choose the color, art detail, transfer or sticker step, and a top coat as one look kit.
- Choose the main color or set.
- Add the art detail: sticker, transfer gel, magnet, or brush.
- Seal the finished look with top coat.
– First apply Russian-style matte sealant: the matte texture makes the subsequent carving more three-dimensional and avoids the sticky feeling of a glossy finish.
– Take some “non-collapsible modeling clay” and use a fine brush to draw the petals using a “light touch – heavy pressure – light lift” technique: starting from the center of the flower and working outward.
Se utilizan triángulos irregulares para representar los pliegues naturales de las rosas de época, que se superponen de dentro a fuera y de grande a pequeño, lo que permite que la textura de los pétalos sea clara y no se colapse.

– Decorate with leaves: Draw leaf shapes next to the flowers, one next to the other.
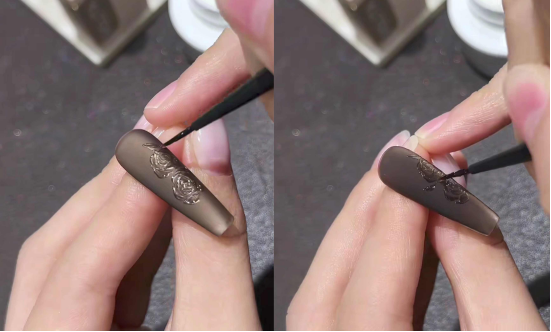
Las pinceladas siguen de cerca los bordes de los pétalos, simulando el patrón de crecimiento de las flores reales.
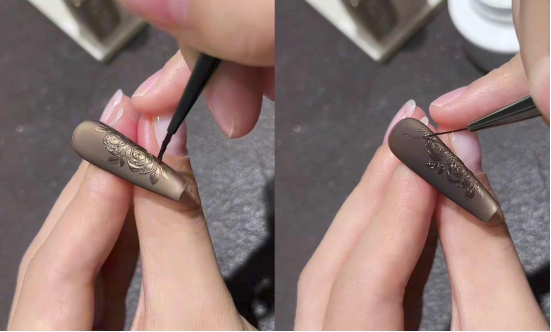
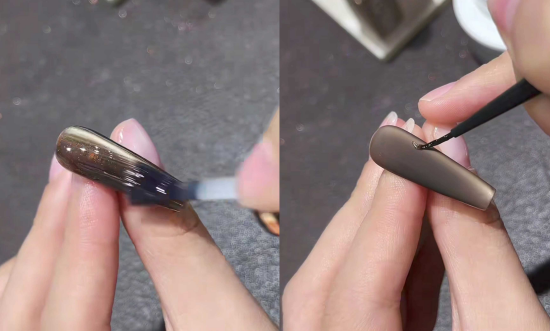
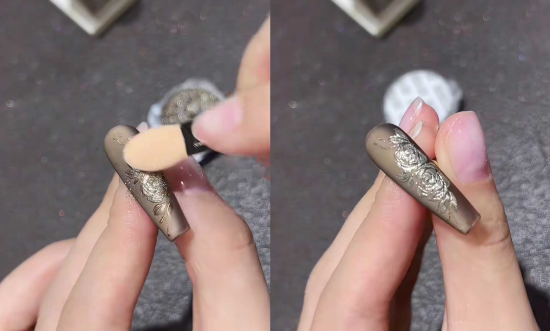
Paso 3: Polvo Rock Gold + Coloración detallada
– After curing the modeling glue under a lamp, take some rock gold powder and lightly rub it onto the carved areas with a sponge.
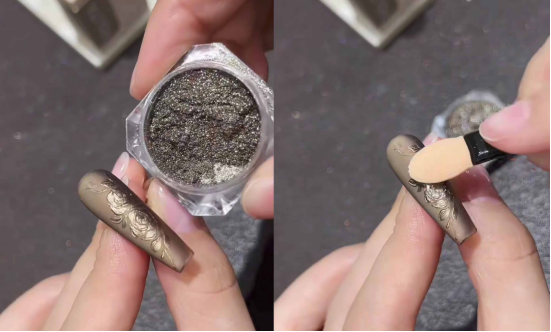
Elimina cualquier resto de polvo. Los polvos dorados se funden con la base mate para crear un look sutil y lujoso.
– Apply (807 color glue)to the center of the flower, use a magnet to remove some of the cat’s eye magnetic powder, and allow the center of the flower to appear “amber-colored,” naturally blending from the center to the edges to enhance the vintage layers.
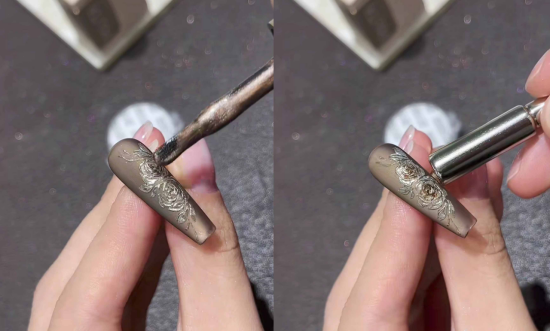
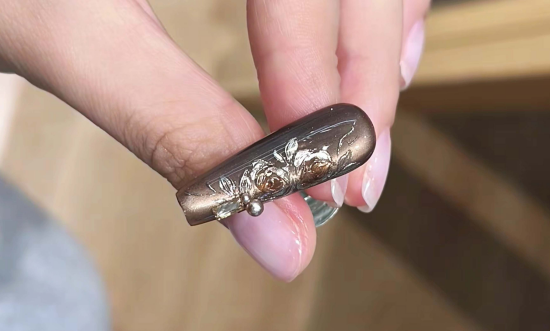
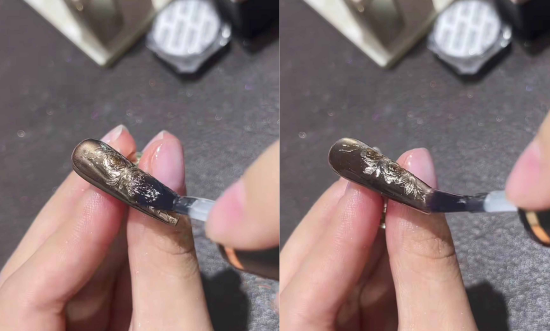
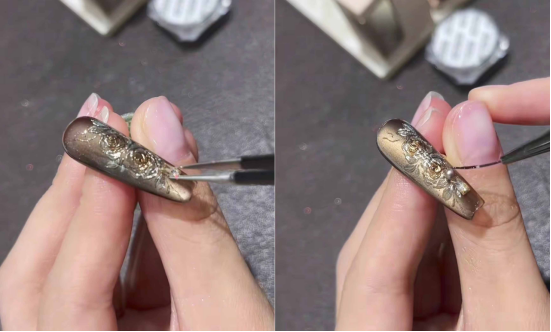
Paso 4: Sellado y decoración
– Apply a layer of Magic Mirror Powder to cover the entire nail. This will fix the gold powder in place, protect the carving, and restore the translucent luster of the nail surface.
– Apply exquisite metal/pearl accessories to flowers or blank areas of the nail surface, secure with base glue, and complete the retro look.
Conclusión
Once completed, the nail surface will have both the shimmering texture of cat’s eyes and the vintage elegance of three-dimensional carvings, making it a sophisticated match for any style of clothing. By following the steps, even beginners can recreate luxurious and elegant nails.
In the tutorial, I used CHROMÉCLAIR’s Esmalte en gel sin HEMA. Their products are safe and hypoallergenic (HEMA-free & TPO-free), environmentally friendly, and free of irritating and harmful ingredients, protecting the health of your nails. There is a wide range of colors to choose from, keeping up with the latest trends, so you can use them with confidence and look good!
Si te encuentras con algún problema durante el proceso, puedes ver el vídeo tutorial a continuación. Si el tutorial te resulta útil y te gusta, recuerda darle un pulgar arriba, guardarlo y suscribirte a mí. ¡Hasta la próxima!