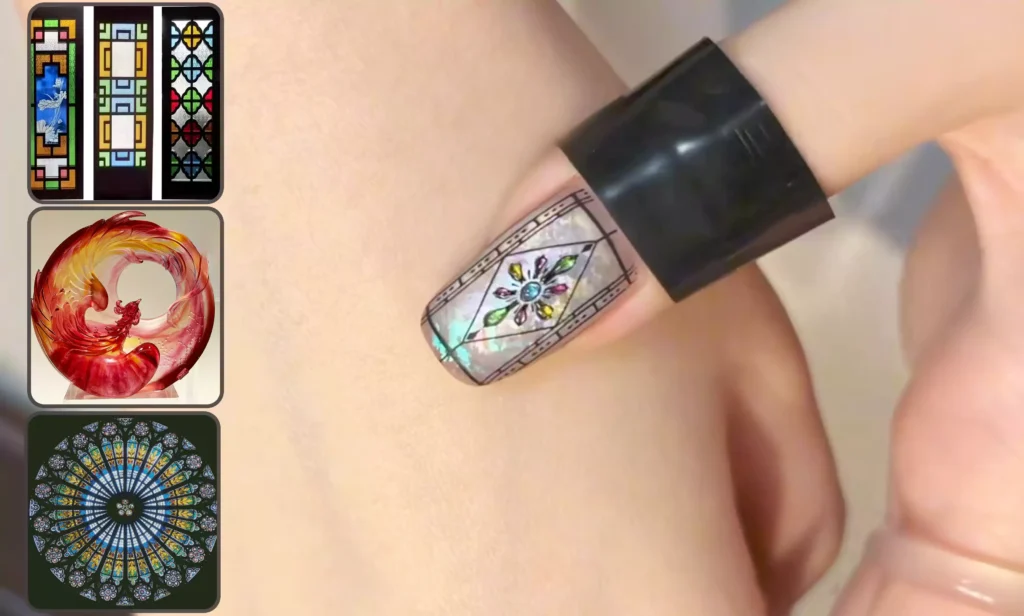
Want a manicure that combines vintage charm with artistic flair?Hello everyone! I’m a star employee at CHROMÉCLAIR, a brand of hema free gel polish brands.Today we’re bringing you this eye-catching stained glass flower window nail art tutorial with detailed steps—come check it out!
Step 1:
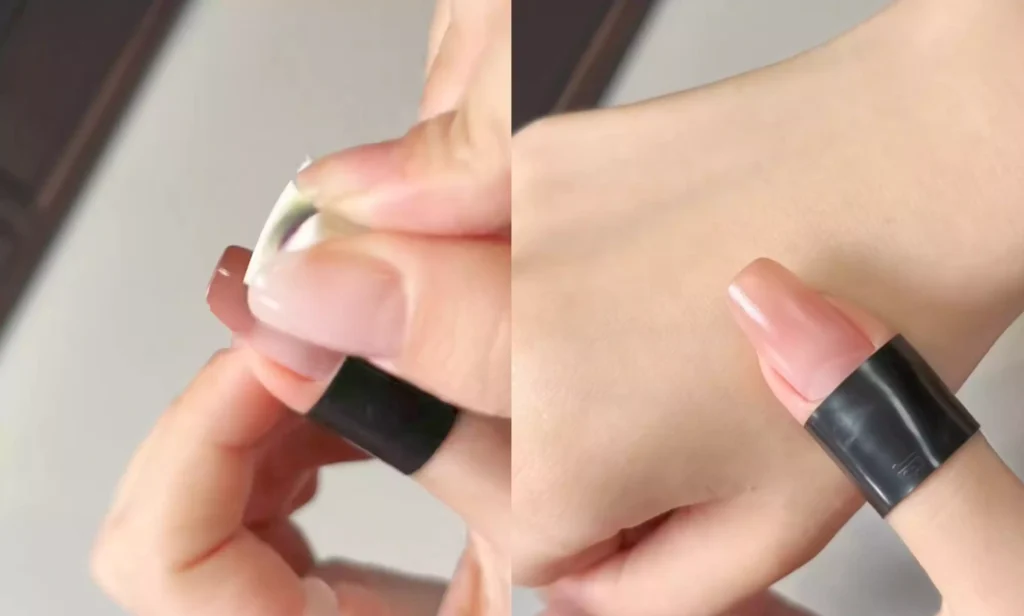
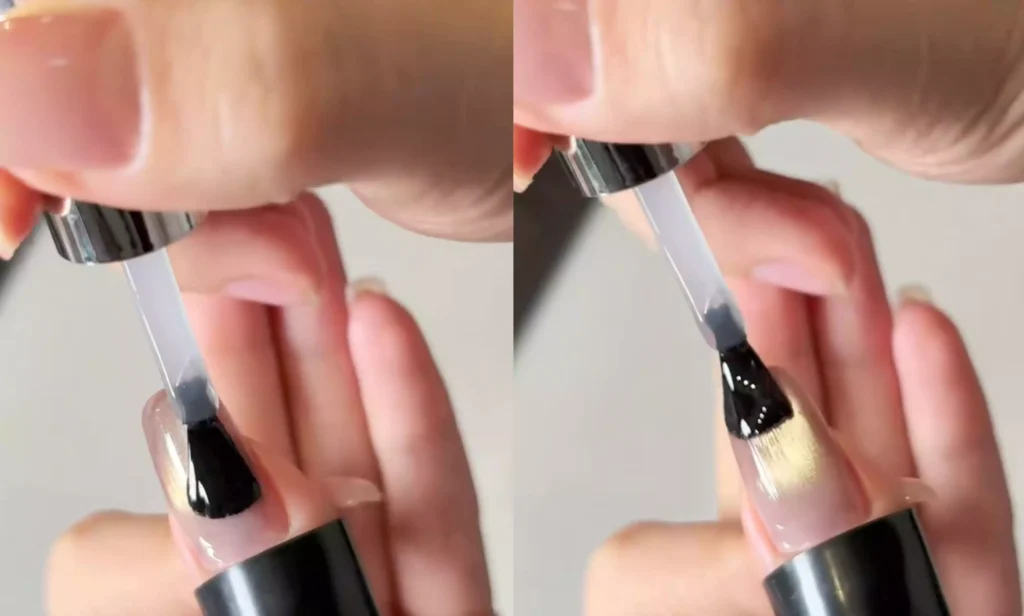
· First, prepare your nails for the manicure. Carefully shape and trim your nails, buff the nail surface until smooth and even, then apply a suitable base coat. Cure under the lamp to create a solid foundation for subsequent steps. Next, address the edges: dip a sponge into dabbing gel and gently pat it over the free edge to conceal it.
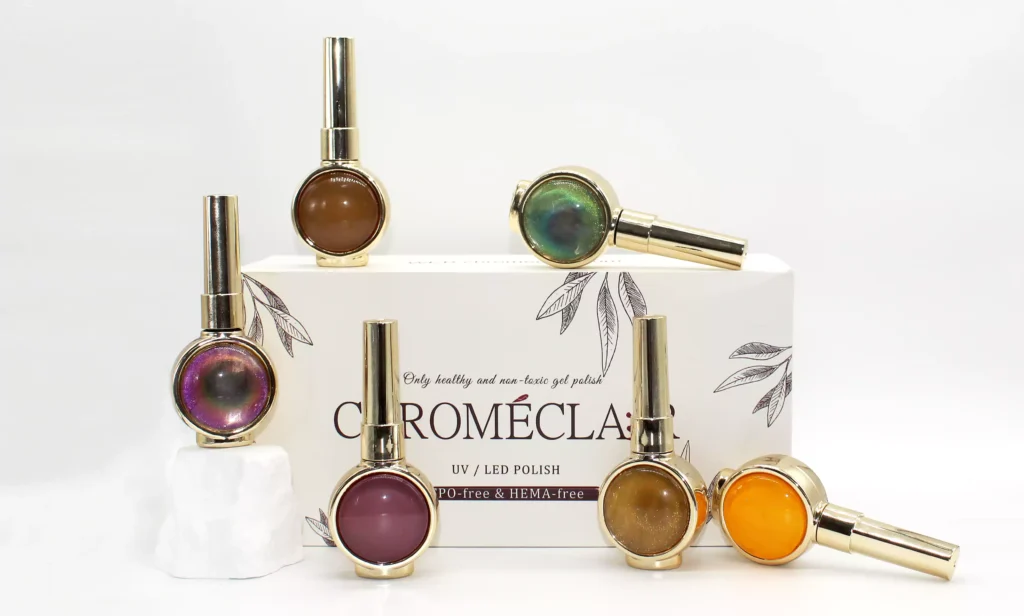
· Next, apply the cat-eye gel polish as a base coat (I used CHROMÉCLAIR’s Hema Free Gel Polish CE series—this cat-eye gel has an exceptional texture that effortlessly forms beautiful glass bead patterns, giving the nail base a luxurious finish).
Use a magnet to draw circles and create a glass bead-like texture.
Recommended next step
Build the Nail Art Look Kit
Tutorial looks need more than a color bottle. Choose the color, art detail, transfer or sticker step, and a top coat as one look kit.
- Choose the main color or set.
- Add the art detail: sticker, transfer gel, magnet, or brush.
- Seal the finished look with top coat.
Step 2:
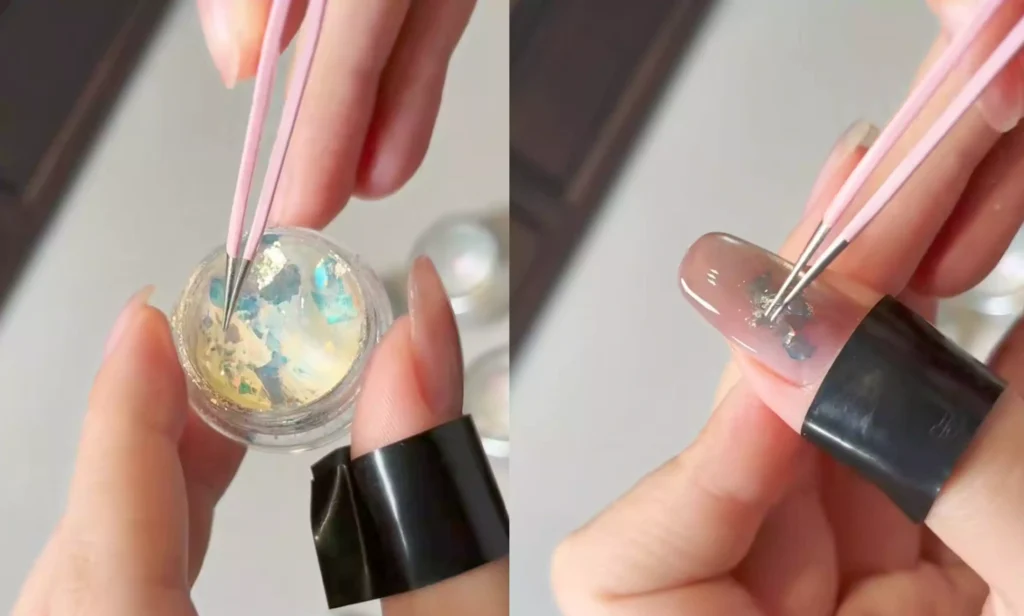
– After the base adhesive is properly applied, apply the reinforcement adhesive. Note: Do not cure with a lamp at this stage.
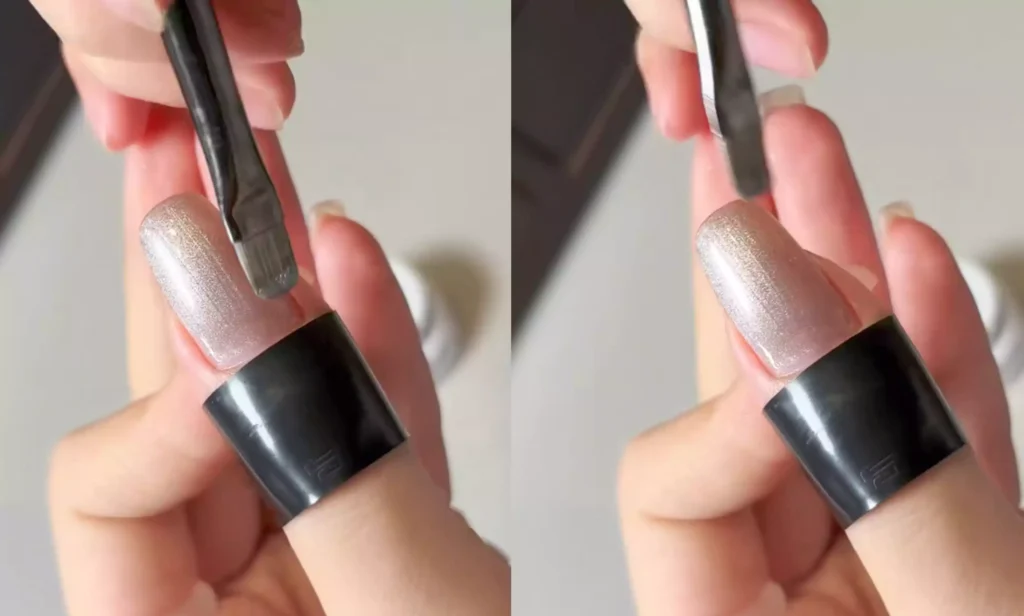
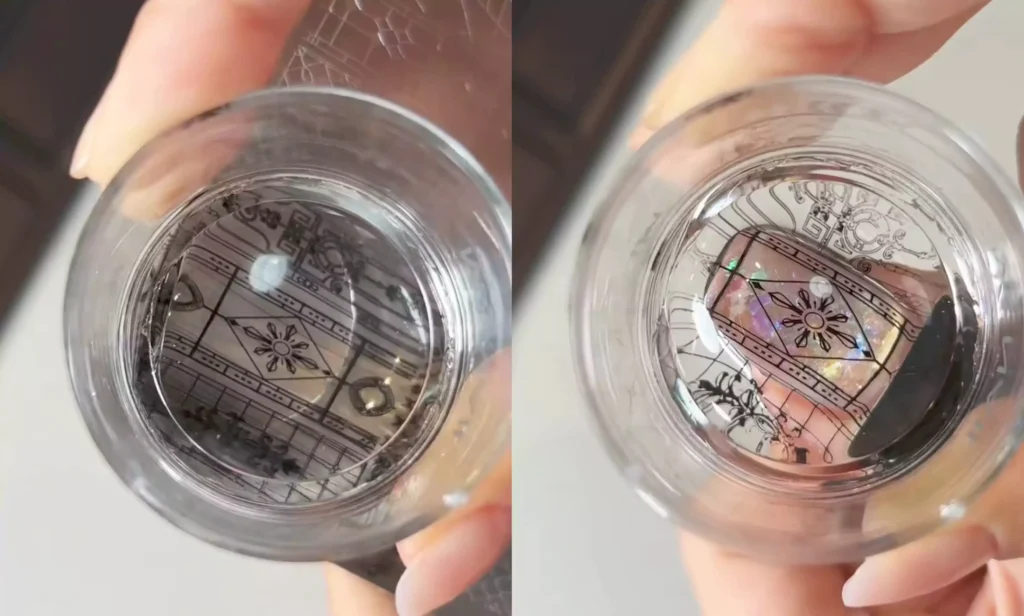
Then prepare opal powder in different colors. Using tweezers, carefully scatter the opal powder in staggered sections across the nail. Each color of opal powder creates a distinct refractive effect, shimmering under light as if the stars themselves were embedded at your fingertips.
– After decorating, cure the backlight, then apply the reflow leveling compound.
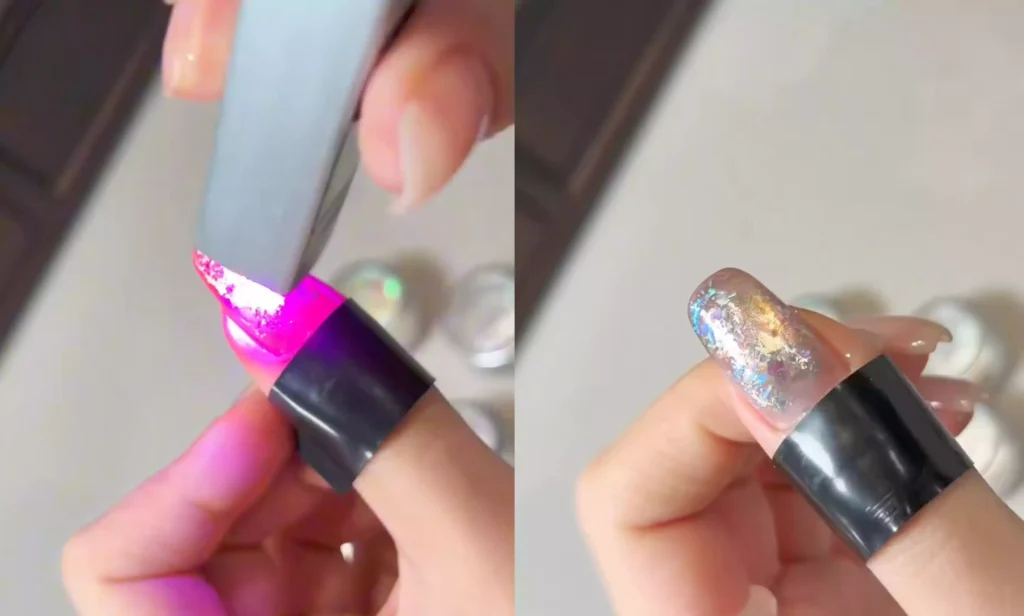
Wipe off the excess gel, then buff the nail surface smooth with a sponge buffer to achieve a more polished and refined finish.
Step 3:
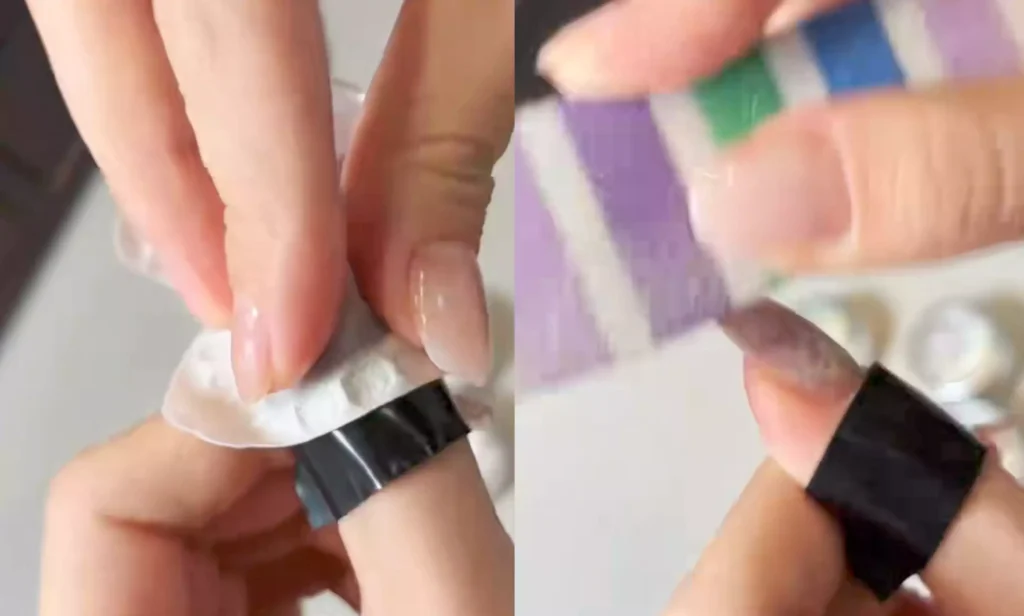
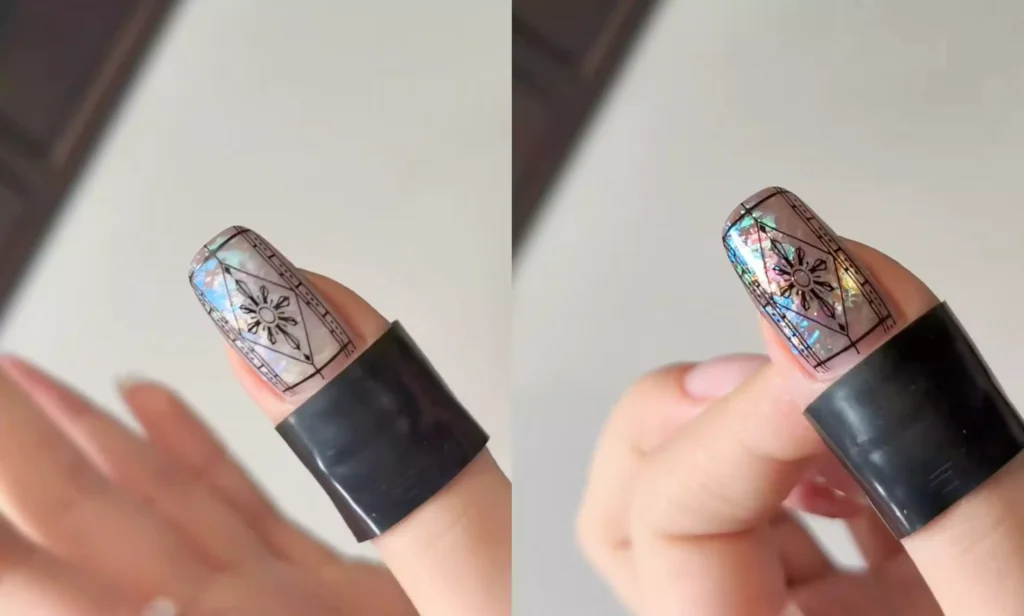
Next comes the pattern transfer stage. Select your favorite stained glass window pattern and transfer it onto your nails.
After the transfer is complete, wipe off any excess adhesive and cure under the lamp. At this point, you can choose your preferred finish—matte or glossy? If you prefer a matte finish, apply a matte topcoat; if you prefer a glossy finish, apply a glossy topcoat.
Step 4:
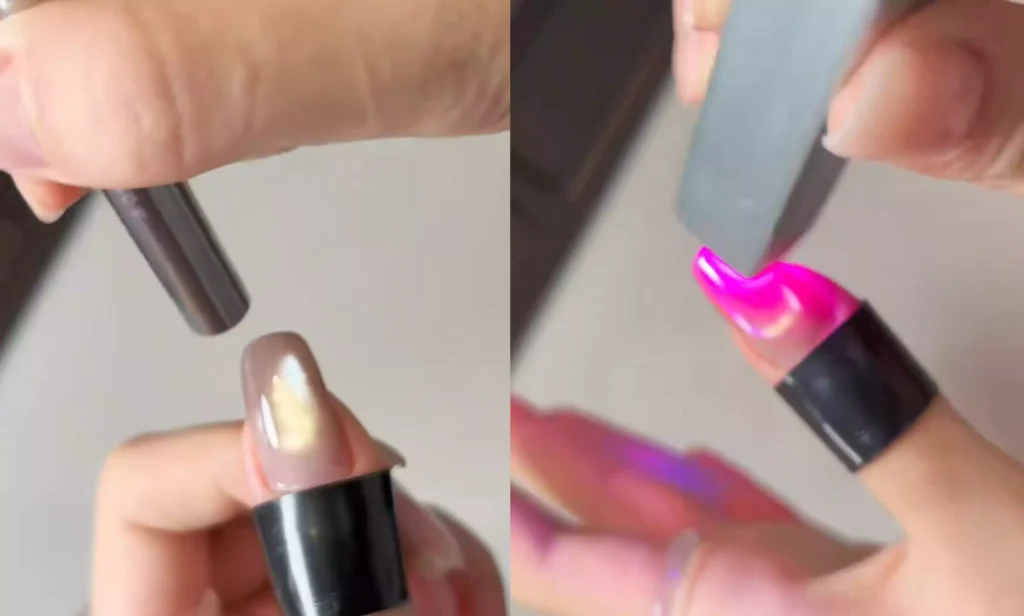
To add a touch of elegance to your manicure, after applying the matte top coat, use cat’s eye gel polish to incorporate subtle details. Use a magnet to create the cat’s eye effect, enhancing the richness of your nail art’s intricate details.
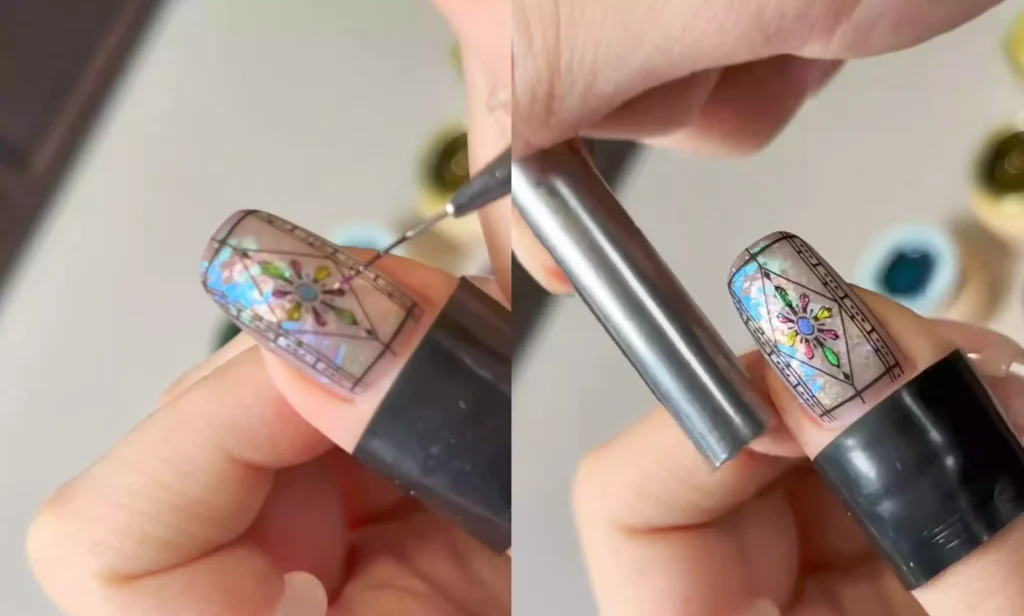
Afterward, the cat’s eye section is layered with blue diamond coating to build a three-dimensional shape. Each light is painted individually, enhancing the sculpted effect.

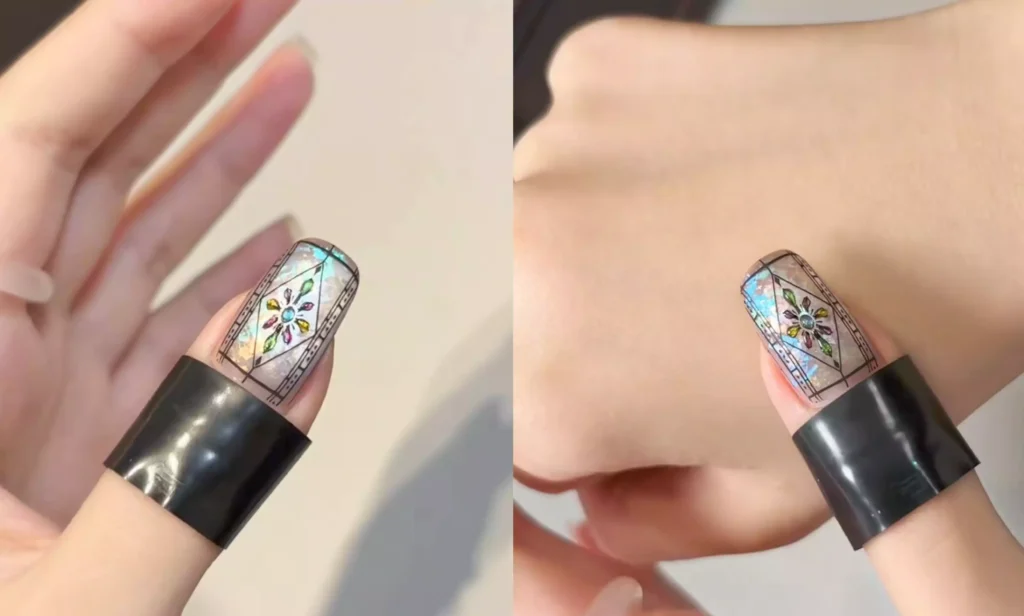
After following these steps, your stunning vintage-inspired stained glass floral nail art is complete. It truly looks gorgeous, brimming with retro charm. Give it a try and let your fingertips showcase this exquisite artistic flair.
In this tutorial, I’m using CHROMÉCLAIR gel polish. This product prioritizes safety, low irritation, and eco-friendliness by being free of harmful ingredients, reducing allergy risks (HEMA-free Gel Polish). It nurtures healthy nails and offers a diverse range of shades to suit mainstream aesthetics, ensuring every consumer enjoys a safe and worry-free experience.
If you run into any issues during the process, check out the video tutorial below. If you find the tutorial helpful and like it, remember to give it a thumbs-up and save it. Subscribe to my channel! See you next time for another tutorial!