
From Nail Health to Application Techniques: Avoiding 90% of Manicure Pitfalls
Hi, nail art lovers! I’m Starry. With eight years of in-depth experience in the nail materials industry—from front-line material testing to providing hands-on guidance in nail salons—I’ve seen countless friends ruin their healthy nails, leaving them thin, brittle, and even inflamed or swollen, all due to a lack of knowledge about nail care, incorrect product choices, and improper techniques.
In this article, I’m cutting through the fluff. Drawing on my practical experience and industry know-how, I’ll cover everything from nail health and product selection to proper application and removal care. This is your one-stop guide to navigating all your nail art confusions, helping you look stylish while protecting your natural nails!
I. Prioritize Nail Health Before Manicures: Healthy Nails are the Foundation of Beauty
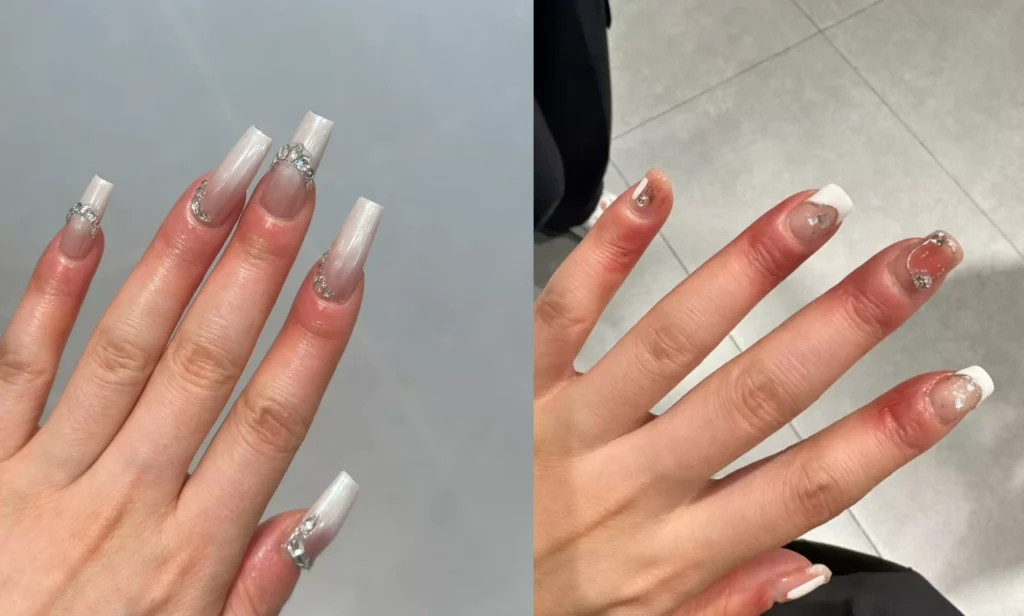
Many people only care about the design’s appearance, neglecting the health of their natural nails. Remember, damaged nails, no matter how delicate the design, cannot support long-lasting beauty. Instead, they trap you in a vicious cycle: get a manicure → damage nails → nails become weaker → need frequent touch-ups. Based on thousands of nail cases I’ve encountered over the years, be sure to avoid these three key nail health pitfalls!
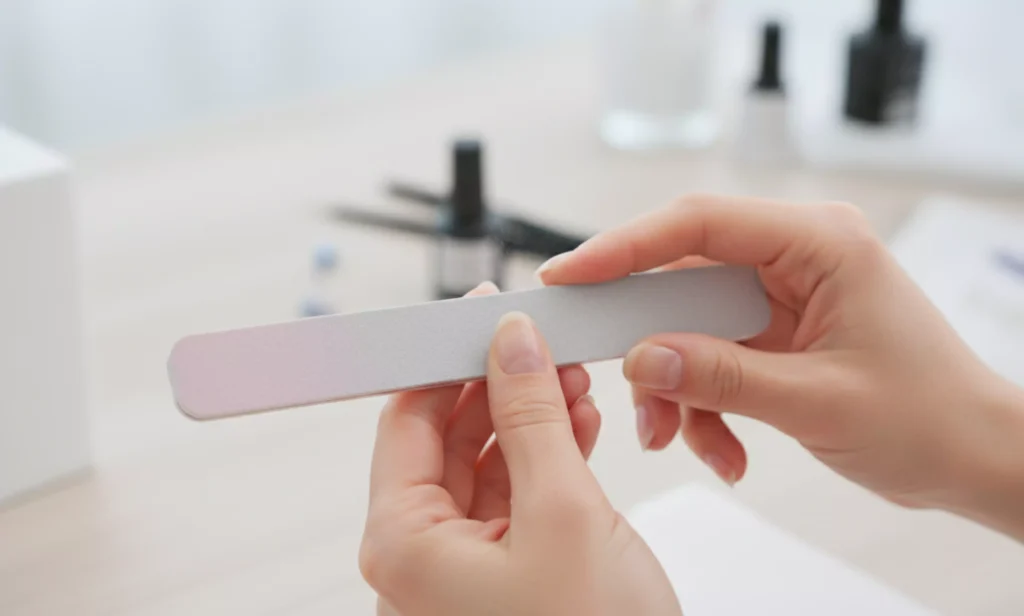
1. Over-Buffing: The “Invisible Killer” of Nails – 90% of People Make This Mistake
I remember visiting a partner nail salon for an inspection and saw a technician repeatedly buffing a client’s nail surface with a coarse file, even abrading the cuticle area. The client thought, “This will make the gel polish last longer,” but this is a huge misconception!
The nail surface has a protective layer. Over-buffing directly removes this “protective film,” making nails thin, brittle, and prone to breakage. It also makes it easier for fungi and bacteria to invade, potentially causing nail bed inflammation.
Here’s a practical tip (proven effective):
- When prepping, use a fine-grit file (180-240 grit). Gently buff the nail surface just enough to remove the oil and shine – there’s no need to abrade the top layer.
- File in one direction (from cuticle to tip). Avoid sawing back and forth, which can cause nail peeling and layering.
- Gently push back cuticles with a cuticle pusher and carefully trim only the dead skin with cuticle nippers. Never buff the cuticle area.
2. Nail Hygiene: A Small Detail Hiding a Major Safety Risk
The cleanliness and dryness of your nails before a manicure directly determine the risk of subsequent infection. I once had a client whose nails became red, swollen, and itchy three days after a manicure. A hospital check confirmed a fungal infection – traced back to residual hand cream on the nails that wasn’t thoroughly cleaned before the procedure.
The correct cleaning steps are simple but must be done properly: First, wipe the nail surface with an alcohol pad to remove oil and dust. Then, dry it with a clean cotton pad, ensuring the nail is completely dry before proceeding. Remember: a damp nail surface not only affects gel adhesion but also becomes a breeding ground for bacteria.
3. Schedule a Rest Period: Give Your Nails a “Breather” for Lasting Beauty
I have many friends who change their nail designs almost weekly, sometimes getting a new set immediately after removal. Over time, their nails become paper-thin and break at the slightest bump. According to industry data, continuously getting manicures for over three months without a break leads to an 82% rate of nail damage.
My advice: Every 4-6 weeks, let your nails rest for 1-2 weeks. During this period, don’t apply any gel polish. Apply a nail strengthener or nourishing oil daily to allow your nails to grow naturally and repair. Don’t worry about them looking plain – a simple coat of clear nourishing polish protects them and looks clean and neat.
II. Choosing the Right Products: Safety First, Aesthetics Second (With Tried-and-Tested Recommendations)
As someone working in nail materials, I encounter various gel polishes daily and have seen countless “no-name” products containing harmful ingredients like formaldehyde, TPO, and HEMA. Long-term use not only damages nails but can also affect overall health through skin absorption. My product selection criteria boil down to two things: safety and practicality.
1. Choose Certified Products, Avoid the “No-Name” Trap
To cut costs, many small nail salons use cheap, unregulated gel polishes. These products often lack testing reports, have unclear ingredients, emit a strong, pungent odor, and can cause nails to yellow and become brittle.
Here’s a simple way to tell: When buying gel polish, always check the packaging for the brand name, manufacturer, ingredient list, and testing reports – all are essential. Polishes from reputable brands have a mild odor, cure properly without much tacky residue, and are less irritating to nails.
2. Understand the Ingredient List: Avoid Harmful Substances, Prioritize Nourishing Formulas
Many people only look at the color and ignore the ingredient list. However, the ingredient list is key to judging product quality, especially for those with sensitive skin or brittle nails. Pay close attention to these points:
- Avoid Harmful Ingredients: TPO (a photoinitiator that can irritate skin with long-term exposure), HEMA (can cause allergies), and formaldehyde (a carcinogen that damages nails and the respiratory tract).
- Prioritize Nourishing Ingredients: Gel polishes containing ingredients like squalane, vitamin E, or panthenol can nourish nails during the manicure, reducing damage.
- Best for Sensitive Skin: Look for polishes labeled “TPO free gel polish” and “HEMA free gel polish.” They are less irritating and less likely to cause allergies.
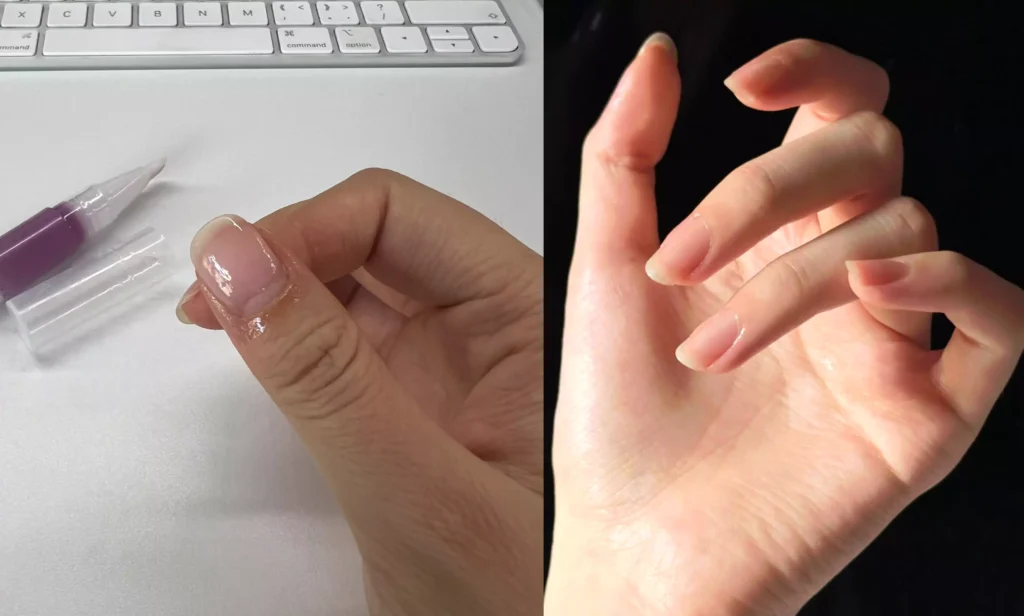
3. Tried-and-Tested Recommendation: CHROMÉCLAIR Gel Polish – Safe and Beautiful
Having been in this industry for so long, I’ve used many brands. CHROMÉCLAIR gel polish is one I consistently recommend to friends and partner salons – primarily because I’ve personally been involved in testing its components, so its safety and practicality are proven.
The biggest highlight of their gel polish is that it’s “TPO-free & HEMA-free,” completely omitting these two potentially irritating and allergenic components. It’s safe for sensitive skin and brittle nails. It also focuses on being low-sensitivity and environmentally friendly, with almost no odor upon application and a beautiful, glossy finish after curing.
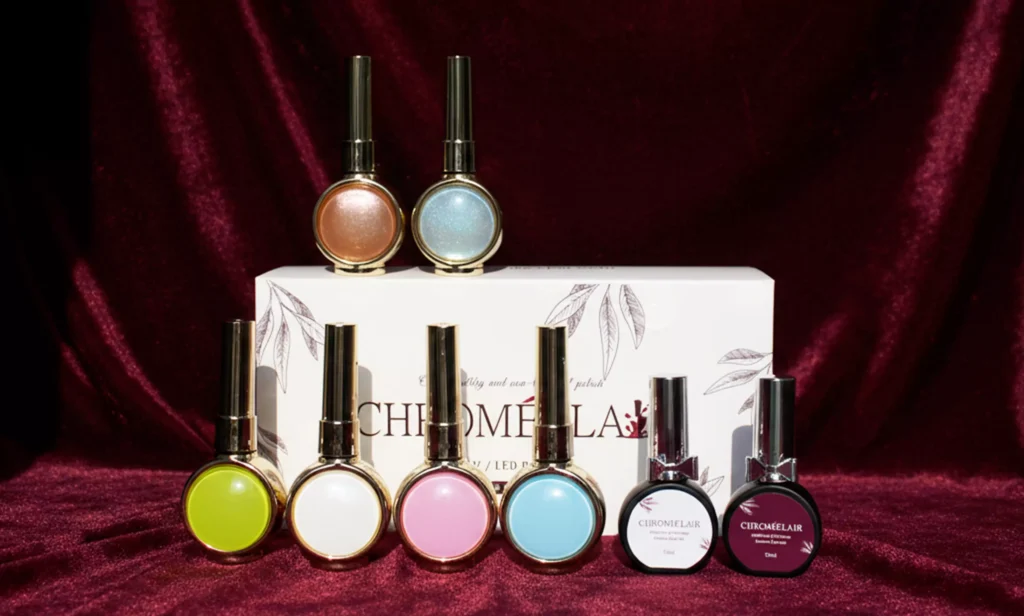
Beyond that, its advantages are clear: a vast range of colors, from daily nudes and soft mauves to trendy brights, keeping up with current nail art aesthetics. Its lasting power is excellent, testing to hold for about 21-35 days with normal activities like housework and typing. The consistency is smooth, making it easy even for beginners to apply without visible brush strokes.
III. Standardized Application: Details Determine Manicure Longevity and Nail Health
With the right products and good nail preparation, improper application ruins everything. I’ve seen many cases where a technician’s incorrect technique damaged nails, caused premature peeling, or even led to infection. Pay close attention to these three operational details!
1. Tool Sterilization: A Major Source of Cross-Infection – Never Overlook It
If nail tools (scissors, tweezers, files, pushers, etc.) aren’t sterilized promptly, they can harbor bacteria and fungi from the previous client, easily leading to cross-infection. Every time I visit a salon, the first thing I check is if the technician sterilizes their tools – it’s a key indicator of a professional shop.
The correct method: After each use, wipe the tool surfaces with a 75% alcohol pad. For items like files that are difficult to wipe, they should be placed in a professional sterilizer (like a UV cabinet or autoclave). Tools should be stored separately to avoid contamination.
2. Technician Qualification: Let Professionals Do Their Job
A skilled technician doesn’t just create beautiful designs; they also protect your nails during the process. I once mentored a beginner technician who, unfamiliar with proper surface preparation, applied gel polish in thick, repeated coats. This led to a thick layer that was prone to peeling and also damaged the nail surface.
I recommend choosing technicians with professional certifications and at least three years of experience. Skilled technicians can adapt their techniques based on your nail condition. For instance, they will use less pressure when buffing thin nails to avoid excessive damage.
3. Avoid Excessive Embellishments: Looks Good, Impractical, and Damaging
Many love to adorn their nails with numerous rhinestones, pearls, or complex 3D sculptures, thinking it looks more exquisite. However, too many decorations increase the nail’s burden, causing uneven stress distribution, making nails prone to warping and breakage. The edges of decorations can also trap dirt, making cleaning difficult and increasing infection risk.
My suggestion: For everyday wear, opt for simpler designs with just one or two accent embellishments. If you do get a complex design, don’t keep it for more than one week; remove it promptly to reduce the strain on your nails.
IV. Removal + Daily Care: A Strong Finish Nurtures Nails Back to Health
Many focus only on the application process, neglecting removal and daily aftercare. In reality, improper removal can be more damaging than the manicure itself. Consistent daily care keeps nails healthy and prolongs the life of your manicure.
1. Proper Removal: Never Peel or Pry – Gentle Removal is Key
The most damaging behavior I see is people, finding gel polish hard to remove, using scissors or coarse files to forcibly scrape or peel it off. This strips away the nail’s surface layer, leaving nails thin, sensitive, and potentially causing onycholysis (separation of the nail plate from the nail bed).
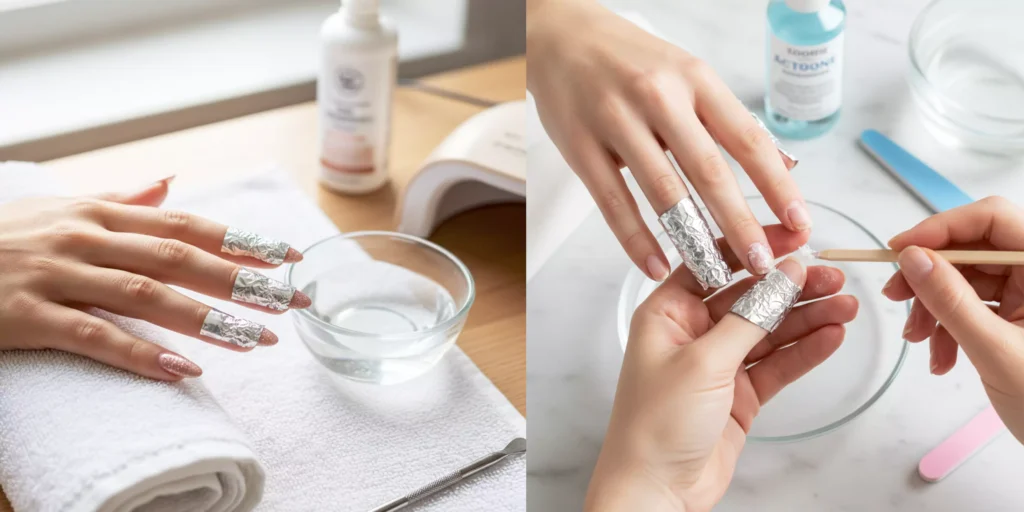
Correct removal steps (tested to be non-damaging):
- Gently buff the top layer of the gel polish with a fine-grit file to remove the shiny topcoat (this helps the remover penetrate).
- Soak a cotton pad with professional nail polish remover (acetone-based), place it on the nail, and wrap securely with foil. Wait for 10-15 minutes.
- After the time is up, gently wipe the nail. The gel should slide off easily. If there’s any residue, gently push it off with a wooden cuticle stick – never scrape forcibly.
- After removal, wipe the nail with an alcohol pad to remove any remaining remover.
2. Post-Removal Care: Timely Repair and “Nourishment” for Nails
After removal, nails are in a vulnerable state and need timely care; otherwise, they’ll continue to weaken. Every time I remove my polish, I do a simple care routine:
- Apply cuticle oil, massaging it into the cuticles and surrounding skin to relieve dryness and prevent hangnails.
- Apply a nourishing nail strengthener or treatment, covering the entire nail plate to provide nutrients and repair the surface.
- Continue applying the nail treatment 1-2 times daily for 3-5 days to help nails recover quickly.
3. Daily Maintenance: Small Habits for Longer-Lasting Manicures & Healthier Nails
After getting a manicure, paying attention to small daily details can significantly extend its life and protect your nails. Remember these points:
- Avoid Harsh Chemicals: Always wear rubber gloves when doing housework (washing dishes, laundry) to prevent nails from directly contacting detergents and cleaners. These substances can corrode the gel polish and damage nails.
- Watch Out for Impacts: Nails are somewhat more vulnerable post-manicure. Avoid knocking them against hard objects (like opening doors or lifting heavy items) to prevent breakage or chipping.
- Trim Regularly: Even with a manicure, trim your nails regularly to maintain an appropriate length (recommended free edge no longer than 1cm). This prevents excessive leverage that can lead to breakage.
V. Looking Ahead: The Future of Manicures Emphasizes “Health and Convenience”
In my eight years, I’ve clearly seen the industry shift – from purely pursuing aesthetics to a growing focus on health, low-sensitivity formulas, and convenience. Looking at current trends, I have a hypothesis: “Skinification of nails” or “treatment manicures” will become mainstream.
This means deeply integrating manicures with nail care. Gel polishes won’t just be safe and low-sensitivity; they’ll be infused with more nourishing ingredients, continuously treating nails during wear. Application and removal will become more convenient, with innovations like peel-off or quick-dry formulas that satisfy our desire for beauty while minimizing damage during removal.
Of course, this requires continuous innovation from the nail materials industry to develop safer, more practical products. It also requires us, as consumers, to adopt a “health first, beauty second” mindset, truly making manicures a healthy and fashionable lifestyle choice.
Finally, I’d Like to Ask You…
Have you ever experienced nail damage or allergies related to manicures? What’s your top priority when choosing nail products? Feel free to share your experiences and thoughts in the comments! Let’s exchange tips on nail care and beauty, and become “beautiful and healthy” nail art enthusiasts together!