
De la salud de las uñas a las técnicas de aplicación: Cómo evitar 90% de errores de manicura
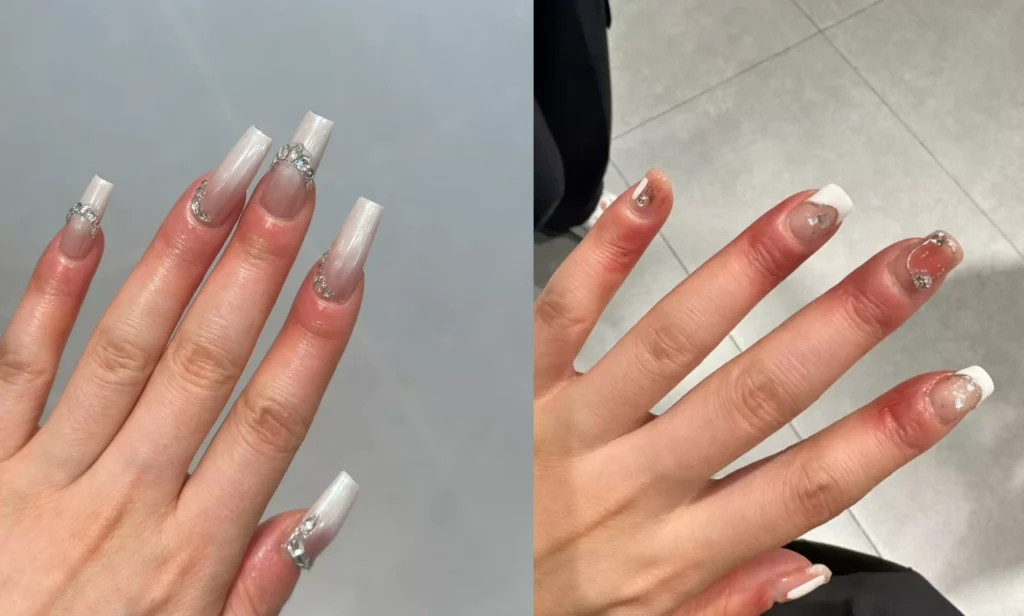
¡Hola, amantes del nail art! Soy Starry. Con ocho años de amplia experiencia en la industria de materiales para uñas, desde pruebas de materiales de primera línea hasta asesoramiento práctico en salones de belleza, he visto a muchísimas amigas arruinar sus uñas sanas, dejándolas finas, quebradizas e incluso inflamadas o hinchadas, todo por falta de conocimiento sobre el cuidado de las uñas, elección incorrecta de productos y técnicas inadecuadas.
En este artículo, voy al grano. Basándome en mi experiencia práctica y mi conocimiento del sector, abordaré todo, desde la salud de las uñas y la selección de productos hasta la correcta aplicación y eliminación. Esta es tu guía definitiva para resolver todas tus dudas sobre manicura, ¡ayudándote a lucir elegante mientras proteges tus uñas naturales!
I. Dar prioridad a la salud de las uñas antes que a la manicura: Unas uñas sanas son la base de la belleza
Muchas personas solo se preocupan por la apariencia del diseño, descuidando la salud de sus uñas naturales. Recuerda que las uñas dañadas, por muy delicado que sea el diseño, no pueden mantener una belleza duradera. En cambio, te atrapan en un círculo vicioso: manicura → uñas dañadas → uñas debilitadas → necesidad de retoques frecuentes. Basándome en miles de casos de uñas que he visto a lo largo de los años, ¡asegúrate de evitar estos tres errores clave en el cuidado de tus uñas!
1. Pulido excesivo: El “asesino invisible” de las uñas: 90% de personas cometen este error.
Recuerdo haber visitado un salón de uñas asociado para una inspección y vi a una técnica puliendo repetidamente la superficie de la uña de una clienta con una lima gruesa, incluso irritando la zona de la cutícula. La clienta pensó: "Esto hará que el esmalte de gel dure más", ¡pero esto es un gran error!
Paso siguiente recomendado
Rutina de gel suave y de larga duración
La formación de burbujas, el descascarillado, la contracción y el desgaste opaco suelen ser problemas del sistema. Para lograr la manicura perfecta, aplica la base, el color y la capa superior al mismo tiempo.
- Prepara la placa ungueal antes de aplicar el color.
- Utilice una capa base que coincida con el sistema de gel.
- Finaliza con una capa protectora compatible para mayor durabilidad y brillo.
Compra un kit de rutina de larga duración.Ver capa superior sin necesidad de limpiarComparar todas las rutinas
La superficie de la uña tiene una capa protectora. El pulido excesivo elimina directamente esta capa protectora, lo que provoca que las uñas se vuelvan finas, quebradizas y propensas a romperse. Además, facilita la invasión de hongos y bacterias, lo que puede causar inflamación del lecho ungueal.
Aquí tienes un consejo práctico (de eficacia comprobada):
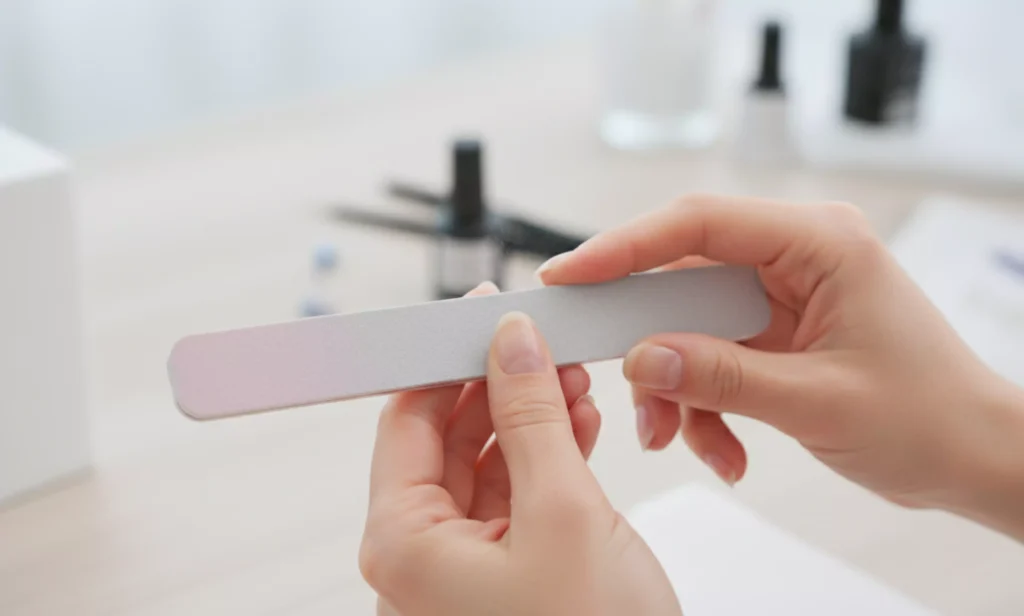
- Para preparar la uña, utilice una lima de grano fino (180-240). Pula suavemente la superficie lo suficiente para eliminar el aceite y el brillo; no es necesario desgastar la capa superior.
- Limar en una sola dirección (de la cutícula a la punta). Evite serrar hacia delante y hacia atrás, ya que puede provocar la descamación de la uña y la formación de capas.
- Empuja suavemente las cutículas hacia atrás con un empujador de cutículas y recorta con cuidado sólo la piel muerta con un alicate para cutículas. Nunca pulas la zona de las cutículas.
2. Higiene de las uñas: Un pequeño detalle que esconde un gran riesgo para la seguridad
La limpieza y el secado de las uñas antes de una manicura influyen directamente en el riesgo de infección posterior. Una vez tuve una clienta cuyas uñas se enrojecieron, se hincharon y le picaban tres días después de una manicura. Un examen médico confirmó una infección por hongos, causada por restos de crema de manos en las uñas que no se habían limpiado bien antes del procedimiento.
Los pasos correctos de limpieza son sencillos, pero deben hacerse adecuadamente: En primer lugar, limpie la superficie de la uña con una almohadilla con alcohol para eliminar el aceite y el polvo. A continuación, séquela con un disco de algodón limpio, asegurándose de que la uña esté completamente seca antes de continuar. Recuerde: una superficie de uñas húmeda no sólo afecta a la adherencia del gel, sino que también se convierte en un caldo de cultivo para las bacterias.
3. Programa un período de descanso: Dale un respiro a tus uñas para una belleza duradera.
Tengo muchas amigas que cambian de diseño de uñas casi semanalmente, y a veces se ponen uno nuevo inmediatamente después de quitárselas. Con el tiempo, sus uñas se vuelven finas como el papel y se rompen al menor golpe. Según datos de la industria, hacerse la manicura de forma continuada durante más de tres meses sin descanso provoca una tasa de 82% de daños en las uñas.
Mi consejo: Cada 4-6 semanas, deja descansar tus uñas durante 1-2 semanas. Durante este tiempo, no uses esmalte semipermanente. Aplica diariamente un endurecedor o aceite nutritivo para que tus uñas crezcan y se reparen de forma natural. No te preocupes si se ven simples: una capa de esmalte transparente nutritivo las protege y les da un aspecto limpio y cuidado.
II. Elegir los productos adecuados: La seguridad primero, la estética después (con recomendaciones de eficacia probada)
Como profesional del sector de los materiales para uñas, me encuentro a diario con diversos esmaltes en gel y he visto infinidad de productos sin marca que contienen ingredientes dañinos como formaldehído, TPO y HEMA. Su uso prolongado no solo daña las uñas, sino que también puede afectar a la salud en general debido a la absorción cutánea. Mis criterios de selección de productos se resumen en dos puntos: seguridad y practicidad.
1. Elija productos certificados, evite la trampa de las marcas desconocidas.
Para abaratar costes, muchos salones de manicura pequeños utilizan esmaltes de gel baratos y no regulados. Estos productos suelen carecer de informes de pruebas, tienen ingredientes poco claros, desprenden un olor fuerte y penetrante y pueden amarillear las uñas y volverlas quebradizas.
Aquí tienes una forma sencilla de saberlo: al comprar esmalte en gel, revisa siempre el envase para ver la marca, el fabricante, la lista de ingredientes y los informes de pruebas; todo esto es fundamental. Los esmaltes de marcas reconocidas tienen un olor suave, se secan correctamente sin dejar residuos pegajosos y son menos irritantes para las uñas.
2. Entender la lista de ingredientes: Evite las sustancias nocivas, dé prioridad a las fórmulas nutritivas
Muchas personas sólo se fijan en el color e ignoran la lista de ingredientes. Sin embargo, la lista de ingredientes es clave para juzgar la calidad del producto, sobre todo para quienes tienen la piel sensible o las uñas quebradizas. Preste mucha atención a estos puntos:
- Evite los ingredientes nocivos: TPO (un fotoiniciador que puede irritar la piel con una exposición prolongada), HEMA (puede provocar alergias) y formaldehído (un carcinógeno que daña las uñas y las vías respiratorias).
- Dé prioridad a los ingredientes nutritivos: Los esmaltes en gel que contienen ingredientes como escualeno, vitamina E o pantenol pueden nutrir las uñas durante la manicura, reduciendo los daños.
- Lo mejor para pieles sensibles: Busque esmaltes etiquetados como “Esmalte en gel sin TPO”" y "“Esmalte en gel sin HEMA.Son menos irritantes y tienen menos probabilidades de provocar alergias.
3. Recomendación probada: Esmalte en gel CHROMÉCLAIR - Seguro y bonito
Tras tantos años en este sector, he utilizado muchas marcas. El esmalte en gel CHROMÉCLAIR es uno que recomiendo constantemente a mis amigos y a los salones con los que colaboro, principalmente porque he participado personalmente en las pruebas de sus componentes, por lo que su seguridad y practicidad están demostradas.
La principal ventaja de su esmalte en gel es que no contiene TPO ni HEMA, eliminando por completo estos dos componentes potencialmente irritantes y alergénicos. Es seguro para pieles sensibles y uñas quebradizas. Además, se caracteriza por su baja sensibilidad y respeto al medio ambiente, con un olor prácticamente imperceptible al aplicarlo y un acabado brillante y hermoso tras el secado.
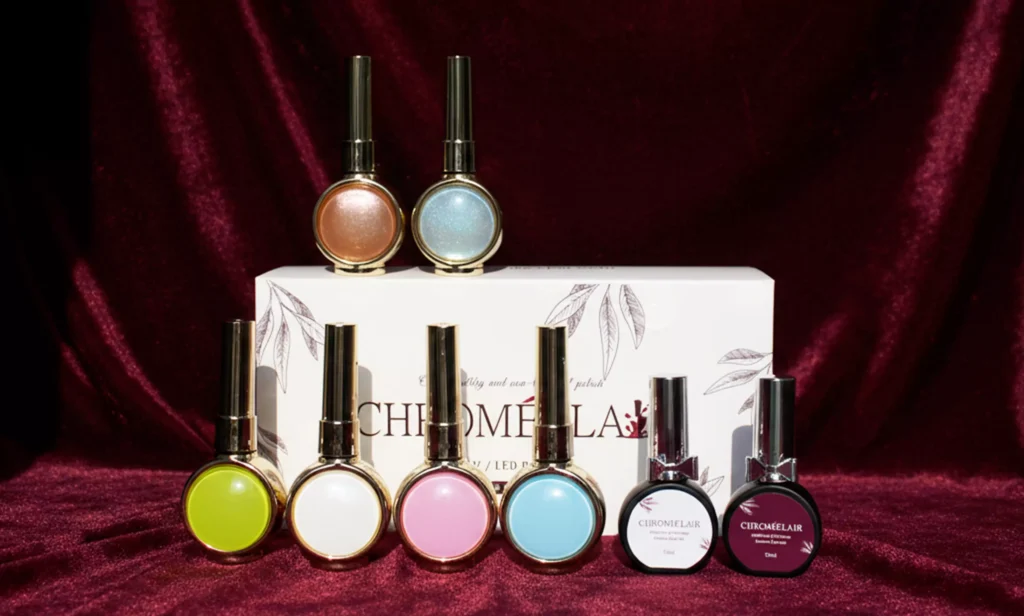
Aparte de eso, sus ventajas son evidentes: una amplia gama de colores, desde los desnudos cotidianos y los malvas suaves hasta los brillantes de moda, manteniéndose al día con la estética del nail art actual. Su duración es excelente, ya que aguanta entre 21 y 35 días con actividades normales como las tareas domésticas y la mecanografía. La consistencia es suave, por lo que resulta fácil de aplicar incluso para principiantes, sin trazos visibles de pincel.
III. Aplicación estandarizada: Los detalles determinan la longevidad de la manicura y la salud de las uñas
Con los productos adecuados y una buena preparación de las uñas, una aplicación incorrecta puede arruinarlo todo. He visto muchos casos en los que la técnica errónea de un técnico dañó las uñas, provocó que se descamaran prematuramente o incluso causó infecciones. ¡Presta mucha atención a estos tres detalles!
1. Esterilización de herramientas: Una importante fuente de infecciones cruzadas - Nunca la pase por alto
Si las herramientas para uñas (tijeras, pinzas, limas, empujadores, etc.) no se esterilizan de inmediato, pueden albergar bacterias y hongos del cliente anterior, lo que facilita el contagio. Cada vez que visito un salón, lo primero que compruebo es si la técnica esteriliza sus herramientas; es un indicador clave de un establecimiento profesional.
El método correcto: Después de cada uso, limpie las superficies de las herramientas con una almohadilla de alcohol 75%. Los artículos difíciles de limpiar, como las limas, deben colocarse en un esterilizador profesional (como una cabina de rayos UV o un autoclave). Las herramientas deben guardarse por separado para evitar la contaminación.
2. Cualificación de los técnicos: Deje que los profesionales hagan su trabajo
Un técnico experto no solo crea diseños hermosos, sino que también protege tus uñas durante el proceso. Una vez, fui mentor de una técnica principiante que, sin conocer la preparación adecuada de la superficie, aplicó esmalte en gel en capas gruesas y repetidas. Esto resultó en una capa gruesa que tendía a descascararse y, además, dañó la superficie de la uña.
Recomiendo elegir técnicos con certificaciones profesionales y al menos tres años de experiencia. Los técnicos cualificados pueden adaptar sus técnicas en función del estado de tus uñas. Por ejemplo, ejercerán menos presión al pulir uñas finas para evitar dañarlas en exceso.
3. Evite los adornos excesivos: Quedan bien, son poco prácticos y perjudican
A muchas les encanta adornar sus uñas con numerosos diamantes de imitación, perlas o intrincadas esculturas en 3D, pensando que así lucen más elegantes. Sin embargo, el exceso de adornos sobrecarga la uña, provocando una distribución desigual de la tensión y aumentando la propensión a deformarse y romperse. Además, los bordes de los adornos pueden acumular suciedad, dificultando la limpieza y aumentando el riesgo de infecciones.
Mi sugerencia: para el día a día, opta por diseños sencillos con solo uno o dos adornos. Si eliges un diseño complejo, no lo lleves puesto más de una semana; quítatelo enseguida para evitar dañar las uñas.
IV. Eliminación + Cuidados Diarios: Un acabado fuerte devuelve la salud a las uñas
Muchos se centran sólo en el proceso de aplicación, descuidando la retirada y el cuidado posterior diario. En realidad, una retirada inadecuada puede ser más perjudicial que la propia manicura. Un cuidado diario constante mantiene las uñas sanas y prolonga la vida de la manicura.
1. Retirada correcta: Nunca despegue ni haga palanca: la clave es una retirada suave.
El comportamiento más perjudicial que observo es que, al tener dificultades para quitar el esmalte en gel, las personas utilizan tijeras o limas gruesas para rasparlo o despegarlo a la fuerza. Esto elimina la capa superficial de la uña, dejándolas finas, sensibles y pudiendo causar onicólisis (separación de la lámina ungueal del lecho ungueal).
Pasos de retirada correctos (se ha comprobado que no causan daños):
- Pule suavemente la capa superior del esmalte de gel con una lima de grano fino para eliminar la capa superior brillante (esto ayuda a que penetre el eliminador).
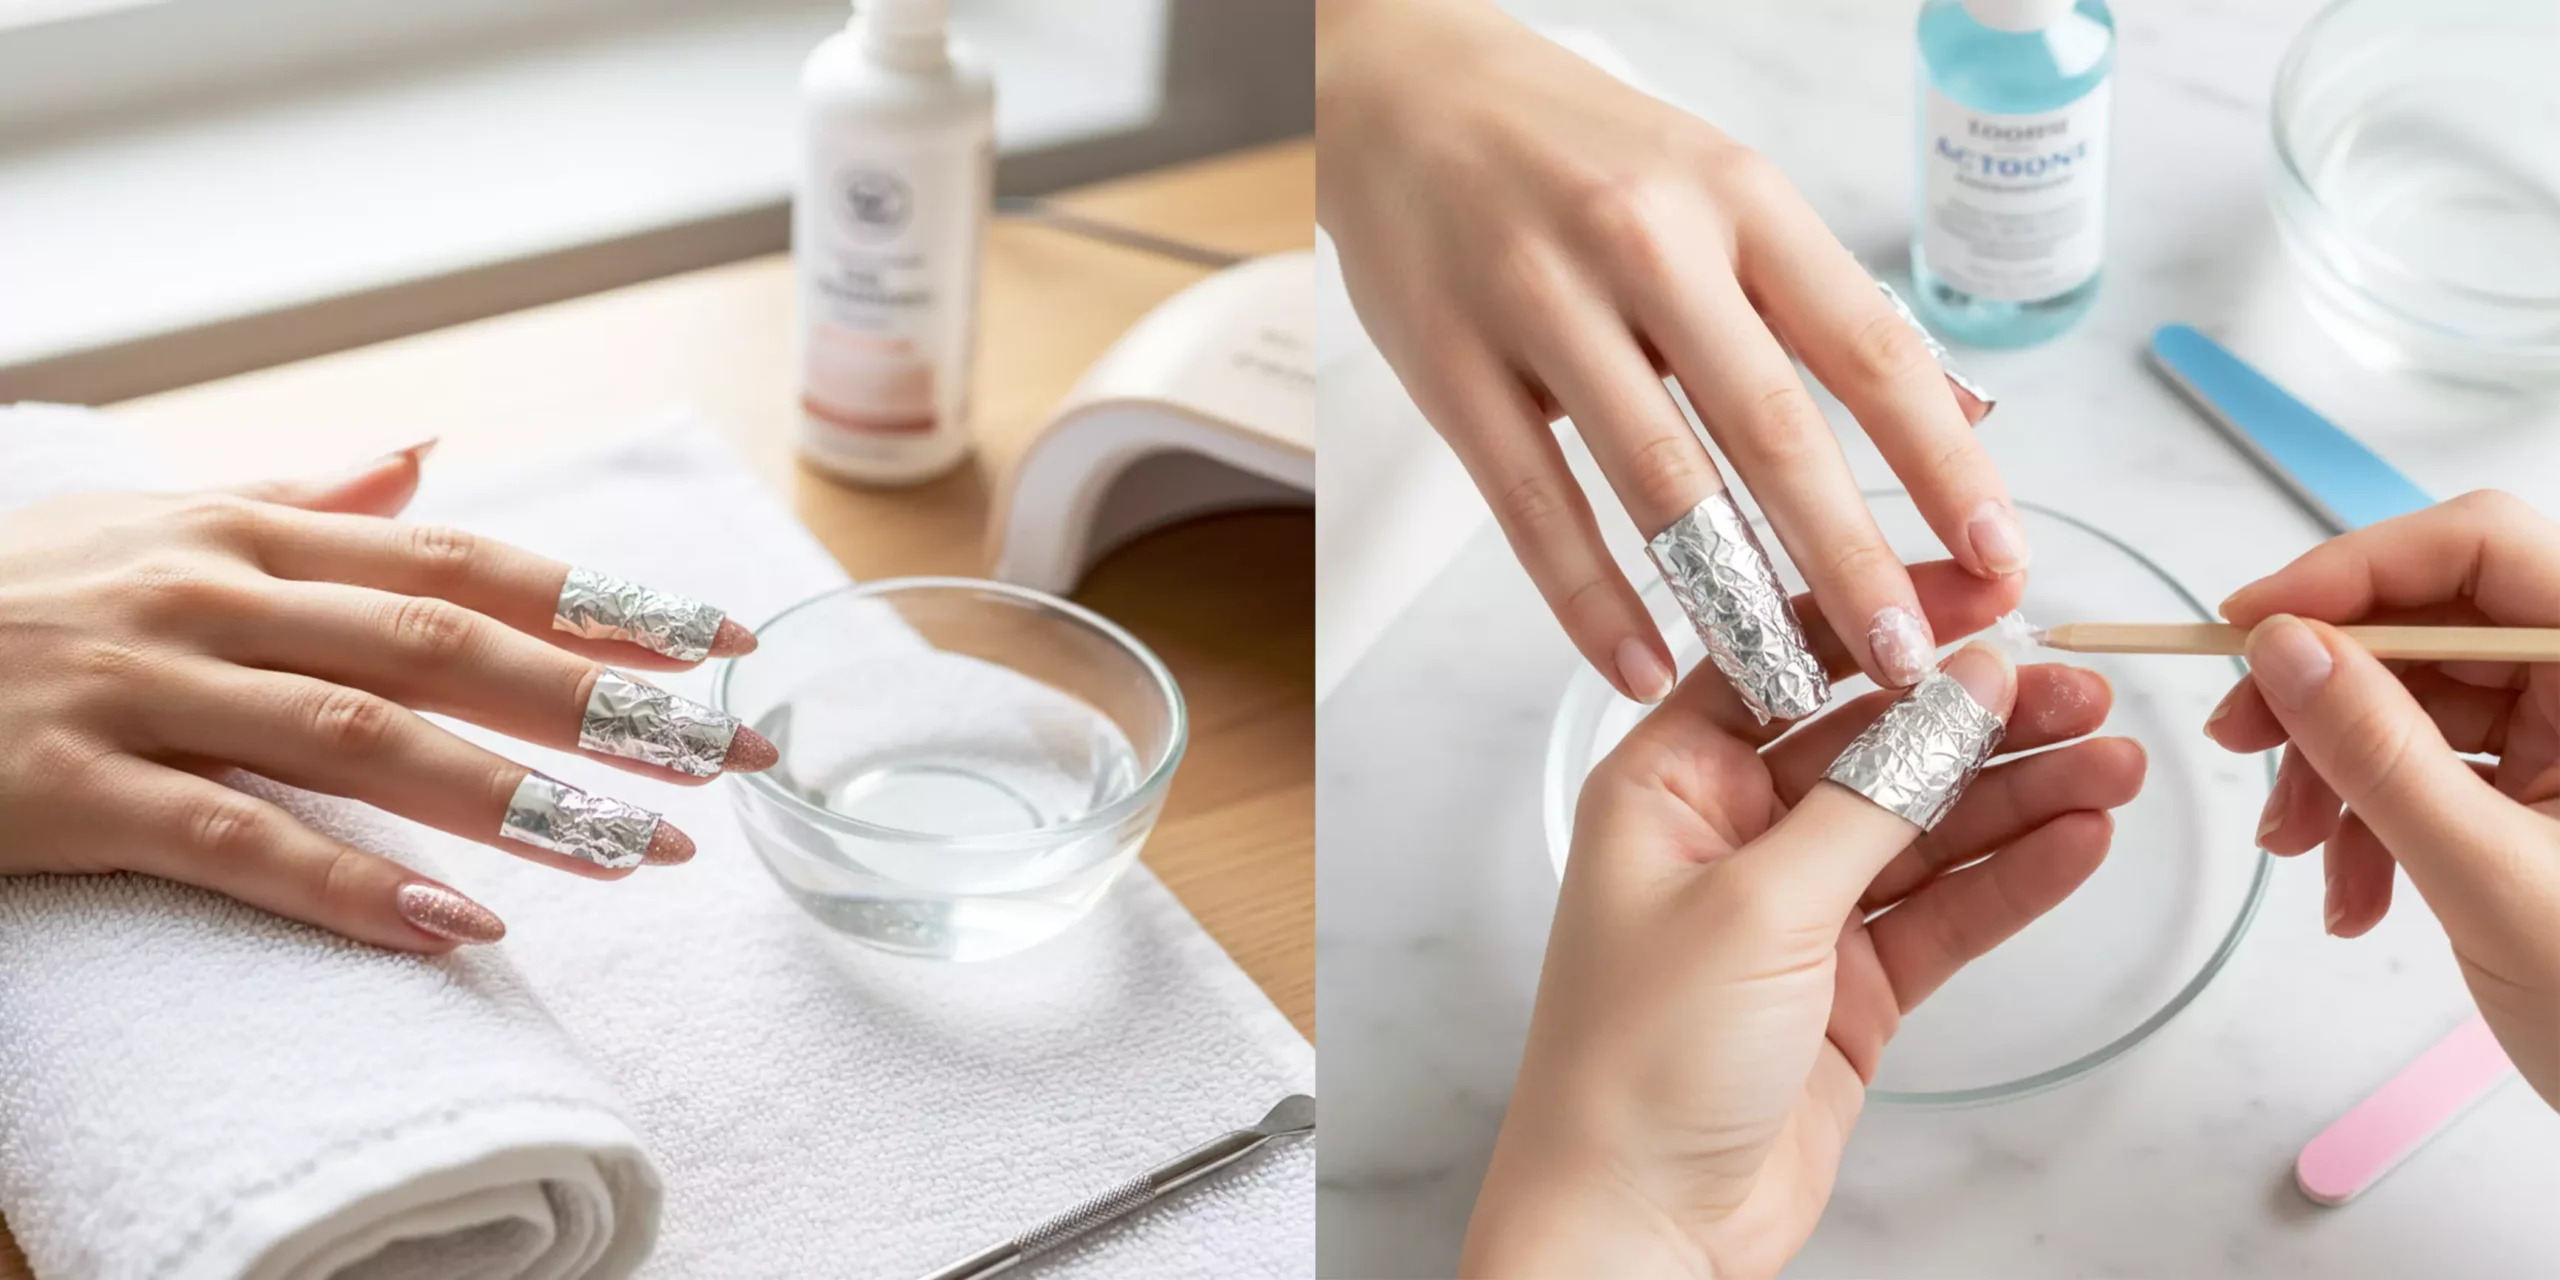
- Empapa un disco de algodón con quitaesmalte profesional (a base de acetona), colócalo sobre la uña y envuélvelo firmemente con papel de aluminio. Espere entre 10 y 15 minutos.
- Una vez transcurrido el tiempo, limpia suavemente la uña. El gel debería desprenderse fácilmente. Si queda algún residuo, retíralo con cuidado con un palito de naranjo para cutículas; nunca raspes con fuerza.
- Después de retirarlo, limpie la uña con una almohadilla con alcohol para eliminar cualquier resto de removedor.
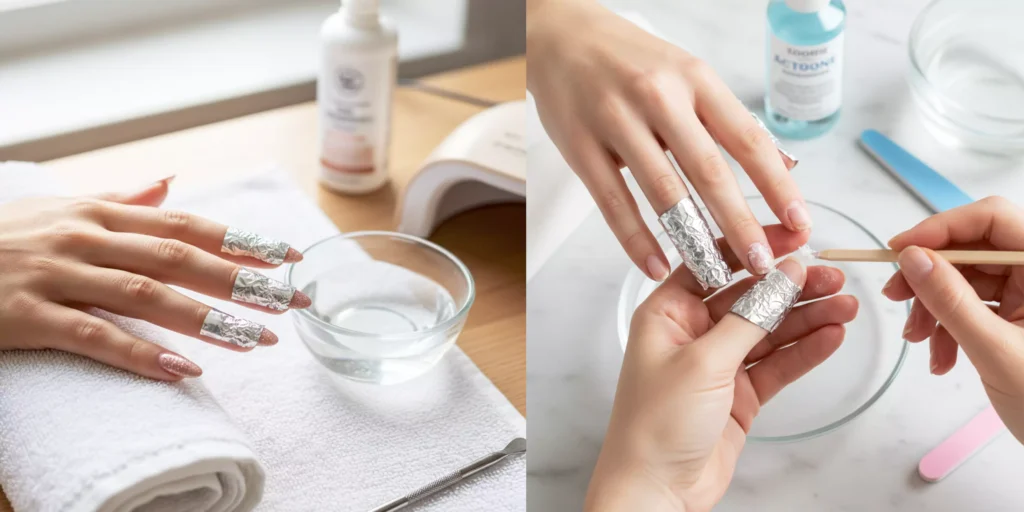
2. Cuidados posteriores a la remoción: Reparación y “nutrición” oportunas para las uñas
Tras retirar el esmalte, las uñas quedan vulnerables y necesitan cuidados oportunos; de lo contrario, seguirán debilitándose. Cada vez que me quito el esmalte, sigo una sencilla rutina de cuidado:
- Aplique aceite para cutículas, masajeándolo en las cutículas y la piel circundante para aliviar la sequedad y prevenir los padrastros.
- Aplique un tratamiento o fortalecedor de uñas nutritivo que cubra toda la placa ungueal para aportar nutrientes y reparar la superficie.
- Continúe aplicando el tratamiento de uñas 1-2 veces al día durante 3-5 días para ayudar a que las uñas se recuperen rápidamente.
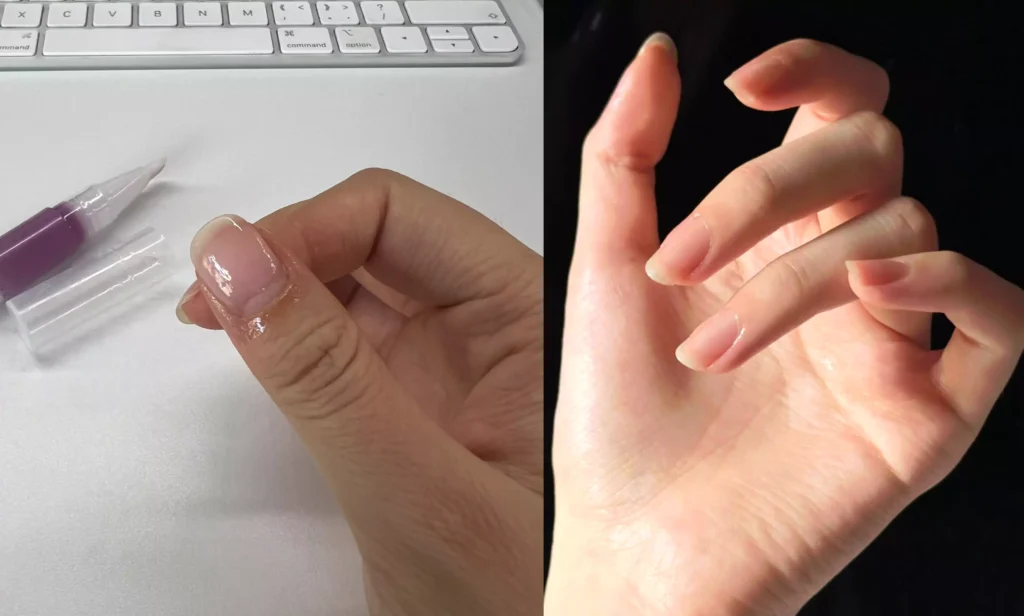
3. Mantenimiento diario: Pequeños hábitos para manicuras más duraderas y uñas más sanas.
Después de hacerte la manicura, prestar atención a los pequeños detalles diarios puede alargar considerablemente su vida y proteger tus uñas. Recuerda estos puntos:
- Evite los productos químicos agresivos: Utiliza siempre guantes de goma cuando realices tareas domésticas (fregar platos, lavar la ropa) para evitar que las uñas entren en contacto directo con detergentes y limpiadores. Estas sustancias pueden corroer el esmalte de gel y dañar las uñas.
- Cuidado con los impactos: Las uñas son algo más vulnerables después de la manicura. Evita golpearlas contra objetos duros (como abrir puertas o levantar objetos pesados) para evitar que se rompan o astillen.
- Recorte regularmente: Incluso con manicura, recórtate las uñas con regularidad para mantener una longitud adecuada (se recomienda que el borde libre no supere 1 cm). Así evitarás que se aprieten en exceso y se rompan.
V. Mirando hacia el futuro: El futuro de las manicuras hace hincapié en la “salud y la comodidad”.”
En mis ocho años de experiencia, he visto claramente cómo la industria ha evolucionado: de centrarse exclusivamente en la estética a priorizar la salud, las fórmulas hipoalergénicas y la comodidad. Observando las tendencias actuales, tengo una hipótesis: las manicuras con tratamientos para el cuidado de las uñas se popularizarán.
Esto implica integrar profundamente la manicura con el cuidado de las uñas. Los esmaltes en gel no solo serán seguros y de baja sensibilidad, sino que también estarán enriquecidos con ingredientes nutritivos que cuidarán las uñas durante su uso. La aplicación y la eliminación serán más sencillas, gracias a innovaciones como las fórmulas de fácil remoción o de secado rápido que satisfacen nuestro deseo de belleza minimizando el daño durante la retirada.
Por supuesto, esto requiere una innovación constante por parte de la industria de materiales para uñas para desarrollar productos más seguros y prácticos. También requiere que, como consumidores, adoptemos una mentalidad que priorice la salud sobre la belleza, convirtiendo así la manicura en una opción de estilo de vida saludable y a la moda.
Finalmente, me gustaría preguntarte…
¿Alguna vez has sufrido daños en las uñas o alergias relacionadas con las manicuras? ¿Cuál es tu principal prioridad al elegir productos para uñas? ¡Comparte tus experiencias y opiniones en los comentarios! Intercambiemos consejos sobre el cuidado de las uñas y la belleza, y seamos “bellas”. y ¡Amantes del arte de uñas saludables, reunidas!
 English
  Spanish
  German
  French
  Italian
  Dutch
Dutch