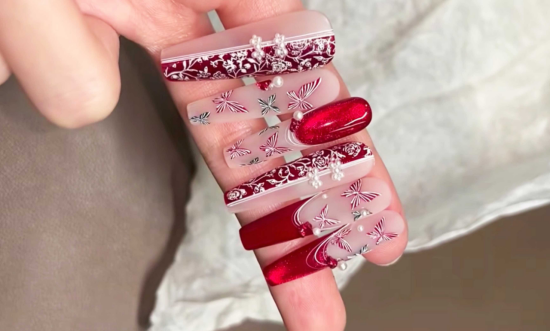
Today I will teach you how to do this embroidered butterfly manicure. The steps are detailed and I will teach you step by step to create an exquisite nail surface that is charming and special. It is very suitable for you who are ambitious.
Step 1: Prime with Base Color and Cat’s Eye Gel
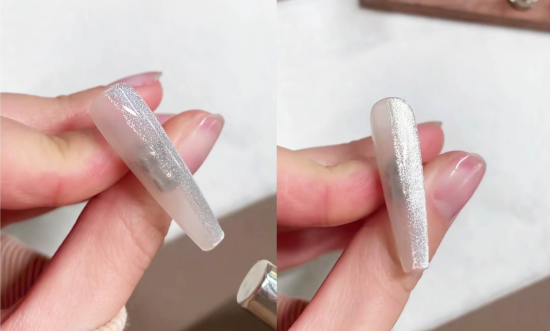
First, apply a layer of nude nail polish as a base color. Cover the nails evenly and then cure under a lamp. Once the base color is dry, apply the diamond-cut cat’s eye gel to only half of the nail.
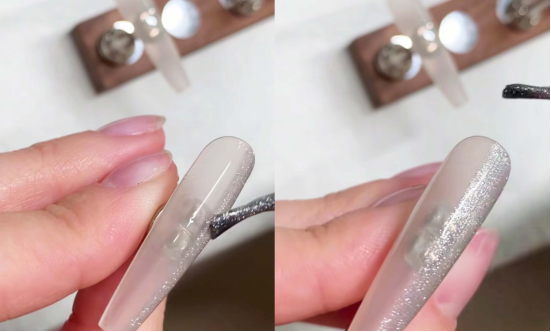
Hold the magnet above the nail for a few seconds to draw out a wide cat’s-eye light band. This step can make half of the nail surface have a fine shimmering cat’s-eye effect, while the other half retains a nude and transparent feeling, and the layering effect is maximized. Then shine a light to fix the cat’s-eye glue.
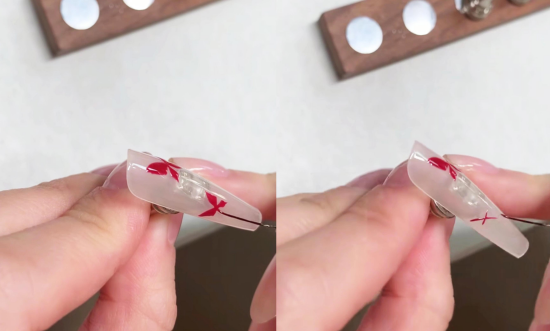
Step 2: Differentiating between a translucent red topcoat and a topcoat
Next, use translucent red polish to cover the half of your nail where you created the cat’s eye. (Don’t worry, the crystal cat’s eye and translucent red combination looks great in every way!) After applying the translucent red, cure under a lamp.
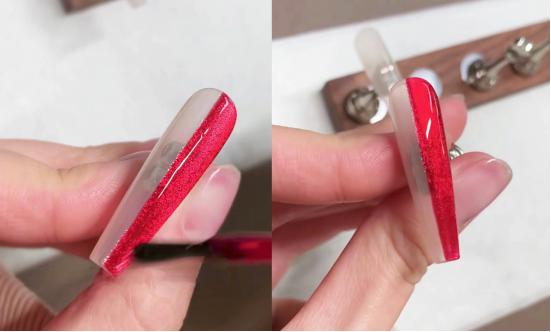
Then we applied the topcoat: the nude half was given a velvet-matte topcoat for a matte finish, while the cat-eye and reddish-red half was given a regular glossy topcoat to maintain a mirror-like sheen. This contrast between the matte and glossy finishes instantly created a visual contrast, elevating the look. Finally, we cured the topcoat under a light.
Step 3: Hand-Drawn Butterfly and Gel Polish
While the topcoat is being illuminated, let’s paint the butterfly. Using gel polish (choose your favorite color; the tutorial uses CHROMÉCLAIR Hema-Free Gel Polish #039; it’s rich, fluid, and non-toxic!), use the “butterfly positioning technique” (basically, locate the point first, then draw the wings; beginners will get the hang of it with practice). Draw the butterfly shape on the nail, then place it under the light to secure it.
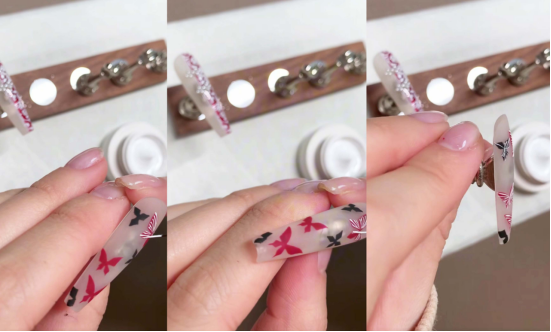
If you think hand-painting butterflies is too technically demanding, you can also use painting glue + nail art plate/stamp to print. The tutorial uses two types of painting glue: one with a thick texture and the other with a relatively thin texture.
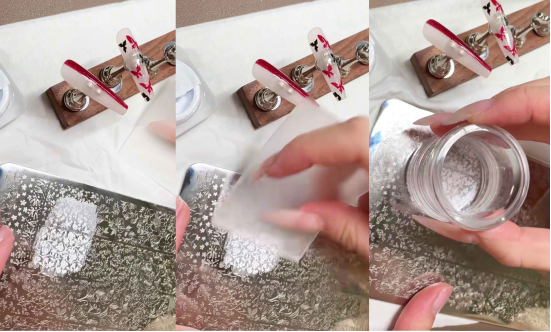
Key points (thin-textured painting glue is more suitable for printing. Try to apply the glue thinner so that the printed pattern will be clearer! You will master the technique after trying a few times).
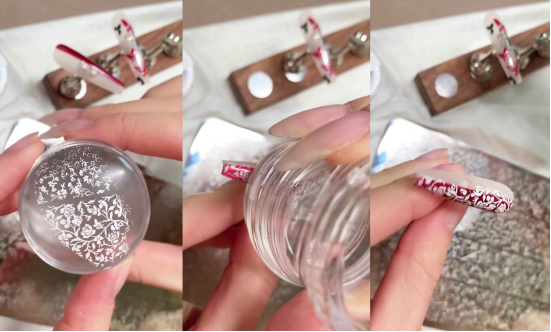
Step 4: Detail Cleaning and Decorative Overlay
After printing, gently remove any unwanted areas of the design with a tool. Wipe off any excess glue around the edges to ensure a clean, crisp surface.
Residue from the stamp can be easily removed with tape. Residue on the steel plate is even easier to remove with an alcohol pad. Clean your tools.
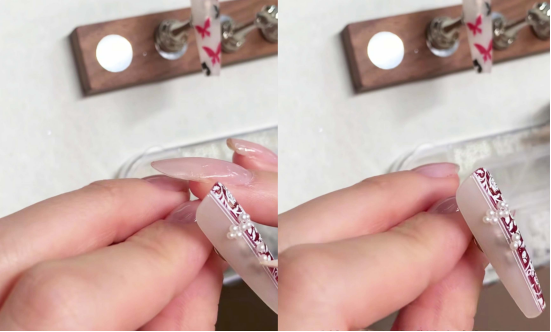
Next, use a fine brush to draw a few thin, straight lines at the intersection of the nails (such as where the nude color meets the translucent red) to add a touch of refinement.
Finally, use pearls of varying sizes to create a “knot” pattern on the nails, instantly giving them a touch of Chinese aesthetics.
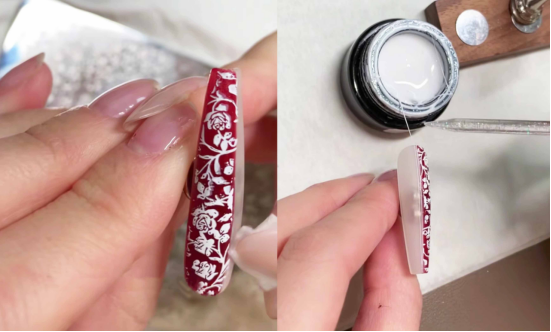
Step 5: Texture the Butterfly and Finish
After removing any excess glue from the butterfly, apply a velvet matte topcoat to give it a matte texture, complementing the matte topcoat on the nude half-nail. After curing under a light, use a thicker paint glue to outline the butterfly (this step is very relaxing; take your time and enjoy the process).
Because we use wash-free painting glue, you can directly send it to the light after painting, and the whole manicure is done!
Finished Product & Tips
The final result is a sophisticated manicure featuring a clash of red and nude, a blend of matte and glossy finishes, a combination of hand-painted butterflies and printed patterns, and pearl embellishments. Whether worn daily or at a party, it’s an eye-catching piece.
Tip: For beginners applying prints, use a thin layer of paint glue and clean your tools promptly for a higher success rate. If you’re not confident painting butterflies, practice a few times on nail art paper before applying the nails for a better result.

In the tutorial, I used CHROMÉCLAIR nail polish. Their products focus on safety, low irritation, environmental protection, and do not contain harmful ingredients. They reduce the risk of allergies (Hema-Free Gel Polish), protect healthy nails, and have a variety of colors to cater to mainstream aesthetics, ensuring that every consumer’s user experience is safe and secure.

Okay, this is the end of the embroidered butterfly nail art tutorial. If you encounter problems during the process, you can watch the video tutorial below. If you find the tutorial useful, remember to like and collect it if you like it, and subscribe to me. See you in the next tutorial!