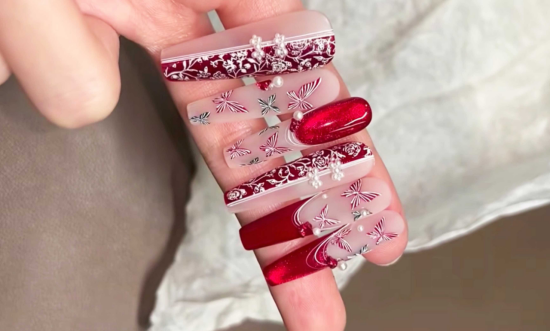
Oggi vi insegnerò a realizzare questa manicure con farfalle ricamate. I passaggi sono dettagliati e vi insegnerò passo dopo passo a creare una squisita superficie per unghie che sia affascinante e speciale. È molto adatto a voi che siete ambiziose.
Passaggio 1: Applicare come base il colore e il gel effetto occhi di gatto.
Innanzitutto, applica uno strato di smalto nude come base. Copri uniformemente le unghie e poi polimerizza sotto una lampada. Una volta asciutto il colore di base, applica il gel effetto occhio di gatto con taglio a diamante solo su metà dell'unghia.
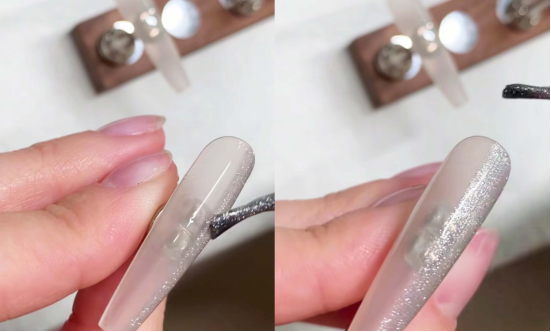
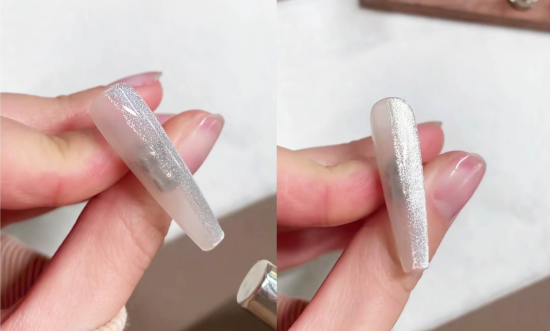
Tenete la calamita sopra l'unghia per qualche secondo per creare una fascia luminosa a occhio di gatto. Questo passaggio permette di ottenere un delicato effetto occhio di gatto su metà della superficie dell'unghia, mantenendo l'altra metà naturale e trasparente, massimizzando così l'effetto a strati. Infine, illuminate l'unghia con una luce per fissare la colla effetto occhio di gatto.
Fase 2: Differenza tra uno smalto rosso traslucido e un topcoat
Passo successivo consigliato
Crea il kit per un look di nail art
Per realizzare un tutorial di bellezza non basta una boccetta di colore. Scegli il colore, il dettaglio artistico, la tecnica di trasferimento o l'applicazione dell'adesivo e il top coat, tutto in un unico kit.
- Scegli il colore principale o il set.
- Aggiungi il dettaglio artistico: adesivo, gel per trasferimento, magnete o pennello.
- Sigilla il risultato finale con uno strato di top coat.
Kit per nail artVedere il gel di trasferimentoConfronta tutte le routine
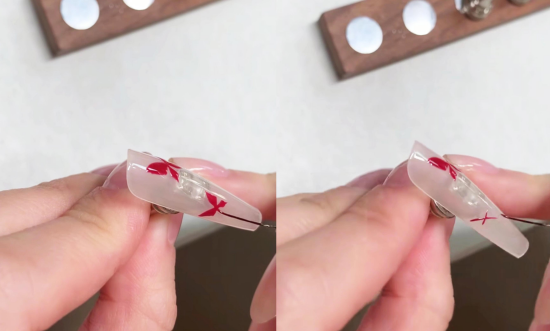
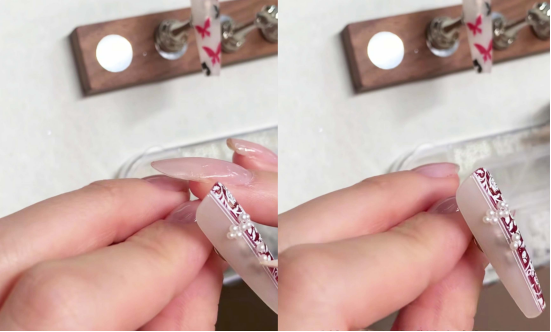
Successivamente, usa uno smalto rosso traslucido per coprire la metà dell'unghia dove hai creato l'occhio di gatto. (Non preoccuparti, la combinazione occhio di gatto con cristalli e rosso traslucido è fantastica in ogni caso!) Dopo aver applicato il rosso traslucido, polimerizza sotto una lampada.
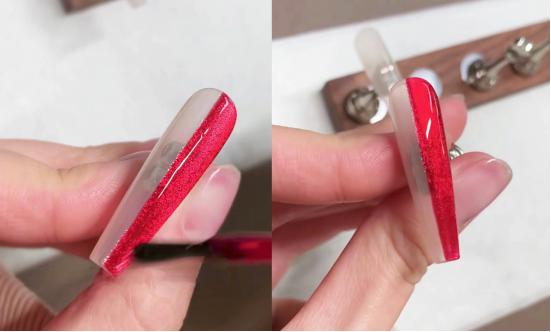
Poi abbiamo applicato il top coat: la metà nuda è stata trattata con un top coat vellutato per ottenere una finitura opaca, mentre la metà cat-eye e rosso-rossa è stata trattata con un normale top coat lucido per mantenere una lucentezza a specchio. Questo contrasto tra le finiture opache e lucide ha creato immediatamente un contrasto visivo, elevando il look. Infine, abbiamo fatto indurire il top coat sotto una luce.
Fase 3: Farfalla disegnata a mano e smalto gel
Mentre il top coat è illuminato, dipingiamo la farfalla. Usando smalto gel (scegli il tuo colore preferito; il tutorial usa CHROMÉCLAIR) Smalto gel senza ema #039; è ricco, fluido e non tossico!), usa la "tecnica di posizionamento a farfalla" (in pratica, individua prima il punto, poi disegna le ali; i principianti ci prenderanno la mano con la pratica). Disegna la forma della farfalla sull'unghia, poi posizionala sotto la luce per fissarla.
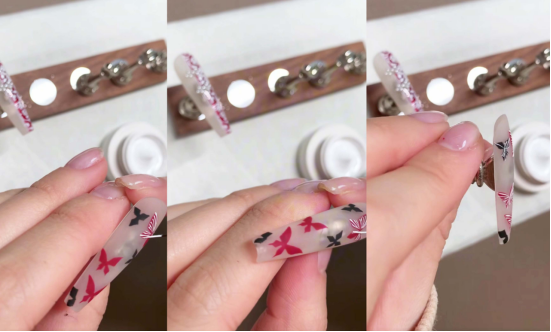
Se pensate che dipingere a mano le farfalle sia troppo impegnativo dal punto di vista tecnico, potete anche utilizzare la colla per pittura + la piastra/tampone per nail art da stampare. Il tutorial utilizza due tipi di colla per pittura: una con una texture spessa e l'altra con una texture relativamente sottile.
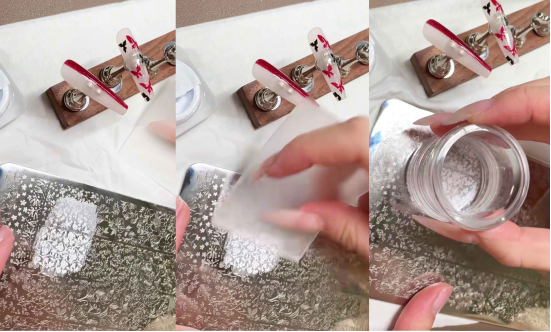
Punti chiave (la colla per pittura a struttura sottile è più adatta per la stampa. Cercate di applicare la colla più sottile in modo che il disegno stampato sia più chiaro! Dopo alcuni tentativi, si riuscirà a padroneggiare la tecnica).
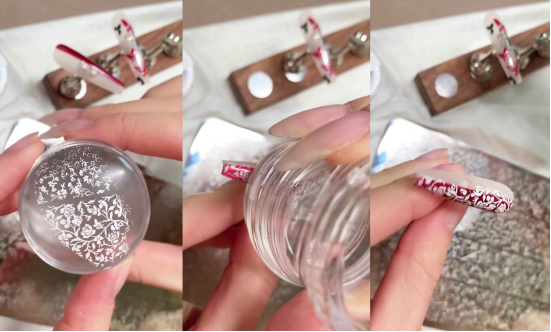
Fase 4: pulizia dei dettagli e sovrapposizione decorativa
Dopo la stampa, rimuovere delicatamente le aree indesiderate del disegno con uno strumento. Eliminare la colla in eccesso sui bordi per garantire una superficie pulita e nitida.
I residui del timbro possono essere facilmente rimossi con del nastro adesivo. I residui sulla piastra d'acciaio sono ancora più facili da rimuovere con un tampone di alcool. Pulire gli strumenti.
Quindi, con un pennello sottile, tracciare alcune linee sottili e dritte all'intersezione delle unghie (come nel punto in cui il colore nude incontra il rosso traslucido) per aggiungere un tocco di raffinatezza.
Infine, utilizzate perle di diverse dimensioni per creare un motivo a "nodo" sulle unghie, conferendo loro immediatamente un tocco di estetica cinese.
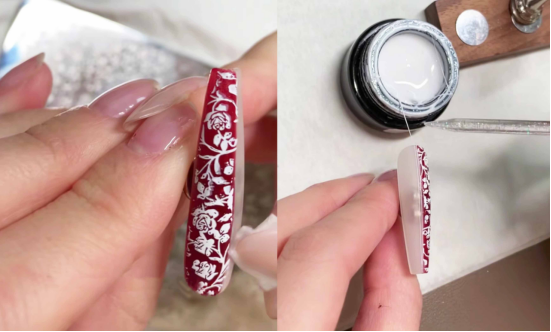
Fase 5: Texture della farfalla e finitura
Dopo aver rimosso la colla in eccesso dalla farfalla, applicare un top coat opaco vellutato per dare una consistenza opaca, che completi il top coat opaco della mezza unghia nuda. Dopo l'indurimento sotto la luce, utilizzare una colla più spessa per delineare la farfalla (questa fase è molto rilassante; prendetevi il tempo necessario e godetevi il processo).
Poiché utilizziamo una colla per pittura senza lavaggio, dopo la pittura è possibile esporla direttamente alla luce e l'intera manicure è pronta!
Prodotto finito e consigli
Il risultato finale è una manicure sofisticata caratterizzata da un contrasto tra rosso e nude, un mix di finiture opache e lucide, una combinazione di farfalle dipinte a mano e motivi stampati, e decorazioni con perle. Che sia indossata tutti i giorni o per una festa, è un vero e proprio gioiello che non passa inosservato.
Consiglio: per chi è alle prime armi con le decorazioni, si consiglia di utilizzare uno strato sottile di colla per unghie e di pulire subito gli strumenti per ottenere un risultato migliore. Se non si ha molta dimestichezza con la pittura a farfalla, è consigliabile fare qualche prova su carta per nail art prima di applicare le decorazioni sulle unghie.

Nel tutorial ho utilizzato lo smalto CHROMÉCLAIR. I loro prodotti si concentrano sulla sicurezza, sulla bassa irritazione, sulla protezione dell'ambiente e non contengono ingredienti nocivi. Riducono il rischio di allergie (Smalto gel senza ema), proteggono le unghie sane e offrono una varietà di colori per soddisfare i gusti più diffusi, garantendo un'esperienza d'uso sicura e protetta per ogni consumatore.

Bene, questa è la fine del tutorial per la nail art della farfalla ricamata. Se riscontrate problemi durante il procedimento, potete guardare il video tutorial qui sotto. Se il tutorial vi è stato utile, ricordatevi di mettere "mi piace" e di raccogliere i commenti se vi è piaciuto, e di iscrivervi a me. Ci vediamo nel prossimo tutorial!