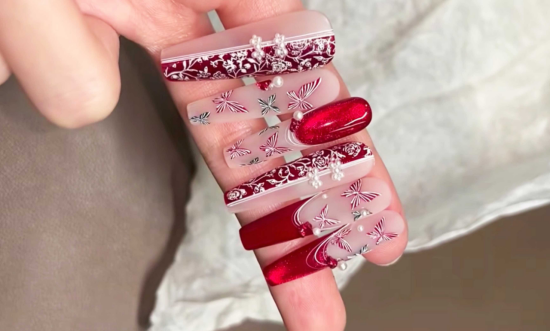
Hoy te enseñaré a hacer esta manicura de mariposa bordada. Los pasos son detallados y te enseñaré paso a paso a crear una superficie de uñas exquisita, encantadora y especial. Es muy adecuado para ti que eres ambiciosa.
Paso 1: Prepara con el color base y el gel delineador de ojos de gato.
Primero, aplica una capa de esmalte color nude como base. Cubre las uñas de manera uniforme y sécalas bajo una lámpara UV/LED. Una vez seca la base, aplica el gel efecto ojo de gato con corte de diamante solo en la mitad de la uña.
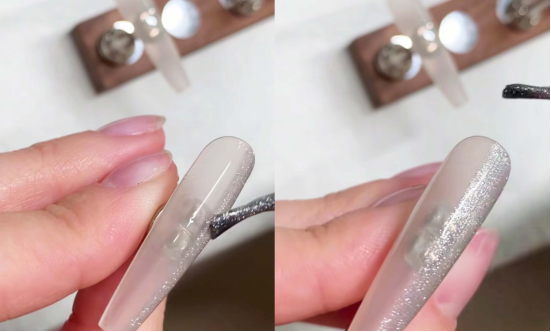
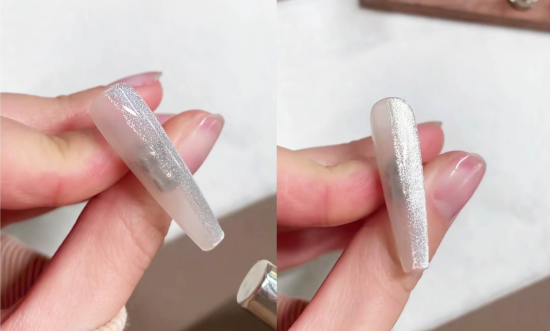
Sostén el imán sobre la uña durante unos segundos para crear una franja luminosa de efecto ojo de gato. Este paso permite que la mitad de la superficie de la uña tenga un sutil efecto ojo de gato brillante, mientras que la otra mitad conserva un aspecto natural y transparente, maximizando así el efecto de capas. A continuación, ilumina la uña para fijar el pegamento del efecto ojo de gato.
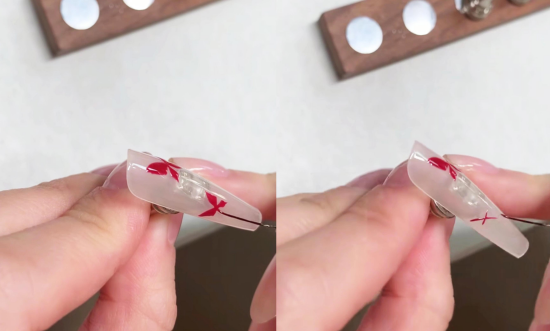
Paso 2: Diferenciar entre un topcoat rojo translúcido y un topcoat
Paso siguiente recomendado
Kit para crear tu propio look de uñas
Para crear un look con estilo, necesitas algo más que un frasco de pintura. Elige el color, el detalle artístico, el paso de transferencia o de la pegatina, y una capa de acabado para crear un look completo con este kit.
- Elige el color principal o el conjunto.
- Añade el detalle artístico: pegatina, gel de transferencia, imán o pincel.
- Para sellar el acabado, aplique una capa de barniz protector.
Compra un kit para lucir un look de uñas decorado.Ver gel de transferenciaComparar todas las rutinas
A continuación, aplica esmalte rojo translúcido en la mitad de la uña donde creaste el ojo de gato. (¡No te preocupes, la combinación del ojo de gato de cristal y el rojo translúcido luce genial!). Después de aplicar el rojo translúcido, sécalo bajo una lámpara.
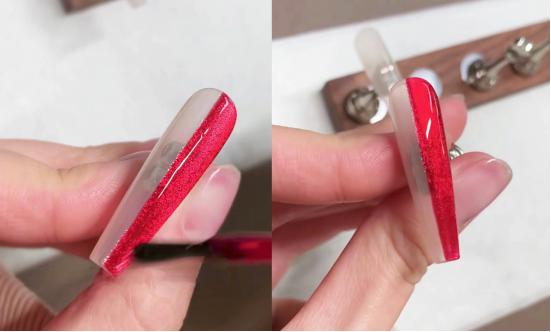
A continuación, aplicamos el topcoat: la mitad nude recibió un topcoat mate aterciopelado para un acabado mate, mientras que la mitad ojos de gato y rojo rojizo recibió un topcoat brillante normal para mantener un brillo de espejo. Este contraste entre los acabados mate y brillante creó instantáneamente un contraste visual que realzó el look. Por último, secamos el topcoat bajo la luz.
Paso 3: Mariposa dibujada a mano y esmalte en gel
Mientras se ilumina la capa superior, pintemos la mariposa. Usando esmalte en gel (elige tu color favorito; el tutorial usa CHROMÉCLAIR Esmalte en gel sin hema #039; ¡es rico, fluido y no tóxico!), use la “técnica de posicionamiento de mariposa” (básicamente, primero localice el punto, luego dibuje las alas; los principiantes lo dominarán con la práctica). Dibuje la forma de la mariposa en la uña, luego colóquela bajo la luz para fijarla.
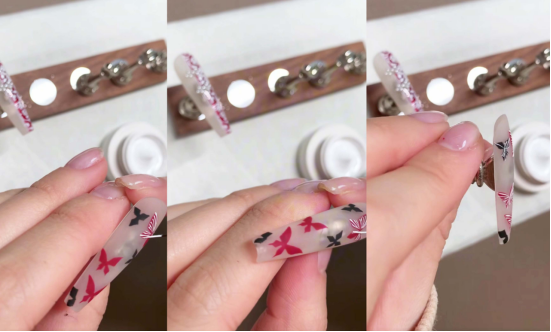
Si crees que pintar mariposas a mano es demasiado exigente desde el punto de vista técnico, también puedes utilizar pegamento para pintar + placa/sello de nail art para imprimir. El tutorial utiliza dos tipos de pegamento para pintar: uno con una textura gruesa y otro con una textura relativamente fina.
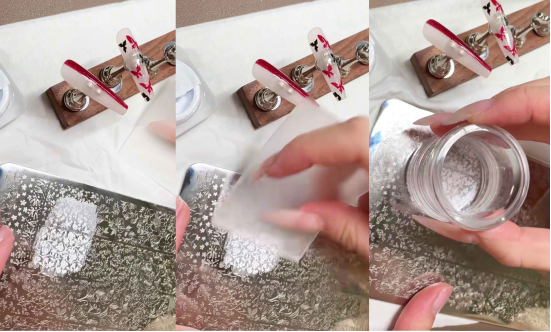
Puntos clave (la cola para pintar de textura fina es más adecuada para imprimir. Intenta aplicar la cola más fina para que el dibujo impreso sea más claro. Dominarás la técnica después de intentarlo unas cuantas veces).
Paso 4: Limpieza detallada y recubrimiento decorativo
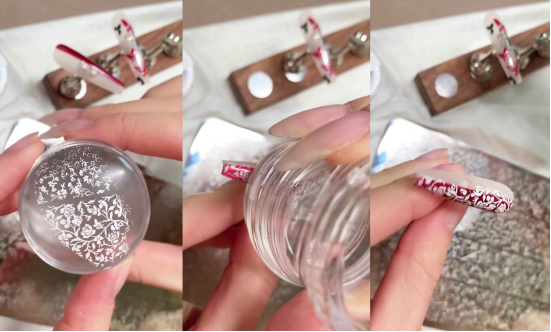
Tras la impresión, elimine suavemente las zonas no deseadas del diseño con una herramienta. Limpie el exceso de pegamento alrededor de los bordes para garantizar una superficie limpia y nítida.
Los residuos del sello pueden eliminarse fácilmente con cinta adhesiva. Los residuos de la placa de acero son aún más fáciles de eliminar con una almohadilla con alcohol. Limpie sus herramientas.
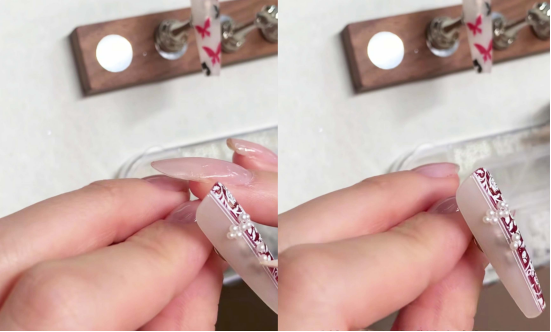
A continuación, utiliza un pincel fino para dibujar unas líneas finas y rectas en la intersección de las uñas (por ejemplo, donde el color nude se une con el rojo translúcido) para añadir un toque de refinamiento.
Por último, utiliza perlas de distintos tamaños para crear un patrón de "nudos" en las uñas, dándoles al instante un toque de estética china.
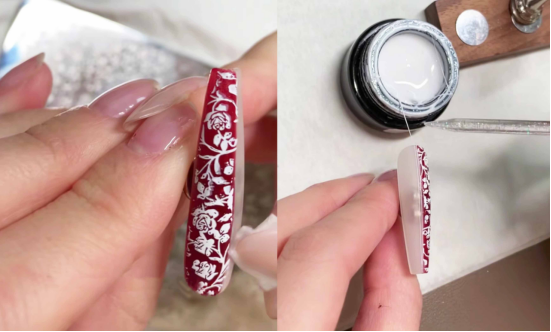
Paso 5: Textura de la mariposa y acabado
Después de retirar el exceso de pegamento de la mariposa, aplica un esmalte mate aterciopelado para darle una textura mate, que complemente el esmalte mate de la media uña nude. Después de que se endurezca bajo una luz, utiliza un pegamento de pintura más grueso para perfilar la mariposa (este paso es muy relajante; tómate tu tiempo y disfruta del proceso).
Como utilizamos cola para pintar sin lavar, puedes enviarla directamente a la luz después de pintar, ¡y ya está hecha toda la manicura!
Producto terminado y consejos
El resultado final es una manicura sofisticada que combina rojo y nude, acabados mate y brillantes, mariposas pintadas a mano, estampados y adornos de perlas. Ideal para el día a día o para una fiesta, sin duda llamará la atención.
Consejo: Si eres principiante en la aplicación de diseños, usa una capa fina de pegamento para pintura y limpia tus herramientas con frecuencia para obtener mejores resultados. Si no te sientes segura pintando mariposas, practica varias veces en papel para uñas antes de aplicarlas para un mejor resultado.

En el tutorial he utilizado esmaltes de uñas CHROMÉCLAIR. Sus productos se centran en la seguridad, la baja irritación, la protección del medio ambiente y no contienen ingredientes nocivos. Reducen el riesgo de alergias (Esmalte en gel sin hema), protegen las uñas sanas y tienen una variedad de colores para satisfacer la estética predominante, lo que garantiza que la experiencia de usuario de cada consumidor sea segura.

Bien, este es el final del tutorial de nail art de mariposa bordada. Si tienes problemas durante el proceso, puedes ver el video tutorial a continuación. Si te parece útil el tutorial, recuerda darle a like y coleccionarlo si te gusta, y suscribirte a mi. ¡Nos vemos en el próximo tutorial!