This time, we will use these attractive steel plates to create a cute and fashionable checkered star print manicure. The steps are not difficult, but the effect is exquisite. Let’s give it a try.

Step 1: Base coat
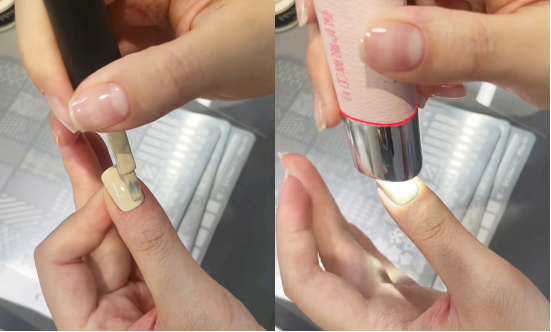
Choose a beige nail polish as the base color (I used CHROMÉCLAIR’s Hema Free Gel Polish No. 9, which is perfect for this style and easy to apply evenly, even for beginners). Apply a thin coat to your nails and cure under a lamp.
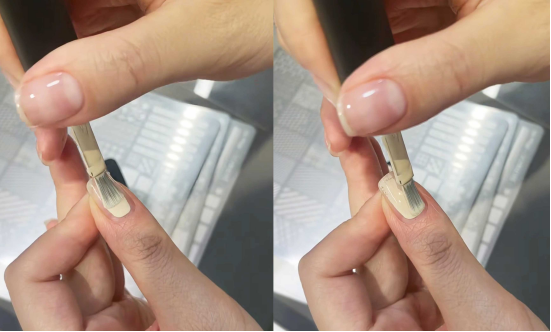
Then apply a second thin coat, cure under the lamp again, and ensure that the base color is even and well saturated.
Step 2: Apply the black star pattern
Recommended next step
Build the Nail Art Look Kit
Tutorial looks need more than a color bottle. Choose the color, art detail, transfer or sticker step, and a top coat as one look kit.
- Choose the main color or set.
- Add the art detail: sticker, transfer gel, magnet, or brush.
- Seal the finished look with top coat.
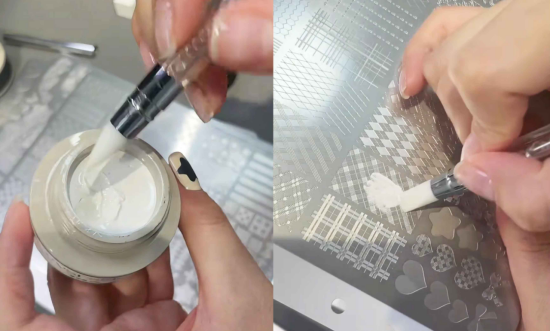
Prepare the black pattie glue. After opening the container, use a specialized tool (such as a silicone pen or similar tool suitable for applying pattie glue) to dip an appropriate amount of black pattie glue.
Then locate the area on the nail art steel plate with the small five-pointed star pattern. Apply the pattie glue evenly to the corresponding steel plate position of the small five-pointed star pattern, and use a scraper to remove any excess glue.
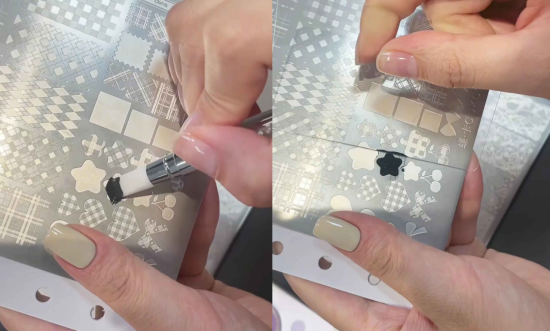
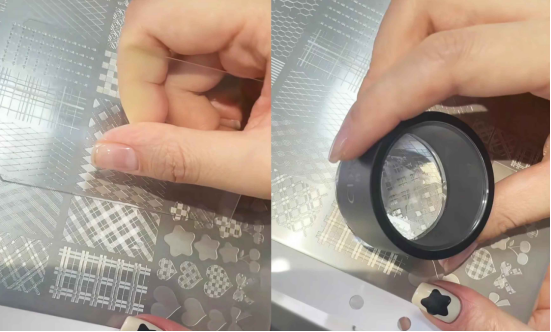
Next, use a clean and dry nail stamp to press down on the pattern coated with adhesive glue, transferring the pattern onto the stamp. Then, carefully press the stamp onto the desired location on the nail (such as the center of the nail or wherever you want to place the stars), and the small five-pointed star pattern will be transferred onto the nail surface.
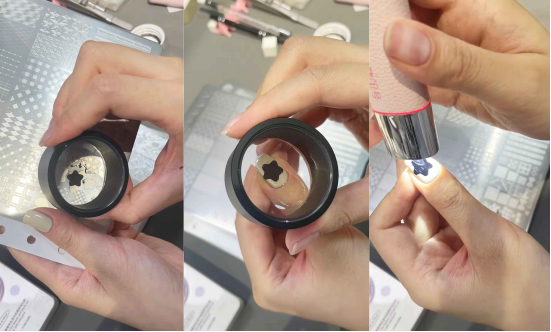
After completing the operation, place the nails under the nail lamp to cure the black star pattern and prevent it from shifting during subsequent operations.
Step 3: Add white checkered pattern
Select white patted glue, dip the glue tool in it, and apply it to the nail plate with the checkered pattern. Make sure that the patted glue covers the entire checkered area and is applied evenly.
The scraper removes excess glue, then presses the stamp onto the checkered steel plate coated with glue to transfer the checkered pattern onto the stamp.
Then press the stamp onto your nail (you can choose to cover the area around the star or place it in a position that complements the star to create a checkered pattern combined with stars).
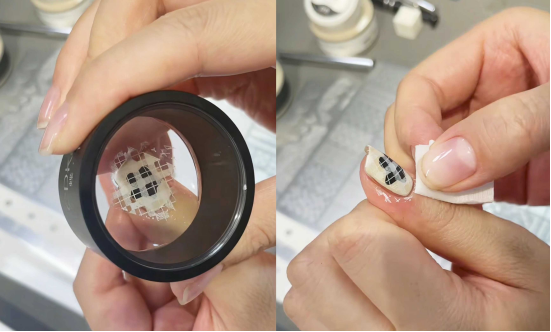
Wipe off any excess glue around the edges, place under a nail lamp, and let the white checkered pattern adhere firmly to the nail.
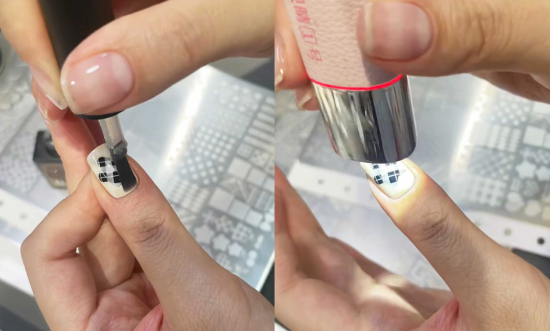
Step 4: Top Coat
Finally, apply a top coat to the surface of the nail and cure it under a lamp to enhance the durability and shine of the manicure.
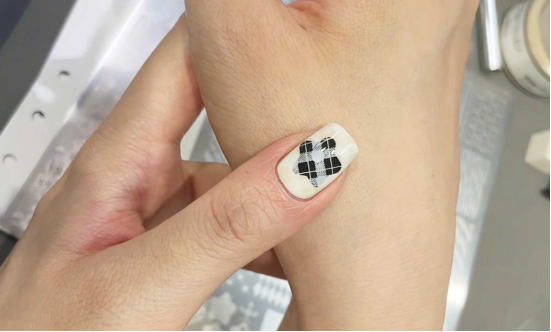
By following these steps, you can create a stylish nail design featuring a checkered pattern and star print. This design combines the playful charm of stars with the retro chic of a checkered pattern, making it perfect for pairing with various styles of clothing in your daily life. If you like this style, give it a try!
This tutorial uses CHROMÉCLAIR’s HEMA-free Gel Polish. The brand places particular emphasis on safety, offering low irritation, environmental friendliness, and no harmful ingredients such as HEMA, which greatly reduces the risk of allergies and gently protects nail health. It also comes in a wide range of colors that keep up with popular aesthetics, allowing every user to enjoy the nail art process with peace of mind and comfort.

If you have any questions during the process, the video tutorial below provides detailed answers. If you find it useful, don’t forget to like and save it, and subscribe! See you next time!