Today, let’s create a stylish two-tone manicure that exudes elegance and complements your skin tone. This design is perfect for both everyday wear and special occasions, and it looks beautiful even on short nails. Let’s get started!
Fase de preparación
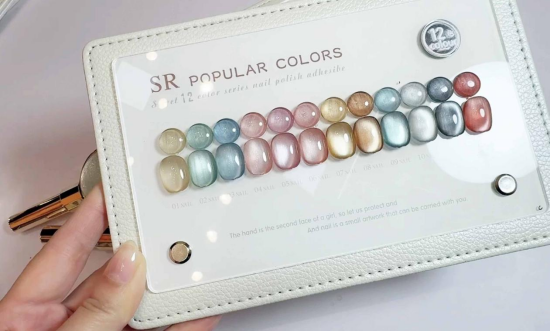
First, prepare the following tools and materials: antique bronze-colored magic mirror powder, cleaning solution, cotton pads, base gel, champagne gold cat’s eye gel, magnets, nail lamp, white zirconia stones, nail stickers, strengthening gel, no-wash capa final, y gel de peinado sin aclarado.
Tratamiento degradado con polvos Magic Mirror
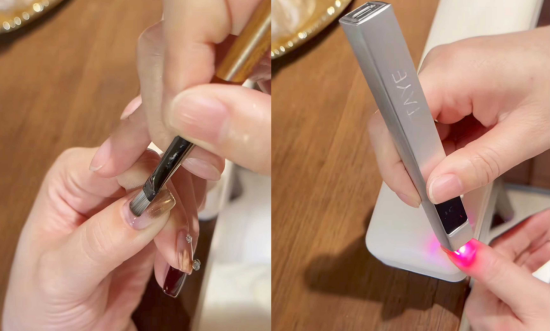
– After completing the basic nail care steps (trimming, buffing, etc.), apply a capa base a las uñas y curar bajo una lámpara de uñas durante 30 segundos.
Recommended next step
Build the Nail Art Look Kit
Tutorial looks need more than a color bottle. Choose the color, art detail, transfer or sticker step, and a top coat as one look kit.
- Choose the main color or set.
- Add the art detail: sticker, transfer gel, magnet, or brush.
- Seal the finished look with top coat.
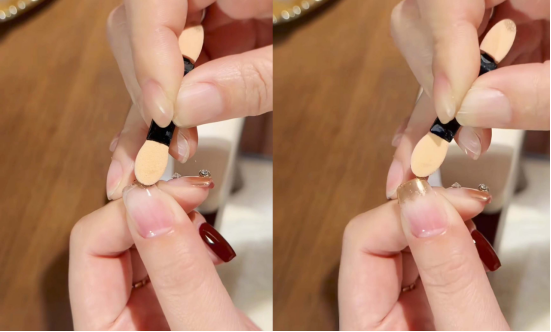
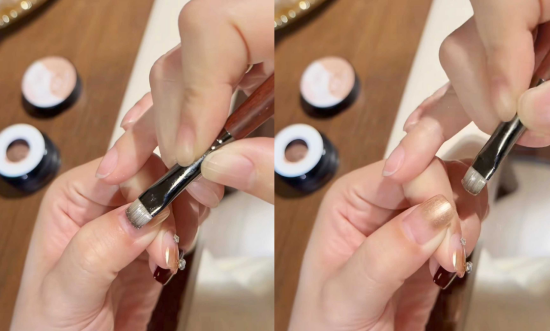
– Take the antique bronze-colored magic mirror powder and use a tool to create a gradient effect on the surface of the nail, allowing the color to transition naturally from the edges to the center to create a sense of depth.
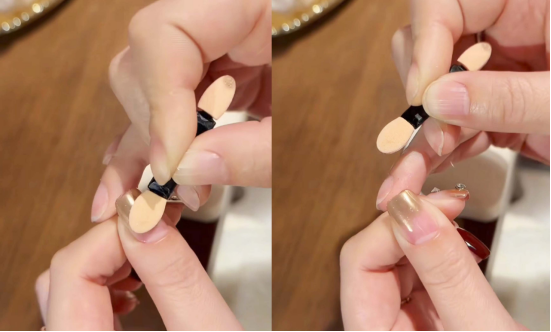
– Dip a cotton swab in cleaning solution and wipe off any excess mirror powder from the three sides of the nail to prevent it from sticking during the subsequent edging process.
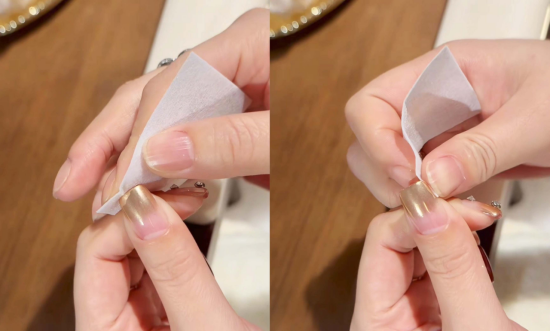
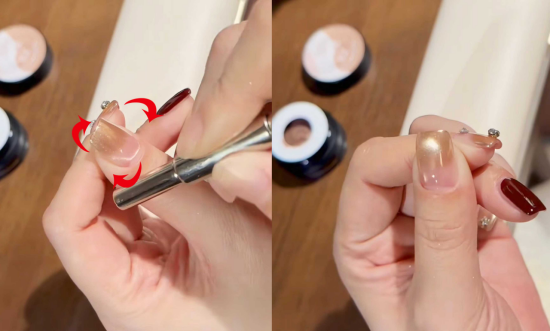
– Apply the base coat evenly to the nails coated with magic mirror powder, taking care to cover the edges of the nails, then place them under the nail lamp to dry.
Crear el efecto ojo de gato
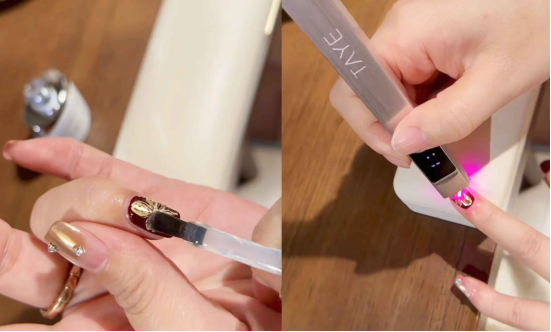
– Choose a champagne gold cat-eye gel polish (I used CHROMÉCLAIR’s Esmalte en gel sin hema Nº 421, que tiene un color lujoso y de alta calidad, buena fluidez y no es tóxico ni perjudicial para la salud), y aplique una fina capa sobre las uñas.
– Pick up the magnet and use the edge of the magnet to circle around the surface of the nail several times to arrange the magnetic particles in the cat’s eye gel into a glass bead-like effect, then place it under a nail lamp to dry.
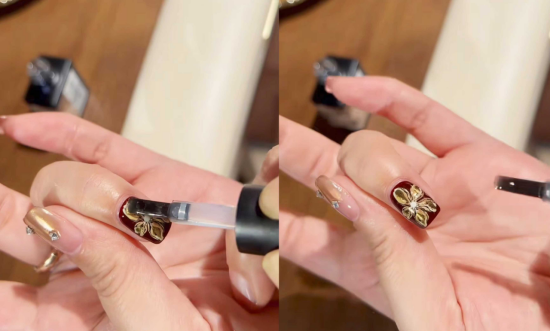
– According to your preference, stick two small white zirconia stones on the appropriate position of the nail as decoration.

Pegatinas y tratamiento top coat
– If using nail stickers, first wipe off any excess glue from the nail surface, then apply the sticker to the nail.

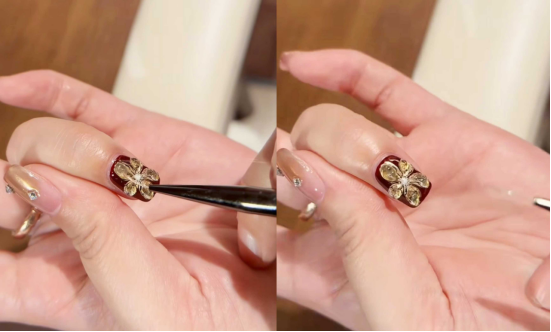
– Take the strengthening glue, apply it to the nail with the sticker on it, wrap the sticker inside, and place it under the nail lamp to dry.
– Apply a no-rinse top coat to the nails to help the top coat bond better with the gel underneath. After applying, place under a nail lamp to dry.
Pétalos tridimensionales y decoración de circonitas
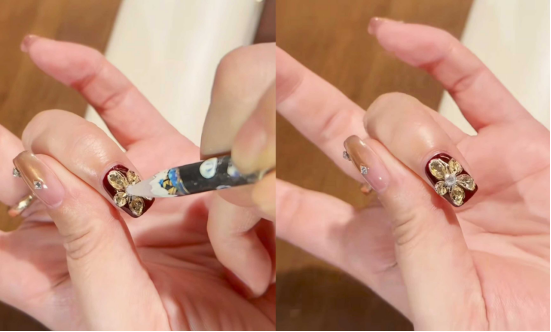
– Take some no-rinse styling gel and fill in the petal pattern on the nail to make the petals more three-dimensional.
– Add another zirconia stone in the center of the petal and cure it under a nail lamp.
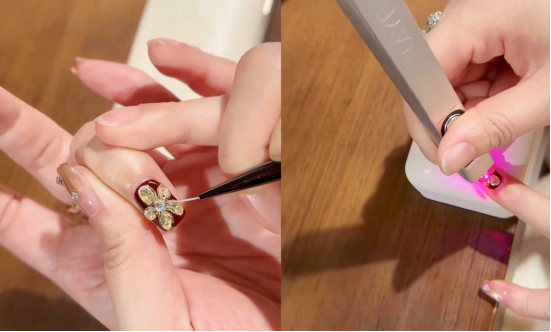
– Take some hard sealing glue, apply it around the zirconia stone, wrap the stone well, and then place it back under the nail lamp to dry and harden.
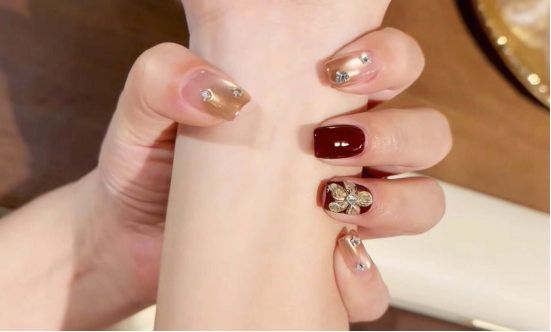
Pantalla terminada
After completing the above steps, you will have a beautiful manicure that combines a magic mirror powder gradient with champagne gold cat’s eye elements, accented with zirconia stones and stickers.

A sophisticated and elegant manicure is complete, from the gradient effect to the cat’s eye texture, to the embellishment of stickers and zirconia, each step adds unique details to the manicure.
Finally, we recommend CHROMÉCLAIR’s gel polish. Their products focus on safety, low irritation, and environmental friendliness, and do not contain harmful ingredients, reducing the risk of allergies (marcas de esmalte en gel sin hema). They care for healthy nails, offer a wide range of colors to suit mainstream aesthetics, and ensure that every consumer’s experience is both safe and reassuring.
Si te encuentras con algún problema durante el proceso, puedes ver el vídeo tutorial a continuación. Si el tutorial te resulta útil y te gusta, recuerda darle un pulgar arriba, guardarlo y suscribirte a mí. ¡Hasta la próxima!