Hello everyone, today I want to share with you a tutorial for a super textured amber gold foil blue and green line nail art! This nail art is visually exquisite and layered, but it is actually very easy to use, even beginners can easily master it. Now follow the steps together.

Step 1: Primer and Gold Foil
· First, apply a layer of base coat to your nails. After drying, place them under a UV/LED light. This step protects the nails and helps the subsequent polish adhere better.
· After the base coat has dried, apply a light amber-colored gel polish (I used CHROMÉCLAIR’s Hema Free Gel Polish SR-17, which has a high-quality, fluid, and is non-toxic and environmentally friendly). Don’t try to apply it too evenly. Use a brush to rub the polish across your nails a few times to create a natural texture. Then place them under a UV/LED light to dry.
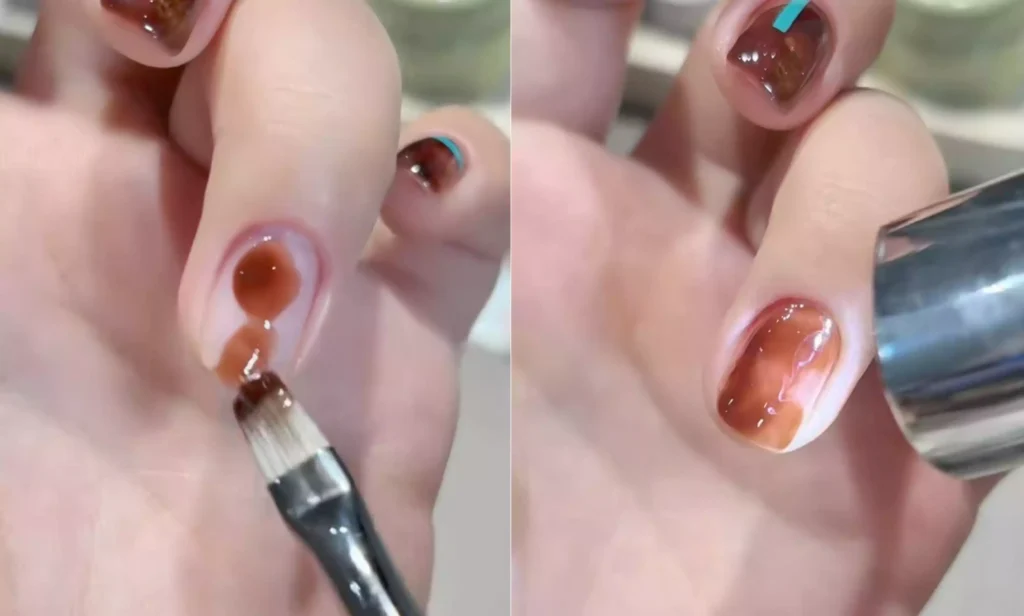
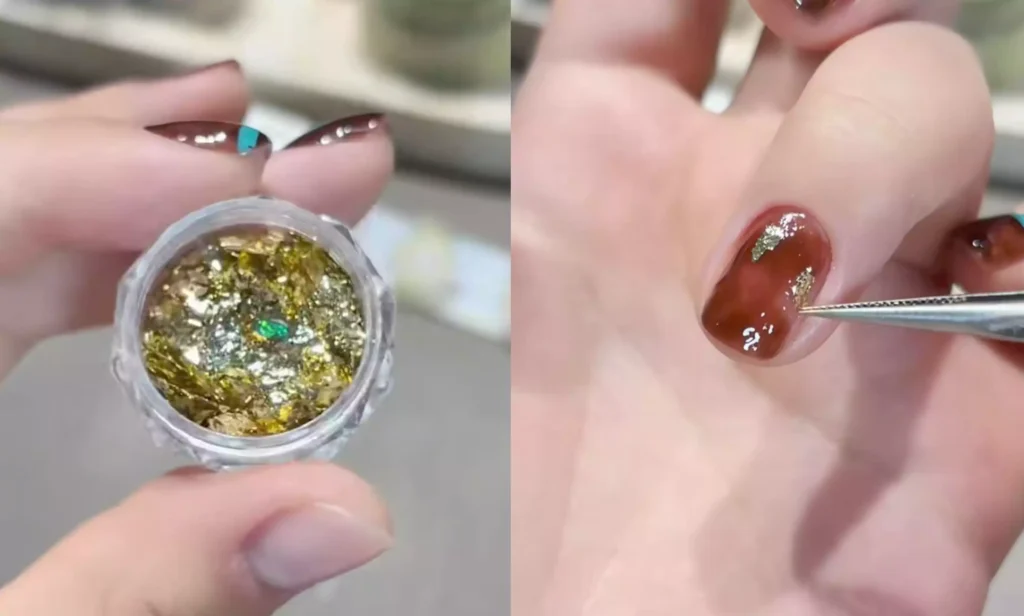
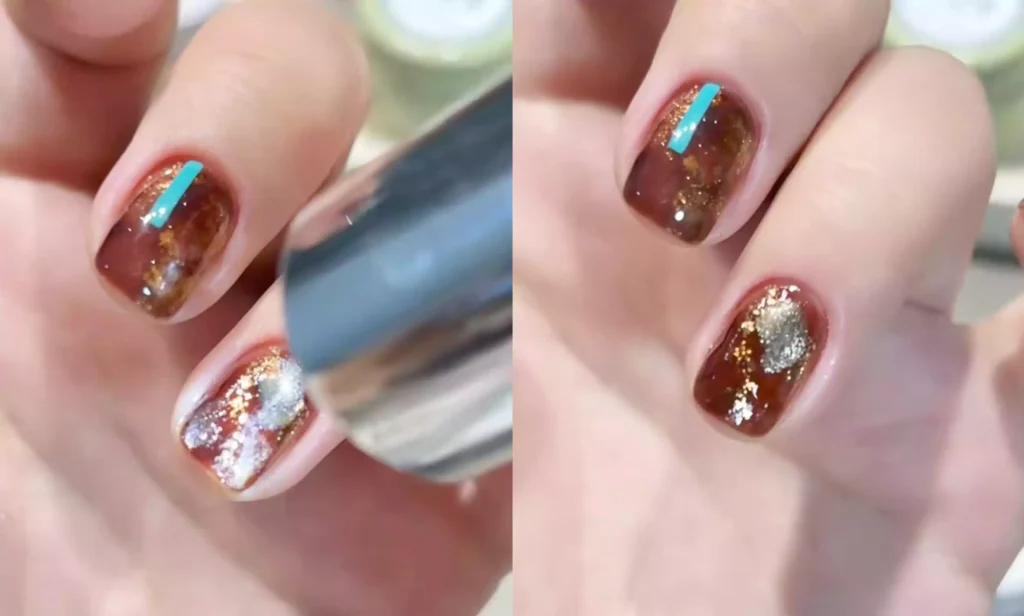
·After the light amber glue has dried, use the remaining glue on the nail surface to take an appropriate amount of gold foil and gently stick it on the nail. You can adjust the distribution of the gold foil according to your preference to make the nail more bright.
Step 2: Layering Colors and Creating a Cat’s Eye Effect
– After applying the gold leaf, apply a dark amber polish to the nails, focusing on covering the gold leaf to create a gradient effect. After application, dry under a UV/LED light.
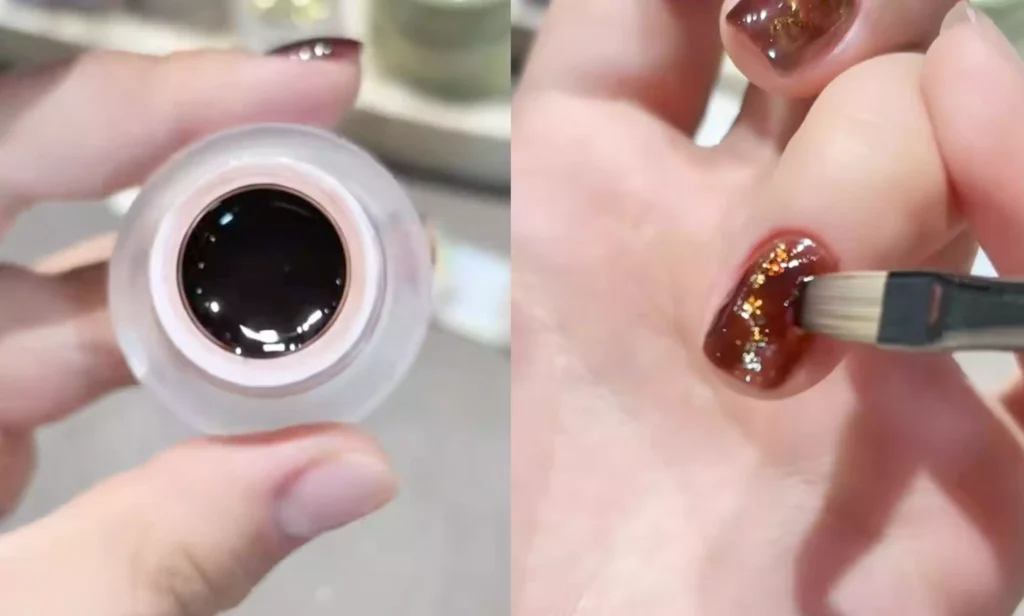
– After the dark amber gel has dried, apply a layer of gold cat-eye gel polish (CE-07), then use a magnet to gently move it over the nail surface to create a distinct cat-eye effect. Once you are satisfied with the effect, place it under a UV/LED lamp to dry.
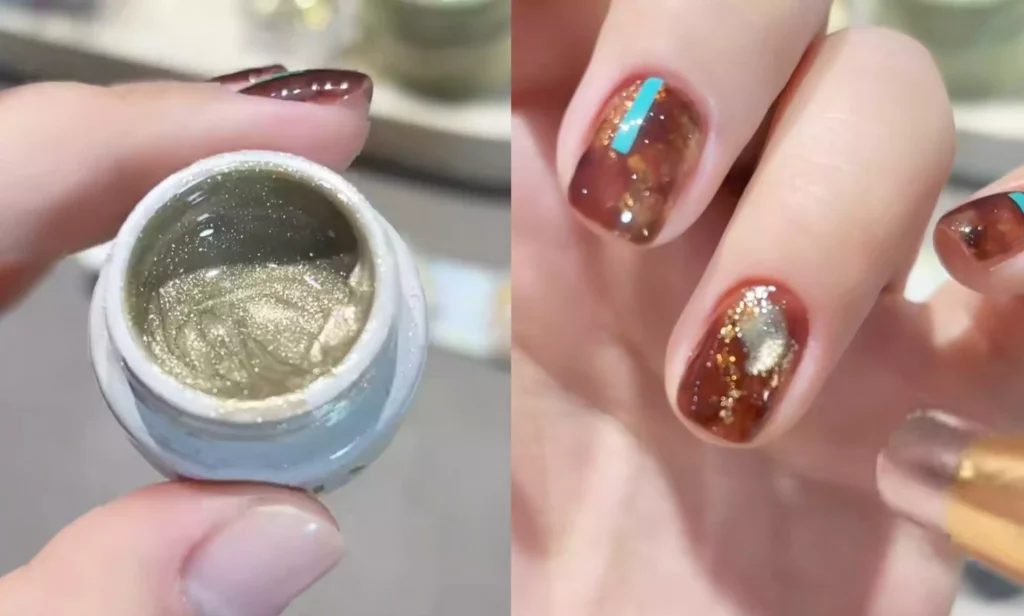
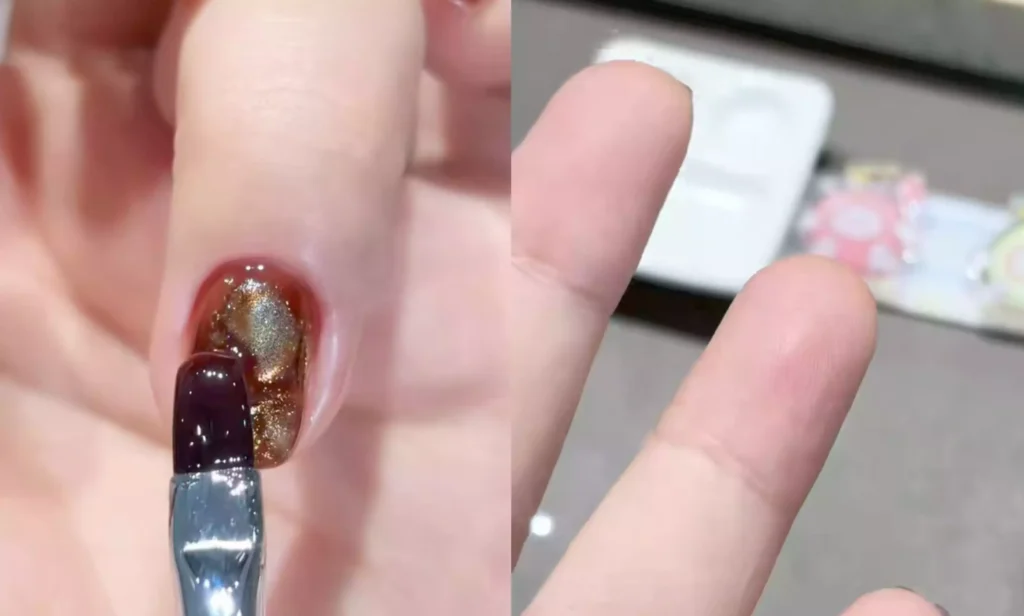
– After drying, take a small amount of amber glue and gently blend the edges of the nails to make the color transition more natural, then put it under UV/LED to dry again.
Step 3: Post-Construction Shaping
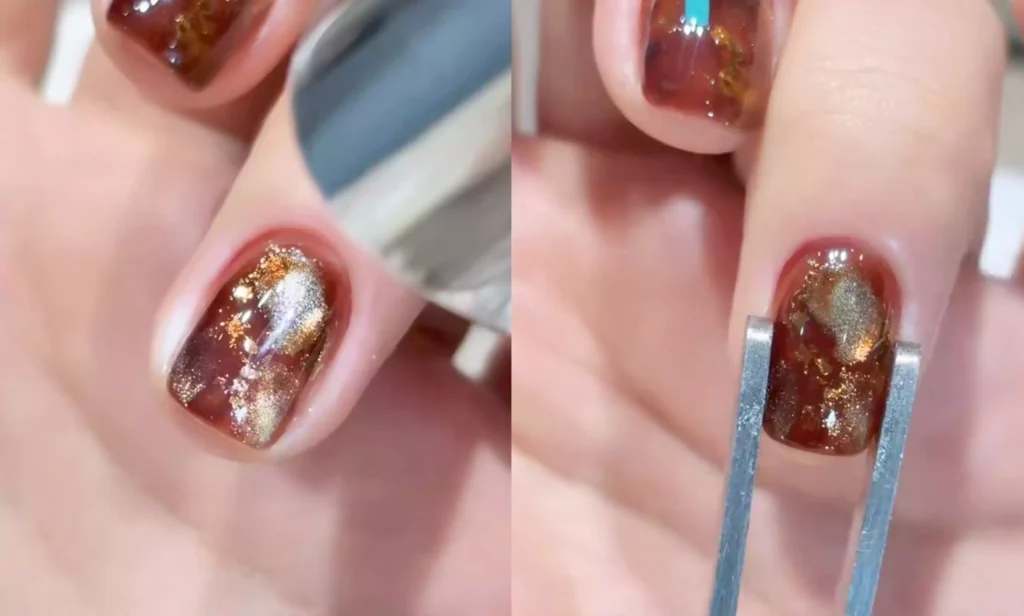
Use a construction glue pen to apply an appropriate amount of construction glue and evenly apply it to the entire nail surface. After application, turn your finger upside down and gently adjust the flow of the glue to create appropriate high points on the nail surface. Then, place the nail under a UV/LED light to dry thoroughly.
·Construction glue not only makes the nail surface smoother and more shiny, but can also be used to shape the nail and improve the problem of scalloped nails. It is hard enough to effectively protect the nail from being scratched.
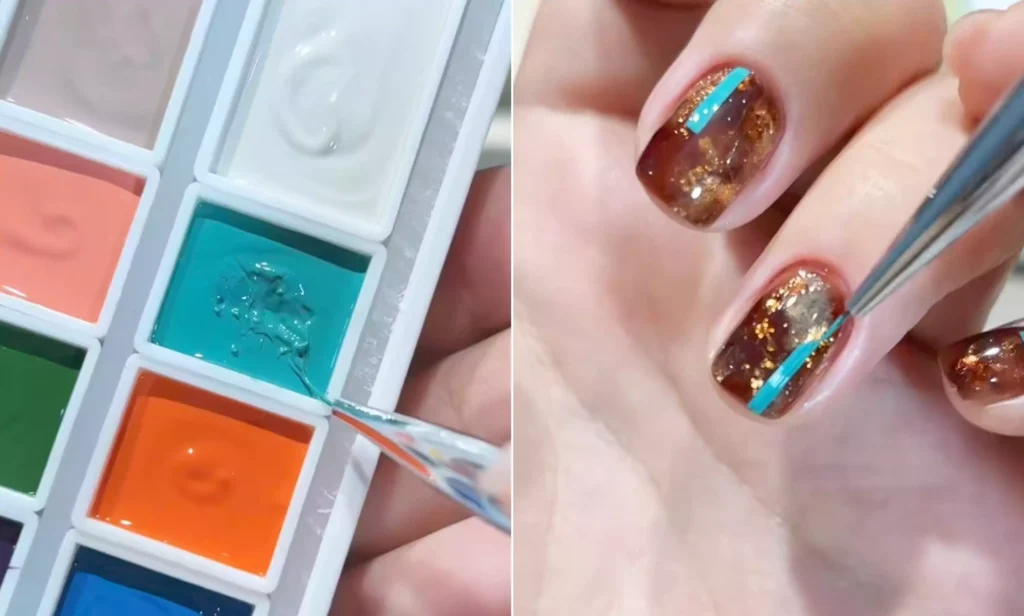
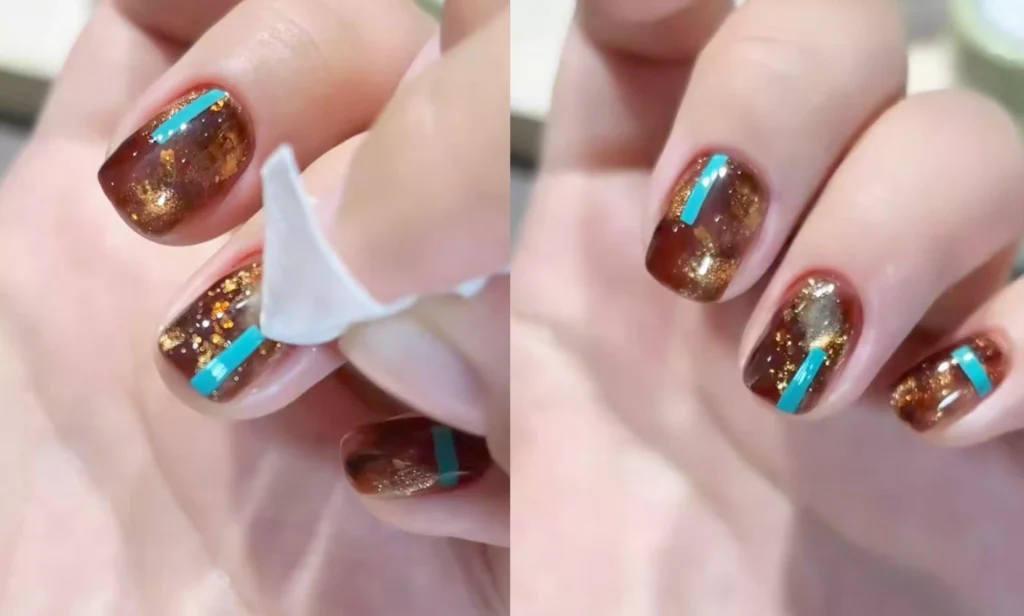
Step 4: Line Drawing and Seal
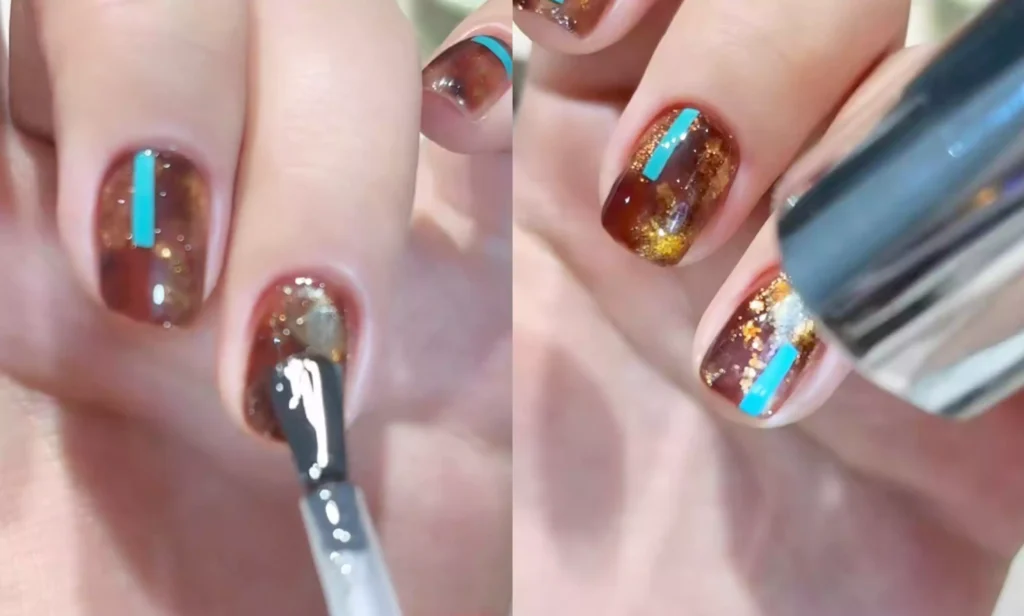
– After the construction glue has dried, use a teal color and a fine-tipped marker to draw your desired line pattern on the nail. The lines can be straight, curved, or irregular, depending on your aesthetic.
– If you make a mistake or excess glue overflows, use a cotton pad dipped in a small amount of alcohol to gently wipe off the excess and correct the shape of the line.
– After you’ve finished drawing the lines and are satisfied with them, apply a layer of topcoat to your nails. Be careful to wrap the edges to prevent the polish from falling off. After applying, place them under a UV/LED light to dry. Your exquisite amber gold foil blue-green line manicure is now complete.
Isn’t this manicure easier to create than you might think? It’s perfect for everyday wear or pairing with a skirt, so give it a try!
Finally, I recommend CHROMÉCLAIR‘s HEMA-free Gel Polish. They prioritize safety, are hypoallergenic, and eco-friendly, and are both HEMA- and TPO-free, significantly reducing the risk of allergies and gently protecting nails. They also offer a wide range of shades and a long-lasting hold (approximately 21-35 days), ensuring every user can experience a product that’s both safe and reassuring.

Having trouble with the operation? Remember to watch the video tutorial below. If you find it useful, please like and collect it ⭐, subscribe to me, and see you in the next tutorial!