Ciao a tutte, oggi voglio condividere con voi un tutorial per una nail art super strutturata con linee blu e verdi! Questa nail art è visivamente squisita e stratificata, ma in realtà è molto facile da usare, anche i principianti possono facilmente padroneggiarla. Ora seguite insieme i passaggi.

Fase 1: Primer e lamina d'oro
- Per prima cosa, applicare uno strato di mano di fondo sulle unghie. Dopo l'asciugatura, mettetele sotto una luce UV/LED. Questo passaggio protegge le unghie e aiuta lo smalto successivo ad aderire meglio.
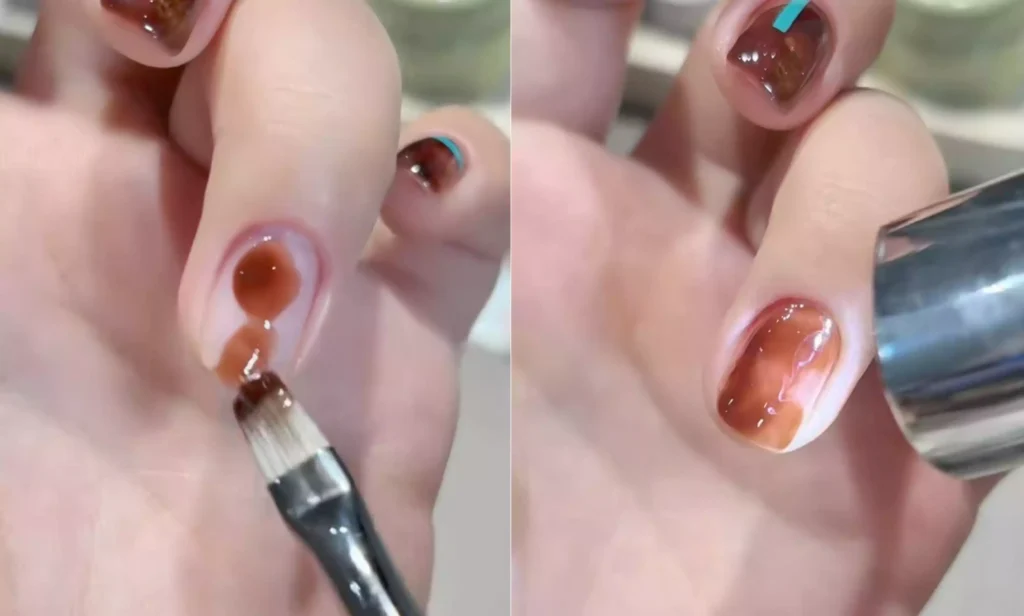
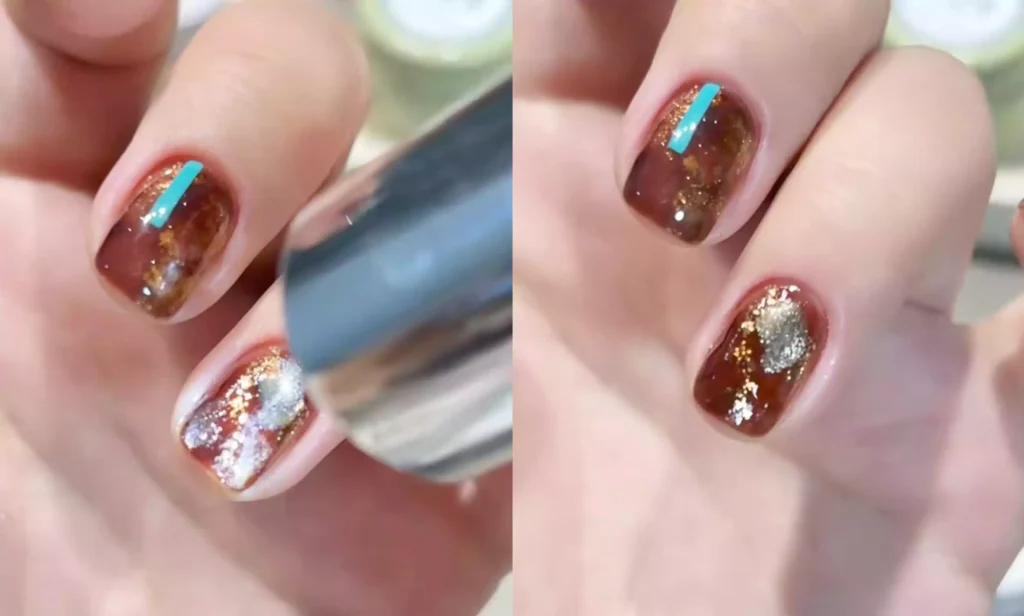
- Dopo che la base si è asciugata, applicare uno smalto gel di colore ambrato chiaro (io ho usato Di CHROMÉCLAIR Smalto gel senza ema SR-17, which has a high-quality, fluid, and is non-toxic and environmentally friendly). Don’t try to apply it too evenly. Use a brush to rub the polish across your nails a few times to create a natural texture. Then place them under a UV/LED light to dry.
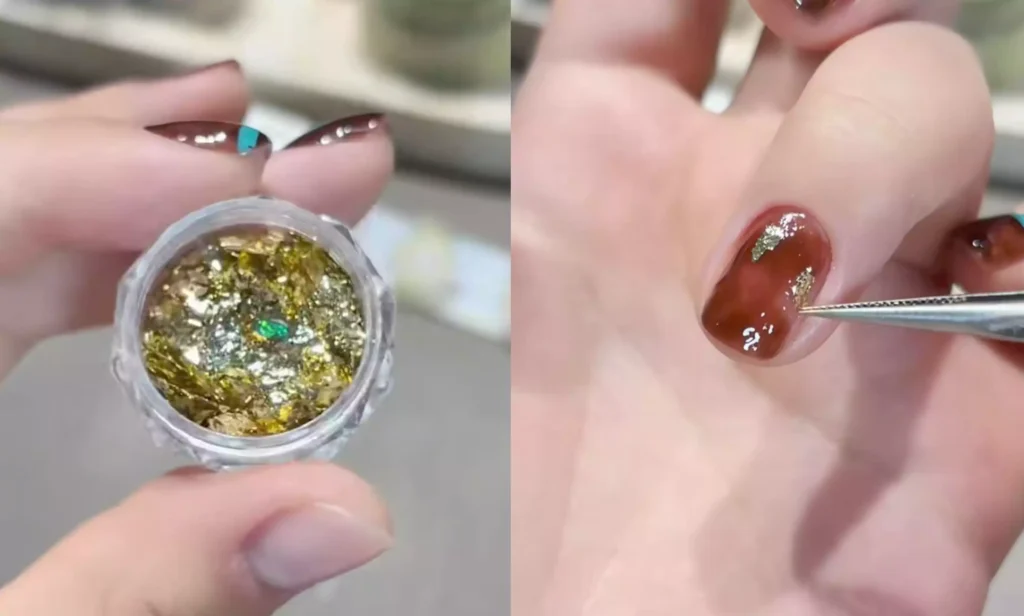
-Dopo che la colla ambra chiara si è asciugata, utilizzate la colla rimasta sulla superficie dell'unghia per prendere una quantità adeguata di lamina d'oro e incollarla delicatamente sull'unghia. Potete regolare la distribuzione della lamina d'oro in base alle vostre preferenze per rendere l'unghia più luminosa.
Passo successivo consigliato
Crea il kit per un look di nail art
Per realizzare un tutorial di bellezza non basta una boccetta di colore. Scegli il colore, il dettaglio artistico, la tecnica di trasferimento o l'applicazione dell'adesivo e il top coat, tutto in un unico kit.
- Scegli il colore principale o il set.
- Aggiungi il dettaglio artistico: adesivo, gel per trasferimento, magnete o pennello.
- Sigilla il risultato finale con uno strato di top coat.
Kit per nail artVedere il gel di trasferimentoConfronta tutte le routine
Step 2: Layering Colors and Creating a Cat’s Eye Effect
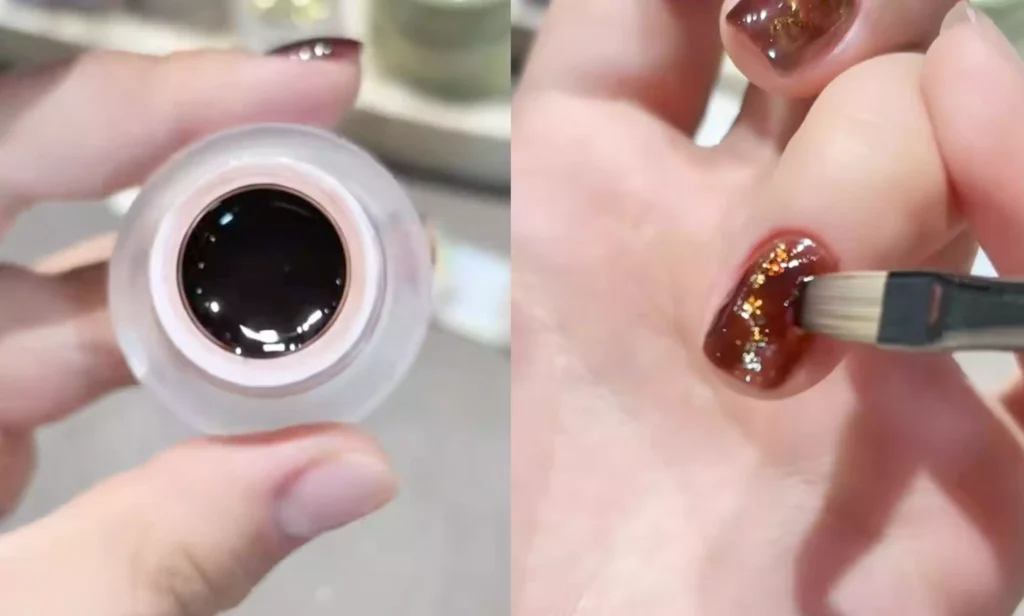
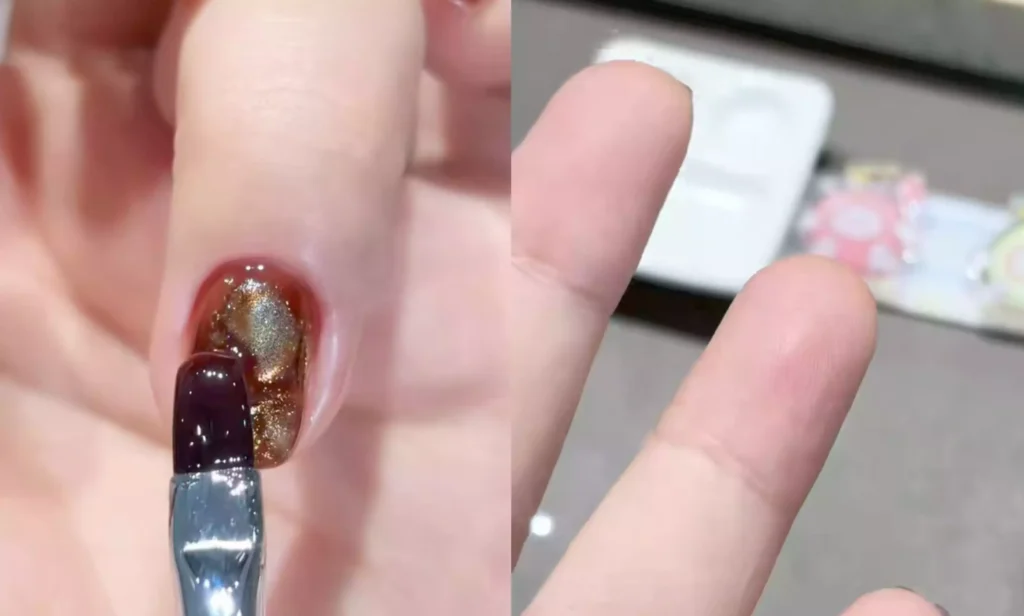
– After applying the gold leaf, apply a dark amber polish to the nails, focusing on covering the gold leaf to create a gradient effect. After application, dry under a UV/LED light.
– After the dark amber gel has dried, apply a layer of gold smalto gel occhi di gatto (CE-07), quindi utilizzare una calamita per muoverla delicatamente sulla superficie dell'unghia per creare un netto effetto cat-eye. Una volta soddisfatte dell'effetto, mettetelo sotto una lampada UV/LED per farlo asciugare.
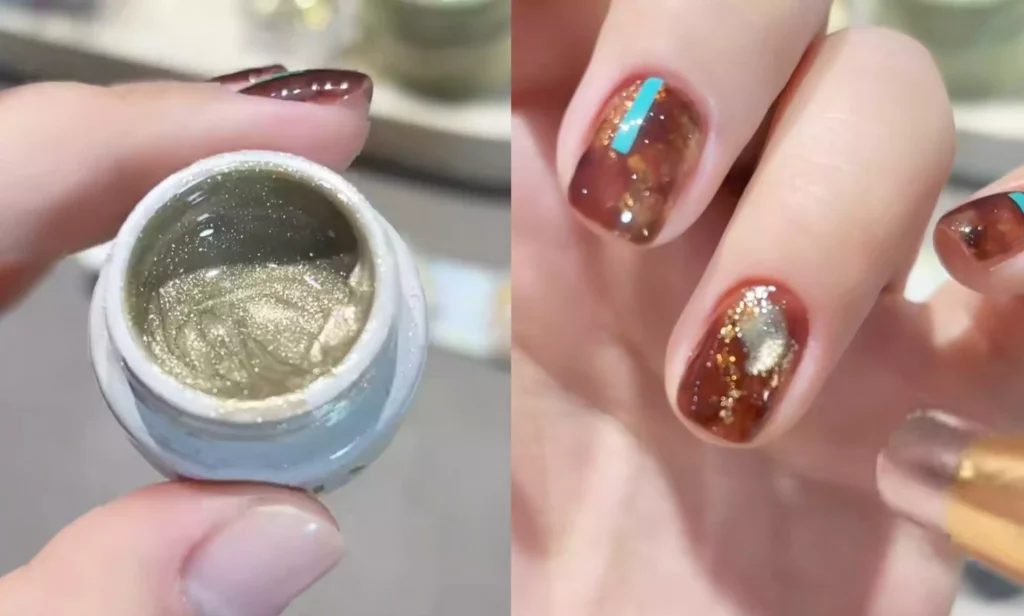
– After drying, take a small amount of amber glue and gently blend the edges of the nails to make the color transition more natural, then put it under UV/LED to dry again.
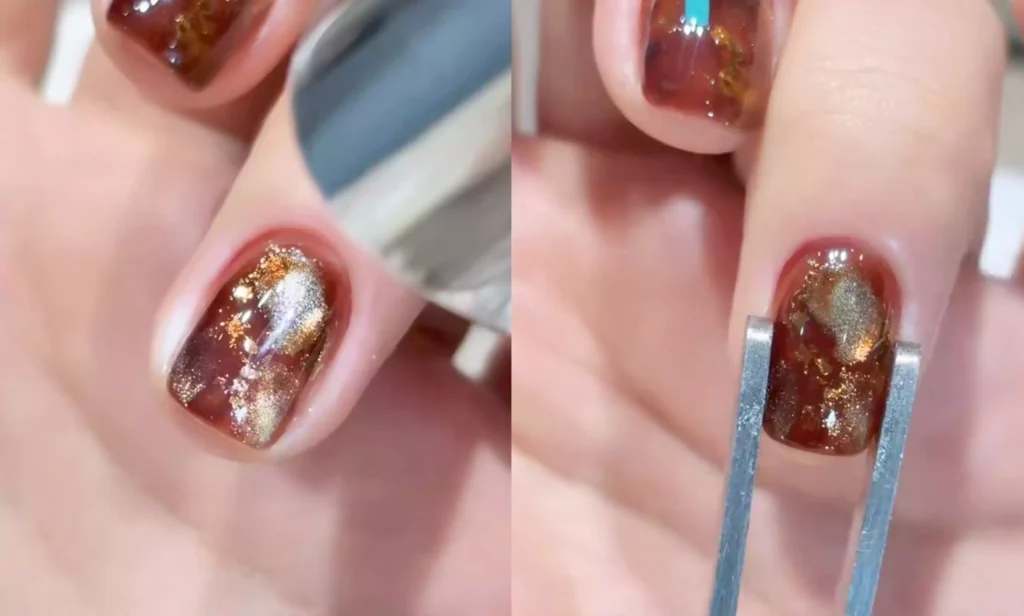
Fase 3: Modellazione post-costruzione
Con una penna per colla da costruzione, applicare una quantità adeguata di colla da costruzione e stenderla uniformemente su tutta la superficie dell'unghia. Dopo l'applicazione, capovolgere il dito e regolare delicatamente il flusso della colla per creare punti alti sulla superficie dell'unghia. Quindi, posizionare l'unghia sotto una luce UV/LED per farla asciugare completamente.
-La colla da costruzione non solo rende la superficie dell'unghia più liscia e lucida, ma può anche essere utilizzata per modellare l'unghia e migliorare il problema delle unghie smerlate. È abbastanza dura da proteggere efficacemente l'unghia dai graffi.
Fase 4: Disegno delle linee e sigillo
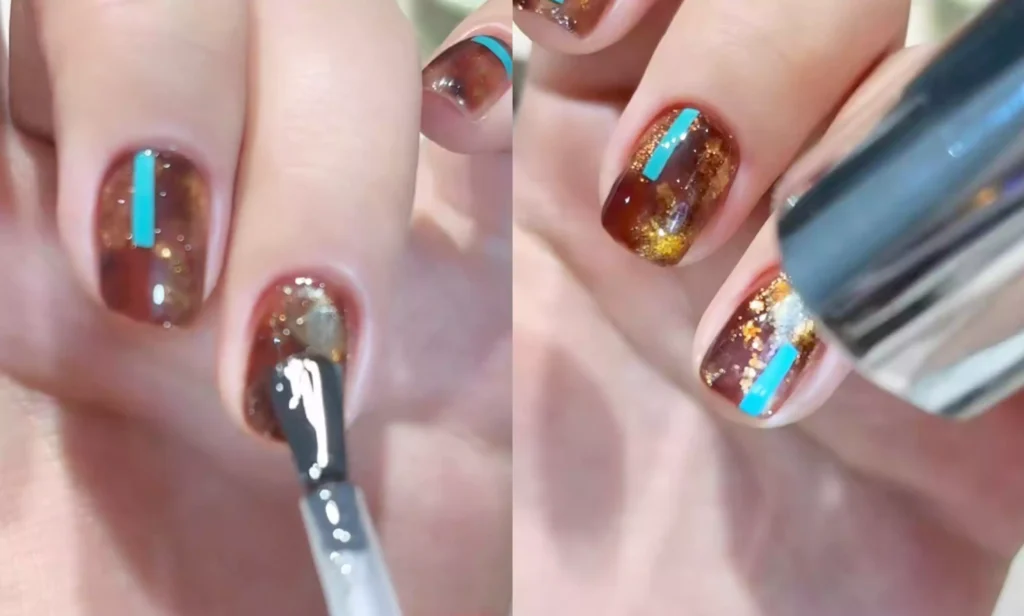
– After the construction glue has dried, use a teal color and a fine-tipped marker to draw your desired line pattern on the nail. The lines can be straight, curved, or irregular, depending on your aesthetic.
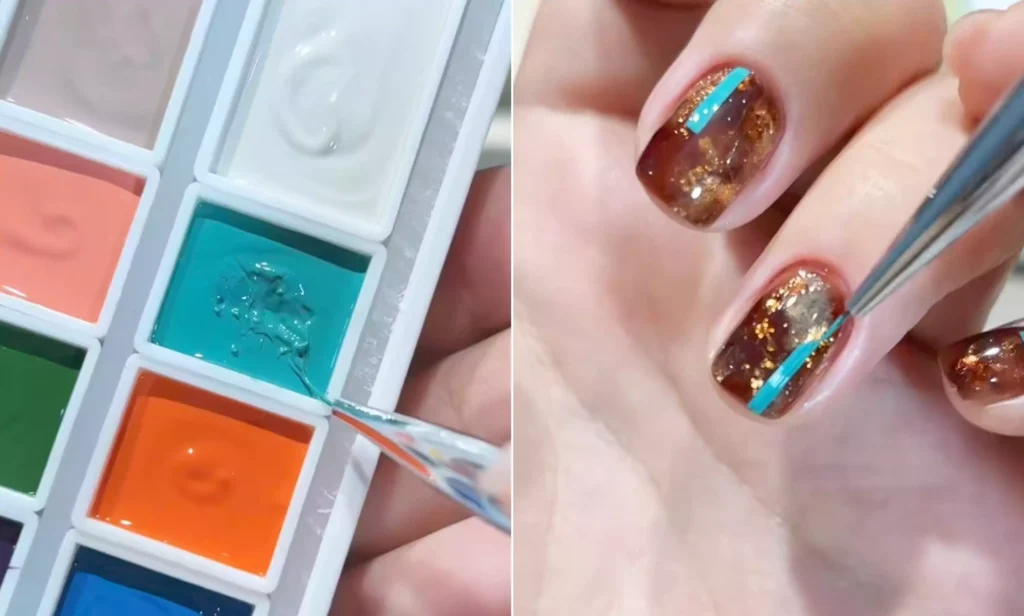
– If you make a mistake or excess glue overflows, use a cotton pad dipped in a small amount of alcohol to gently wipe off the excess and correct the shape of the line.
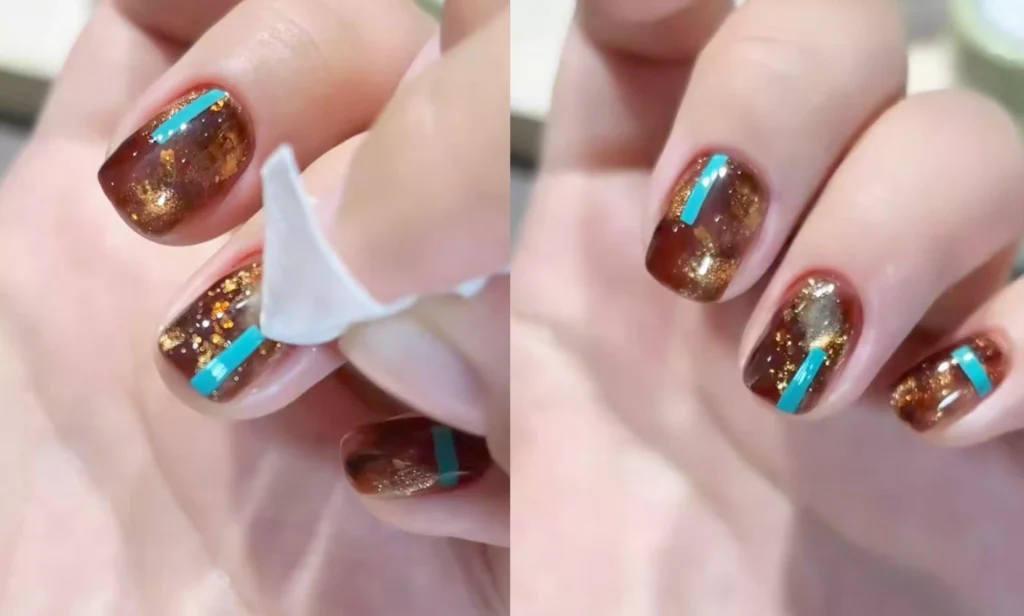
– After you’ve finished drawing the lines and are satisfied with them, apply a layer of topcoat to your nails. Be careful to wrap the edges to prevent the polish from falling off. After applying, place them under a UV/LED light to dry. Your exquisite amber gold foil blue-green line manicure is now complete.
Isn’t this manicure easier to create than you might think? It’s perfect for everyday wear or pairing with a skirt, so give it a try!
Infine, raccomando CHROMÉCLAIR‘s Smalto gel senza HEMA. They prioritize safety, are hypoallergenic, and eco-friendly, and are both HEMA- and TPO-free, significantly reducing the risk of allergies and gently protecting nails. They also offer a wide range of shades and a long-lasting hold (approximately 21-35 days), ensuring every user can experience a product that’s both safe and reassuring.

Avete problemi con il funzionamento? Ricordatevi di guardare il video tutorial qui sotto. Se lo trovate utile, mettete un "mi piace" e raccoglietelo ⭐, iscrivetevi e arrivederci al prossimo tutorial!