Hola a todos, ¡hoy quiero compartir con vosotros un tutorial para un nail art de líneas azules y verdes en lámina de oro ámbar súper texturizado! Este nail art es visualmente exquisito y en capas, pero en realidad es muy fácil de usar, incluso los principiantes pueden dominarlo fácilmente. Ahora siga los pasos juntos.

Paso 1: Imprimación y lámina dorada
- En primer lugar, aplique una capa de capa base a sus uñas. Una vez secas, colócalas bajo una luz UV/LED. Este paso protege las uñas y ayuda a que el esmalte posterior se adhiera mejor.
- Una vez seca la capa base, aplica un esmalte en gel de color ámbar claro (yo utilicé CHROMÉCLAIR’s Esmalte en gel sin hema SR-17, which has a high-quality, fluid, and is non-toxic and environmentally friendly). Don’t try to apply it too evenly. Use a brush to rub the polish across your nails a few times to create a natural texture. Then place them under a UV/LED light to dry.
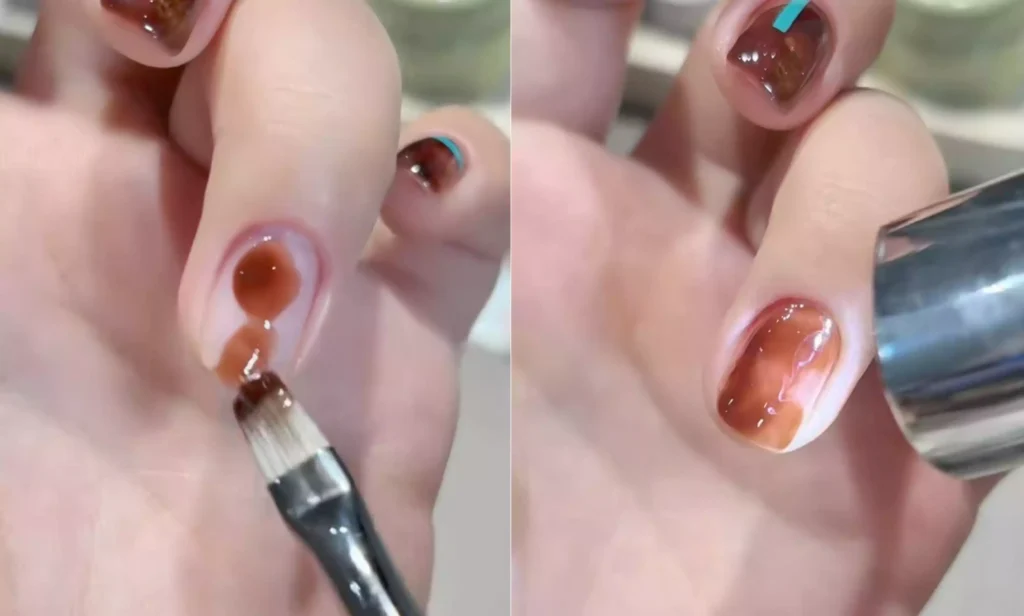
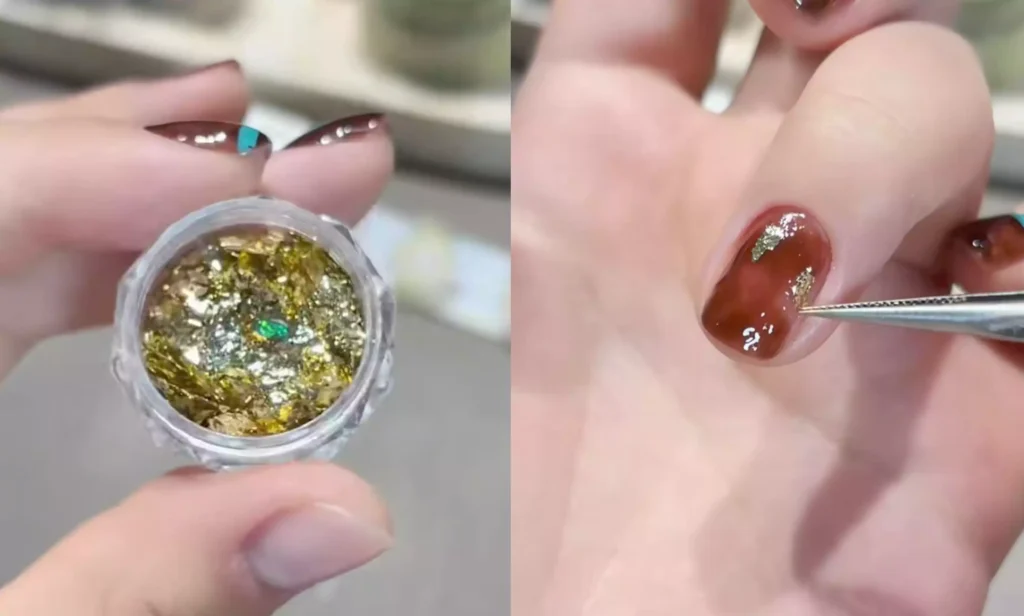
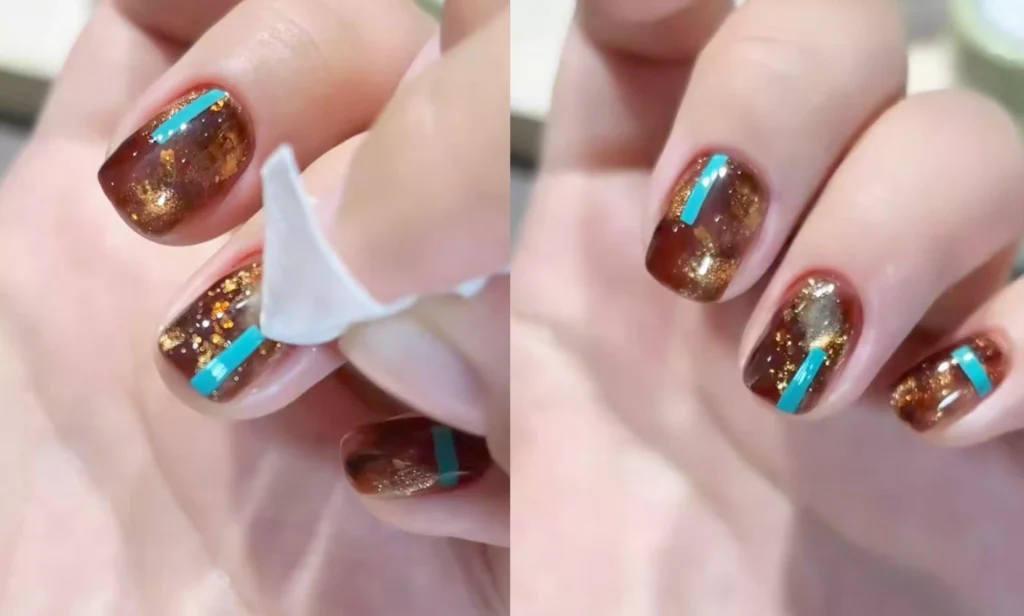
-Una vez seco el pegamento ámbar claro, utilice el pegamento sobrante en la superficie de la uña para coger una cantidad adecuada de lámina dorada y péguela suavemente sobre la uña. Puede ajustar la distribución de la lámina dorada según sus preferencias para que la uña quede más brillante.
Recommended next step
Build the Nail Art Look Kit
Tutorial looks need more than a color bottle. Choose the color, art detail, transfer or sticker step, and a top coat as one look kit.
- Choose the main color or set.
- Add the art detail: sticker, transfer gel, magnet, or brush.
- Seal the finished look with top coat.
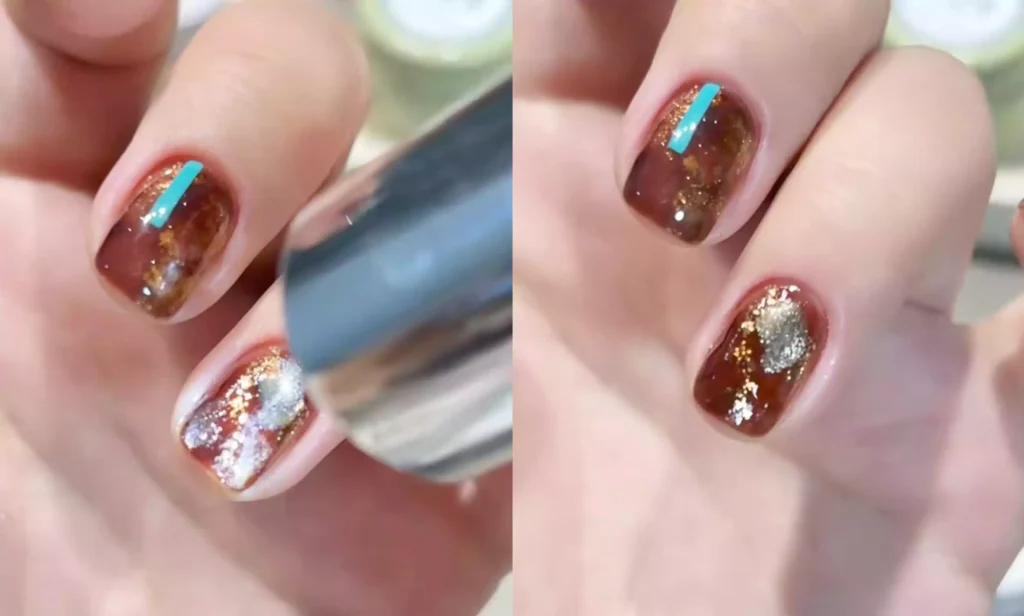
Step 2: Layering Colors and Creating a Cat’s Eye Effect
– After applying the gold leaf, apply a dark amber polish to the nails, focusing on covering the gold leaf to create a gradient effect. After application, dry under a UV/LED light.
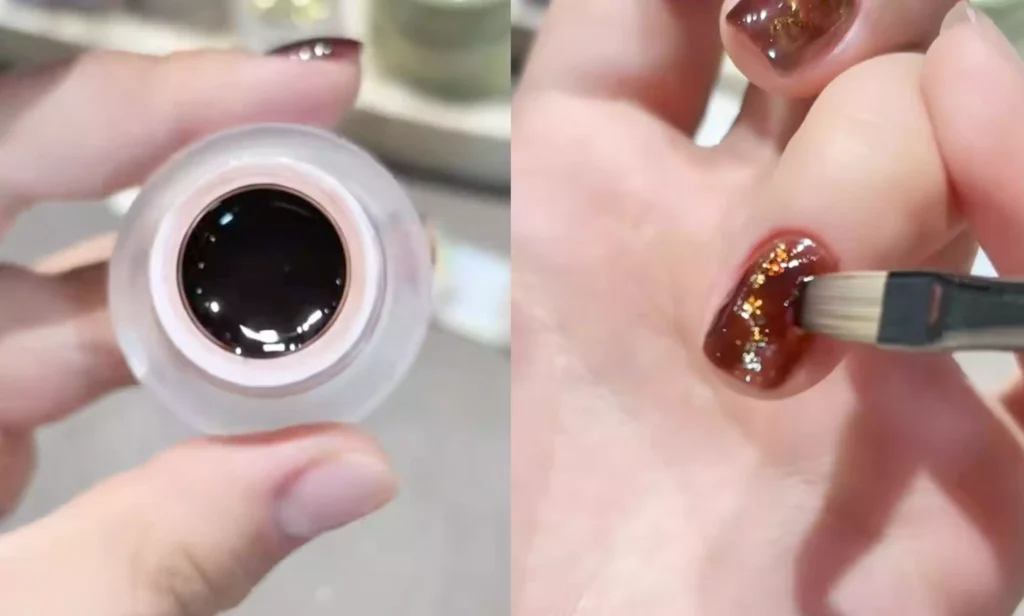
– After the dark amber gel has dried, apply a layer of gold esmalte en gel cat-eye (CE-07) y, a continuación, utiliza un imán para moverlo suavemente sobre la superficie de la uña y crear un marcado efecto de ojos de gato. Cuando esté satisfecho con el efecto, colóquelo bajo una lámpara UV/LED para que se seque.
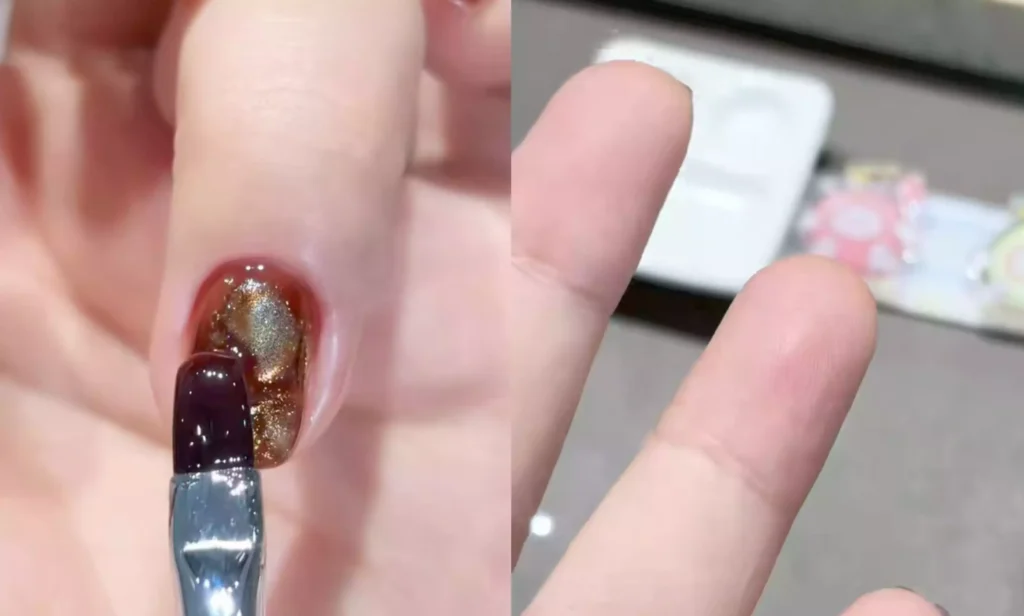
– After drying, take a small amount of amber glue and gently blend the edges of the nails to make the color transition more natural, then put it under UV/LED to dry again.
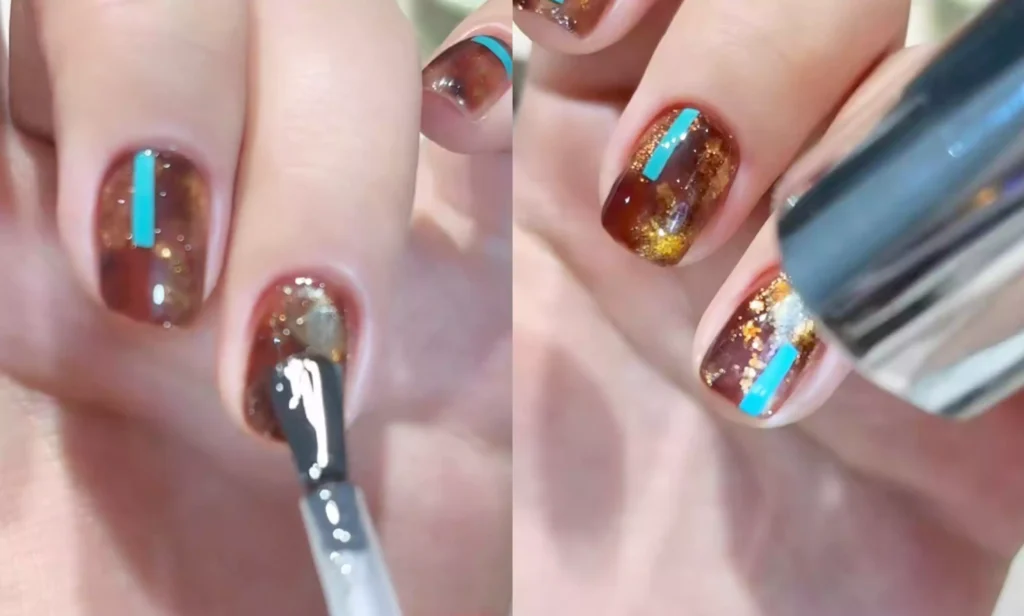
Etapa 3: Conformación posterior a la construcción
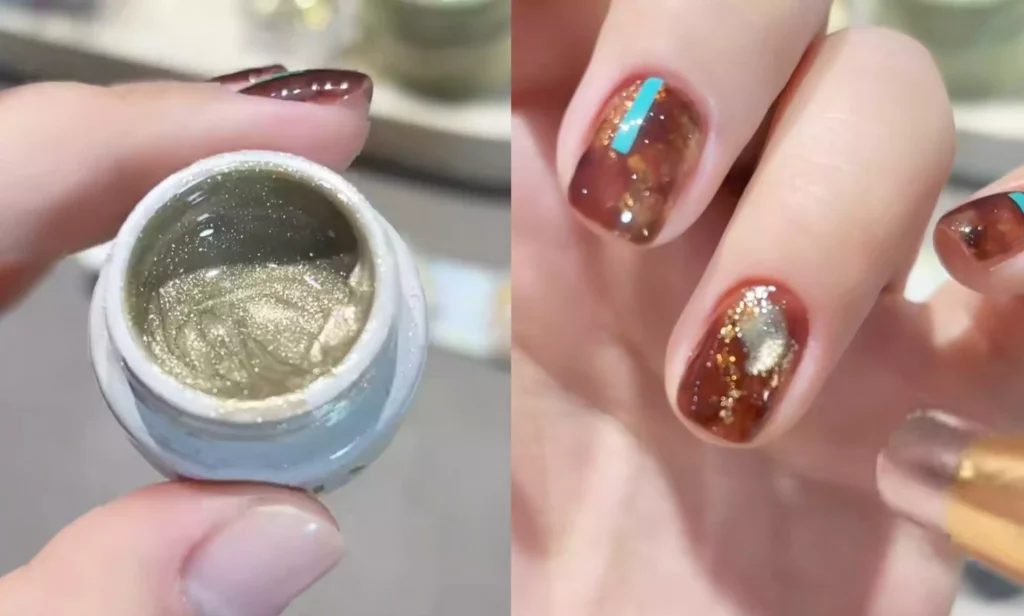
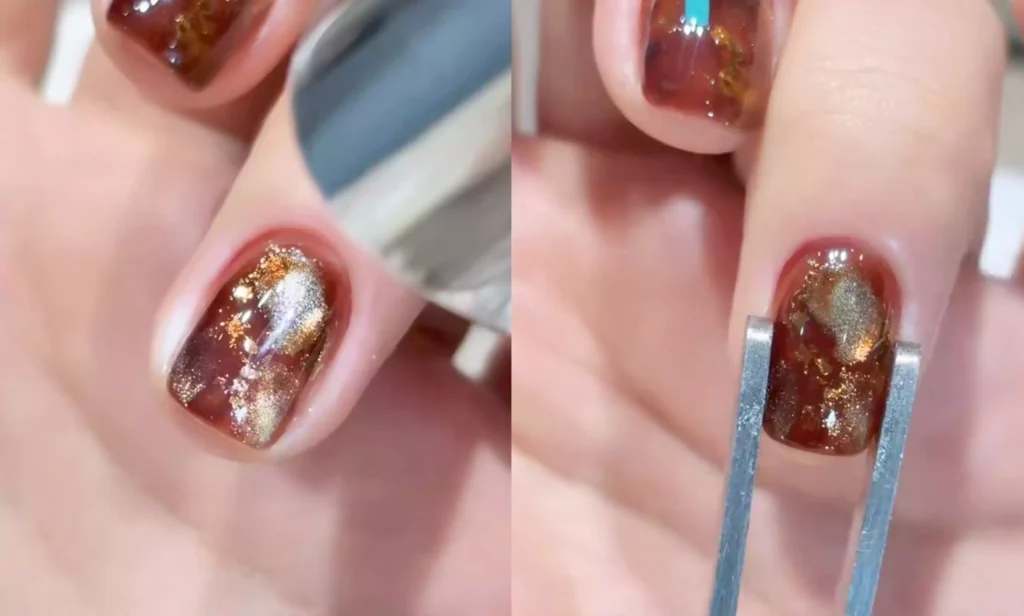
Utilice un rotulador de cola de construcción para aplicar una cantidad adecuada de cola de construcción y aplíquela uniformemente en toda la superficie de la uña. Tras la aplicación, dé la vuelta al dedo y ajuste suavemente el flujo del pegamento para crear puntos altos adecuados en la superficie de la uña. A continuación, coloque la uña bajo una luz UV/LED para que se seque completamente.
-El pegamento de construcción no sólo hace que la superficie de la uña sea más lisa y brillante, sino que también se puede utilizar para dar forma a la uña y mejorar el problema de las uñas festoneadas. Es lo suficientemente duro como para proteger eficazmente la uña de los arañazos.
Paso 4: Dibujo lineal y sello
– After the construction glue has dried, use a teal color and a fine-tipped marker to draw your desired line pattern on the nail. The lines can be straight, curved, or irregular, depending on your aesthetic.
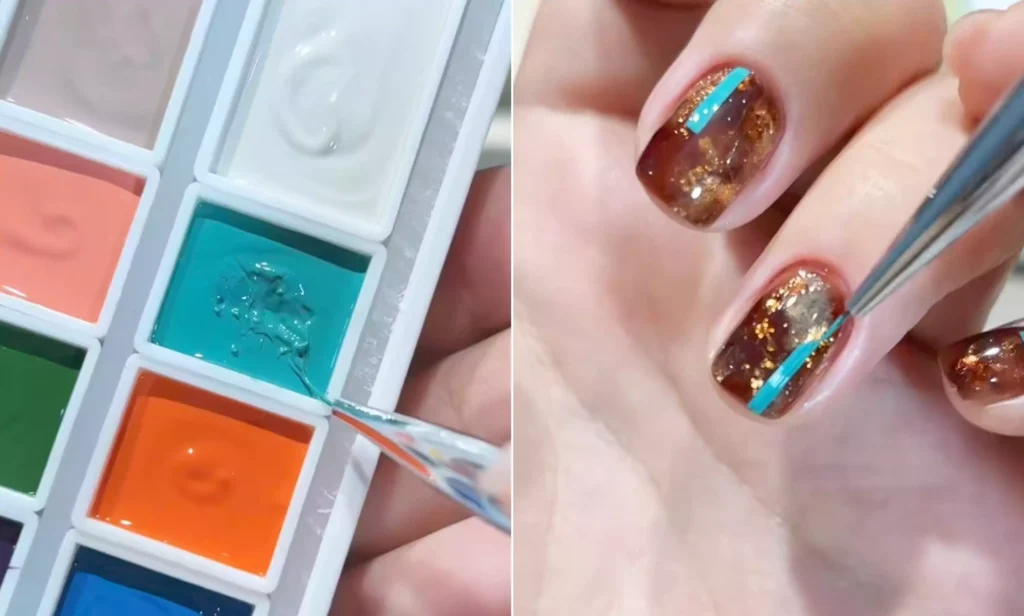
– If you make a mistake or excess glue overflows, use a cotton pad dipped in a small amount of alcohol to gently wipe off the excess and correct the shape of the line.
– After you’ve finished drawing the lines and are satisfied with them, apply a layer of topcoat to your nails. Be careful to wrap the edges to prevent the polish from falling off. After applying, place them under a UV/LED light to dry. Your exquisite amber gold foil blue-green line manicure is now complete.
Isn’t this manicure easier to create than you might think? It’s perfect for everyday wear or pairing with a skirt, so give it a try!
Por último, recomiendo CHROMÉCLAIR‘s Esmalte en gel sin HEMA. They prioritize safety, are hypoallergenic, and eco-friendly, and are both HEMA- and TPO-free, significantly reducing the risk of allergies and gently protecting nails. They also offer a wide range of shades and a long-lasting hold (approximately 21-35 days), ensuring every user can experience a product that’s both safe and reassuring.

¿Tienes problemas con el funcionamiento? Recuerda ver el videotutorial a continuación. ¡Si te resulta útil, por favor, como y recogerlo ⭐, suscribirse a mí, y nos vemos en el próximo tutorial!