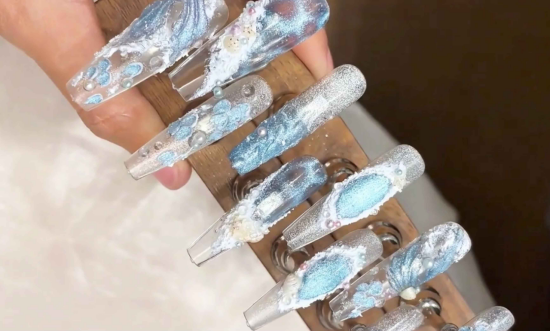
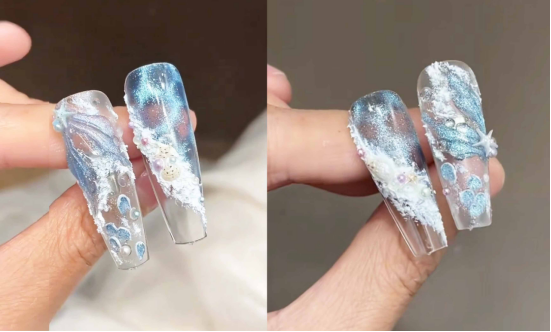
This time, we bring you a detailed tutorial on how to create ocean-style manicure. It will show you the complete process of mermaid-themed manicure from the basics to decoration through multiple steps. It uses materials such as cat’s eye glue and plaster glue, combined with light absorption, carving and other techniques to create a manicure style that is rich in layers and ocean atmosphere.
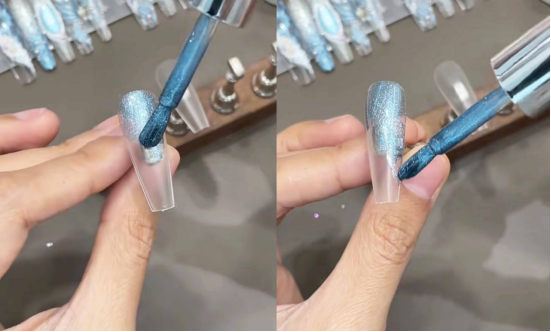
Step 1: Create ripples with a blue cat-eye base color
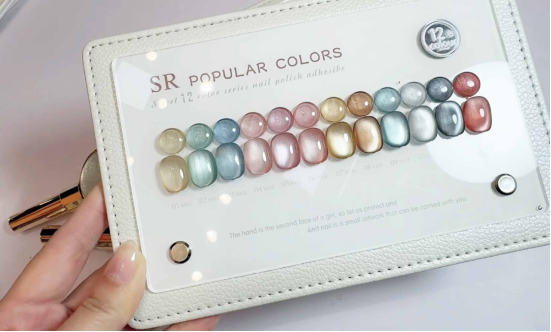
Choose a blue cat-eye gel polish as the base color (I used CHROMÉCLAIR Hema Free Gel Polish No. 811; the color is perfect for this look and flows well, allowing even beginners to apply it evenly). Apply a suitable amount of gel polish to the nails in irregular patterns, creating a more natural and random look.
After finishing the painting, there is no need to illuminate the nail immediately. Instead, pick up the magnetic tool and bring it close to the nail surface. Use the magnetic force to absorb the water ripple effect. This step changes the arrangement of the magnetic powder in the cat’s eye glue by the magnetic field.
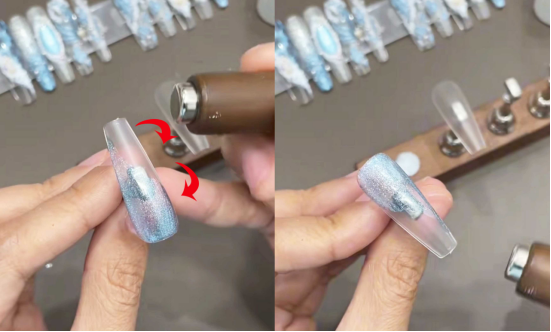
Create a texture similar to the flow of water waves and create the basic texture of ocean elements. After the operation is completed, use a nail lamp to dry the nail surface.
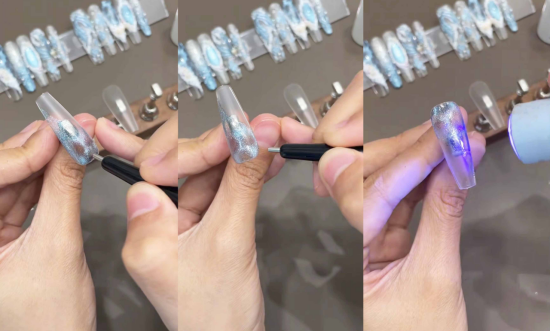
Then apply the sealant directly and let it dry to lay the base color foundation for the subsequent steps.
Step 2: Use white plaster glue to simulate ocean foam
Dip your finger into the white plaster glue and apply it along the borderline formed by the cat’s eye glue (using a “drag and tap” technique). Drag the glue naturally across the surface of the nail while tapping it lightly. This creates an uneven thickness and soft edges, simulating the fluffy and natural feel of ocean foam.
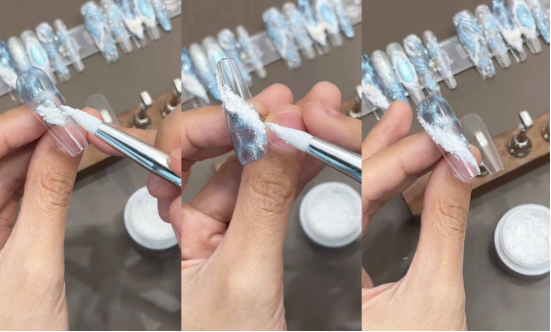
There is no need to illuminate the lamp in advance in this step. Keep the glue layer wet and proceed directly to the jewelry pasting stage.
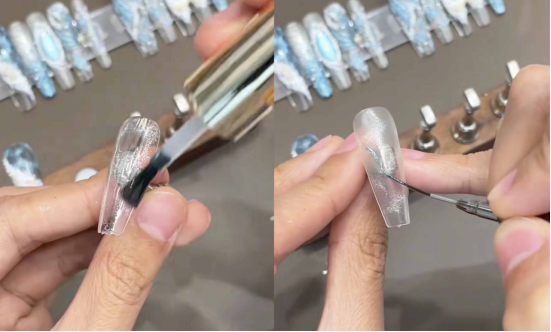
Step 3: Attach and secure ocean-themed accessories
Use tweezers to attach ocean-themed accessories such as starfish and conch shells to the wet plaster area.
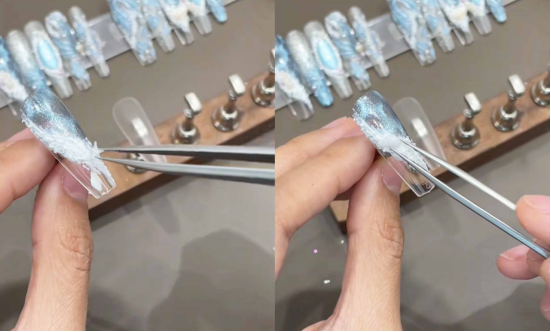
Add tiny pearls to enrich the elements. After completing the layout of the accessories, place it under a nail lamp to dry, so that the plaster glue and the accessories are firmly bonded, while also fixing the previous water ripples and foam texture.

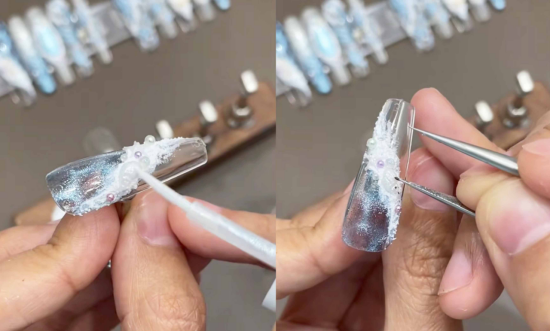
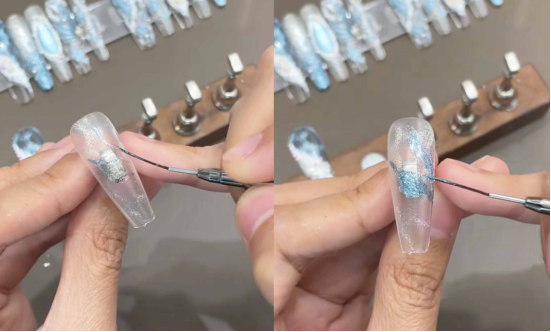
Step 4: Apply Blending Liquid Color and Add Details (Conch and Other Ornaments)
After the nails have dried, apply blending liquid color to the conch and other ornaments. Blending creates a natural transition between colors and adds a sense of realism. Then, use a fine brush to add texture to the ornaments or other areas of the nail, such as simulating the growth of a conch or the lines of waves, to complete the basic ocean-inspired look for a single finger.
Step 5: Create the Second “Mermaid Tail + Fish Scale” Look
Base Color and Water Ripples: First, apply a baseless cat-eye gel. After applying, use a magnetic tool to draw in the light and create a more stretched water ripple effect.
Once dry, apply a matte topcoat to create a matte, marine-like base.
Mermaid tail drawing: Take the blue cat’s eye glue and use a fine brush to draw a mermaid tail-like shape on the nail surface.
After applying, use a magnet to absorb the light again to make the cat’s eye effect more obvious, and dry it in the sun to fix the color and texture.

Fish scale simulation: Use a wooden stick to take white carving glue and gently scrape it on a specific area of the nail surface. Utilizing the ductility and thickness of the carving glue, you can create a raised texture similar to fish scales.
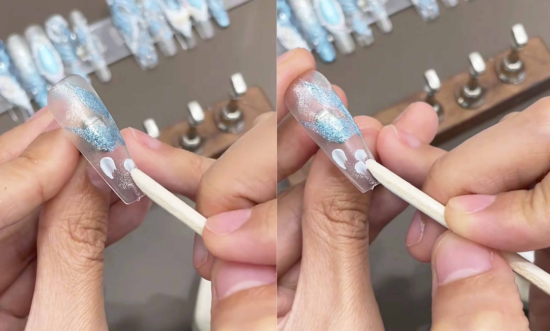
After drying, color the fish scales, use a magnet again to create a cat’s eye effect and dry it to enhance the texture of the marine life.

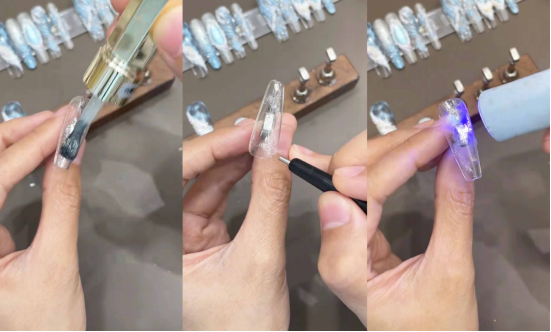
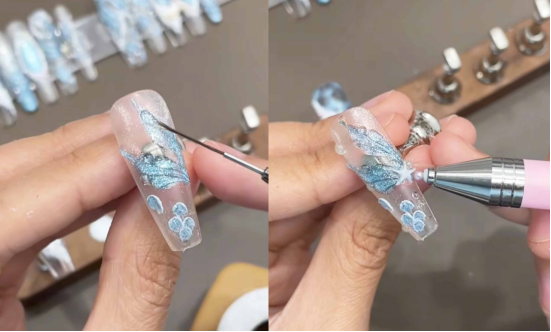
Partial sealing and three-dimensional modeling: Use a small brush to seal key areas such as the fish tail and scales.

Enhance wear resistance; finally, use hard sealing glue to shape a three-dimensional arc on the fishtail to simulate the dynamic sense of the fishtail swinging, and at the same time, you can add small accessories to enrich the details.
Ending
This completes the process for creating a mermaid-themed manicure. Through the play of light and shadow with cat’s eye glue, the three-dimensional shaping with plaster glue, and the detailed overlay of accessories and smudging, a marine atmosphere is achieved, from the base color to the embellishments.
Finally, I would like to recommend CHROMÉCLAIR gel polish. Their products focus on safety, low irritation, environmental protection, and do not contain harmful ingredients, reducing the risk of allergies (HEMA-free Gel Polish). They protect healthy nails and come in a variety of colors to cater to mainstream aesthetics, ensuring that every consumer has a safe and secure user experience.
If you encounter any problems during the process, you can watch the video tutorial below. If you think the tutorial is useful, please like and subscribe to me. See you next time.