
Friends, I’m Starry. Having worked in nail product research and development and teaching for eight years, I get asked the same question every day: “Does getting your nails done really damage your nails?” Today, let’s skip the platitudes. I want to sit down with you, like an old friend, and talk about the core of this issue. After reading this article, you’ll clearly understand: who is truly responsible for nail damage? How can you achieve “beauty without damage” through specific product choices and application techniques? This isn’t just anecdotal advice; it’s a healthy nail care philosophy I’ve verified through countless cases and experiments.
I. Vor dem Auftragen des Nagellacks: 70% von Erfolg oder Misserfolg steht bereits fest
I always tell my students that our hands should not only create beauty but also, like doctors, adhere to the principle of “do no harm.” All lasting beauty must be built on a foundation of health. And the laying of this foundation begins even before you walk into the nail salon or open the product packaging.
1. Produktauswahl: Verstehen der Inhaltsstoffe
When I first started in the industry, the market was growing wildly, and the quality of products varied greatly. I remember once, to test a Grundierung that was touted as “super long-lasting,” I tried it myself, and after a few days, my nails showed obvious white spots and peeling at the edges. That lesson made me a complete “ingredient enthusiast.”
Inhaltsstoffe, vor denen Sie sich in Acht nehmen müssen:
- Hochgradig reizende Monomere:
Such as HEMA (hydroxyethyl methacrylate). It’s a common adhesive, but high concentrations are one of the main culprits of allergic reactions. For sensitive individuals, contact can significantly increase the probability of redness, swelling, and itching around the nails.
Recommended next step
Smooth, Long-Lasting Gel Routine
Bubbling, peeling, shrinkage, and dull wear are usually system problems. Build the manicure with prep, base, color, and top coat together.
- Prep the nail plate before color.
- Use a base coat that matches the gel system.
- Finish with a compatible top coat for wear and shine.
Shop long-lasting routine kitSee no-wipe top coatCompare all routines
- Minderwertige Fotoinitiatorsysteme:
For example, certain unstable TPO derivatives. They may generate excessive heat during curing, causing a strong “burning sensation,” which is detrimental to the health of nail bed cells in the long run.
Meine praktischen Auswahlkriterien:
Look for the “low-irritation” or “suitable for sensitive skin” label: This isn’t just marketing jargon. Responsible major brands usually adjust their entire resin and monomer system to meet this standard, reducing overall irritation. For example, the new formula from the CHROMÉCLAIR brand, which I have long followed and recommended, achieves a “double-free” promise – HEMA-free & TPO-free. Dabei geht es nicht nur um das Entfernen von Inhaltsstoffen, sondern um eine Neugestaltung des Konzepts einer gesunden Maniküre, die Farbe und Glanz in Salonqualität bietet und gleichzeitig das Risiko einer Sensibilisierung minimiert.

Hinweis: Der Kauf von TPO-freiem Gelpolitur ist eine kluge Entscheidung.
Sensorisches Erstscreening: Wenn das Gel einen stechenden Geruch hat oder nach dem Öffnen die Augen reizt, oder wenn die Textur dünn und wässrig ist, sollten Sie vorsichtig sein. Dies bedeutet oft, dass es eine große Menge aktiver Verdünnungsmittel enthält, die nicht nur stark reizend sind, sondern auch eine höhere Aushärtungsschrumpfung aufweisen können, was zu einem Abheben und nachfolgenden Schäden führt.
2. Pre-treatment: Your nails are not “wooden planks to be sanded”
The most heartbreaking scene for me is seeing nail technicians using electric nail drills to aggressively thin down the client’s natural nails, like polishing a piece of wood. This directly strips away the nail’s natural protective barrier.
Wesentliche Verfahren, die eingehalten werden müssen:
- Feilen, nur um die Haftung zu erhöhen:
Verwenden Sie nur Schleifpapier der Körnung 180/240, sanft und in einer Richtung, um nur die ölige, glänzende Schicht von der Nageloberfläche zu entfernen. Danach sollte die Nageloberfläche ein gleichmäßiges, mattes Finish haben, aber ihre Dicke muss unverändert bleiben.
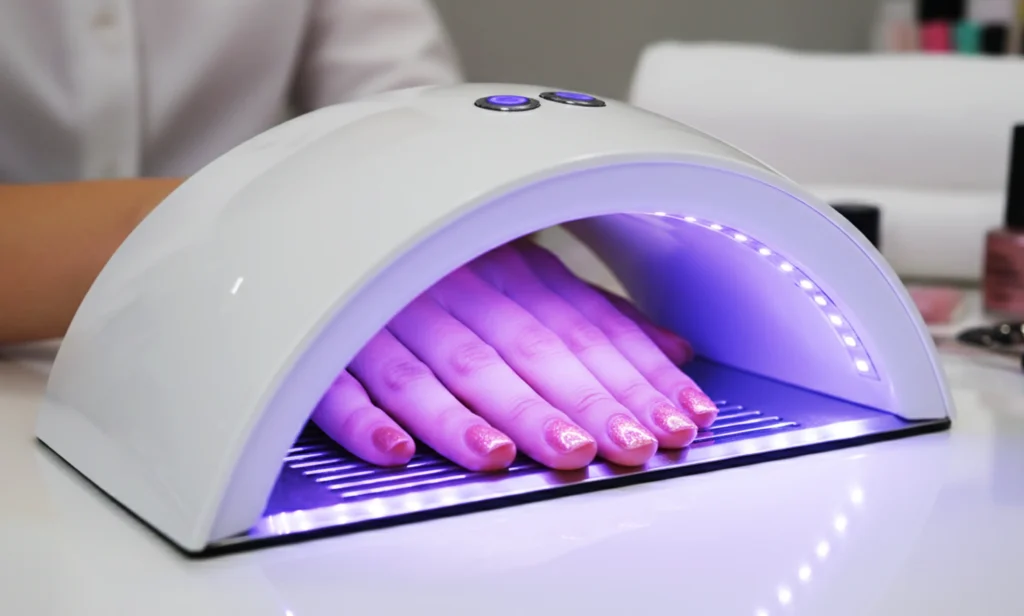
- Der Schutz von UV-Lampen ist eine Verantwortung für die Zukunft:
UVA-Strahlen sind durchdringend, und eine langfristige kumulative Exposition beschleunigt die Lichtalterung der Haut an den Händen.
- In meinem Studio ist das Standardverfahren:
Before using the UV lamp, we apply SPF50+ sunscreen or a thick layer of Vaseline to the client’s cuticles and provide professional black UV-protective fingerless gloves. Don’t underestimate this step; it protects the client’s skin condition ten years from now.
II. Anwendung und Heilung: Details sind der Teufel, aber auch der Schutzengel
Once you’ve chosen the right products and laid the foundation, the real test of skill begins. Most hidden nail damage problems stem from details overlooked at this stage.
1. Application Technique: “Thin” is the only truth
“Apply more for better adhesion”—this is the most harmful misconception I’ve ever heard. Excessively thick gel layers lead to incomplete internal curing, generating immense shrinkage stress. This not only makes the gel prone to lifting (damaging the nail when peeled off), but the uncured monomers also continuously irritate the nail surface.
My “Three-Layer Thin Application Rule”:
– Base coat: Apply so thinly that it’s almost transparent, forming only a uniform, thin film.
– Color gel: Wischen Sie nach der Entnahme des Gels eine Seite des Pinsels an der Flaschenöffnung ab und drücken Sie das Gel dann vorsichtig von der Mitte zur Vorderseite des Nagels. Für gesättigte Farben sind zwei Schichten erforderlich, und jede Schicht muss gründlich ausgehärtet werden.
- Deckschicht: Tragen Sie ihn ebenfalls dünn auf und achten Sie darauf, dass er den Nagelrand vollständig bedeckt, um ihn zu versiegeln.
Wie ist die Dicke zu beurteilen?
Betrachten Sie den Nagel nach dem Auftragen des Gels von der Seite. Die Nageloberfläche sollte eine natürliche, glatte Rundung aufweisen, und es sollten keine sichtbaren Gelablagerungen vorhanden sein.
2. Curing: It’s not as simple as pressing a switch
Mismatched curing time and lamp power are the culprits behind “curing heat” pain and insufficient deep curing.
Was Sie wissen müssen:
- Die Lampe muss zum Gel passen:
Verwenden Sie immer die entsprechende LED- oder UV-Lampe mit der von der Gelmarke empfohlenen Leistung. In der Regel benötigen LED-Lampen 30-60 Sekunden und UV-Lampen 120 Sekunden oder mehr.
• Emergency treatment for “fingertip stinging”:
If the client feels stinging, besides product issues, it’s most likely due to the gel being too thick or the lamp tubes being old.
- Meine Methode ist:
Nehmen Sie die Hand sofort heraus, warten Sie 2 bis 3 Sekunden und legen Sie sie dann wieder hinein, wiederholen Sie dies zwei- oder dreimal. So wird die Hitze effektiv abgeleitet und Verbrennungen werden vermieden.
- Ein kleines Experiment zur Demonstration:
Ich habe einmal ein Leistungsmessgerät verwendet, um die Aushärtung verschiedener Gelschichtdicken zu testen. Die Ergebnisse zeigten, dass eine Erhöhung der Schichtdicke um 1 Millimeter die für die vollständige Aushärtung erforderliche Zeit verdoppeln konnte und die Härte in der Mitte des Gels deutlich unzureichend war. Dies ist die Hauptursache für künftige Rissbildung und Abhebung.
III. Removal: The Most Dangerous “Bomb Disposal” Step
I dare say that more than half of physical nail damage stems from incorrect gel polish removal. Violent tearing, prying with metal tools, prolonged soaking in high-concentration acetone… each time a “nail tragedy” unfolds.
The “Golden Four Steps” for Safe Removal:
- Polieren der Deckschicht:
Verwenden Sie eine Feile mit einer Körnung von 180 oder mehr und polieren Sie nur den glänzenden Decklack vorsichtig ab und hören Sie auf, sobald die darunter liegende Farbe sichtbar wird. Das Ziel ist es, die Versiegelung aufzubrechen, nicht den Naturnagel zu polieren.
- Einwickeln und Erweichen:
Tränken Sie ein Wattepad mit einer ausreichenden Menge an professionellem Gellackentferner, umwickeln Sie den Nagel fest und sichern Sie ihn dann mit Aluminiumfolie. Warten Sie 10-15 Minuten.

- Sanfte Beseitigung:
After the time is up, use a wooden or silicone cuticle pusher to gently push away the swollen and whitened gel, like sweeping away dust. If it doesn’t come off easily, re-wrap the nail; do not force it!

- Reinigung und Neutralisierung:
Nach der Reinigung der Nageloberfläche mit Alkohol sofort Nagelhautöl auftragen, um die verlorenen Lipide wieder aufzufüllen.
• “A Bloody Lesson”:
I once had a client who tore off her gel polish herself, resulting in extensive nail bed separation and bleeding. Her recovery period lasted three months, and the new nail remained uneven. Remember, many nail injuries are irreversible.
IV. After removing gel polish: Give your nails a “deep breath” and a much-needed break
Nägel sind lebendes Gewebe und brauchen Ruhe und Erholung. Ständige Gel-Maniküren sind wie nicht nachhaltige landwirtschaftliche Praktiken, die den Boden auslaugen und letztlich zu geschwächten Nägeln führen.
Checkliste für die Grundversorgung während der Erholungsphase:
- Obligatorische Pause: Gönnen Sie Ihren Nägeln nach 1-2 vollständigen Gelmaniküre-Zyklen mindestens 2-3 Wochen Zeit für nackte Nägel.
- Tiefenwirksame Ernährung: Tragen Sie morgens und abends ein Nagelhautöl auf, das reich an Vitamin E, Süßmandelöl oder Panthenol ist, und massieren Sie es ein, bis es eingezogen ist.
- Interne Supplementierung: Erhöhen Sie die Zufuhr von Eiweiß, Biotin (Vitamin B7) und Eisen, die die Bausteine für ein starkes Nagelwachstum sind.
- Beobachten Sie und seien Sie aufmerksam: Wenn Ihre Nägel dauerhaft vergilbt, brüchig, rissig oder gerötet sind, sollten Sie alle Produkte sofort absetzen und einen Dermatologen aufsuchen.。
V. Future Outlook: Can We Achieve “Burden-Free” Beauty?
Können wir uns ein Material vorstellen, das den ultimativen Glanz und die Haltbarkeit von Gellack vereint und sich dennoch so leicht und unbedenklich entfernen lässt wie normaler Nagellack? Das ist kein Hirngespinst. Die Iteration der Peel-off-Basislacktechnologie und der Aufstieg von Hochleistungsnagellacken auf Wasserbasis gehen in diese Richtung.
Meine kühne Hypothese:
Future healthy nail care may become “modular” and “intelligent.” For example, through more precise spectral curing technology, different functional layers (adhesion, color, reinforcement) could be perfectly cured layer by layer, completely eliminating curing stress. Or, a biodegradable biomimetic polymer could emerge that naturally metabolizes as the nail grows after providing protection.
Schließlich bin ich als Fachmann in der Branche fest davon überzeugt:
The prerequisite for beauty is health, and the core of professionalism is respect and responsibility. We are not only holding our clients’ hands, but also their trust in beauty.
I hope this “nail care map,” which incorporates my eight years of experience, lessons, and reflections, can illuminate your path and help you avoid the pitfalls I have witnessed firsthand. Your nails deserve the gentlest care.
So, what are the most challenging problems you’ve encountered in nail care? Or, do you have any unique nail care secrets? Feel free to share them with me below, and let’s work together to make beauty safer and longer-lasting.