Today I’ll show you how to create a 3D butterfly manicure! The steps are explained in great detail, so even beginners can easily replicate it and become a master of exquisite manicures!

Paso 1: Crear un tono de base suave
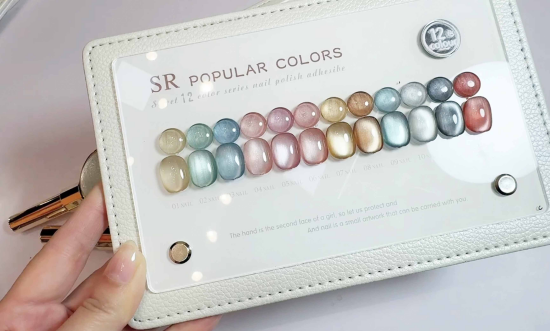
Base degradada inversa: Elige un esmalte en gel nude (aquí he utilizado CHROMÉCLAIR Esmalte en gel sin hema Nº 13, que no es tóxico y es saludable, y fluye bien, lo que permite una aplicación uniforme por parte de los principiantes). Aplicar sólo en la mitad delantera de la uña. Utiliza un pincel para difuminar y barre suavemente hacia las raíces, creando un degradado inverso de más oscuro en la parte delantera a más claro en la trasera, dando a los bordes un efecto difuminado y de enfoque suave.
Utiliza pegamento con purpurina para dar brillo: Aplica una fina capa de pegamento con purpurina en el centro de la uña, como si enterraras una capa de diamantes en la uña.
Brillará secretamente bajo la luz, y es muy exquisito.
Recommended next step
Build the Nail Art Look Kit
Tutorial looks need more than a color bottle. Choose the color, art detail, transfer or sticker step, and a top coat as one look kit.
- Choose the main color or set.
- Add the art detail: sticker, transfer gel, magnet, or brush.
- Seal the finished look with top coat.
Transparent color blending transition: Take transparent brown + transparent gray nail polish, dip a fan-shaped brush into the two, and gently pat them on the nails to make the different color blocks flow naturally, saying goodbye to the awkwardness of “clear distinction”;
Paso 2: Dar forma a la mariposa 3D (Crear una decoración de alma)
La mariposa es la pieza central de esta manicura, y crear una mariposa en 3D tú misma es muy fácil.
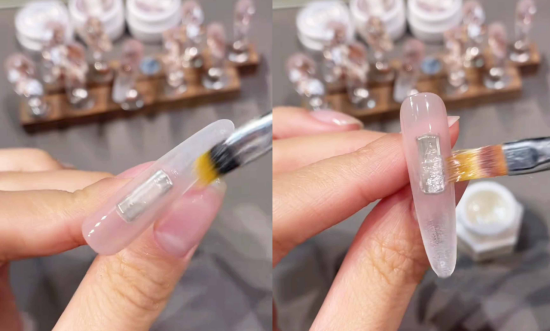
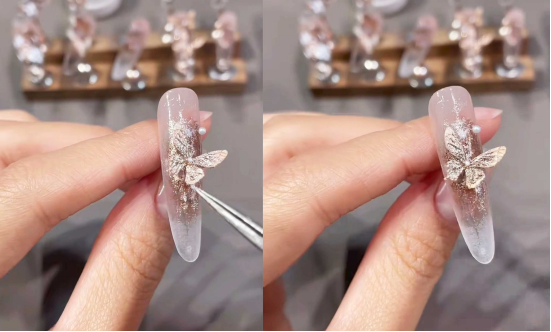
Filling and Curing the Mold: Take the transparent butterfly mold and use tweezers to apply an appropriate amount of clear molding glue. Evenly fill the mold’s butterfly grooves (be careful not to spill over the edges).
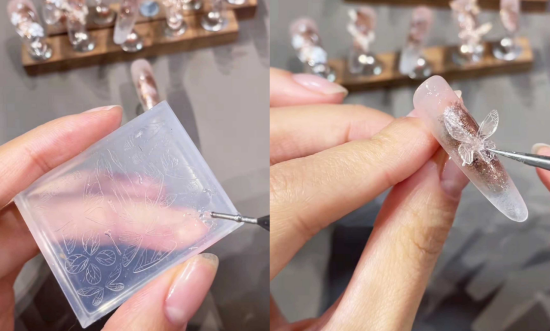
Desmoldeo bajo una lámpara: Coloca el molde lleno de pegamento bajo una lámpara de uñas para que se seque (el tiempo exacto depende de las instrucciones del pegamento, generalmente entre 30 y 60 segundos). Una vez curado, retire suavemente el molde para crear una mariposa transparente y tridimensional.
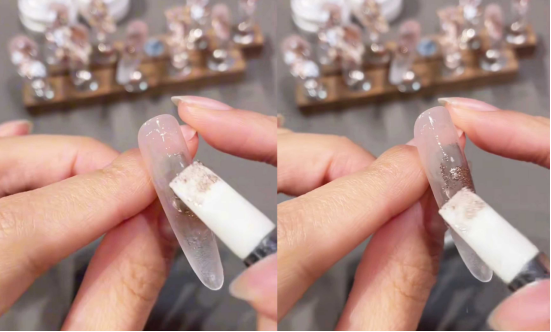
Colocación: Aplique una pequeña cantidad de imprimación en la parte posterior de la mariposa y adhiérala con precisión al centro visual de la uña (por ejemplo, la parte media superior). Presione durante unos segundos para fijarla. La mariposa tridimensional da vida instantáneamente a tu nail art.
Step 3: Blend the Butterfly’s Color (Make It Vivid and Dynamic)
A plain, transparent butterfly isn’t eye-catching enough; give it a gradient makeup look and instantly transform it into a fingertip elf!
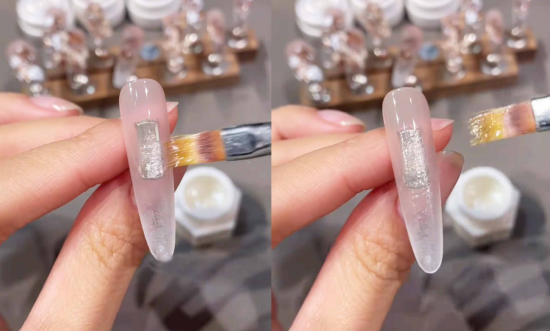
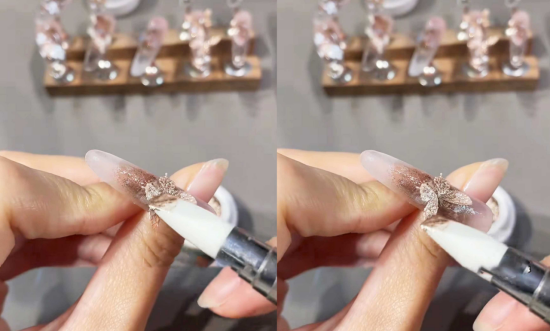
Apply a thin layer of glitter glue to the entire butterfly, creating a “pearlescent gauze dress” and adding a touch of translucence to the base color.
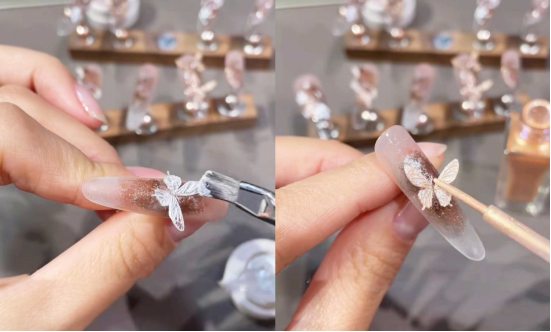
Orange Watercolor: Dip a fine brush into the watercolor and gently brush it across the butterfly’s surface, evenly tinting it with a warm orange hue. This instantly transforms the color from “transparent” to “vibrant.”
Gradient Wings: Focus on the edges and wrinkles of the wings, using a “dark to light” technique to create a gradient effect—dark at the base and lighter at the tip. This simulates the light and shadow gradations of a real butterfly’s wings, making them appear to “breathe.”
Step 4: Detailing & Topcoat (Securing the Elegance)
These last two steps provide a “safety” and “add-on” to your manicure, ensuring its long-lasting beauty.
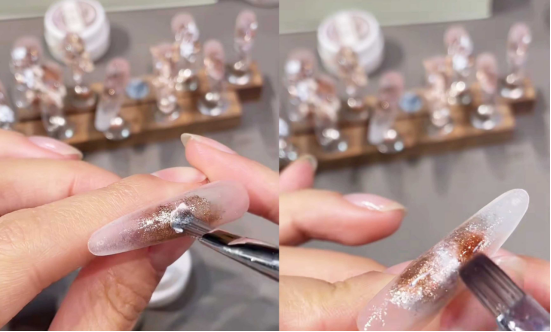
Adornos ligeramente lujosos: Utiliza unas pinzas para coger mini perlas y diamantes diminutos y aplícalos alrededor de la mariposa o en zonas de la uña que no utilices (como la base o los bordes). Elige perlas de 2-3 mm de tamaño para un aspecto más refinado, y elige diamantes con un brillo sutil para complementar el color base.
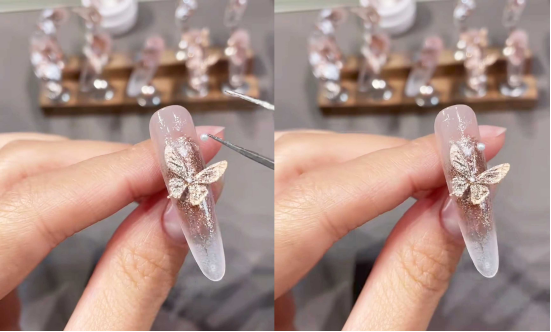
Finishing coat for the entire hand: Finally, apply a layer of super-bright finishing glue, evenly covering from fingertips to roots. This will not only make the manicure wear-resistant and scratch-resistant, but also make the base color, butterfly, and diamond decoration glossy and uniform to a “mirror-grade” finish.
En el tutorial, he utilizado esmalte en gel CHROMÉCLAIR. Sus productos tienen una buena fluidez, por lo que incluso los principiantes pueden aplicarlos de manera uniforme. Se centran en la seguridad, la baja irritación y la protección del medio ambiente, no contienen ingredientes nocivos, reducen el riesgo de alergias (Esmalte en gel sin HEMA), proteger unas uñas sanas y garantizar a todos los consumidores una experiencia de usuario segura.
Amigos, guardad este tutorial y practicad. Si encuentras algún problema durante el proceso, puedes ver el video tutorial más abajo. Si encuentras útil el tutorial, por favor dale a me gusta y suscríbete. ¡Nos vemos en el próximo tutorial!