Today I’ll show you how to create a 3D butterfly manicure! The steps are explained in great detail, so even beginners can easily replicate it and become a master of exquisite manicures!

Schritt 1: Erstellen Sie einen weichen Grundton
Basis mit umgekehrtem Farbverlauf: Wählen Sie einen nudefarbenen Gel-Lack (hier habe ich CHROMÉCLAIR Hema Free Gel Polish Nr. 13, der ungiftig und gesund ist und gut fließt, so dass er auch von Anfängern aufgetragen werden kann). Nur auf die vordere Hälfte des Nagels auftragen. Verwenden Sie einen Mischpinsel, um sanft zum Nagelansatz hin zu streichen, so dass ein umgekehrter Farbverlauf von vorne nach hinten entsteht, der den Rändern einen unscharfen, weichzeichnenden Effekt verleiht.
Verwenden Sie Glitzerkleber zum Aufhellen: Tragen Sie eine dünne Schicht Glitzerkleber in der Mitte des Nagels auf, als ob Sie eine Schicht Diamanten im Nagel vergraben würden.
Es leuchtet heimlich im Licht und ist sehr exquisit.
Recommended next step
Build the Nail Art Look Kit
Tutorial looks need more than a color bottle. Choose the color, art detail, transfer or sticker step, and a top coat as one look kit.
- Choose the main color or set.
- Add the art detail: sticker, transfer gel, magnet, or brush.
- Seal the finished look with top coat.
Transparent color blending transition: Take transparent brown + transparent gray nail polish, dip a fan-shaped brush into the two, and gently pat them on the nails to make the different color blocks flow naturally, saying goodbye to the awkwardness of “clear distinction”;
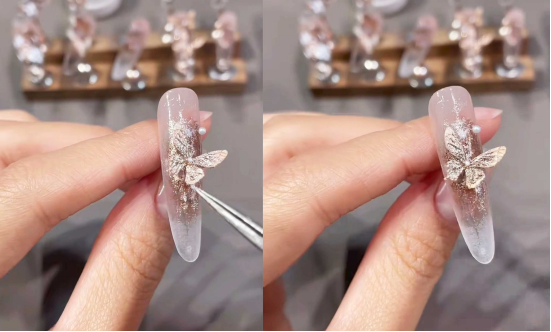
Schritt 2: Gestalten Sie den 3D-Schmetterling (Erstellen einer Seelendekoration)
Der Schmetterling ist das Herzstück dieser Maniküre, und es ist ganz einfach, einen 3D-Schmetterling selbst zu gestalten!
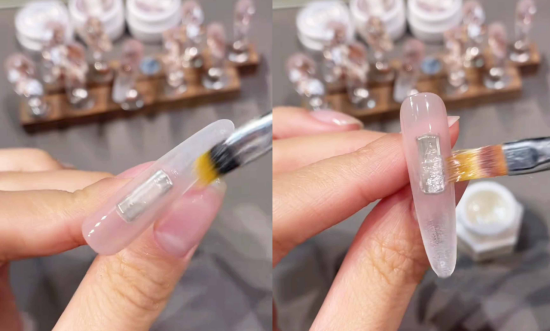
Filling and Curing the Mold: Take the transparent butterfly mold and use tweezers to apply an appropriate amount of clear molding glue. Evenly fill the mold’s butterfly grooves (be careful not to spill over the edges).
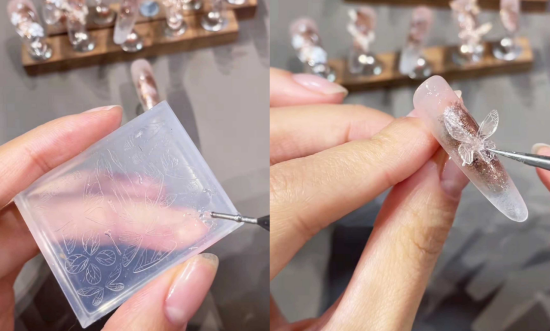
Entformen unter einer Lampe: Legen Sie die mit Kleber gefüllte Form zum Trocknen unter eine Nagellampe (die genaue Zeit hängt von der Anleitung des Klebers ab, im Allgemeinen 30-60 Sekunden). Nach dem Aushärten entfernen Sie die Form vorsichtig, um einen transparenten, dreidimensionalen Schmetterling zu erhalten.
Positionierung: Tragen Sie eine kleine Menge Primer auf die Rückseite des Schmetterlings auf und kleben Sie ihn genau auf die optische Mitte des Nagels (z. B. den oberen mittleren Teil). Einige Sekunden lang andrücken, um ihn zu fixieren. Der dreidimensionale Schmetterling erweckt Ihre Nailart im Handumdrehen zum Leben.
Step 3: Blend the Butterfly’s Color (Make It Vivid and Dynamic)
A plain, transparent butterfly isn’t eye-catching enough; give it a gradient makeup look and instantly transform it into a fingertip elf!
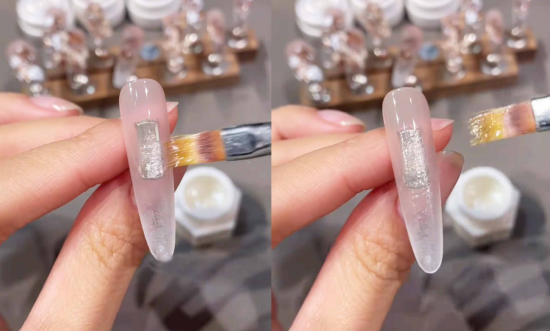
Apply a thin layer of glitter glue to the entire butterfly, creating a “pearlescent gauze dress” and adding a touch of translucence to the base color.
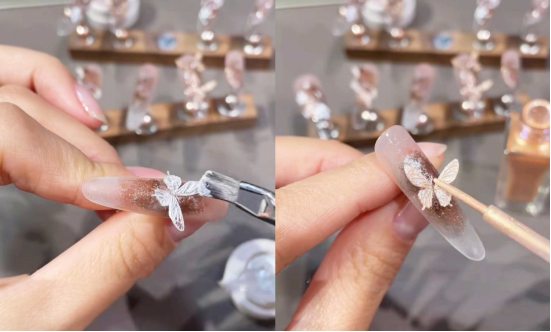
Orange Watercolor: Dip a fine brush into the watercolor and gently brush it across the butterfly’s surface, evenly tinting it with a warm orange hue. This instantly transforms the color from “transparent” to “vibrant.”
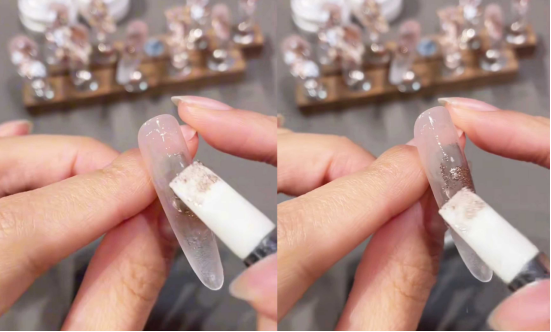
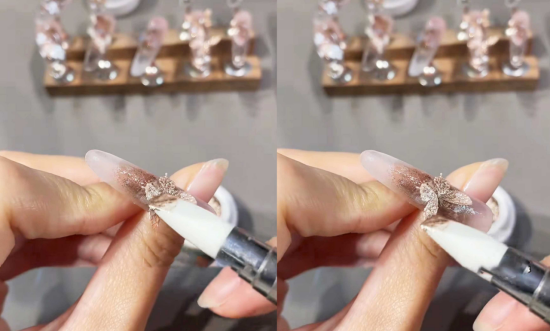
Gradient Wings: Focus on the edges and wrinkles of the wings, using a “dark to light” technique to create a gradient effect—dark at the base and lighter at the tip. This simulates the light and shadow gradations of a real butterfly’s wings, making them appear to “breathe.”
Step 4: Detailing & Topcoat (Securing the Elegance)
These last two steps provide a “safety” and “add-on” to your manicure, ensuring its long-lasting beauty.
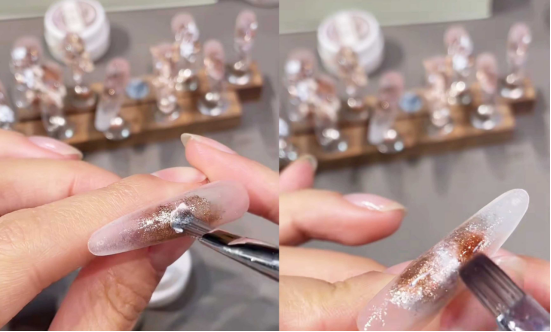
Leicht luxuriöse Verzierungen: Nehmen Sie mit einer Pinzette Mini-Perlen und winzige Diamanten auf und tragen Sie sie um den Schmetterling herum oder auf unbenutzte Bereiche des Nagels (z. B. die Basis oder die Ränder) auf. Wählen Sie 2-3 mm große Perlen für einen raffinierten Look und wählen Sie Diamanten mit einem subtilen Schimmer, um die Grundfarbe zu ergänzen.
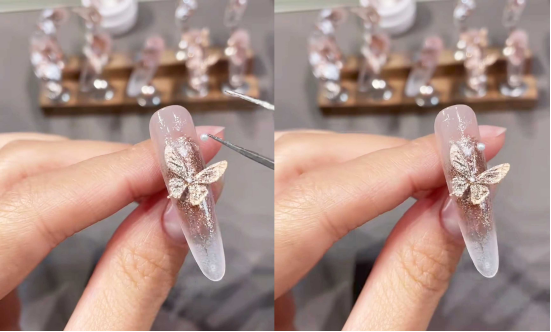
Finishing coat for the entire hand: Finally, apply a layer of super-bright finishing glue, evenly covering from fingertips to roots. This will not only make the manicure wear-resistant and scratch-resistant, but also make the base color, butterfly, and diamond decoration glossy and uniform to a “mirror-grade” finish.
In diesem Tutorial habe ich CHROMÉCLAIR-Gelpolitur verwendet. Die Produkte von CHROMÉCLAIR sind sehr flüssig, so dass auch Anfänger sie gleichmäßig auftragen können. Sie konzentrieren sich auf Sicherheit, geringe Reizung und Umweltschutz, enthalten keine schädlichen Inhaltsstoffe, reduzieren das Risiko von Allergien (HEMA-freie Gel-Politur), gesunde Nägel zu schützen und dafür zu sorgen, dass jeder Verbraucher ein sicheres Nutzungserlebnis hat.
Freunde, bitte speichert dieses Tutorial und übt es. Wenn Sie während des Prozesses auf Probleme stoßen, können Sie sich das Video-Tutorial unten ansehen. Wenn Sie das Tutorial nützlich finden, bitte mögen und abonnieren Sie mich. Wir sehen uns im nächsten Tutorial!