Want to have unique and eye-catching nails? Today, we will unlock the romantic mermaid nails.The operation is simple,The process is simple, and I will explain the techniques in detail in the following tutorial. Even beginners can try it out. I will teach you step by step how to create “ocean magic.” If you like it, follow me and let’s get started!

Schritt 1: Grundfarbe und Katzenaugen-Gel Grundierung
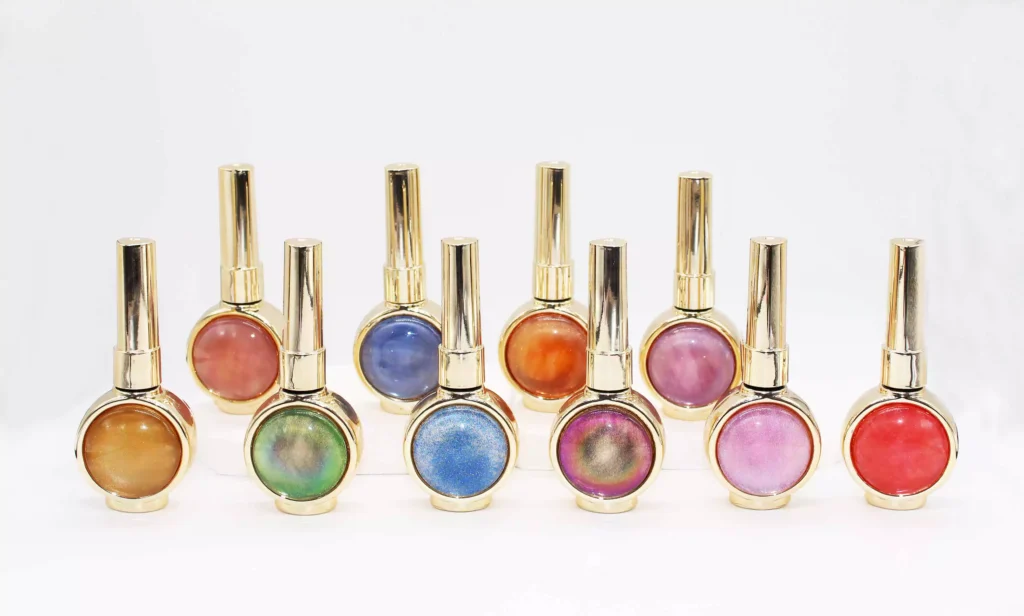
Wählen Sie zunächst Ihren Favoriten Katzenaugen-Gelpolitur (I used CHROMÉCLAIR’s Hema Free Gel Polish CE-06, die einen transparenten Verlaufseffekt hat).

It applies smoothly and has long-lasting color retention. After applying it to the nail surface, first outline the mermaid tail contour—imagine the flowing lines of a mermaid’s tail.
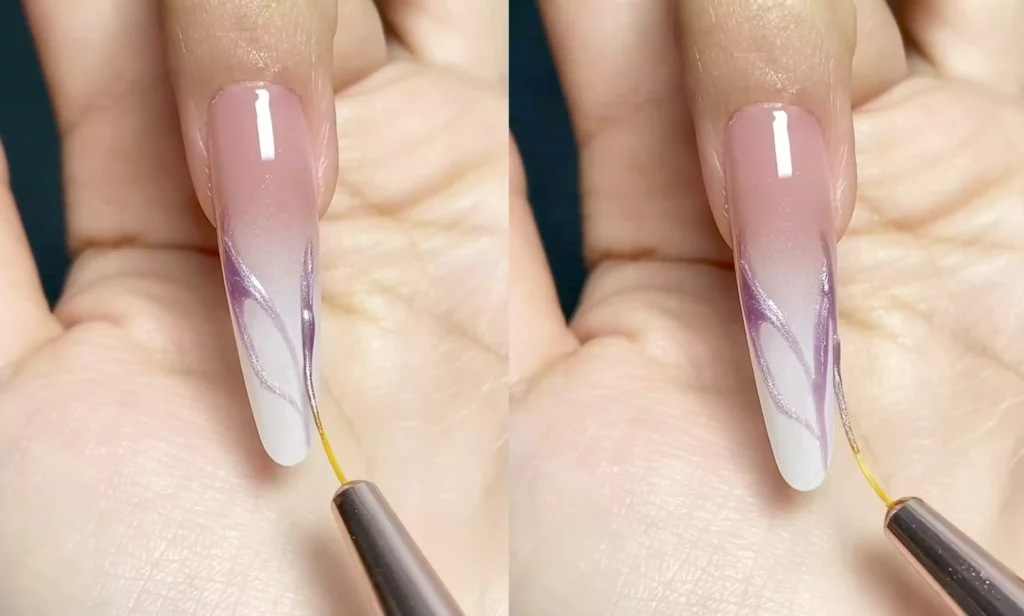
Fill in the contour area with cat’s eye glue, then use a magnet to create a glossy effect, making the base color resemble the sparkling surface of the sea and laying a dreamy foundation for the subsequent styling.
Recommended next step
Build the Nail Art Look Kit
Tutorial looks need more than a color bottle. Choose the color, art detail, transfer or sticker step, and a top coat as one look kit.
- Choose the main color or set.
- Add the art detail: sticker, transfer gel, magnet, or brush.
- Seal the finished look with top coat.
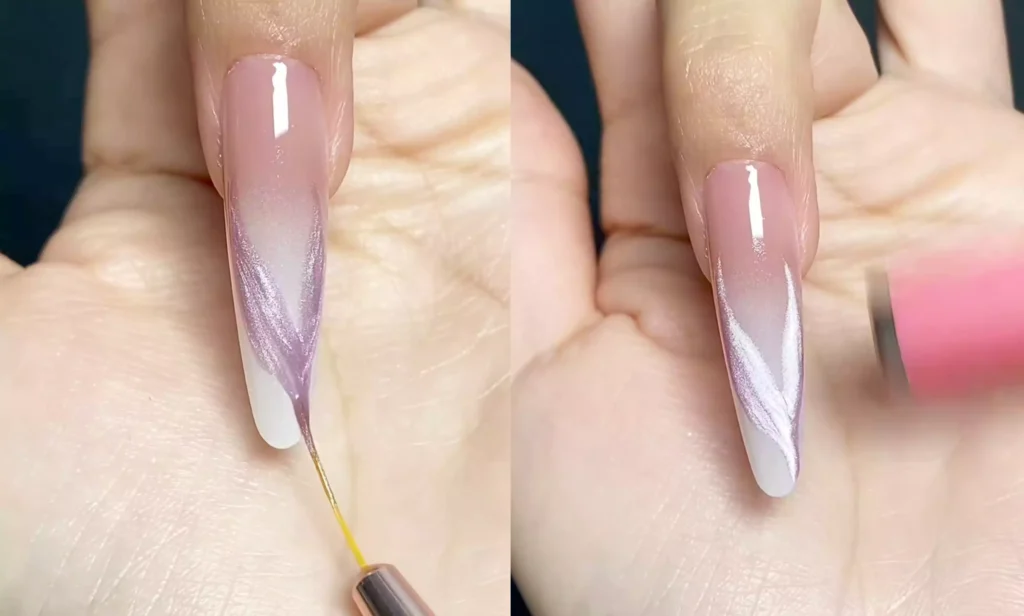
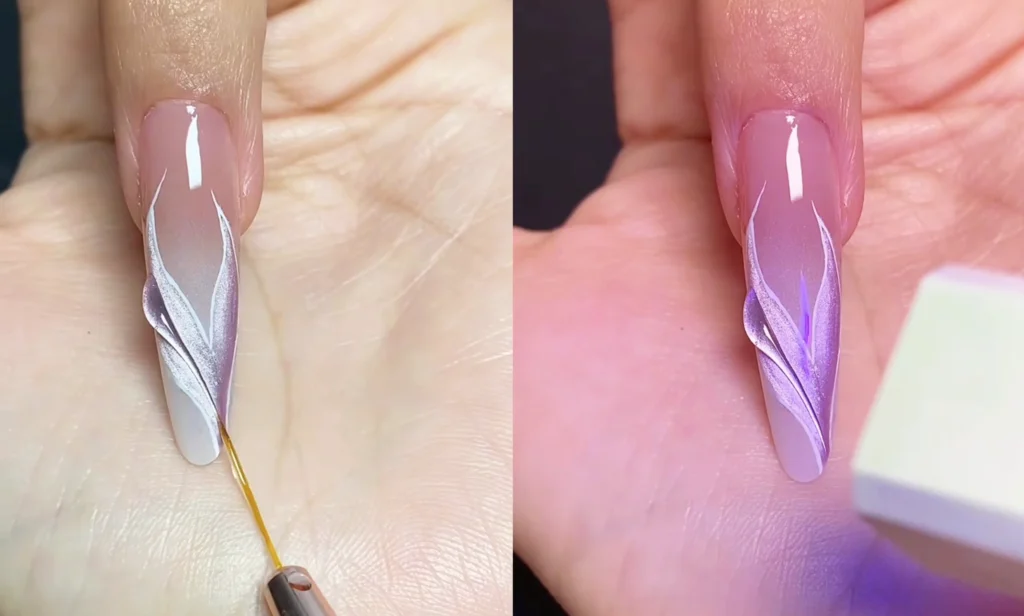
Schritt 2: Feines Konturieren mit weißem Farbkleber
Nachdem die Grundfarbe getrocknet ist, wechseln Sie zu weißem Farbkleber, um die Konturen zu zeichnen.
This step tests your attention to detail: slowly trace along the mermaid’s tail line, especially the tip of the tail. The smoothness of the lines directly determines the overall refinement of the design. Imagine embellishing the fish tail with silver trim. Each stroke must be steady, ensuring that the lines are clear and naturally follow the curve of the fish tail.
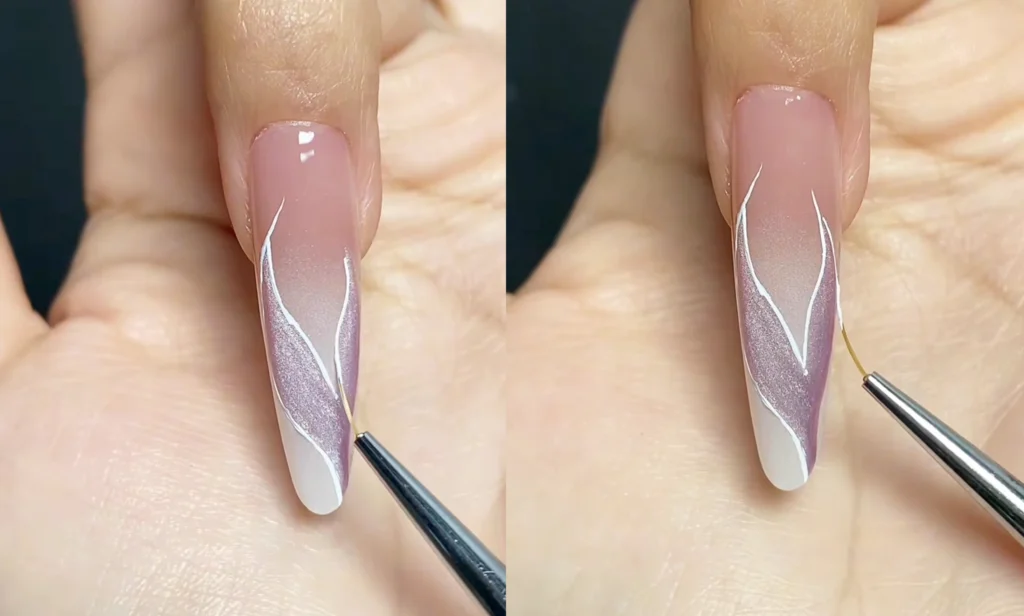
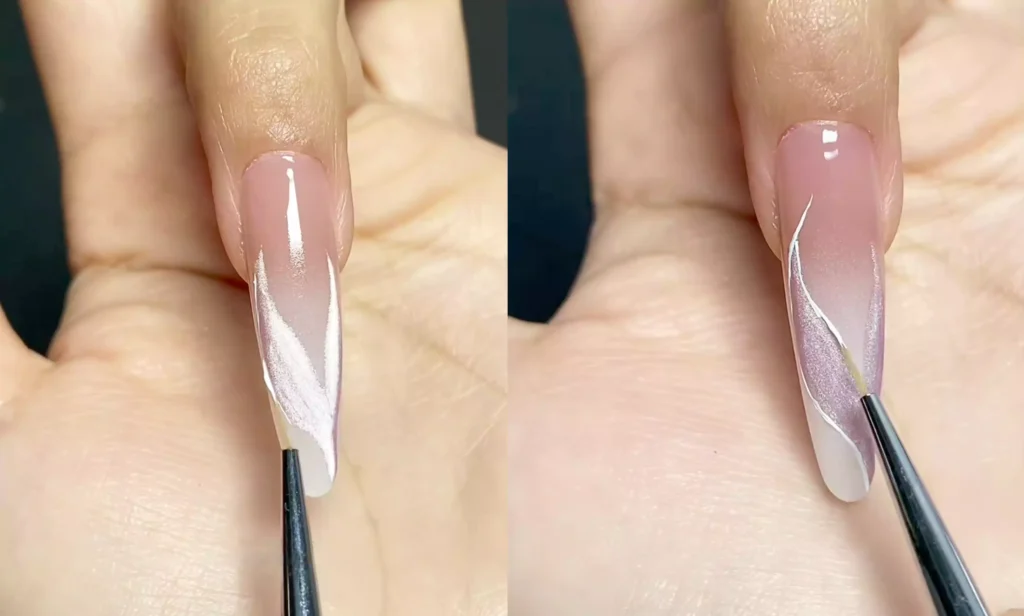
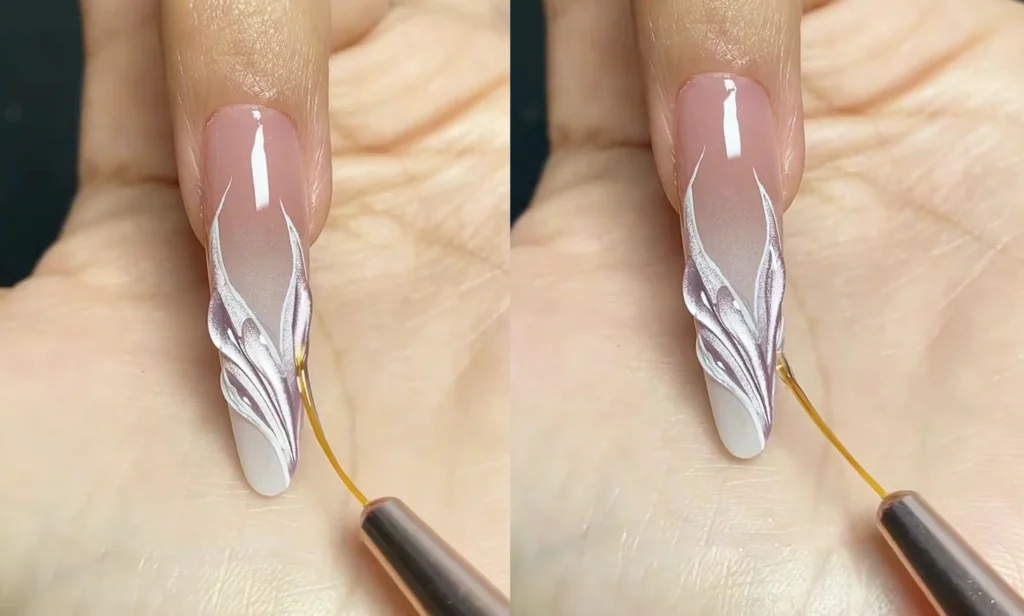
Schritt 3: Dreidimensionale Schichten mit No-Rinse Sealer erzeugen
Wählen Sie einen Sealer mit hoher Viskosität, der sich nicht abspülen lässt, um die Dreidimensionalität zu erhöhen. Tauchen Sie die Spitze des Pinsels in den Kleber und drehen Sie ihn dann um, damit der Kleber auf natürliche Weise zur Spitze fließt.
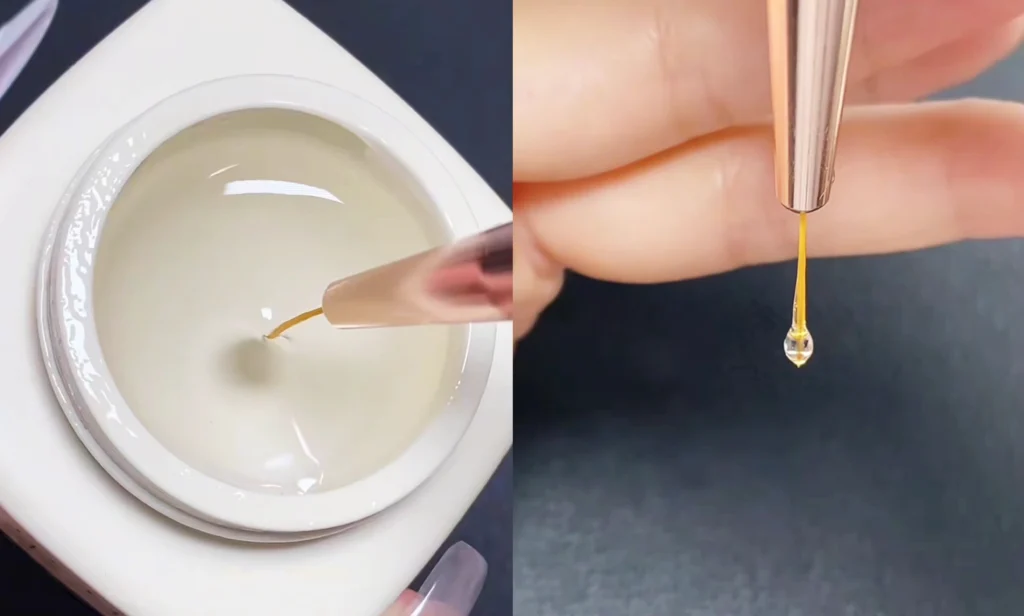
Als Nächstes "drückst du die Kleberaupe mit der Stiftspitze und ziehst sie nach unten". Verwenden Sie nach dem Ziehen jeder Linie eine Lampe, um die Form zu fixieren (um zu verhindern, dass sich der Kleber verformt).
If you don’t control the amount of gel beads properly during the process (like in the failed example), don’t panic.
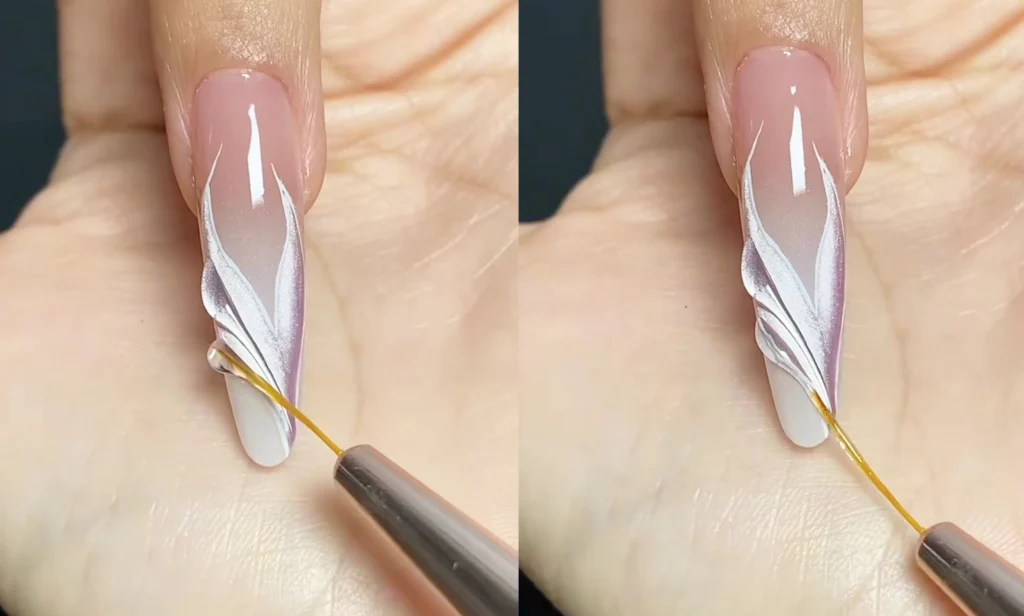
Nach den Anpassungen fahren Sie fort. Die leichten Unregelmäßigkeiten, die von Hand entstehen, machen die Nailart lebendiger.
Schritt 4: Fügen Sie dekorative Elemente hinzu, um den Look zu vervollständigen
Sobald alle dreidimensionalen Linien getrocknet sind, fügen Sie kleine Strasssteine oder Perlen hinzu - wählen Sie zarte, zierliche Accessoires und befestigen Sie sie vorsichtig in der Nähe des Schwanzes des Fisches, wie funkelnde Sterne im Ozean. Tragen Sie abschließend eine Deckschicht auf, um das Design zu verstärken, die Haltbarkeit der Maniküre zu erhöhen und den einzigartigen durchscheinenden Glanz der Meerjungfrau zu erhalten.
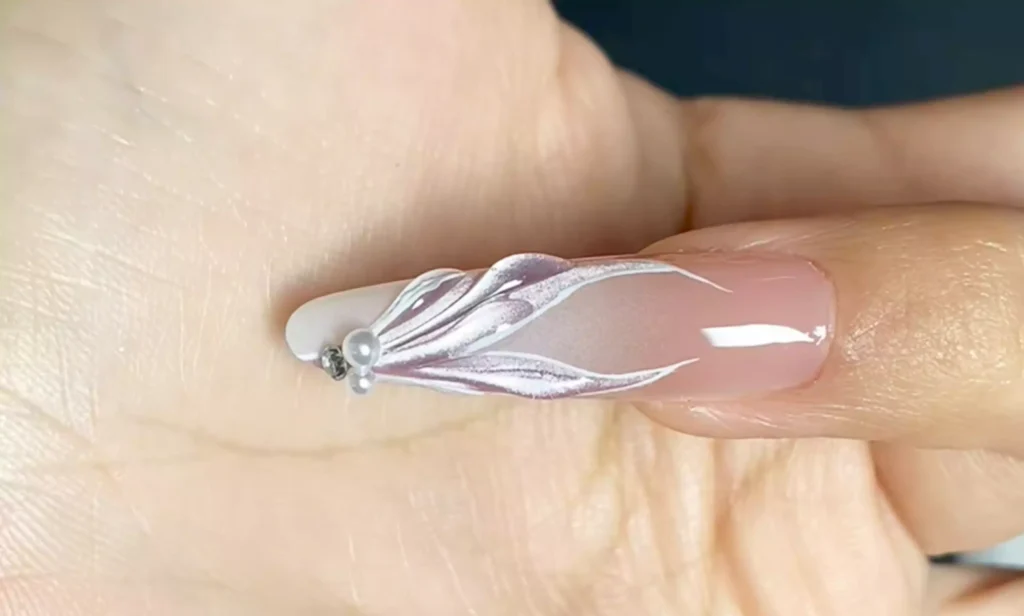
Von der Grundfarbe mit Farbverlauf über das dreidimensionale Fischschwanz-Design bis hin zu den funkelnden Verzierungen - diese Nailart fängt die Romantik des Ozeans direkt an Ihren Fingerspitzen ein. Folgen Sie den Schritten und probieren Sie es aus - auch Sie können Ihren eigenen, von Meerjungfrauen inspirierten Stil kreieren.
In the tutorial, I used CHROMÉCLAIR’s HEMA-freie Gel-Politur. Their products are known for being safe and hypoallergenic (HEMA-free & TPO-free), environmentally friendly, and free of irritating and harmful ingredients, protecting the health of your nails. They offer a wide range of colors, long-lasting color retention (around 21 days), and keep up with the latest trends, so you can use them with confidence and look great!
If you have any questions during the process, the video tutorial below provides detailed answers. If you find it useful, don’t forget to like and save it, and subscribe! See you next time!