Today I’ll show you how to create a 3D butterfly manicure! The steps are explained in great detail, so even beginners can easily replicate it and become a master of exquisite manicures!

Step 1: Create a soft base tone
Reverse gradient base: Choose a nude gel polish (here I used CHROMÉCLAIR Hema Free Gel Polish No. 13, which is non-toxic and healthy, and flows well, allowing even application by beginners). Apply only to the front half of the nail. Use a blending brush to gently sweep toward the roots, creating a reverse gradient from darker in front to lighter in the back, giving the edges a hazy, soft-focus effect.
Use glitter glue to brighten: Apply a thin layer of glitter glue in the middle of the nail, as if burying a layer of diamonds in the nail.
It will glow secretly under the light, and it is very exquisite.
Recommended next step
Build the Nail Art Look Kit
Tutorial looks need more than a color bottle. Choose the color, art detail, transfer or sticker step, and a top coat as one look kit.
- Choose the main color or set.
- Add the art detail: sticker, transfer gel, magnet, or brush.
- Seal the finished look with top coat.
Transparent color blending transition: Take transparent brown + transparent gray nail polish, dip a fan-shaped brush into the two, and gently pat them on the nails to make the different color blocks flow naturally, saying goodbye to the awkwardness of “clear distinction”;
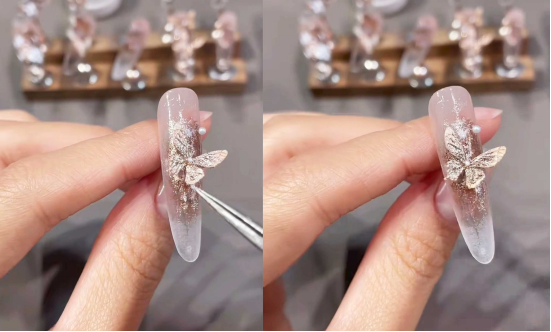
Step 2: Shape the 3D Butterfly (Creating a Soul Decoration)
The butterfly is the centerpiece of this manicure, and creating a 3D butterfly yourself is easy!
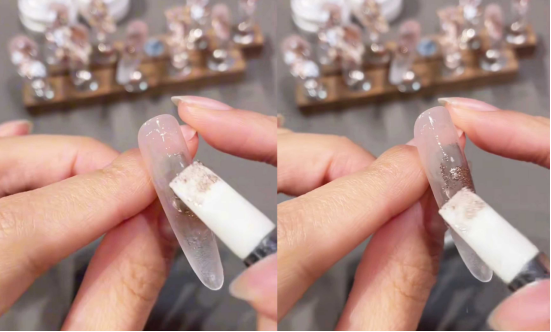
Filling and Curing the Mold: Take the transparent butterfly mold and use tweezers to apply an appropriate amount of clear molding glue. Evenly fill the mold’s butterfly grooves (be careful not to spill over the edges).
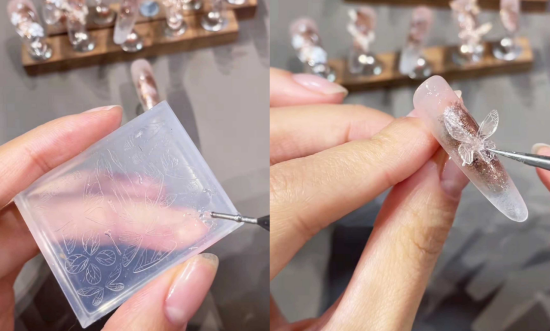
Demolding under a lamp: Place the mold filled with glue under a nail lamp to dry (the exact time depends on the glue instructions, generally 30-60 seconds). Once cured, gently remove the mold to create a transparent, three-dimensional butterfly.
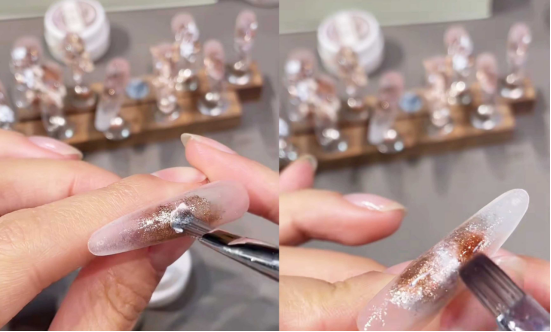
Positioning: Apply a small amount of primer to the back of the butterfly and precisely adhere it to the visual center of the nail (e.g., the upper middle part). Press for a few seconds to secure. The three-dimensional butterfly instantly brings your nail art to life.
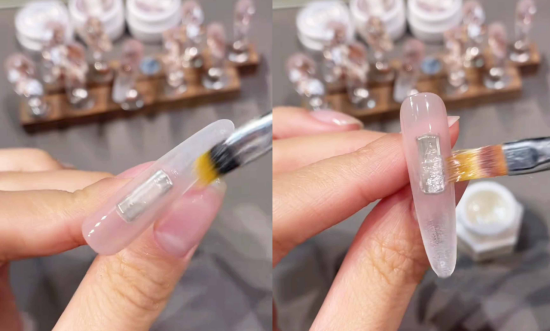
Step 3: Blend the Butterfly’s Color (Make It Vivid and Dynamic)
A plain, transparent butterfly isn’t eye-catching enough; give it a gradient makeup look and instantly transform it into a fingertip elf!
Apply a thin layer of glitter glue to the entire butterfly, creating a “pearlescent gauze dress” and adding a touch of translucence to the base color.
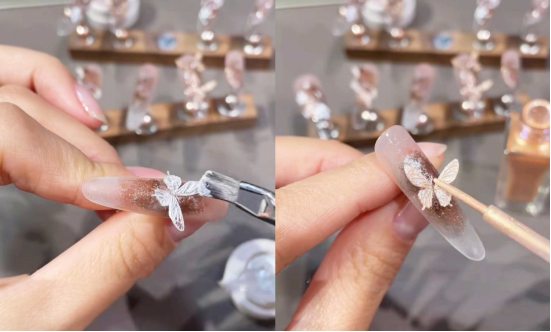
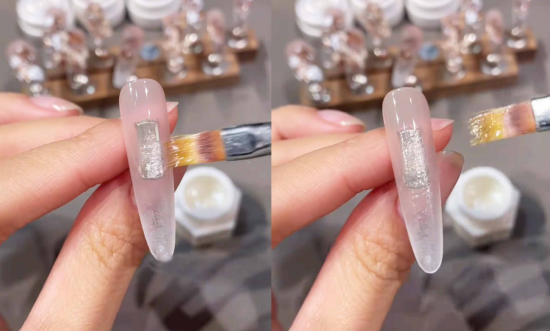
Orange Watercolor: Dip a fine brush into the watercolor and gently brush it across the butterfly’s surface, evenly tinting it with a warm orange hue. This instantly transforms the color from “transparent” to “vibrant.”
Gradient Wings: Focus on the edges and wrinkles of the wings, using a “dark to light” technique to create a gradient effect—dark at the base and lighter at the tip. This simulates the light and shadow gradations of a real butterfly’s wings, making them appear to “breathe.”
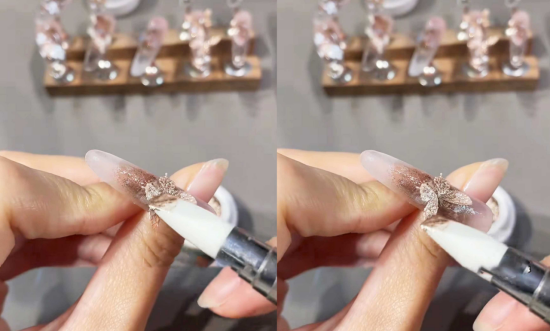
Step 4: Detailing & Topcoat (Securing the Elegance)
These last two steps provide a “safety” and “add-on” to your manicure, ensuring its long-lasting beauty.
Lightly luxurious embellishments: Use tweezers to pick up mini pearls and tiny diamonds and apply them around the butterfly or to unused areas of the nail (such as the base or edges). Choose pearls 2-3mm in size for a more refined look, and choose diamonds with a subtle shimmer to complement the base color.
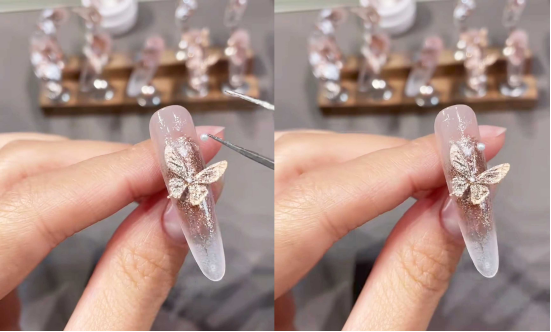
Finishing coat for the entire hand: Finally, apply a layer of super-bright finishing glue, evenly covering from fingertips to roots. This will not only make the manicure wear-resistant and scratch-resistant, but also make the base color, butterfly, and diamond decoration glossy and uniform to a “mirror-grade” finish.
In the tutorial, I used CHROMÉCLAIR gel polish. Their products have good fluidity, so even beginners can apply them evenly. They focus on safety, low irritation, and environmental protection, do not contain harmful ingredients, reduce the risk of allergies (HEMA-free Gel Polish), protect healthy nails, and ensure that every consumer has a safe and secure user experience.
Friends, please save this tutorial and practice. If you encounter any problems during the process, you can watch the video tutorial below. If you find the tutorial useful, please like and subscribe to me. See you in the next tutorial!