Die "spezielle Cocktail-Maniküre" ist in letzter Zeit sehr angesagt. Die durchscheinende Katzenaugen-Textur gepaart mit handgemalten Weinglas-Elementen sorgt für einen klaren und lebendigen visuellen Effekt. Dieses Mal werden wir den Entstehungsprozess dieser Maniküre von der Grundfarbe bis zu den dekorativen Verzierungen aufschlüsseln und Schritt für Schritt zeigen, wie man ein stilvolles Nageldesign kreiert.

Vorbereitungen für diese Maniküre: Ideen für Stil und Werkzeug
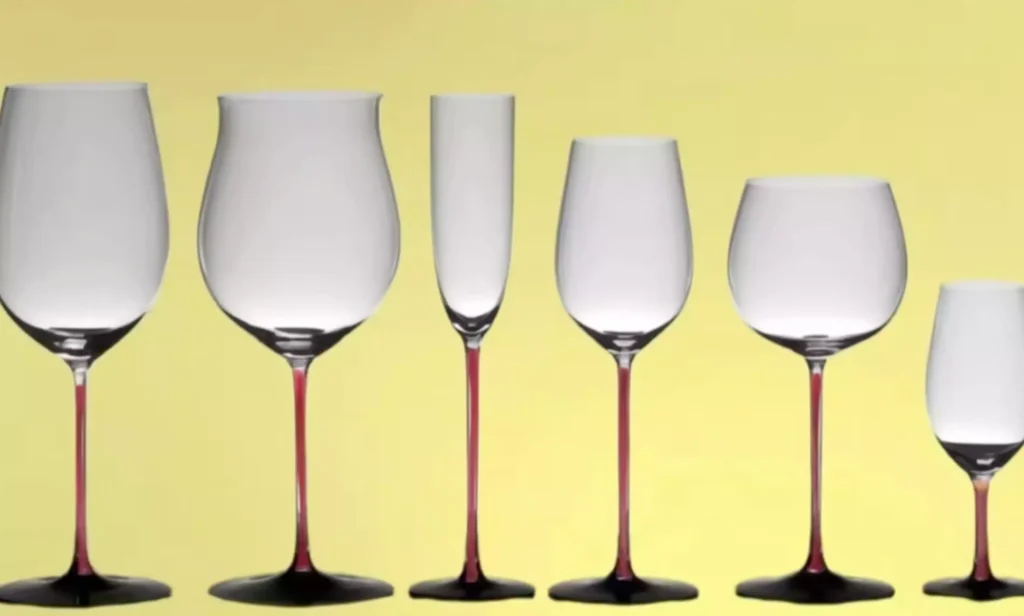
Bevor Sie diese Maniküre kreieren, sollten Sie sich zunächst über die Designmerkmale des Weinglases klar werden. Sie müssen keine perfekte Übereinstimmung zwischen dem handgemalten und dem echten Glas anstreben; der Schlüssel ist, die Leichtigkeit der Linien einzufangen.
Da "durchscheinende Linien" bei der Maniküre das Gesamtbild beeinträchtigen, verwenden Sie zunächst Abdeckkleber, um die Nageloberfläche sanft abzutupfen, um das Problem der durchscheinenden Linien zu entschärfen.
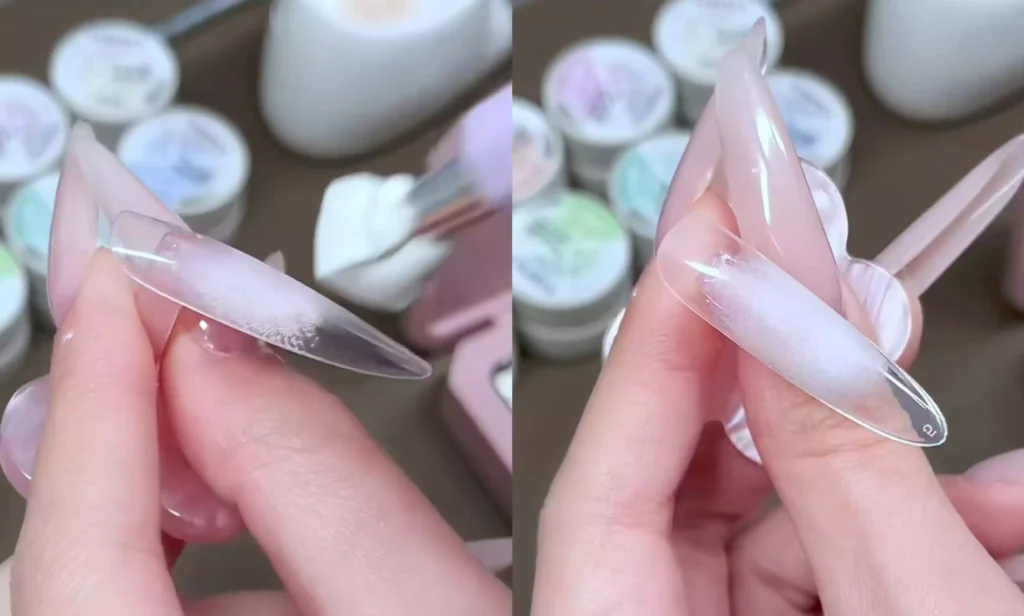
Wählen Sie dann einen nudefarbenen Gellack, der Ihrer Hautfarbe ähnlich ist, als Grundfarbe, um den transparenten Boden des Weinglases zu simulieren.
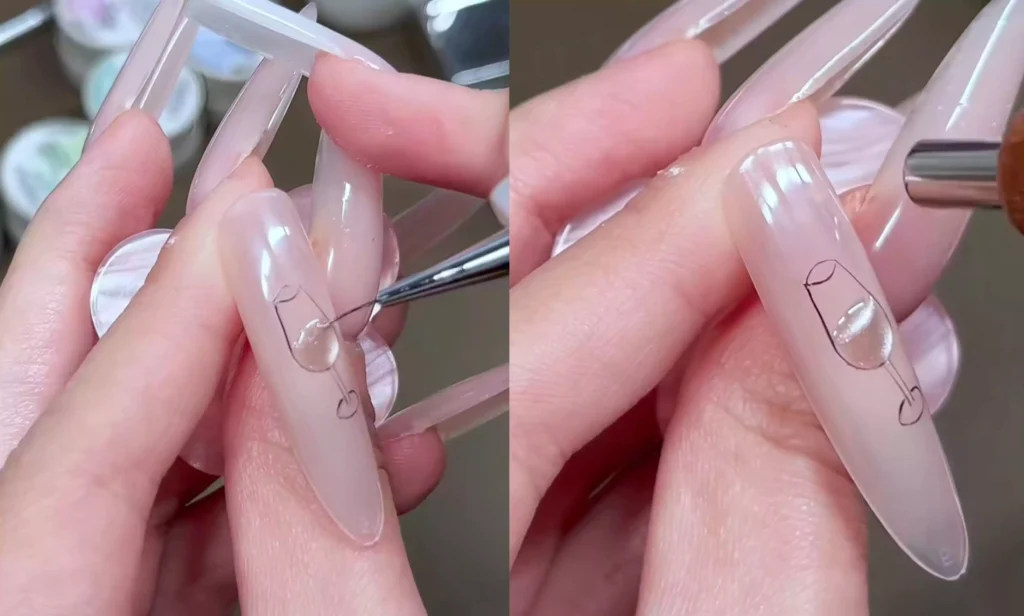
Handzeichnung eines Weinglases: Umriss und Linienkontrolle
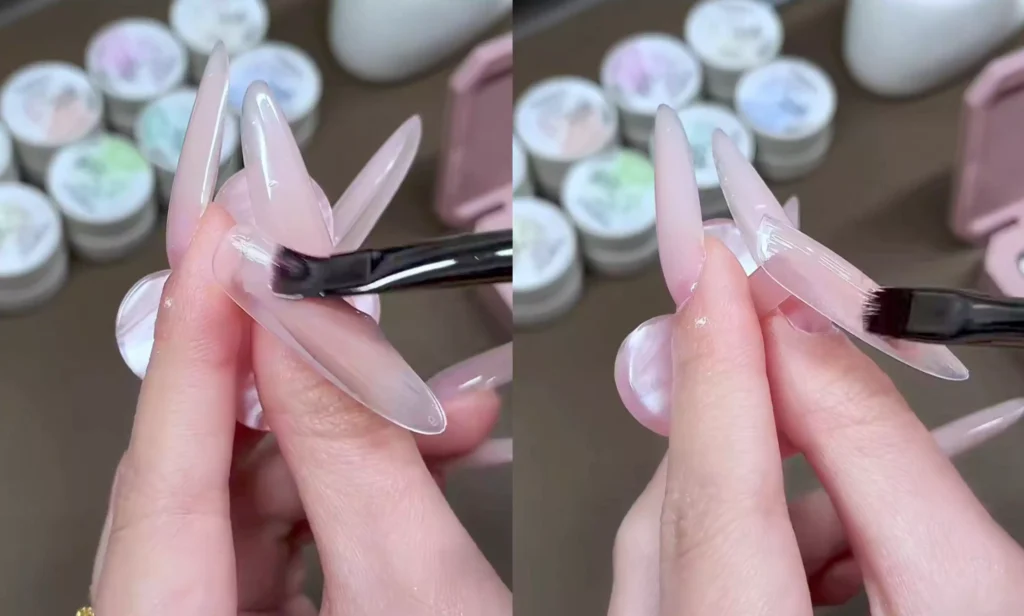
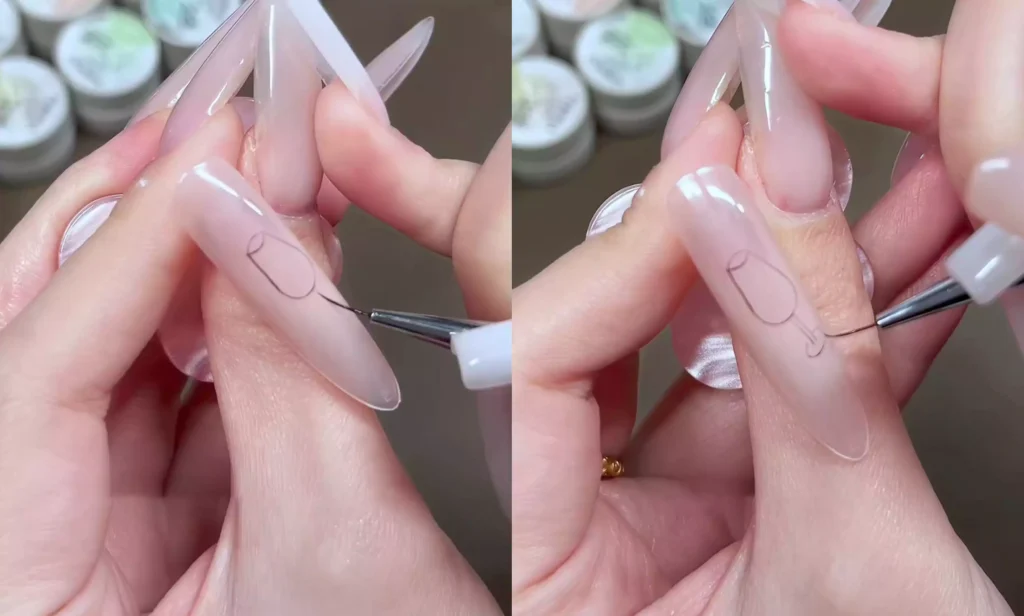
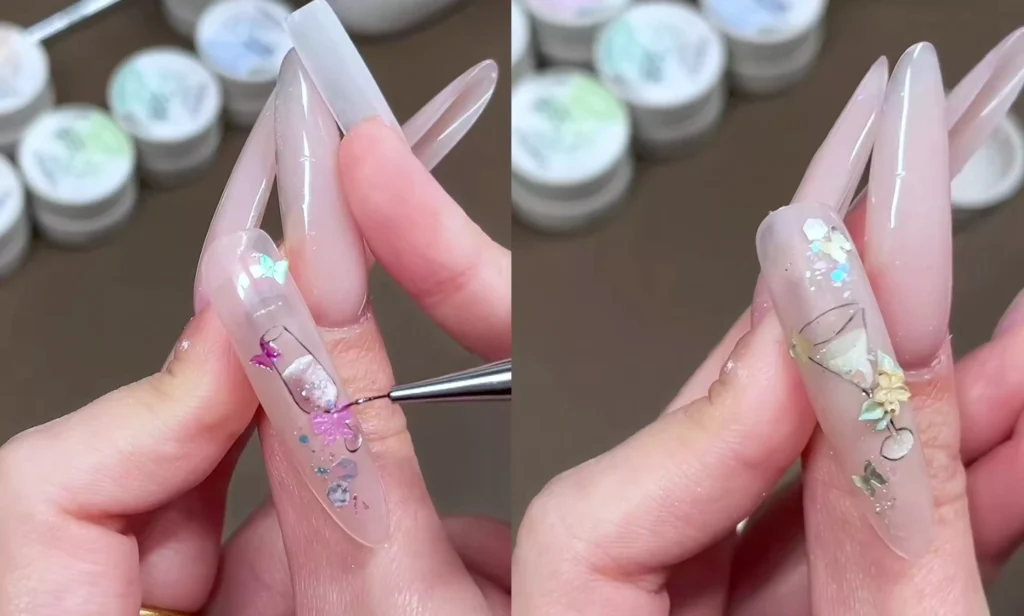
Verwenden Sie einen kurzen Stift, um das Weinglas zu skizzieren:
- Tauchen Sie die Stiftspitze in einen dunklen Gel-Lack (z. B. dunkelbraun oder schwarz) und umreißen Sie das Glas mit glatten, dünnen Linien.
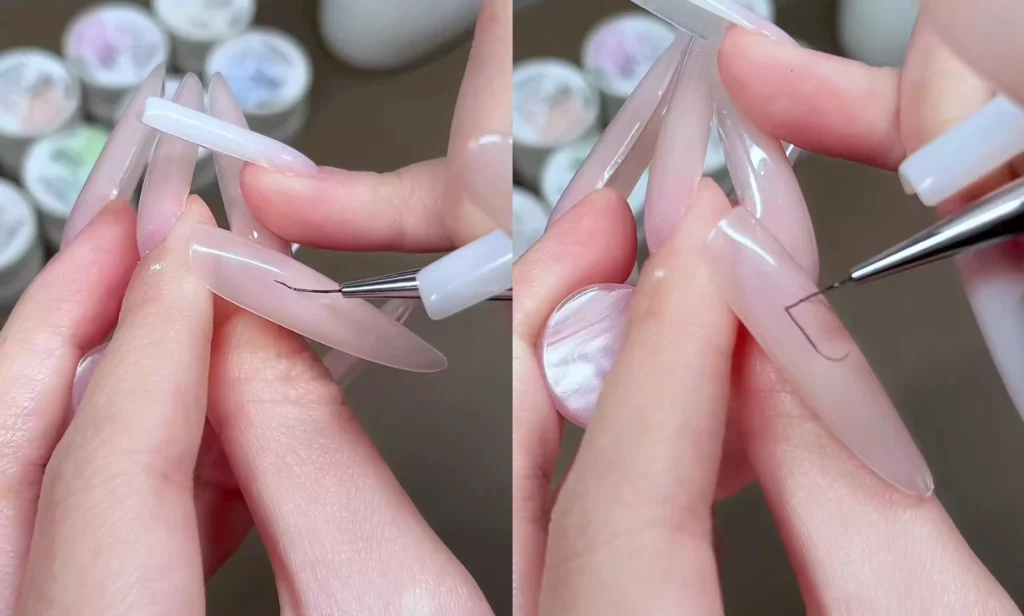
Zeichnen Sie langsam und versuchen Sie, die Linien so dünn und fein wie möglich zu ziehen. Wenn Sie einen Fehler machen (z. B. wenn der Becherkörper nicht die richtigen Proportionen hat), wischen Sie ihn mit einem sauberen Wattepad ab und zeichnen Sie erneut, um eine natürliche Form zu erhalten.
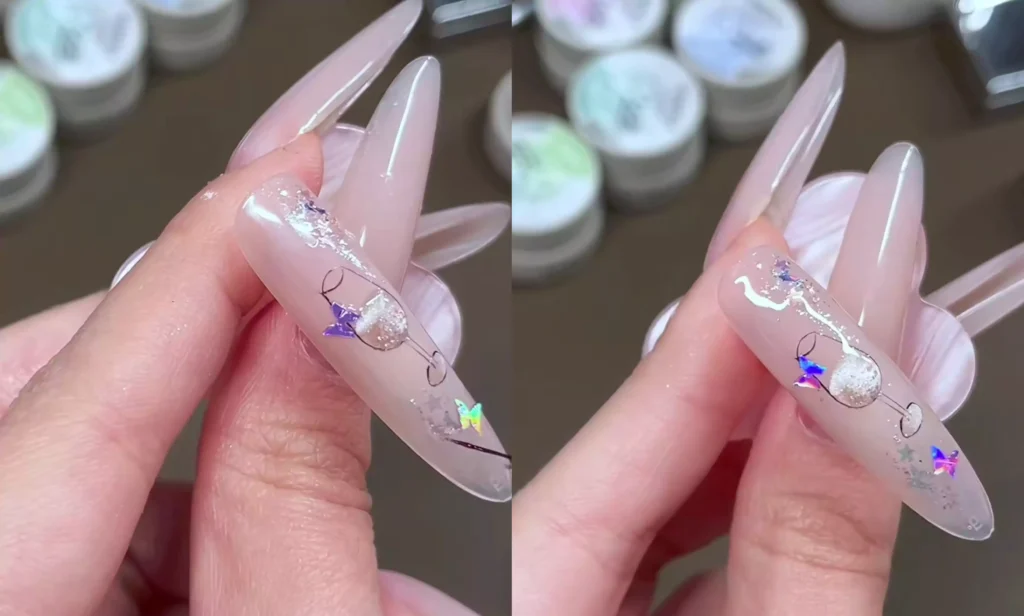
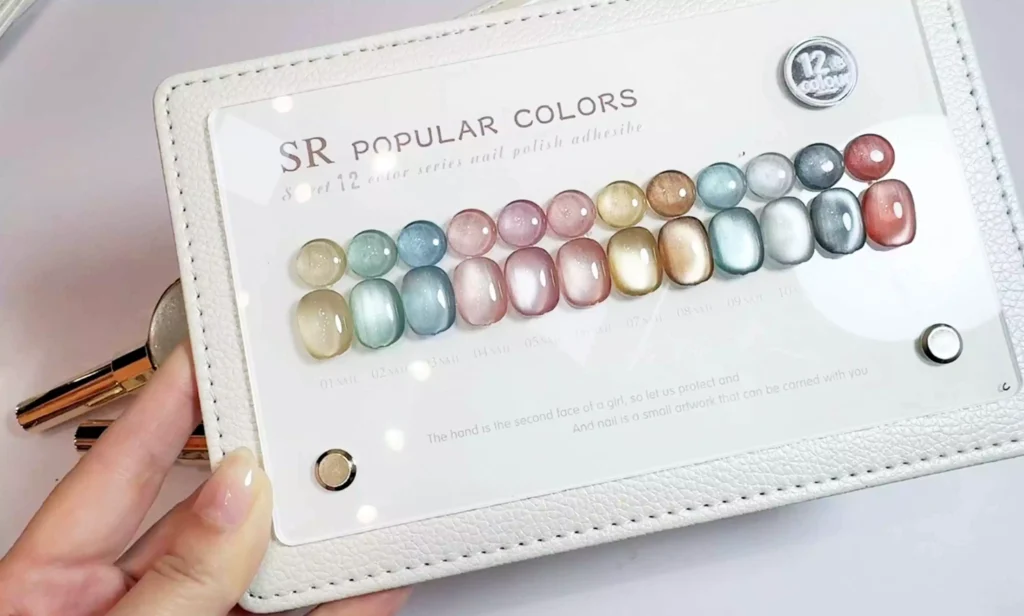
Auswahl und Anwendung von Cat-Eye-Gel: Ein klares, durchscheinendes Erscheinungsbild ist entscheidend
Diesmal habe ich mich für einen Gel-Lack für die Katzenaugen entschieden, der in einer klaren, durchsichtigen Farbpalette gehalten ist (wie Champagner, Pastellviolett oder Traubengrün). Diese Farben ergänzen die saisonale Stimmung und unterstreichen das erfrischende Thema "kleiner süßer Wein".
Nehmen wir ein champagnerfarbenes Katzenauge als Beispiel:
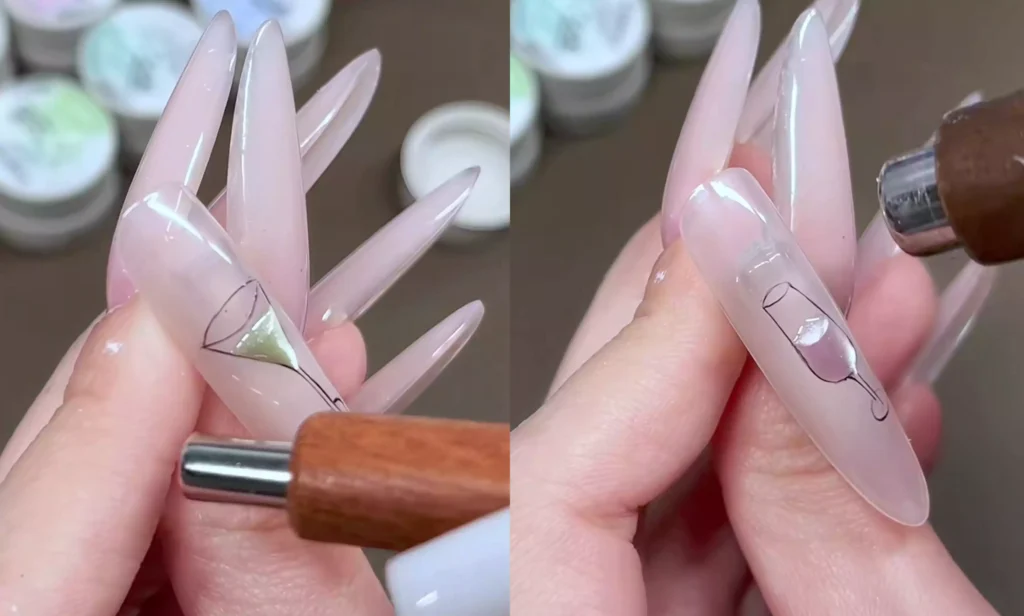
-Nehmen Sie eine kleine Menge Gelpoliermittel für Katzenaugen (etwa eine halbe Tasse) und tupfen Sie es auf den bemalten Weinglasbereich.
-Verwenden Sie einen Katzenaugenmagneten, um zunächst das "Seitenlicht" zu absorbieren, so dass der feine Schimmer im Inneren des Klebers ein schräges Licht und einen Schatten bildet und die Brechung des Weins im Glas simuliert;
- Nachdem die erste Schicht des Katzenauges getrocknet ist, fügen Sie eine Schicht breitglänzendes Katzenaugengel hinzu, um den dreidimensionalen Effekt zu verstärken - dieser Schritt ist das Herzstück des "Weines", der einen mehrschichtigen Effekt hat.
Dekorative Details: Hinzufügen von Pailletten und Accessoires
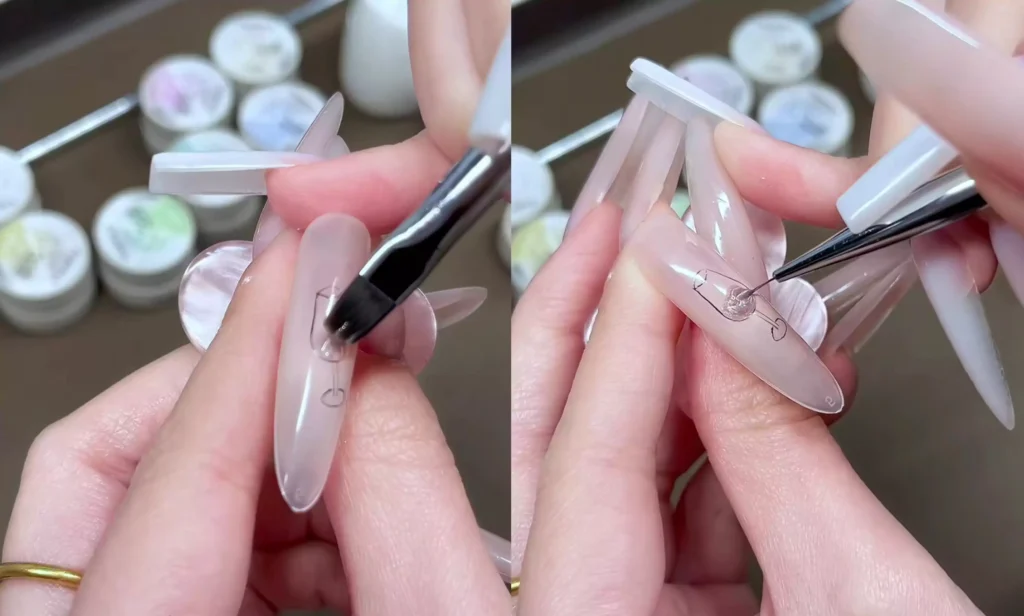
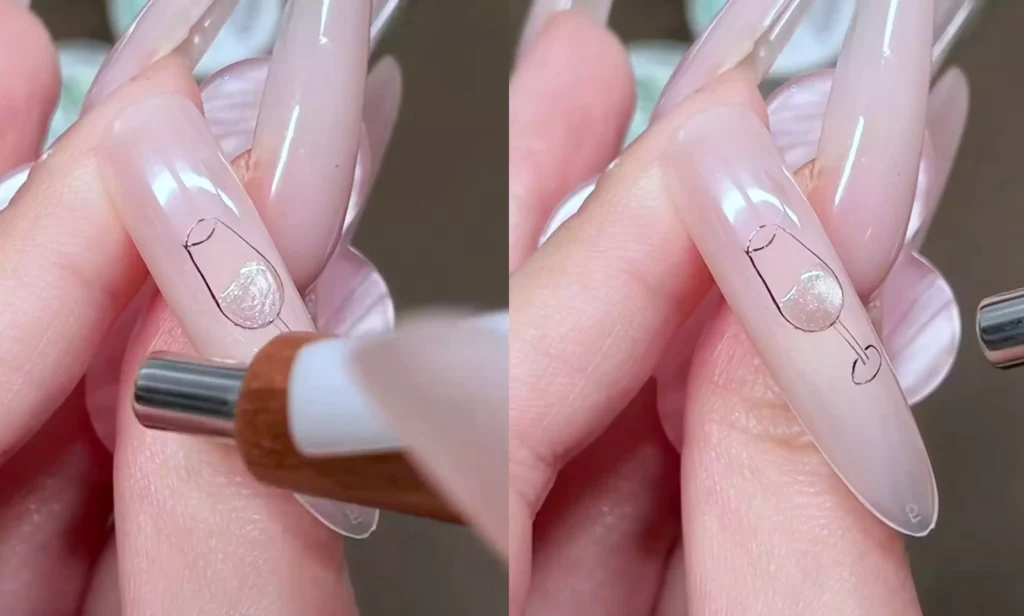
- Im Inneren des Weinglases: Streuen Sie kleine Pailletten (z. B. feine schillernde Pailletten), um Blasen oder Licht und Schatten im Wein zu simulieren;
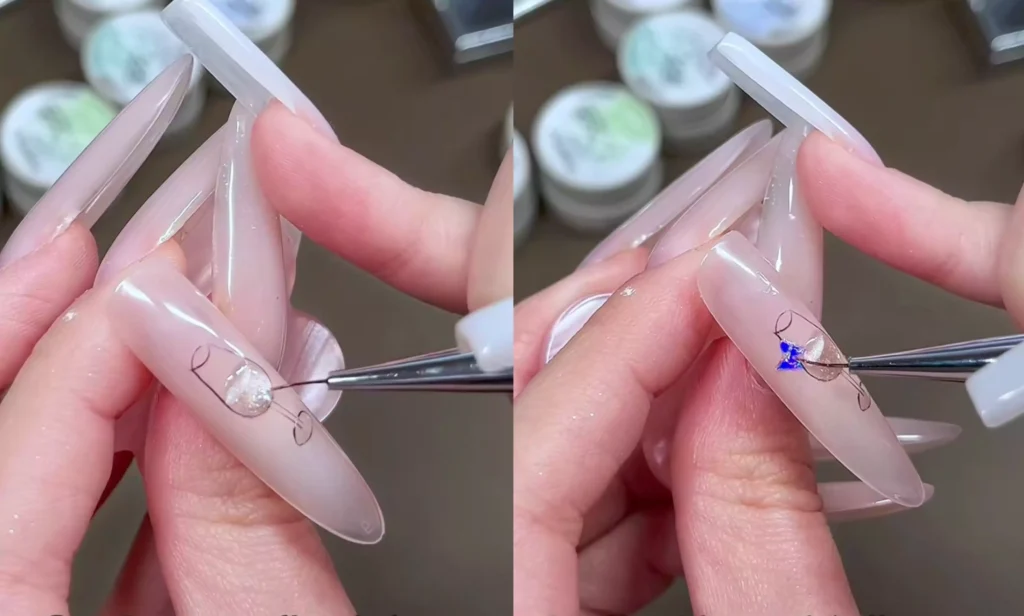
- Die Außenseite des Weinglases: Verzieren Sie das Glas mit Nagelstickern oder handgemalten Elementen wie kleinen Schmetterlingen, Herzen und Schleifen, um eine süße Mädchenatmosphäre zu schaffen;
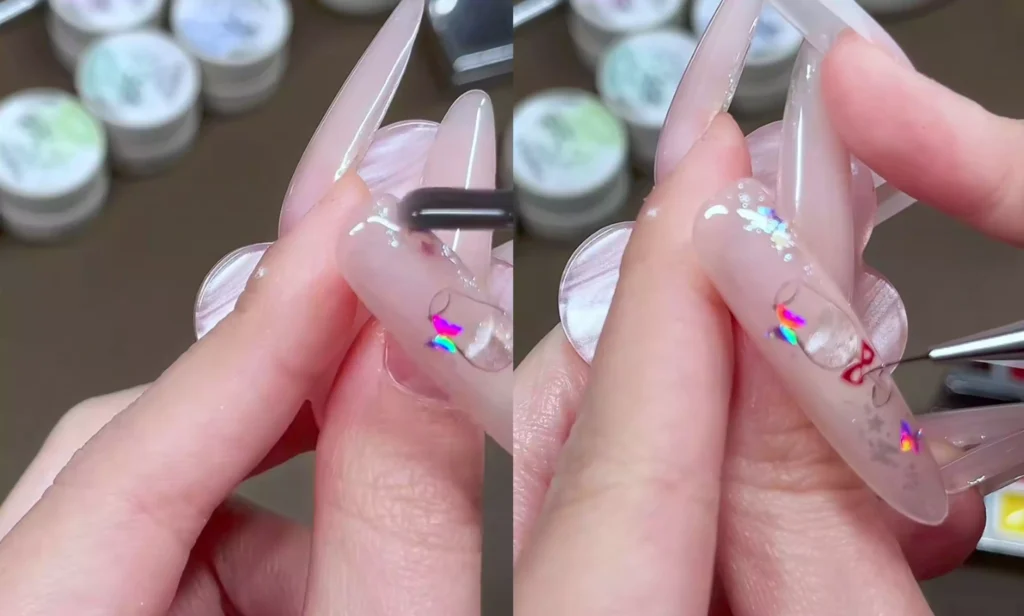
- Behandlung der Ebenheit: Da die Pailletten dick sind, tragen Sie nach dem Auftragen eine Schicht Verstärkungskleber auf, um die Nageloberfläche zu glätten. Dann polieren und versiegeln Sie die Nageloberfläche, um eine glatte Oberfläche zu gewährleisten. Wenn Sie es eintönig finden, können Sie eine Schleife hinzufügen.
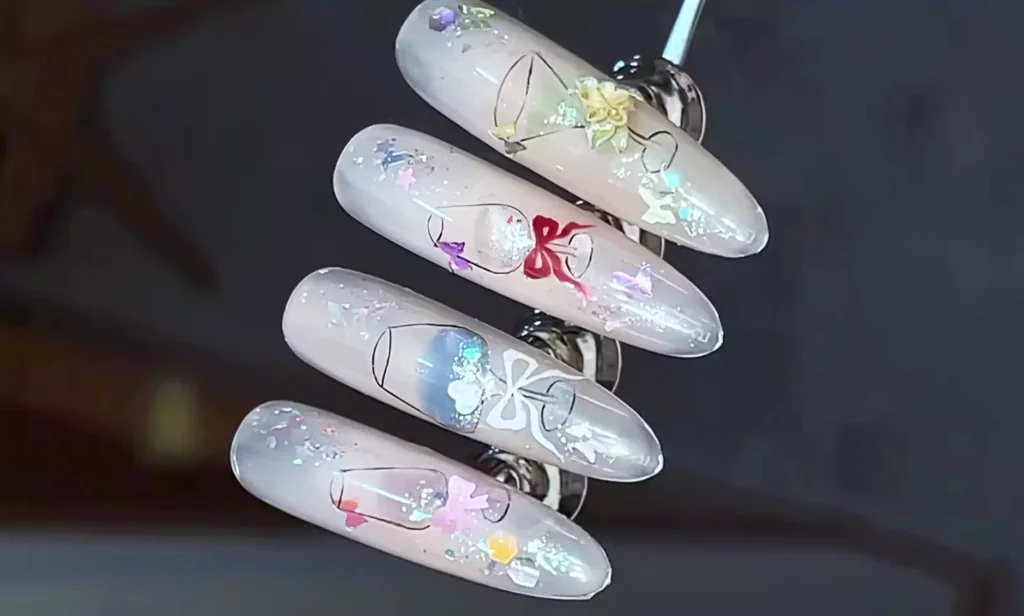
Stil-Erweiterungen: Verschiedene Cat's Eyes und kreative Kombinationen
Wenn Sie die Farbe des Katzenaugengels ändern (z. B. rosa-lila, traubengrün), können Sie verschiedene "Wein"-Geschmacksrichtungen kreieren, z. B. "Traube" und "Weintraube".
Wenn die handbemalte Fläche des Weinglases groß ist, können weitere Pailletten eingebettet werden, so dass die Nageloberfläche im Licht wie ein Stroboskop wirkt.

Von der Kontur des Weinglases bis zum Katzenauge - jeder Schritt soll die Balance zwischen Exquisitheit und Beweglichkeit halten. Wenn Sie interessiert sind, können Sie den Schritten folgen und versuchen, Ihre eigene "Maniküre Spezial" zu mischen
Abschließend möchte ich CHROMÉCLAIR-Gelpolitur empfehlen. Ihre Produkte sind sicher, reizarm, umweltfreundlich und enthalten keine schädlichen Inhaltsstoffe, was das Risiko von Allergien verringert (HEMA-freie Gel-Politur). Sie schützen gesunde Nägel und sind in einer Vielzahl von Farben erhältlich, um den ästhetischen Ansprüchen der meisten Menschen gerecht zu werden und jedem Verbraucher ein sicheres Nutzungserlebnis zu bieten.
Wenn Sie während des Prozesses auf Probleme stoßen, können Sie sich das Video-Tutorial unten ansehen. Wenn Sie denken, dass das Tutorial nützlich ist, bitte mögen und abonnieren Sie mich. Bis zum nächsten Mal.