
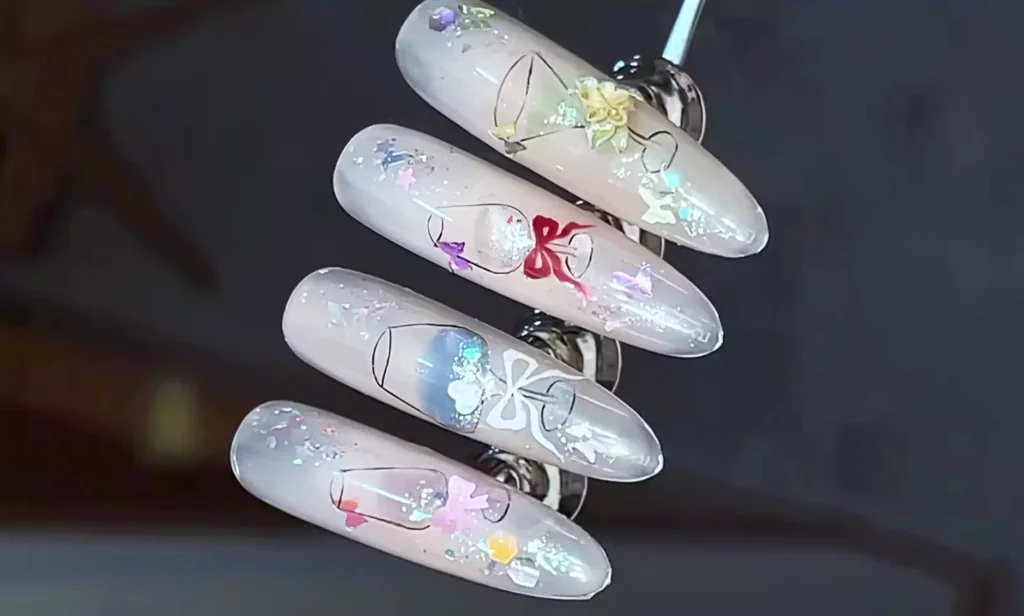
The “special cocktail manicure” has been trending lately. Its translucent cat’s-eye texture paired with hand-painted wine glass elements creates a clear and vibrant visual effect. This time, we’ll break down the creation process of this manicure, from base color to decorative embellishments, showing step-by-step how to create a stylish nail design.
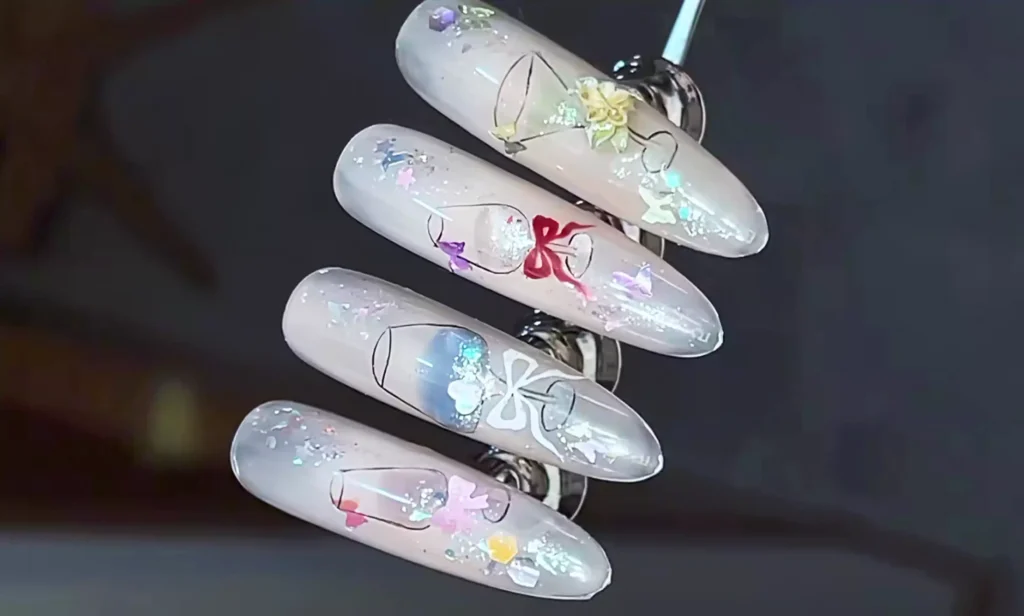
Preparazione per questa manicure: Idee di stile e strumenti
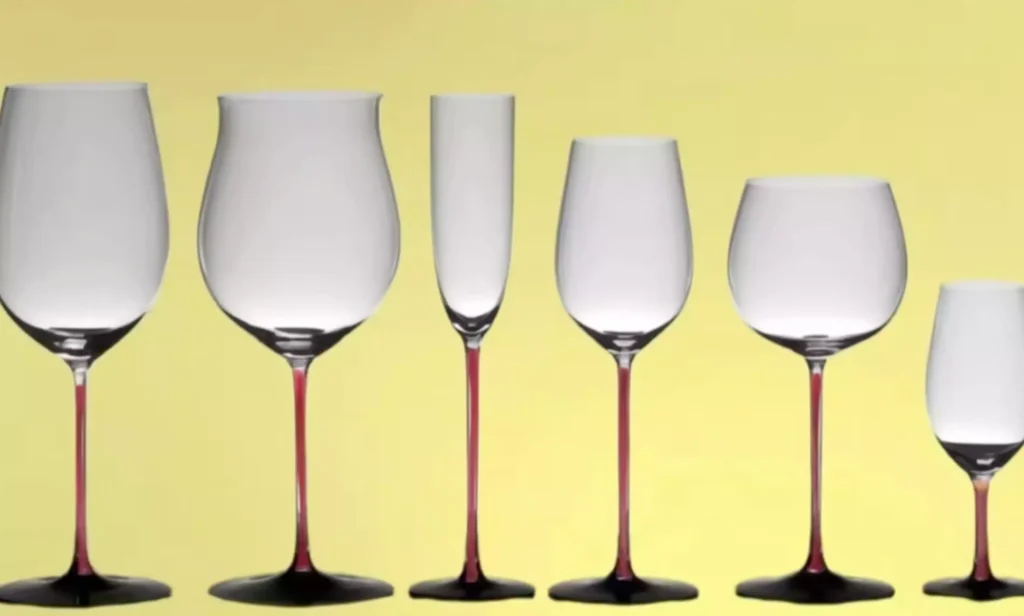
Before creating this manicure, first understand the design characteristics of the wine glass. You don’t need to aim for a perfect match between the hand-painted and the real thing; the key is to capture the lightness of the lines.
Since “see-through lines” on manicures will affect the overall refinement, first use concealer glue to gently pat the nail surface to weaken the problem of see-through lines.
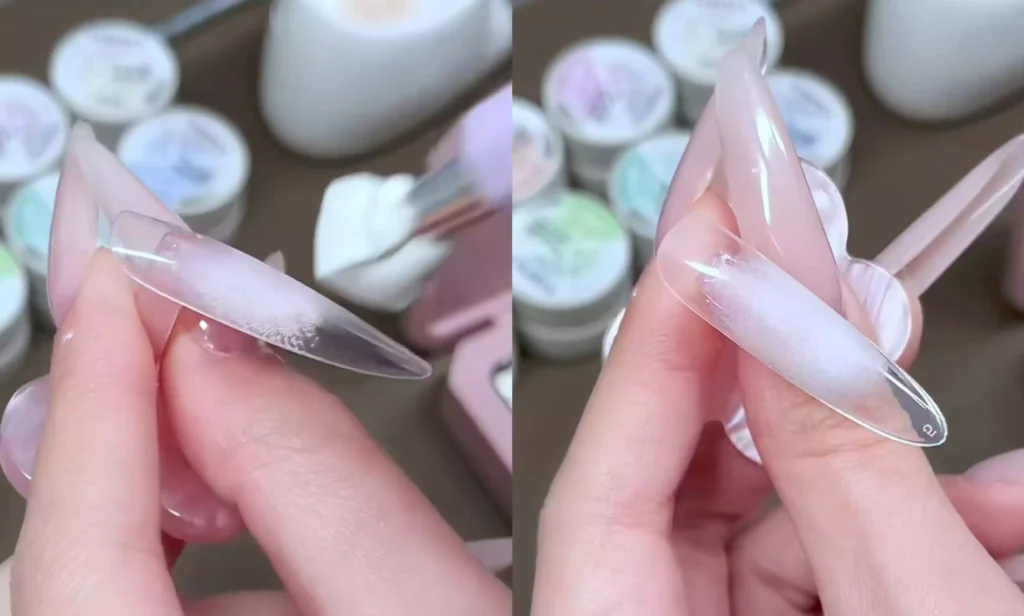
Scegliete quindi uno smalto gel nude che si avvicini al colore della vostra pelle come colore di base per simulare la base trasparente del bicchiere di vino.
Passo successivo consigliato
Use a Compatible UV/LED Curing Setup
CHROMÉCLAIR gel polish and gel nail stickers require a compatible UV/LED nail lamp. Build the curing step into the complete routine instead of treating it as optional.
- Apply the compatible gel product in a controlled layer.
- Cure it under a UV/LED nail lamp according to the product label.
- Check the surface before continuing with the next coat or top coat.
Shop UV/LED nail lampSee handheld UV lampConfronta tutte le routine
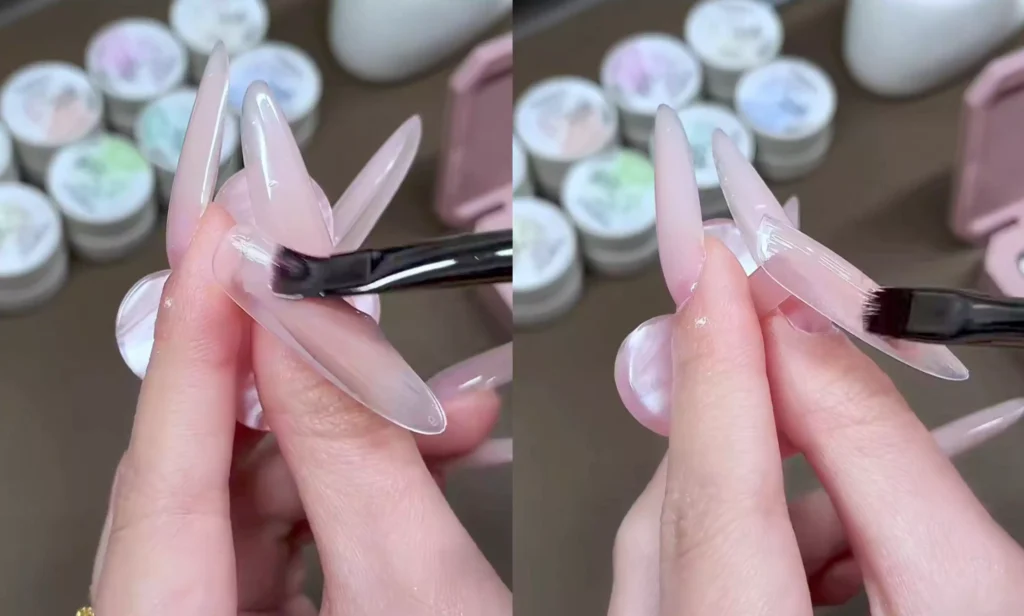
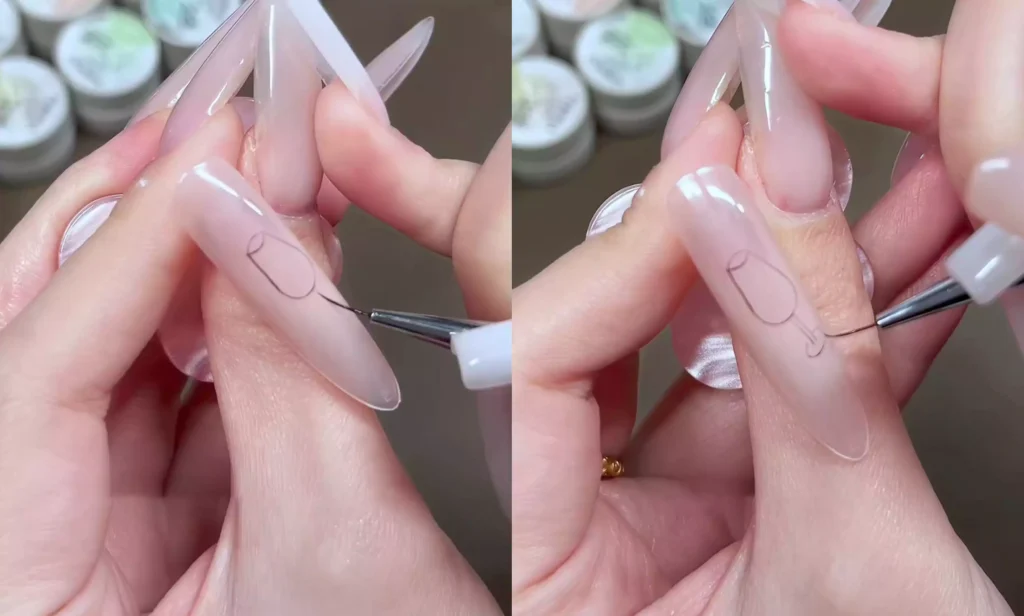
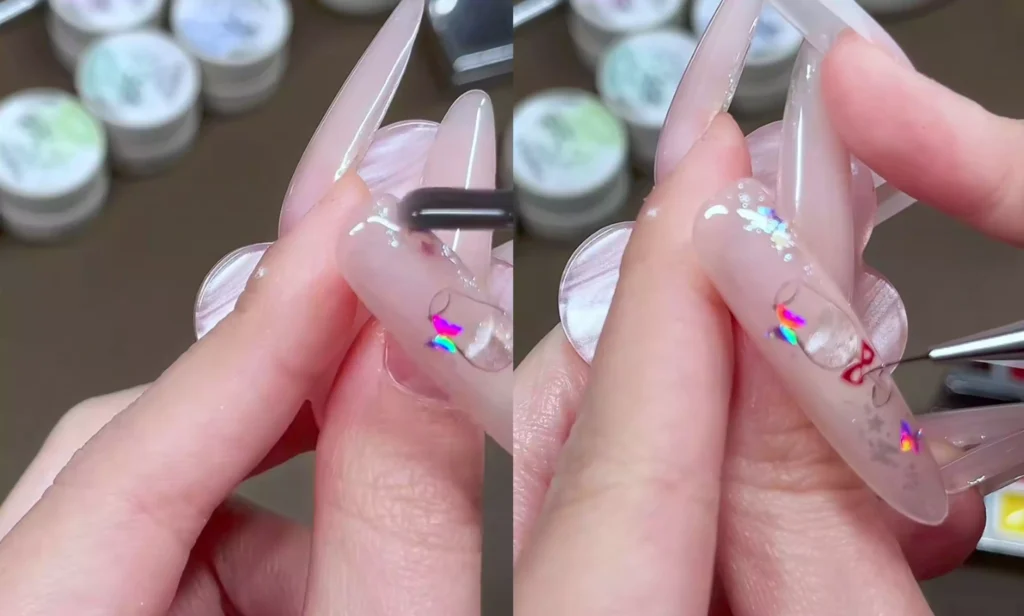
Disegnare a mano un bicchiere di vino: Controllo dei contorni e delle linee
Utilizzare un pennarello a tratto corto per delineare il profilo del bicchiere di vino:
- Intingere la punta della penna in uno smalto gel scuro (come il marrone scuro o il nero) e delineare il vetro con linee sottili e uniformi.
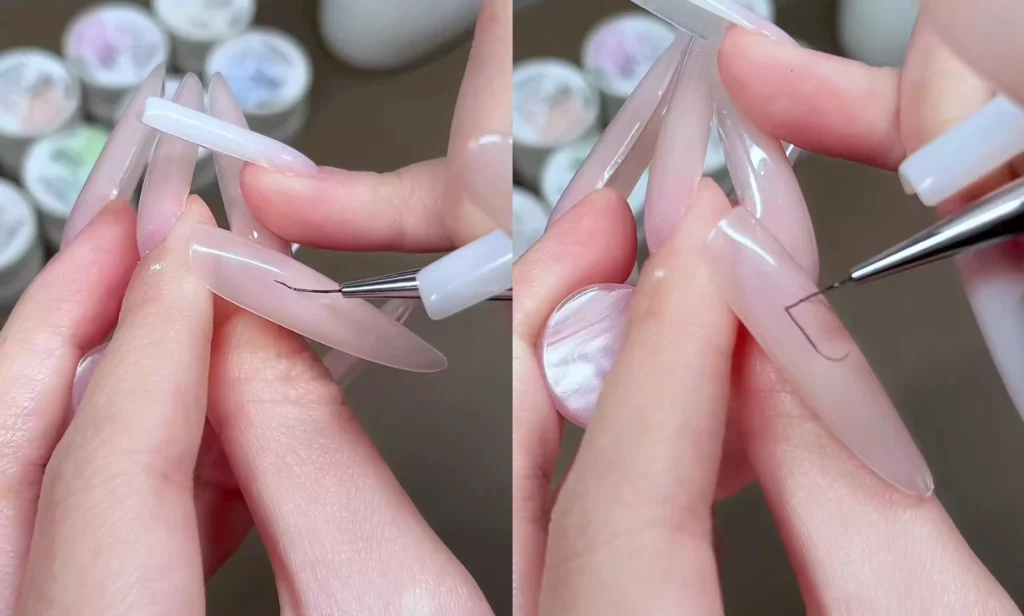
Rallentate il disegno e cercate di rendere le linee il più possibile sottili e delicate; se commettete un errore (ad esempio, il corpo della tazza non è nelle giuste proporzioni), cancellatelo con un batuffolo di cotone pulito e disegnate di nuovo per garantire una forma naturale.
Scelta e applicazione del gel per occhi di gatto: Un aspetto chiaro e traslucido è fondamentale
Questa volta, il smalto gel occhi di gatto I chose tends to be in a clear, sheer color palette (such as champagne, pastel purple, or grape green). These colors complement the seasonal mood and enhance the refreshing “little sweet wine” theme.
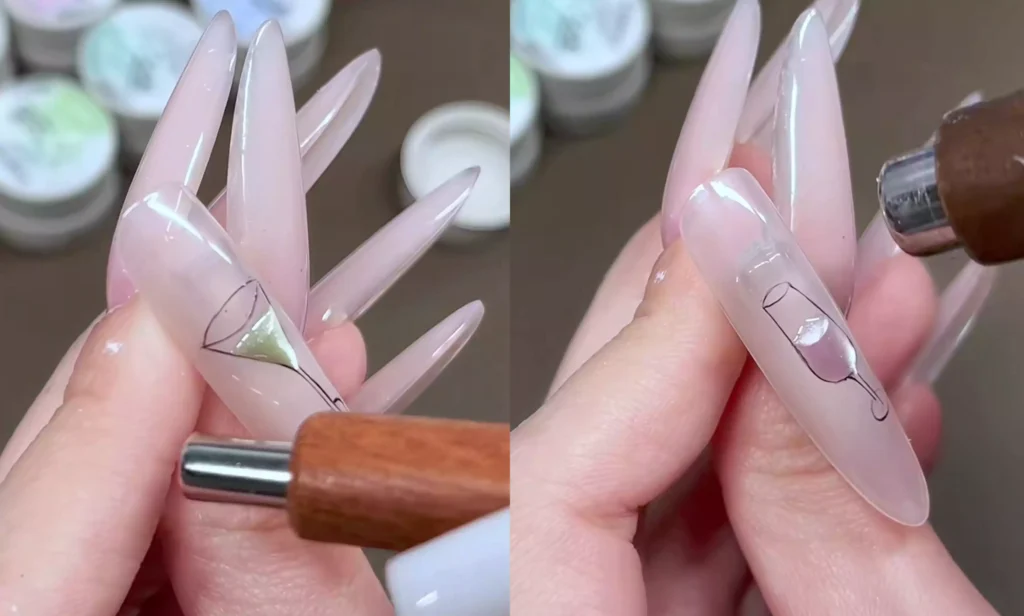
Ad esempio, un cat-eye color champagne:
-Prendete una piccola quantità di smalto gel per occhi di gatto (circa mezza tazza) e applicatela sulla zona dipinta del bicchiere di vino.
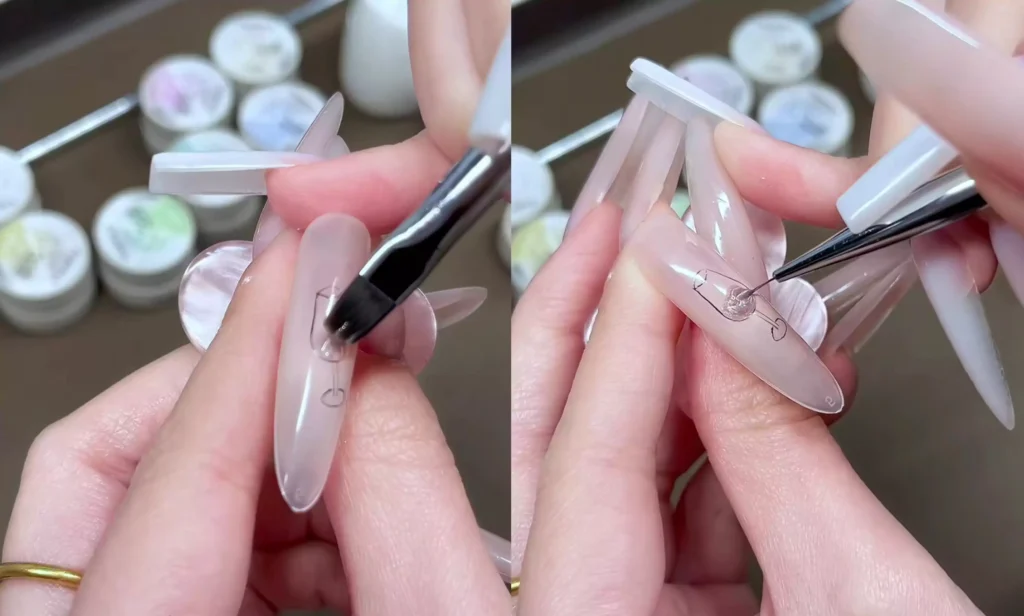
·Use a cat’s eye magnet to absorb the “side light” first, so that the fine shimmer inside the glue forms an oblique light and shadow, simulating the refraction of the wine in the glass;
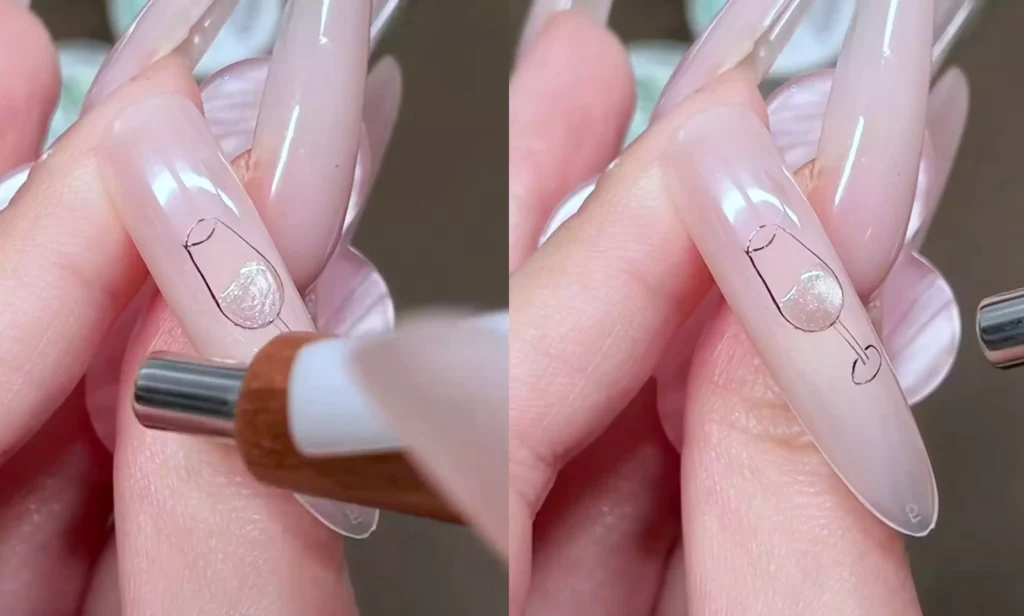
· After the first layer of cat’s eye is dry, add a layer of wide-gloss cat’s eye gel on it to enhance the three-dimensional effect – this step is the core of making the “wine” have a layered effect.
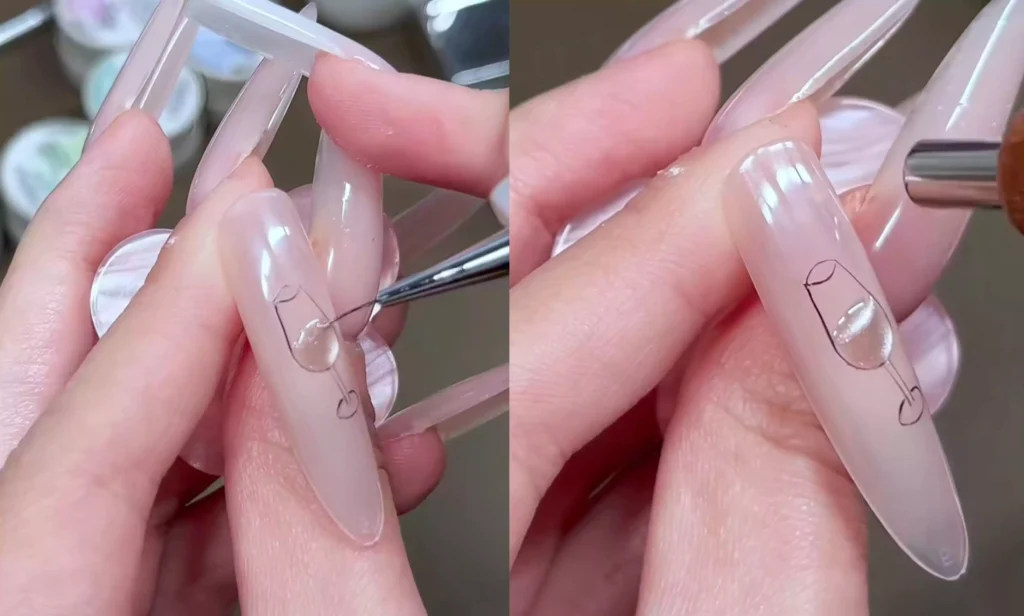
Dettagli decorativi: Aggiungere paillettes e accessori
– Inside the wine glass: Sprinkle small sequins (such as fine iridescent sequins) to simulate bubbles or light and shadows in the wine;
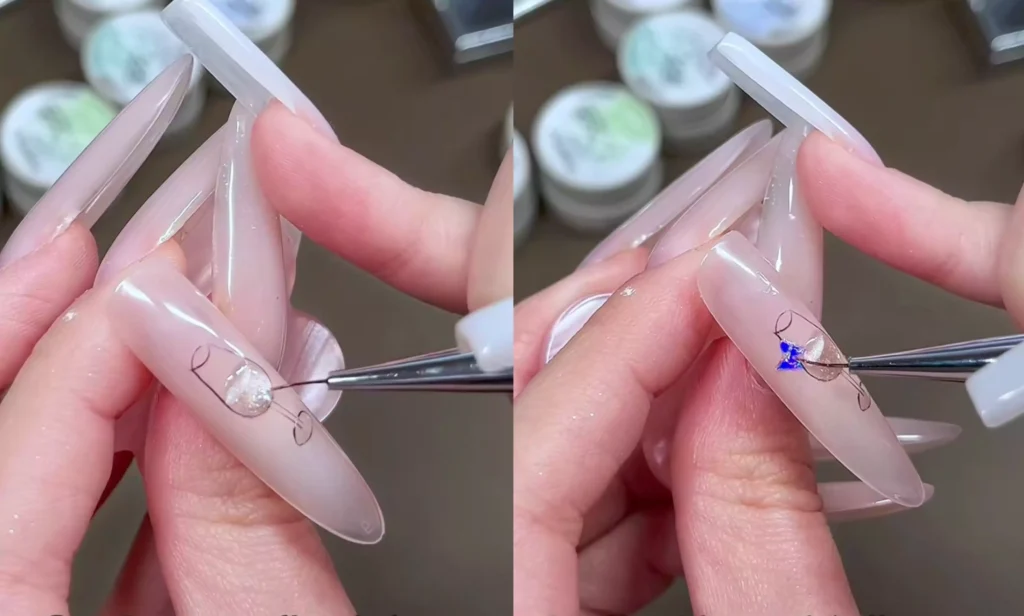
– Outside of the wine glass: Decorate with nail stickers/hand-painted elements such as small butterflies, hearts, and bows to add a sweet girl atmosphere;
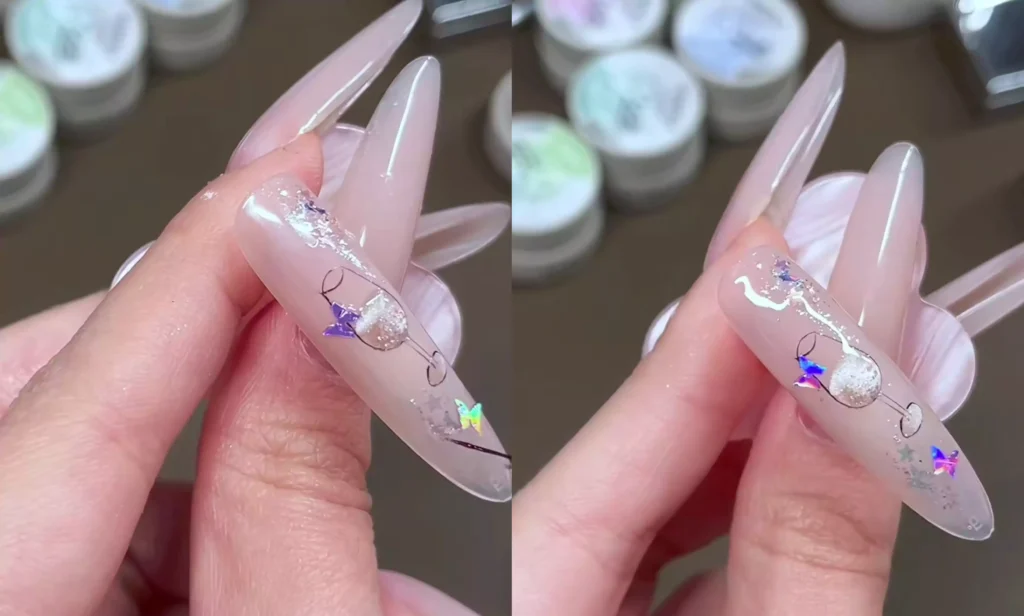
– Flatness Treatment: Because the sequins are thick, apply a layer of reinforcing glue to level the nail surface after application. Then polish and seal the nail surface to ensure a smooth surface. If you find it monotonous, you can add a bow.
Style Extensions: Different Cat’s Eyes and Creative Pairings
Changing the color of the cat’s eye gel (e.g., pink-purple, grape green) allows you to create different “wine” flavors, such as “grape” and “grape.”
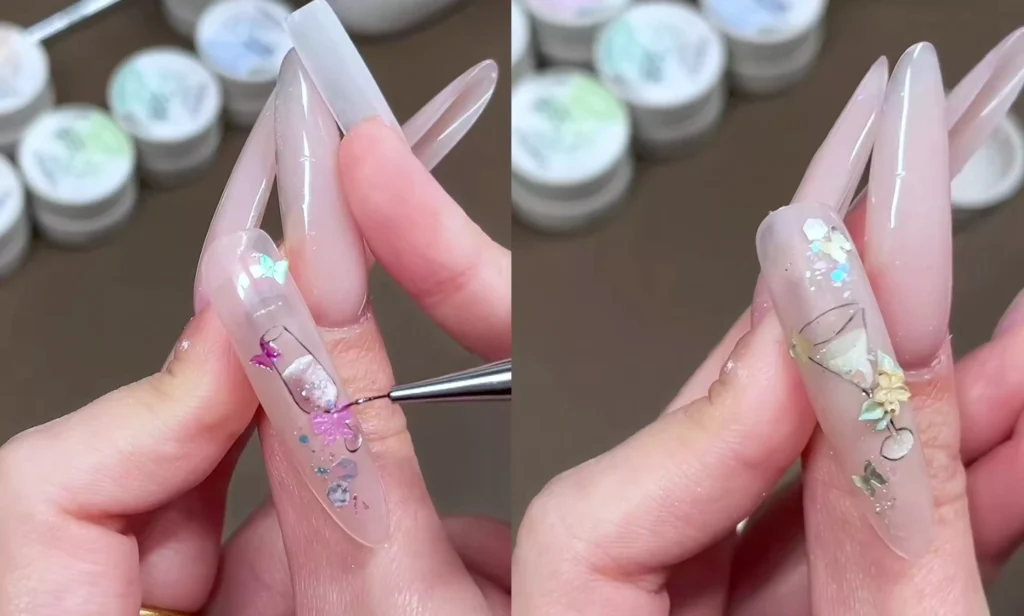
Se l'area dipinta a mano del bicchiere da vino è ampia, si possono incastrare più paillettes all'interno per far sembrare la superficie dell'unghia un effetto stroboscopico sotto la luce.
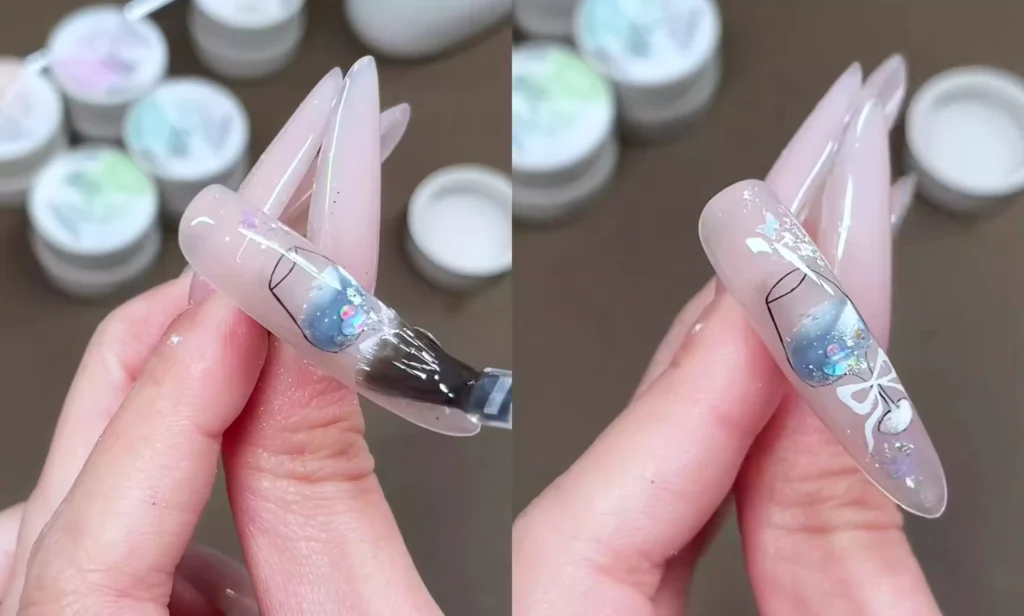
From the wine glass outline to the cat’s eye light and shadow, every step is to balance the exquisiteness and agility. If you are interested, you may wish to follow the steps and try to mix your own “manicure special”
Infine, vorrei raccomandare lo smalto gel CHROMÉCLAIR. I loro prodotti si concentrano sulla sicurezza, sulla bassa irritazione, sulla protezione dell'ambiente e non contengono ingredienti nocivi, riducendo il rischio di allergie (Smalto gel senza HEMA). Proteggono le unghie sane e sono disponibili in una varietà di colori per soddisfare le estetiche più diffuse, assicurando a ogni consumatore un'esperienza d'uso sicura e protetta.
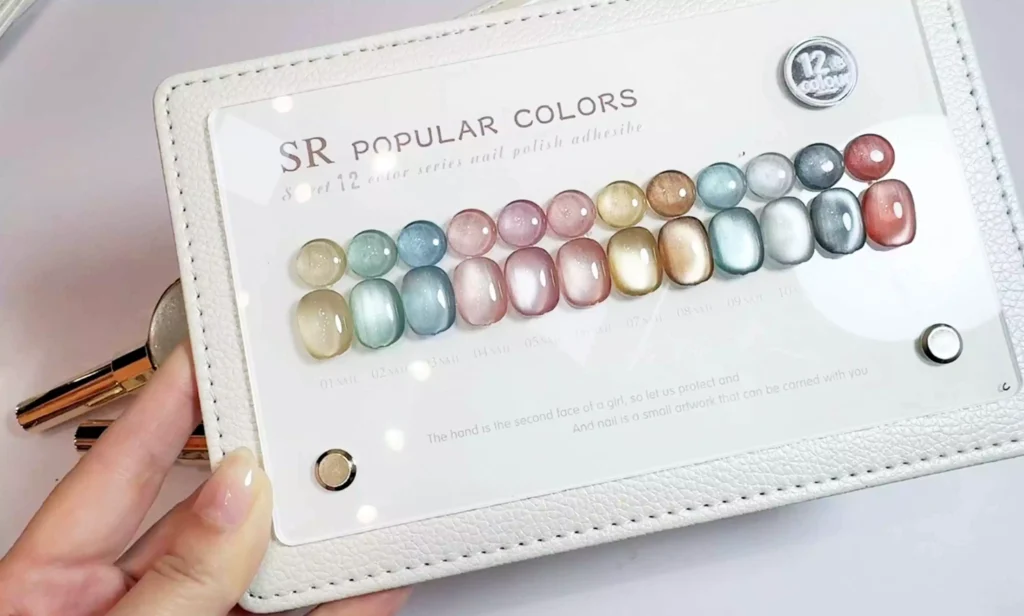
Se riscontrate qualche problema durante il processo, potete guardare il video tutorial qui sotto. Se ritenete che il tutorial sia utile, mettete un "mi piace" e iscrivetevi. Alla prossima volta.
 English
  Spanish
  German
  French
  Italian
  Dutch
Dutch