
Der Sommer ist da! Heute zeige ich euch, wie ihr eine super funkelnde, leuchtende Sternschnuppen-Maniküre kreiert und die Sommersterne auf euren Fingerspitzen einfängt. Folgt mir Schritt für Schritt, um diese wunderschöne Maniküre nachzumachen!
Schritt 1: Grundierung und Basis-Katzenaugen-Kreation
Wähle zuerst deinen Lieblings-Basislack (ich habe CHROMÉCLAIR verwendet). HEMA-freie Gel-Politur Produkte Nr. 41, ein schlichter blaugrüner Farbton, perfekt für den Sommer!) und lackieren Sie Ihre Nägel gleichmäßig. Dieser Schritt sorgt dafür, dass der Katzenaugen-Effekt lebendiger wirkt und länger anhält.
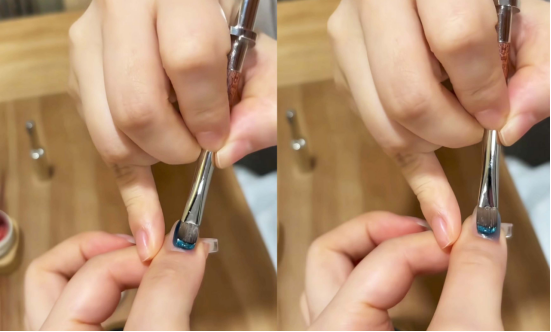
Wenn die Grundierung fast trocken ist, nehmen Sie die Magnetwerkzeug, Ziehen Sie es langsam nah an die Nageloberfläche heran und saugen Sie mit dem Magneten die katzenaugenartige Textur mit dem perlmuttartigen Glanz heraus. Nun erscheint ein zarter, glänzender Streifen wie ein Sternenhimmel auf Ihren Nägeln – einfach traumhaft!.
Schritt 2: Verfeinern Sie das Katzenauge & Umgang mit schwimmendem Leim
Empfohlener nächster Schritt
HEMA/TPO-freie Starterroutine
Sie probieren CHROMÉCLAIR zum ersten Mal aus? Beginnen Sie mit einer kleinen, aufeinander abgestimmten Pflegeroutine anstatt mit einer beliebigen Flasche.
- Wählen Sie eine HEMA/TPO-freie Farbe oder ein Set.
- Kombinieren Sie es mit einem passenden Unter- und Überlack.
- Verwenden Sie dasselbe System für eine reibungslosere erste Maniküre.
Shop-Starter-Routine-SetBeginnen Sie mit UV1 7PCSVergleiche alle Routinen
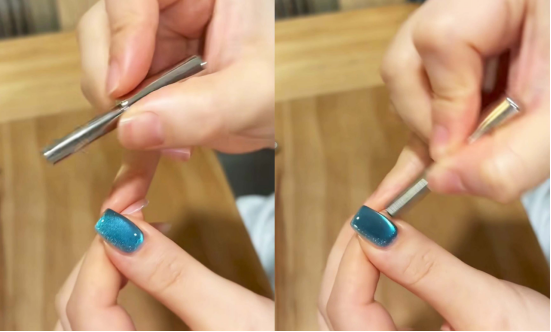
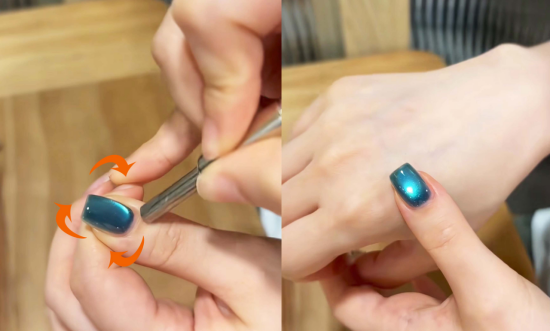
Als Nächstes verwenden Sie das kleinere Ende des Magneten und kreisen damit um Ihren Finger, um einen dynamischeren und gleichmäßigeren Lichteffekt im Katzenauge zu erzeugen.
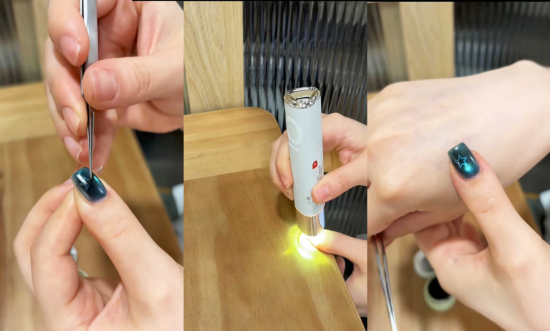
Härten Sie die Kleberschicht mit einer Nagellampe aus. Nach dem Aushärten befinden sich noch einige Klebereste auf der Nageloberfläche. Keine Sorge, wischen Sie diese einfach vorsichtig mit einem Wattepad ab, und Ihre Nägel sind im Nu wieder sauber.

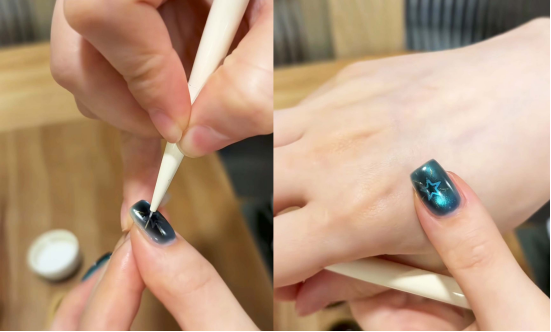
Schritt 3: Dekorieren und Farbe auftragen (Fünfzackiger Stern + schwarzer Kleber)
Jetzt wird dekoriert! Zuerst klebst du einen fünfzackigen Stern auf (wähle einen kleinen, zarten Stern für einen besonders eleganten Look!). Sobald er klebt, tupfst du mit einem Wattepad etwas schwarzen Kleber auf deine Nägel. Das verleiht dem Stern Tiefe und erzeugt einen verträumten, sternenklaren Effekt.

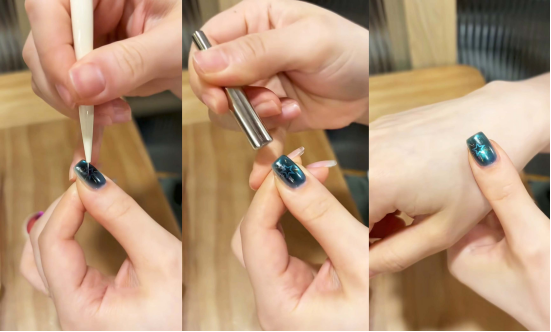
Nehmen Sie den Aufkleber nach dem Fotografieren ab und denken Sie daran, ihn mit dem Licht zu fixieren.
Schritt 4: Mehrfarbiges Cat-Eye-Overlay (Gold + Rosenrot)
Sie können die Farben nach Ihrem persönlichen Geschmack wählen, es empfiehlt sich jedoch, zwei oder drei Farben zu verwenden, um Ihre Maniküre zu verschönern und die Farbabstimmung zu erleichtern. Tragen Sie zunächst goldenes Katzenaugen-Gel auf und malen Sie einen Kreis entlang des Nagelrandes. Achten Sie dabei auf eine ruhige Hand, um gleichmäßige Linien zu erzielen.
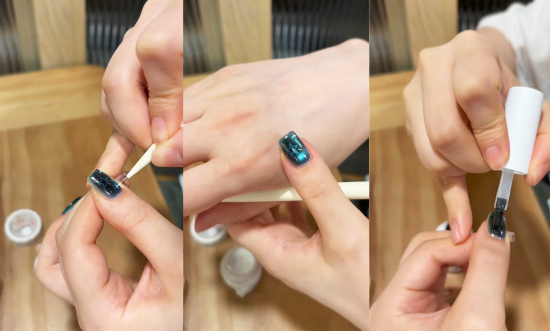
Wechseln Sie nun zu einem rosaroten Cat-Eye-Gel und ziehen Sie vorsichtig eine feine Linie (sie muss nicht lang sein, nur lang genug für einen dekorativen Effekt). Verwenden Sie anschließend einen Magneten, um den Cat-Eye-Effekt zu verstärken und so den goldenen und rosaroten Schimmer dreidimensional wirken zu lassen. Härten Sie das Gel anschließend unter einer UV-Lampe aus. Ihre Nägel werden nun wie eine Galaxie funkeln.
Schritt 5: Kleine Sterne aufmalen und mit Dichtungsmasse abschließen
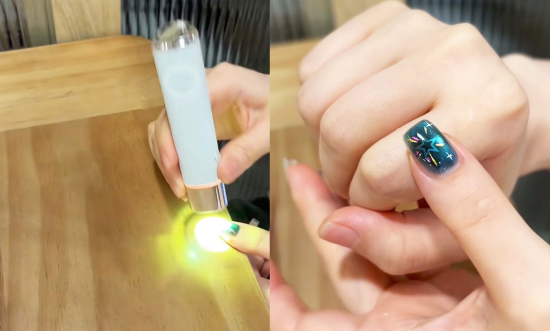
Nachdem der Lack ausgehärtet ist, verwenden Sie einen feinen Nagellackstift, den Sie in eine helle Farbe tauchen (Silber oder Weiß wirken beide sehr märchenhaft), und zeichnen Sie zwei kleine Sterne auf die freien Stellen des Nagels, um den “Sternenhimmel”-Effekt zu vervollständigen.
Zum Schluss tragen Sie einen Decklack auf, der widerstandsfähiger und heller ist. Nach dem Auftragen unter einer Lampe aushärten lassen, und schon ist eine funkelnde Meteor-Maniküre fertig.
Ich empfehle die Nagellackprodukte von CHROMÉCLAIR: Fokus auf Sicherheit, geringe Hautreizung, Umweltschutz, keine schädlichen Inhaltsstoffe, reduziertes Allergierisiko (TPO-frei & HEMA-frei), eine Vielzahl von Farben, die gängigen ästhetischen Ansprüchen gerecht werden, für Anwender mit empfindlicher Haut geeignet sind, gesunde Nägel pflegen und sicherstellen, dass jeder Kunde ein sicheres und unbedenkliches Erlebnis hat.
Interessierte Freunde können sich auf der Website die
WEB: https://chromeclair.com/
Die ganze Anleitung endet hier. Nach der Fertigstellung werden Ihre Nägel wie eine Sommernachts-Sternschnuppe in der Hand sein, funkelnd und schön. Es passt gut zu Röcken und Hosen im Sommer. Probiert es einfach aus, meine Lieben. Wenn ihr Fragen habt, fragt mich bitte im Kommentarbereich. Tschüss!