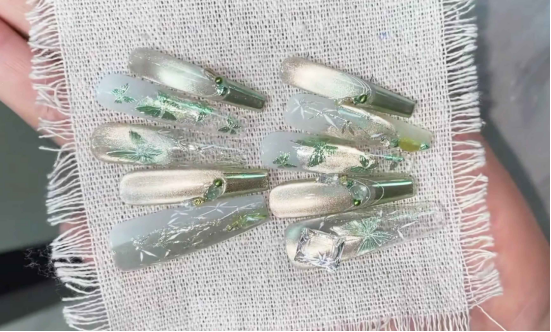
A touch of fresh green brings a minty coolness to summer. Create a manicure to please yourself! Today, let’s explore the essence of the “Green Bamboo Manicure Tutorial” and learn how to create a vibrant and refreshing summer manicure.
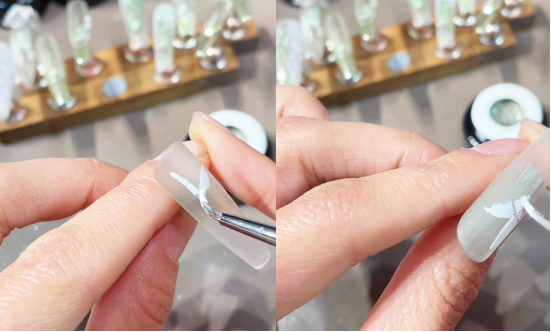
Schritt 1: Wählen Sie eine Grundfarbe, wählen Sie mintgrün
Um einen erfrischenden Sommerlook zu erzielen, ist die Wahl der Grundfarbe entscheidend. Ich empfehle, ein klares Grün mit einem subtilen Perlglanz zu wählen, um einen durchscheinenden, natürlichen Look zu erzielen. (In diesem Tutorial habe ich CHROMÉCLAIR Hema-Free Gel-Polish No. 809; it’s clear, easy to blend, and non-toxic!)
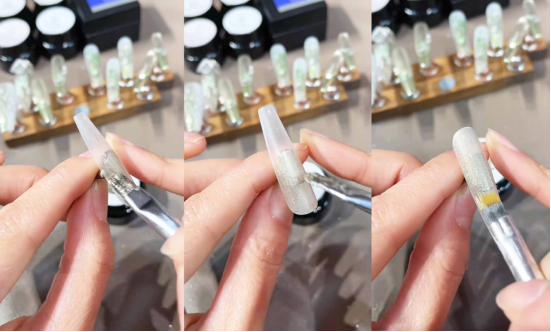
Apply the paint to half of your nail. Don’t rush; once you’ve evenly applied the paint, use a sweeping brush to gently create a gradient effect. Next, use the cat’s eye magnet: first draw it sideways to create a “broad light” effect, then push it in the center to create a “glass bead” texture. The result is a light, clear green, resembling newly emerged bamboo shoots, setting the stage for the subsequent “green bamboo” element and making the green more vibrant.
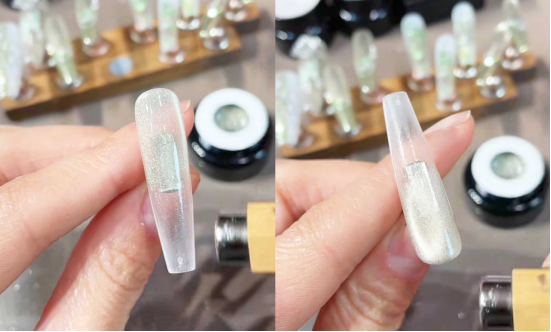
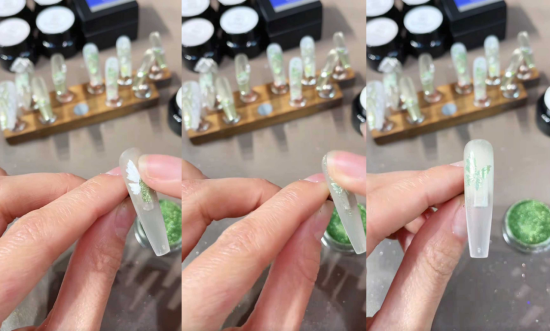
Schritt 2: Matte Topcoat für eine matte Textur
Nachdem der Cat-Eye-Basecoat vollständig getrocknet ist, tragen Sie einen nicht haftenden, matten Decklack auf. Dieser Topcoat sorgt nicht nur für ein luxuriöses, mattes Finish, sondern bietet auch eine rutschfeste Oberfläche für die nachfolgende Bemalung und ermöglicht eine bessere Haftung von Farbkleber und Magic Mirror Powder.
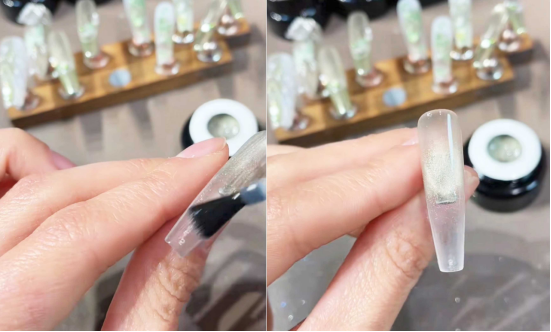
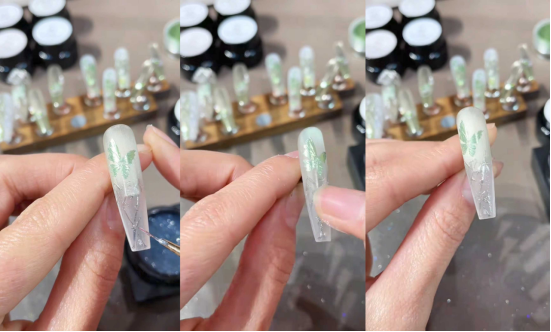
Schritt 3: Zeichnen Sie einen Schmetterling und tragen Sie Magic Mirror Powder für einen dynamischen Effekt auf.
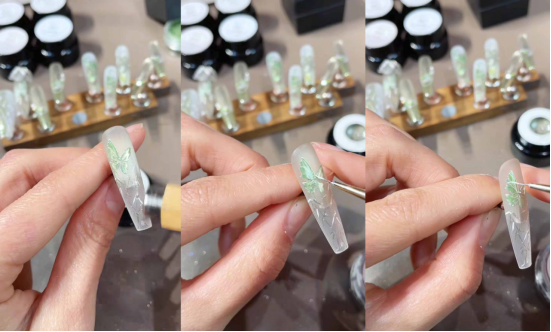
Use “No-Wash White Paint Glue” to draw a butterfly: Dip the tip of your brush into the glue and lightly outline the butterfly on the nail. Draw the wings lightly, imagining the butterfly perched on a bamboo leaf.
After painting the butterfly, take the “green magic mirror powder” to rub the butterfly with powder: use your fingertips or cotton swab to gently press and wipe, so that the magic mirror powder sticks firmly to the painting glue, and the butterfly will instantly turn into a gradient green.
Schritt 4: Bemalen Sie den Bambus und fangen Sie die poetische Schönheit des Bambuswaldes ein.
Use modeling glue to paint the bamboo. This glue is non-flowing, making it ideal for creating three-dimensional or intricate designs. Dip the tip of your brush into the glue and slowly outline the bamboo branches on your nails, then add the details of the leaves. Because the glue doesn’t flow, you can paint the entire bamboo shape in one go without worrying about lines collapsing. After painting the bamboo, apply “Light Champagne Magic Mirror Powder” to give the branches and leaves a soft sheen.
Schritt 5: Details hinzufügen und die Versiegelung verstärken
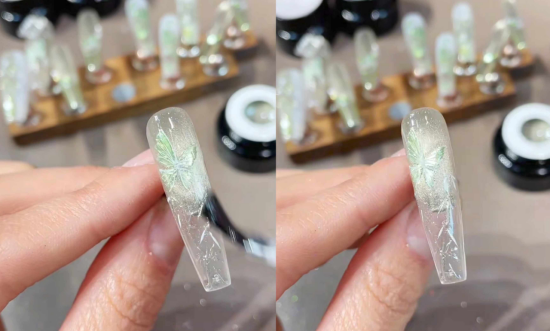
Fügen Sie mit weißem Malkleber nach dem Zufallsprinzip ein paar kleine Blätter hinzu, um die verstreuten Zweige eines Bambuswaldes zu simulieren.
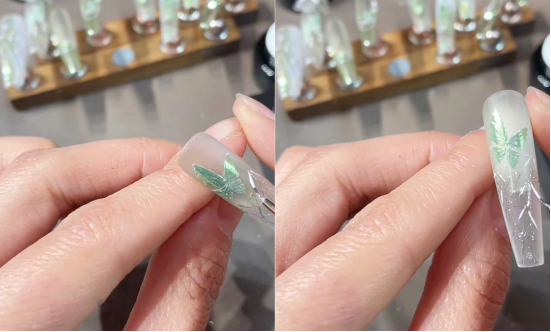
Then take “No. 809 Cat’s Eye Glue” and paint it on the butterfly. The magnetic strip absorbs the light to make the butterfly’s color richer and more layered. Finally, use “white drawing glue” to outline the butterfly. The butterfly instantly has a “skeletal feel” and is extremely agile!
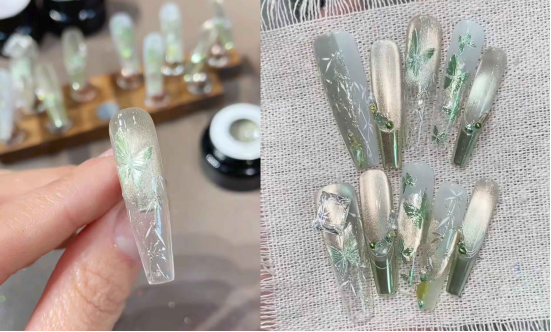
Nachdem alle Muster getrocknet sind, tragen Sie eine Schicht verstärkende Dichtungsmasse auf und leuchten schließlich mit dem Licht, um das Ganze zu vollenden.
Folgen Sie dieser Anleitung, um eine erfrischende Bambus-Maniküre zu kreieren. Ob in Kombination mit heller Kleidung oder einem geblümten Kleid, es kann den Gesamtlook sofort aufwerten und Sie im heißen Sommer auffallen lassen. Probieren Sie es aus!
In diesem Tutorial habe ich CHROMÉCLAIR-Gelpolitur verwendet. Ihre Produkte sind sicher, reizarm, umweltfreundlich und enthalten keine schädlichen Inhaltsstoffe. Sie reduzieren das Risiko von Allergien (HEMA-freie Gel Polish), protect healthy nails, and have a variety of colors to cater to mainstream aesthetics, ensuring that every consumer’s user experience is safe and secure.
Wenn Sie während des Prozesses auf Probleme stoßen, können Sie sich das Video-Tutorial unten ansehen. Wenn Sie das Tutorial nützlich finden, bitte mögen und abonnieren Sie mich. Wir sehen uns im nächsten Tutorial!