Ciao, sono Starry. Sono stata immersa nel settore delle forniture per unghie per otto anni interi, lavorando ogni giorno con tutti i tipi di gel per unghie, formulazioni di ingredienti, problemi di allergia e test di resistenza all'usura. Conosco i dettagli di quasi tutti i gel costruttori presenti sul mercato e ho visto innumerevoli onicotecniche e utenti privati commettere errori evitabili semplicemente perché non conoscono a fondo questo prodotto.
Quasi ogni giorno, clienti e onicotecniche mi pongono sempre le stesse domande: cos'è il gel costruttore? In cosa si differenzia dal normale smalto semipermanente? Ed è adatto a unghie danneggiate e sottili?

In questo articolo condividerò con voi tutto ciò che ho imparato in otto anni di esperienza nel settore, per spiegarvi a fondo cos'è il gel costruttore: la scienza che ne sta alla base, la corretta applicazione, le differenze rispetto al normale smalto gel, i metodi di rimozione e come scegliere le formule meno allergeniche possibili. Una guida completa e senza informazioni superflue.
1. Per prima cosa, capire cos'è davvero il gel costruttore: non è solo uno smalto gel spesso.
La maggior parte delle persone che si avvicinano per la prima volta alla ricostruzione unghie pensa che il Liquid Builder Gel sia semplicemente uno "smalto gel più denso". Questo equivoco è la causa principale di un utilizzo scorretto, di una scarsa durata e persino di danni alle unghie.
Dal punto di vista tecnico, il gel costruttore (a volte chiamato anche gel modellante o gel strutturante) è un gel ad alta viscosità che può essere polimerizzato con luce UV o LED. La funzione principale del gel non è la colorazione, bensì il rinforzo strutturale dell'unghia naturale. Spiegate sempre ai vostri clienti e studenti: se lo smalto semipermanente è la vernice che rende bella una casa, il gel costruttore ne è la base e il supporto.
Passo successivo consigliato
Routine con gel lisciante e a lunga durata
Bolle, sfaldamento, restringimento e opacità sono solitamente problemi del sistema. Realizza la manicure contemporaneamente con la preparazione, la base, il colore e il top coat.
- Preparare la lamina ungueale prima di applicare lo smalto.
- Utilizzare una base coat che si abbini al sistema in gel.
- Completa il lavoro con uno strato di finitura compatibile per una maggiore durata e brillantezza.
Acquista un kit di routine a lunga durataScopri il top coat senza bisogno di puliziaConfronta tutte le routine
Funzioni principali: Ideale per unghie deboli e danneggiate
Il gel costruttore è stato creato con lo scopo di risolvere ogni tipo di problema della struttura dell'unghia, con funzioni specifiche pianificate fin dall'inizio. È un agente coadiuvante e riparatore, non solo cosmetico:
- Rinforza le unghie fragili e deboli, creando le condizioni favorevoli per una corretta crescita delle unghie.
- Consente di realizzare allungamenti delle unghie naturali e di riparare unghie screpolate, spezzate o danneggiate.
- Crea una forma strutturata per le unghie, correggendo quelle piatte o incurvate.
Curare: Ogni secondo conta più di quanto si pensi
Per indurire completamente il gel costruttore si utilizza una lampada UV/LED professionale. Il processo di polimerizzazione medio richiede dai 30 ai 60 secondi con una lampada LED, mentre con una lampada UV bastano 2-3 minuti, e non è negoziabile. Per il mio marchio partner, ho effettuato dei test sullo stesso gel costruttore, confrontando due gruppi: il primo è stato polimerizzato per 45 secondi e il secondo per soli 20 secondi. Dopo 5 giorni, il secondo gruppo ha iniziato a sfaldarsi ai bordi e la sua durezza era inferiore alla metà di quella del primo.
In sintesi, una polimerizzazione incompleta non è solo uno spreco di tempo, ma anche di prodotto. Rende le unghie fragili, fa aderire il gel morbido al letto ungueale e aumenta il rischio di irritazioni. Quindi non c'è bisogno di avere fretta, perché pochi secondi in più garantiranno durata e protezione alle unghie.

2. Differenze chiave: Gel costruttore vs. smalto gel normale (oltre allo spessore)
Questa è la domanda che mi è stata posta più spesso nei miei otto anni di esperienza in questo settore. Sebbene entrambi siano a base di gel e necessitino di polimerizzazione con luce UV/LED, si tratta di prodotti completamente diversi con scopi completamente differenti. Nessuna competenza da parte vostra potrà risolvere il problema del sollevamento e della rottura delle unghie quando si sostituisce il gel costruttore con un normale smalto semipermanente. Ho preparato una tabella per aiutare i principianti a notare subito la differenza:
| Categoria di confronto | Gel costruttore (Gel strutturante) | Smalto gel normale |
| Consistenza e struttura | Denso, ad alta viscosità, modellabile, a flusso minimo | Sottile, a bassa viscosità, colante, non riesce a mantenere la forma o a sopportare il peso |
| Scopo principale | Supporto strutturale, estensioni, riparazioni, rafforzamento dei chiodi (focus: durata) | Colore, lucentezza, finitura decorativa (focus: estetica) |
| Livello di forza | Elevata resistenza; portante, resiste alla flessione e alla rottura | Bassa resistenza; quasi nessun supporto strutturale, si appoggia solo sulla superficie dell'unghia. |
| Strumenti di applicazione | Richiede pennelli per scolpire, forme per unghie o guide per tip; richiede una tecnica precisa. | Si applica con un pennello incorporato, senza bisogno di strumenti speciali o abilità avanzate. |
Ma soprattutto, una volta completamente indurito, il gel costruttore crea una rete polimerica tridimensionale reticolata molto spessa e compatta, che combina la resistenza dell'acrilico con l'elasticità del gel morbido. Rispetto all'acrilico tradizionale, il gel costruttore non si crepa né si scheggia facilmente e ha un odore notevolmente inferiore, il che lo rende più piacevole da lavorare. Questo è il motivo per cui viene utilizzato oggi nei saloni di tutto il mondo.
A causa della consistenza densa di questo materiale, è necessario prestare attenzione durante l'applicazione, poiché un'applicazione impropria può causare grumi, bolle o una superficie irregolare. L'applicazione deve essere effettuata a strati sottili e non in modo casuale.
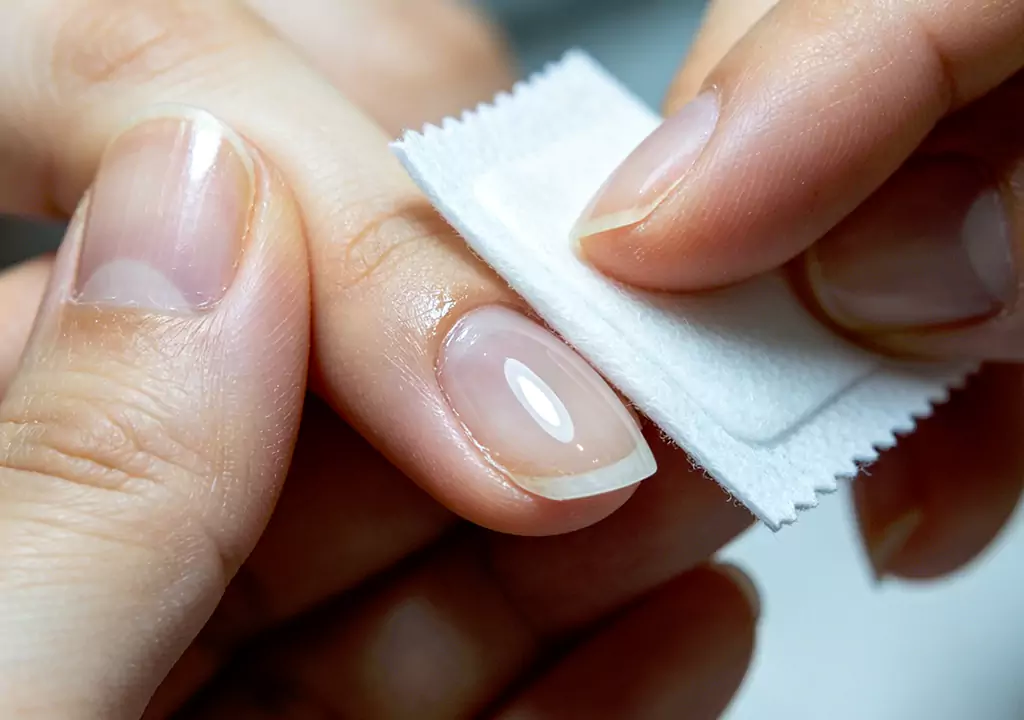
3. Rimozione sicura: Un passo sbagliato rovina mesi di crescita delle unghie
Ho visto personalmente quante persone rovinano le proprie unghie a causa di una rimozione errata del gel, dopo averci dedicato tanto tempo con l'aiuto di gel costruttori. Questa è la fase più critica, quella in cui si commettono più errori, e se non viene eseguita correttamente, tutti gli sforzi saranno vani. Di seguito, la mia tecnica di rimozione sicura in 4 fasi, basata su 10 anni di esperienza:
- Limare lo strato superiore per aprire il sigillo: Lima lo strato superiore con una lima per unghie di media durezza per rimuovere lo strato superficiale e la finitura lucida. Non limare fino all'unghia naturale, poiché stai rimuovendo solo lo strato protettivo per permettere all'acetone di penetrare.
- Il metodo di ammollo e avvolgimento per ammorbidire: Immergete dei dischetti di cotone nell'acetone puro e avvolgete ogni unghia strettamente con i dischetti, coprendola poi con della carta stagnola. Lasciate agire per 10-15 minuti. Alcuni prodotti che promettono una rimozione in 2 minuti sono in realtà gel ammorbidenti; seguite scrupolosamente le istruzioni.
- Spingere delicatamente, non staccare o raschiare.: Una volta completamente ammorbidito, utilizzare un bastoncino di legno d'arancio o uno spingi cuticole in metallo per spingere delicatamente il gel fuori dal letto ungueale. Non scacciare, staccare o forzare mai, in quanto è la principale causa di danni permanenti alle unghie.
- Idratare immediatamente: Subito dopo la rimozione, applicare un olio per cuticole e una crema per unghie per idratare la lamina ungueale, la pelle circostante e i bordi dell'unghia, alleviando la secchezza causata dall'esposizione all'acetone.
Una mia cliente, per risparmiare tempo, non limò le unghie e rimosse il gel dopo soli cinque minuti di ammollo, strofinando energicamente. Si ritrovò con la lamina ungueale assottigliata quasi a metà e le unghie diventarono estremamente sensibili. Ci vollero ben otto mesi prima che tornassero alla normalità.

4. Variazioni popolari: BIAB vs. Hard BIAB: qual è la scelta giusta per voi?
La manicure in gel strutturato è diventata un vero successo tra tutte le tendenze nail art grazie alla sua tecnologia di gel costruttore facile da usare. Due delle tendenze nail art più popolari sono il BIAB (Builder in a Bottle, noto anche come Plexigel), un gel strutturato in un unico passaggio facile da usare. Spesso si fa confusione tra il BIAB normale e quello rigido, ecco perché li analizzerò entrambi qui.
BIAB regolare: ideale per la cura quotidiana e per extension leggere.
Il BIAB classico è la varietà più comune. La sua consistenza è medio-densa, ma la tecnica di modellatura è resa molto più semplice grazie al flacone unico, che lo rende molto più pratico da usare rispetto al gel costruttore tradizionale. Il risultato è una manicure naturale e impeccabile, ben diversa dalle unghie finte voluminose del passato, e permette di allungare le unghie naturali fino a 1 cm. Ideale per la cura standard delle unghie e per manicure dall'aspetto naturale.
BIAB duro: per unghie gravemente deboli o danneggiate
Hard BIAB è una formulazione superiore e potenziata che offre una resistenza e una rigidità doppie rispetto al BIAB tradizionale. Questo prodotto è specificamente studiato per unghie molto sottili, fragili e soggette a rotture frequenti, o per clienti che hanno subito fratture a causa di rosicchiamenti o altri traumi. Consiglio sempre l'utilizzo di Hard BIAB in questi casi, poiché agisce come uno scudo e permette alle unghie di rigenerarsi in un ambiente sicuro.
Kit per il fai-da-te in casa: Per i principianti, ma senza tagliare gli angoli
Oggi, grazie ai kit per la ricostruzione unghie in gel fai-da-te di diverse marche, è possibile applicare autonomamente le unghie artificiali, grazie alla fornitura di formine personalizzate e degli strumenti necessari. Questo semplifica il processo; tuttavia, c'è un inconveniente: le lampade per la polimerizzazione domestica non sono generalmente potenti come quelle utilizzate nei saloni. Il tempo di polimerizzazione deve essere lo stesso di quello prescritto e, come di consueto, è necessario applicare strati sottili.
5. Guida agli acquisti: Certificazioni di sicurezza e ingredienti non sono negoziabili
Dopo otto anni di esperienza nel settore della ricostruzione unghie, vorrei ribadire un principio fondamentale: la sicurezza deve avere la priorità sull'estetica. Quando si sceglie un gel costruttore, non basate mai la vostra decisione solo sul prezzo o sul colore, soprattutto se avete unghie delicate o soggette ad allergie. Ecco cosa dovete tenere a mente:
- Standard SGS, MSDS e FDA: Scegli prodotti testati da SGS o MSDS, conformi agli standard FDA. Queste certificazioni indipendenti garantiscono la sicurezza e la non irritazione dei prodotti. Non optare mai per prodotti economici e senza marca, perché non puoi permetterti di compromettere la salute delle tue unghie.
- Evitare i più comuni fattori di allergia: L'HEMA (2-idrossietil metacrilato) è l'allergene più comune nei gel per unghie e il TPO è un fotoiniziatore ad alto rischio legato a reazioni cutanee come arrossamenti e prurito. Molti marchi rinomati offrono oggiSenza HEMA e senza TPO formule per utenti sensibili. Ad esempio, CHROMÉCLAIR offre una linea di prodotti completa che comprende Gel costruttore liquido, top coat diamante, Top coat opaco e Rivestimento di base in gomma, formulato senza questi ingredienti aggressivi. Non si tratta solo di eliminare alcune sostanze chimiche; si tratta di ridefinire la cura sicura delle unghie, mantenendo la durata e la brillantezza di un trattamento professionale e riducendo al minimo i rischi di allergie.

- Una corretta conservazione garantisce che il prodotto non venga sprecato: Il gel costruttore è sensibile alla luce e al calore. Evitare di conservare il prodotto vicino a fonti di calore e luce, poiché ciò potrebbe causare un addensamento o una polimerizzazione prematura. L'addensamento dovuto all'esposizione al freddo è normale; è sufficiente riscaldare il flacone per ripristinare la consistenza corretta.
Approfondimento sul settore: Il gel costruttore potrebbe diventare uno strumento di riabilitazione delle unghie?
Oltre ai consigli pratici che ho fornito sopra, c'è un pensiero su cui ho riflettuto a lungo durante i miei otto anni di carriera.
Con la crescente disponibilità sul mercato di formule ipoallergeniche, vegane e dermatologicamente testate, il confine tra trattamenti cosmetici per le unghie e cura professionale si fa sempre più labile. Mi sorge spontanea una domanda: il gel costruttore può diventare un dispositivo per trattamenti clinici delle unghie?
Allo stato attuale, i dermatologi hanno poche opzioni a disposizione per trattare la malnutrizione delle unghie, le unghie sottili causate da traumi e le unghie che si sfaldano. Un gel rinforzante delicato, in grado di proteggere le unghie danneggiate e favorire la crescita di quelle sane, potrebbe rappresentare un valido complemento non invasivo al lavoro dei dermatologi.
Certo, sarebbero necessari test approfonditi e approvazioni mediche, ma non c'è dubbio su dove stiamo andando, perché la cura delle unghie non riguarda più solo l'estetica, ma soprattutto la salute delle unghie. Questo è sempre stato il principio guida della mia carriera.
Pensieri finali
Il gel costruttore non è un mistero: è un salvavita per le unghie deboli e danneggiate e la base di una manicure strutturata e di lunga durata. Seguite queste regole fondamentali: scegliete formule certificate e sicure, curate completamente, rimuovete correttamente ed evitate gli allergeni aggressivi. In questo modo, potrete ottenere unghie bellissime e mantenere sane le unghie naturali.
Mi piacerebbe sentire il vostro parere: Quali prodotti per unghie utilizzate attualmente? Se avete provato gel costruttore, Qual è la parte più impegnativa: la sagomatura e il livellamento o la rimozione sicura? Lasciate un commento qui sotto con le vostre esperienze o domande e cerchiamo di risolvere i problemi insieme. Dopo tutto, nel settore delle unghie, i dettagli fanno la differenza.