
Hello everyone! I’m Star from CHROMÉCLAIR.
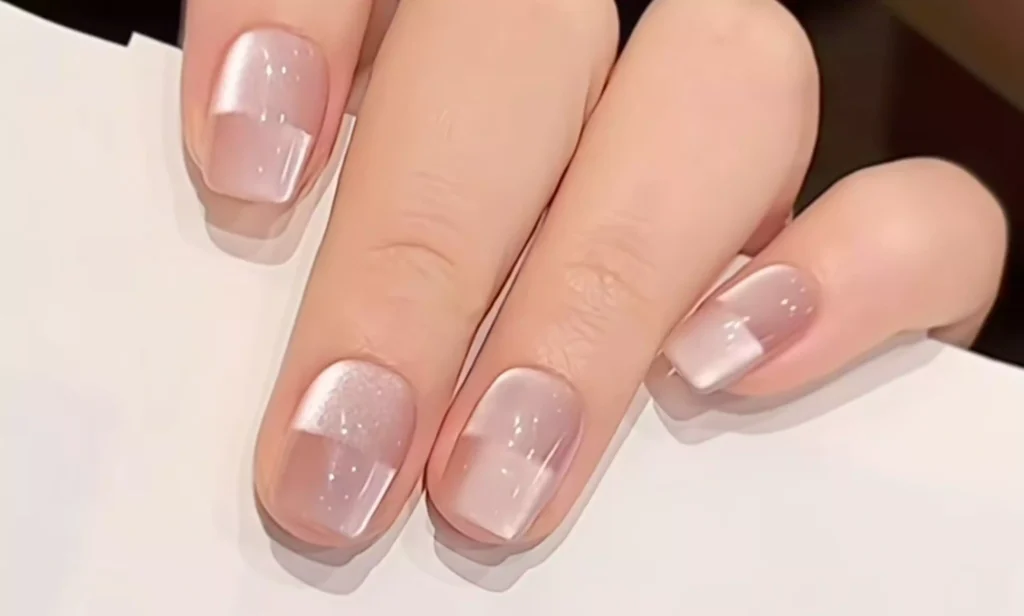
Oggi vi mostrerò i passaggi per creare questa manicure cat-eye nude di alto livello. Se seguite i passaggi, potrete facilmente ottenere la stessa squisita manicure.
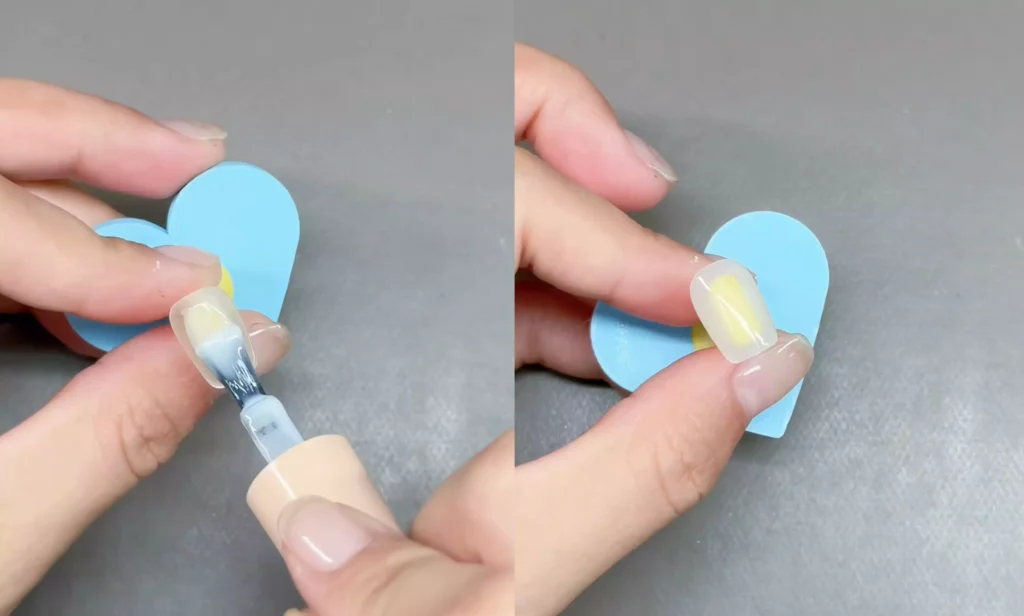
Fase 1: Adesivo e zona
Applicare uno strato leggero di smalto gel bianco cremoso e stenderlo uniformemente sulle unghie con un pennello. Mettete lo smalto sotto una lampada per unghie per farlo indurire.
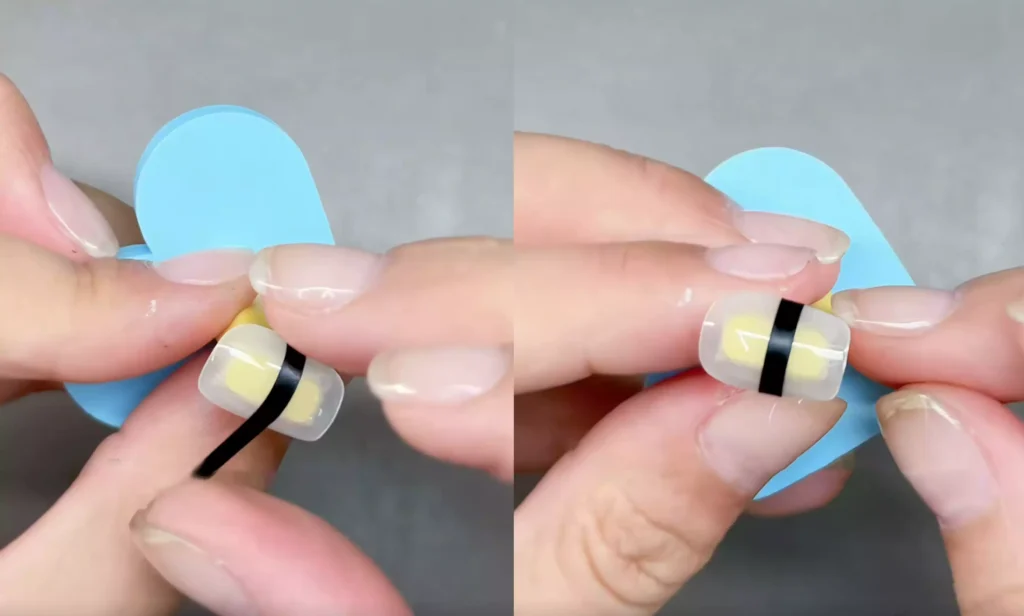
After the polish has cured, remove the prepared tape and apply it precisely along the center line of the nail to define the upper and lower areas of the manicure. If the tape isn’t sticky enough, gently press it down to secure it firmly to the nail. Ensure the tape is completely in contact with the nail to prevent spillage when applying polish later.
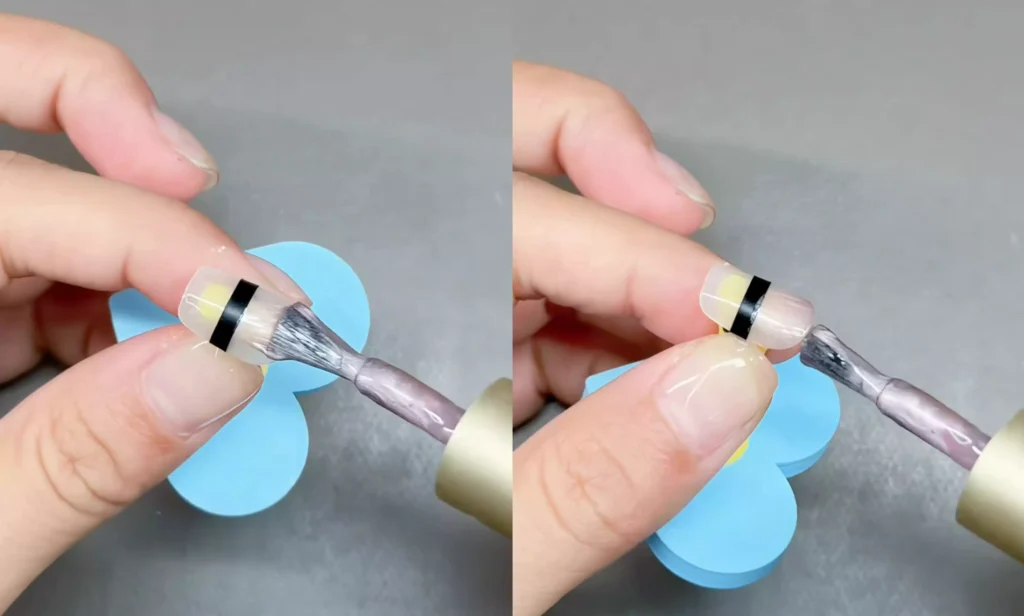
Fase 2: Creare il cat-eye nella parte superiore
Prendete un nudo smalto gel occhi di gatto (Io ho usato CHROMÉCLAIR Smalto gel senza ema CE-05, che ha una solidità di 21-35 giorni ed è facile da applicare in modo uniforme, anche per i principianti). Iniziare ad applicare lo smalto sulla metà superiore dell'unghia. Fare molta attenzione durante l'applicazione, coprendo uniformemente ogni angolo e bordo dell'unghia, assicurandosi di non tralasciare nessuna zona.
In this step, don’t shine the light first, but carefully tear off the tape that was previously applied.
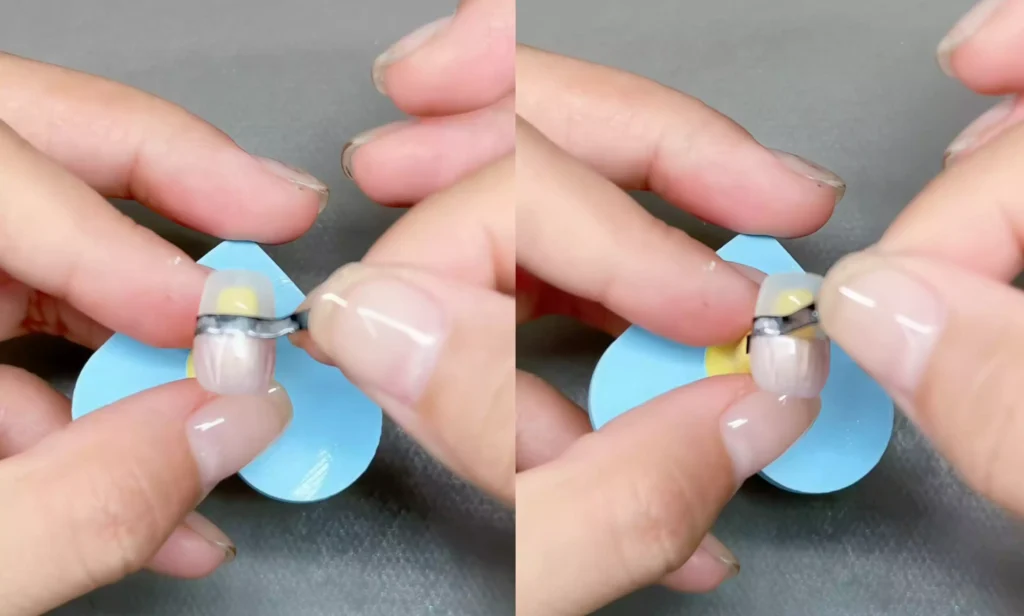
Then take out the cat’s eye magnet and absorb a bright inverted light above the nail piece to create a unique cat’s eye effect, and then put it into the nail lamp to cure it.
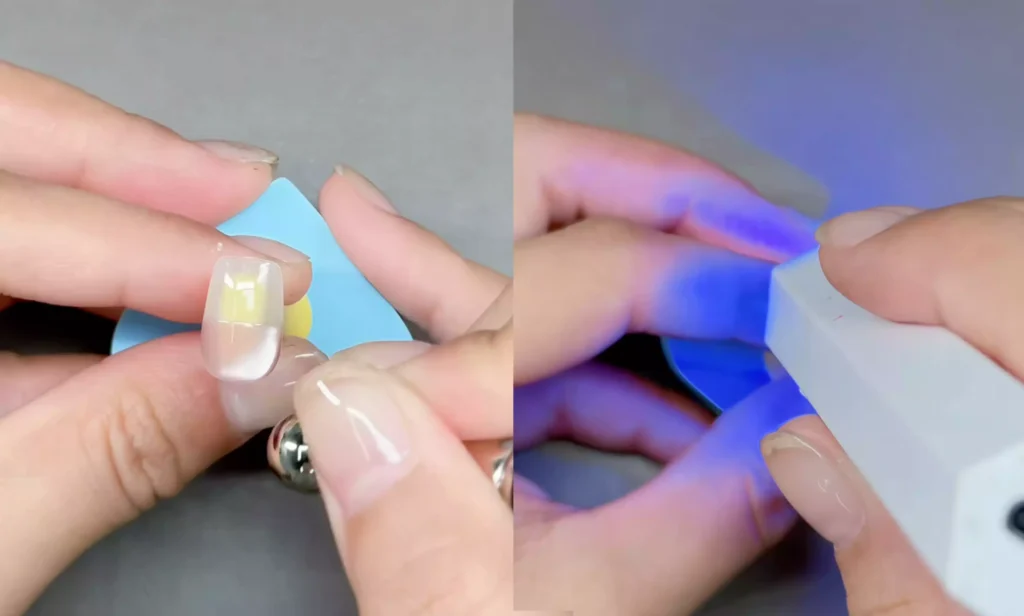
Step 3: Create the cat’s eye on the lower half
Per la restante metà inferiore dell'unghia, seguire gli stessi passaggi della metà superiore.
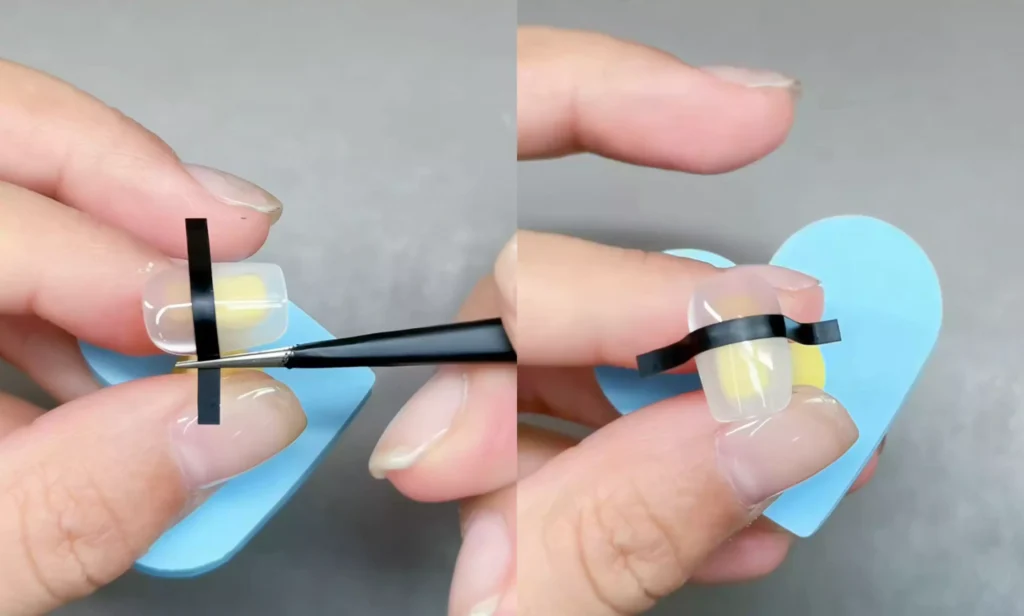
When applying the new adhesive strip, ensure the bottom edge of the strip aligns precisely with the bottom edge of the upper cat’s eye. Do not allow the upper cat’s eye to show, as this will affect the overall aesthetic. Repeat the steps from the previous step, using the cat’s eye magnet to draw a side light in the opposite direction of the previous one above the nail. Place the nail under a nail lamp to cure.
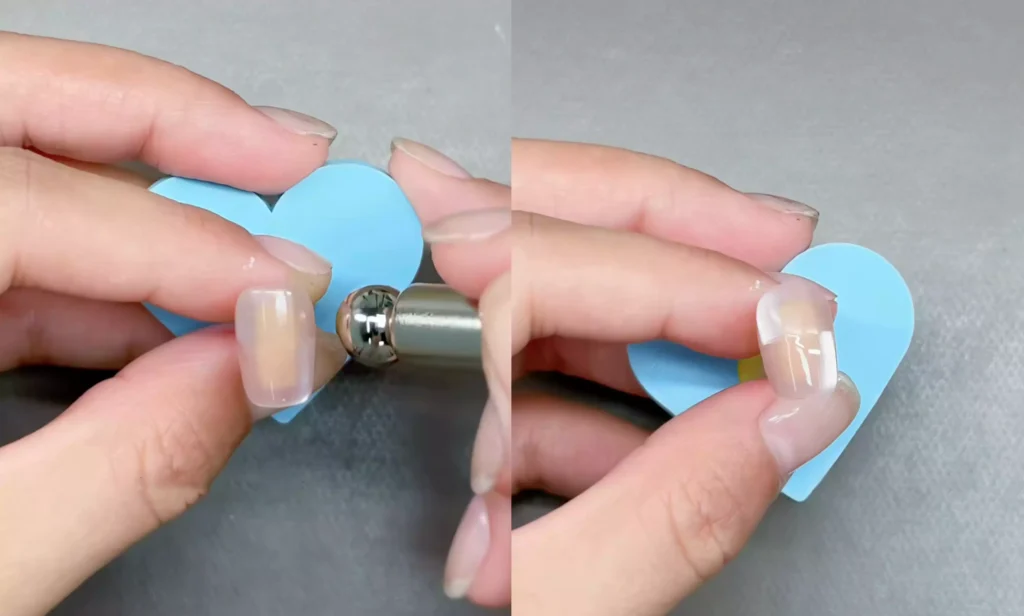
Fase 4: terminare con un top coat
Infine, applicare uniformemente uno strato di top coat sulle unghie. Mettetele sotto una lampada per unghie per farle asciugare e la vostra lussuosa manicure cat-eye nude è ora perfettamente completata.
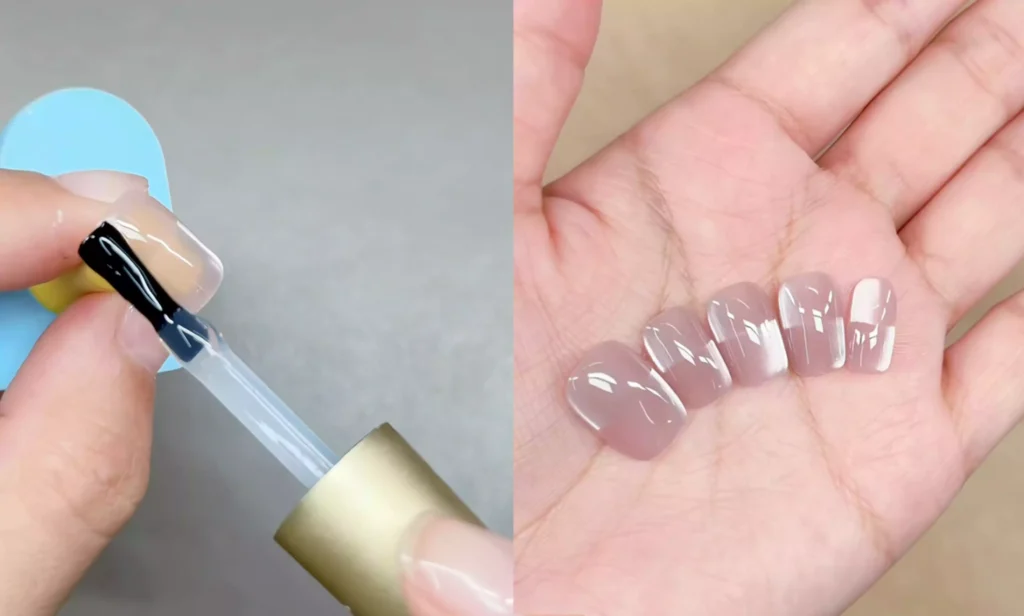
Potete provare a realizzarla seguendo questi passaggi dettagliati. Credo che anche voi possiate creare bellissimi effetti di nail art come nell'esempio.
Finally, I recommend CHROMÉCLAIR’s Smalto gel senza HEMA. This product prioritizes safety, is hypoallergenic, environmentally friendly, and (HEMA-free&TPO-free) contains no harmful ingredients, significantly reducing the risk of allergies while gently protecting nails. It also comes in a wide range of shades and lasts for approximately 21-35 days, ensuring every user can experience a product that’s both safe and reassuring.
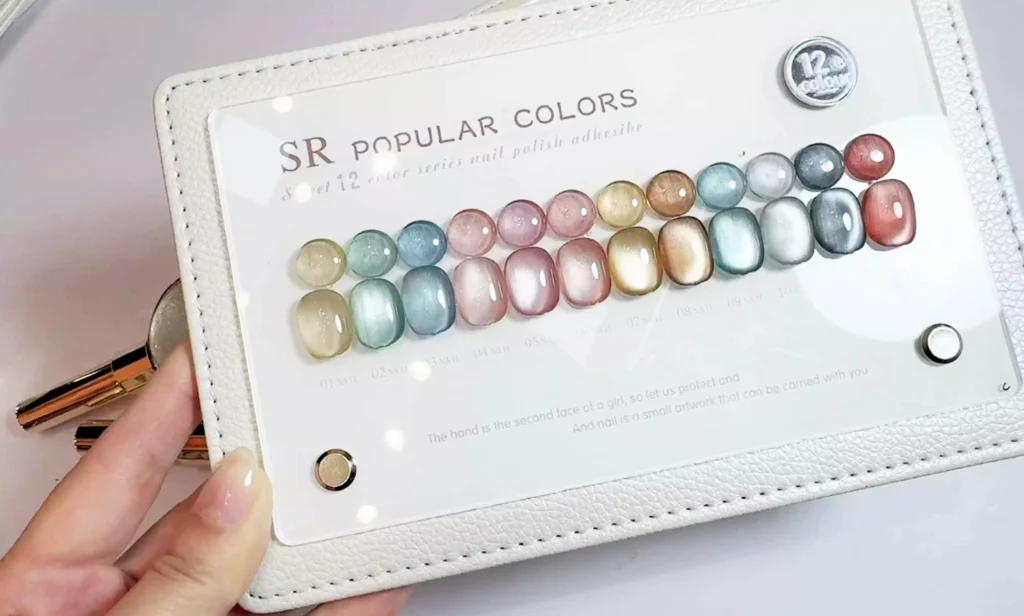
Questo è tutto per la condivisione di oggi. Vi raccomando di mettere il vostro like, aggiungerlo ai preferiti e iscrivervi. Invitate i vostri amici a unirsi a noi! Se riscontrate qualche problema durante il processo, potete guardare il video tutorial alla fine dell'articolo. Alla prossima!
 English
  Spanish
  German
  French
  Italian
  Dutch
Dutch