
Desideri avere unghie uniche e accattivanti? Oggi sveleremo i segreti delle romantiche unghie da sirena. La procedura è semplice, il procedimento è facile e ti spiegherò le tecniche in dettaglio nel seguente tutorial. Anche le principianti possono provarci. Ti insegnerò passo dopo passo come creare la "magia dell'oceano". Se ti piace, seguimi e iniziamo!
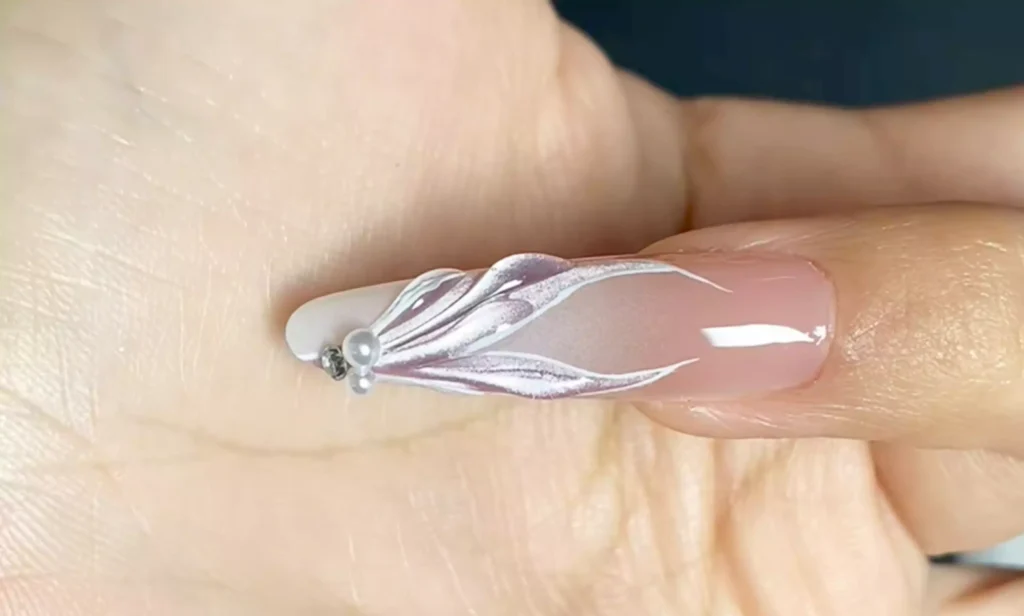
Fase 1: Colore di base e gel per occhi di gatto mano di fondo
Per prima cosa, scegliete il vostro preferito smalto gel occhi di gatto (ho usato CHROMÉCLAIR Smalto gel senza ema CE-06, che ha un effetto sfumato trasparente).
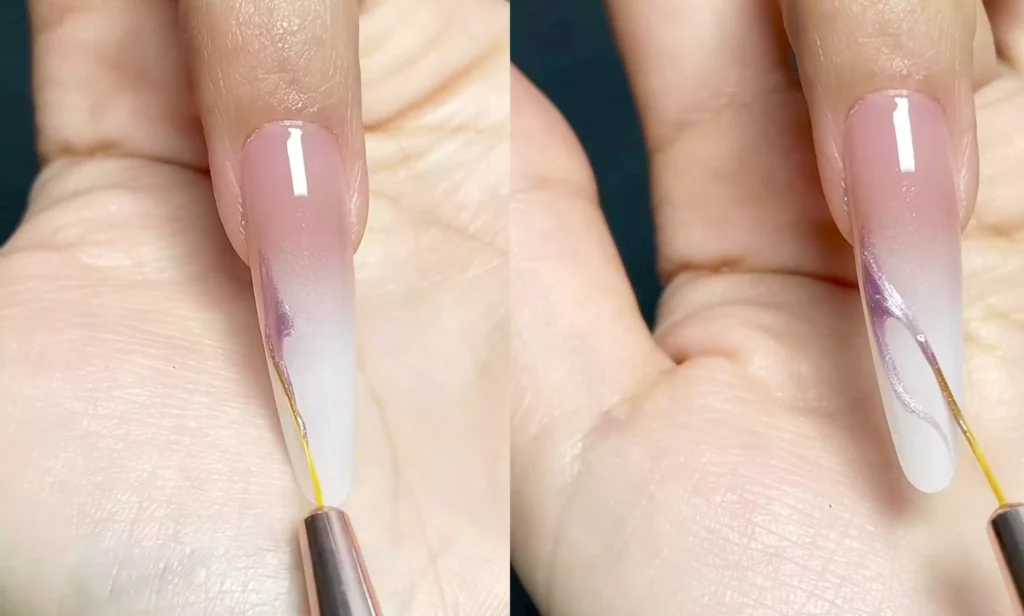
Si applica facilmente e ha una tenuta del colore a lunga durata. Dopo averlo applicato sulla superficie dell'unghia, delineate prima il contorno della coda di sirena: immaginate le linee fluide della coda di una sirena.
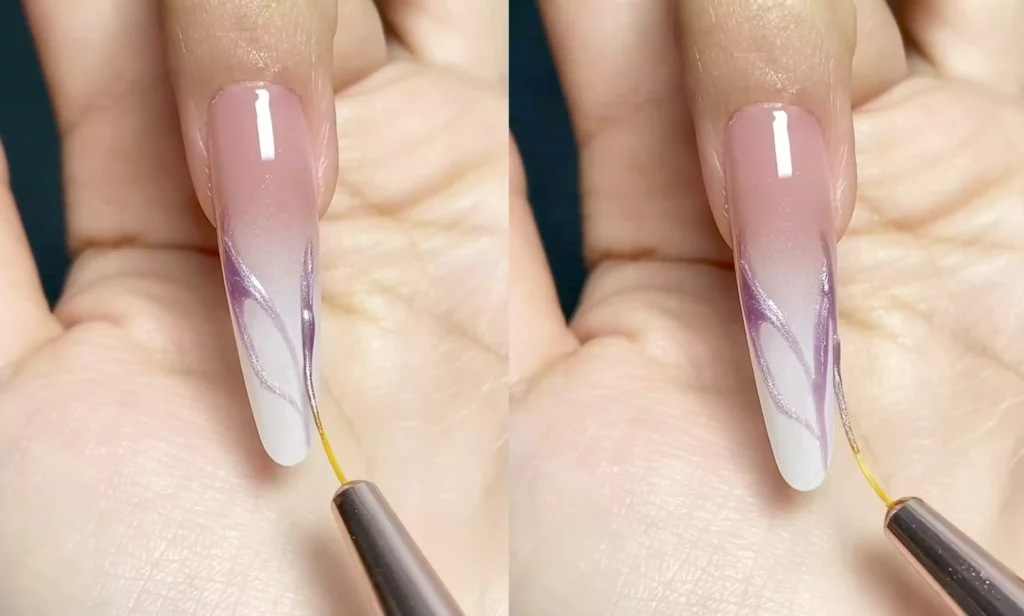
Riempite l'area del contorno con la colla occhio di gatto, quindi utilizzate una calamita per creare un effetto lucido, in modo che il colore di base assomigli alla superficie scintillante del mare e getti una base da sogno per lo styling successivo.
Passo successivo consigliato
Crea il kit per un look di nail art
Per realizzare un tutorial di bellezza non basta una boccetta di colore. Scegli il colore, il dettaglio artistico, la tecnica di trasferimento o l'applicazione dell'adesivo e il top coat, tutto in un unico kit.
- Scegli il colore principale o il set.
- Aggiungi il dettaglio artistico: adesivo, gel per trasferimento, magnete o pennello.
- Sigilla il risultato finale con uno strato di top coat.
Kit per nail artVedere il gel di trasferimentoConfronta tutte le routine
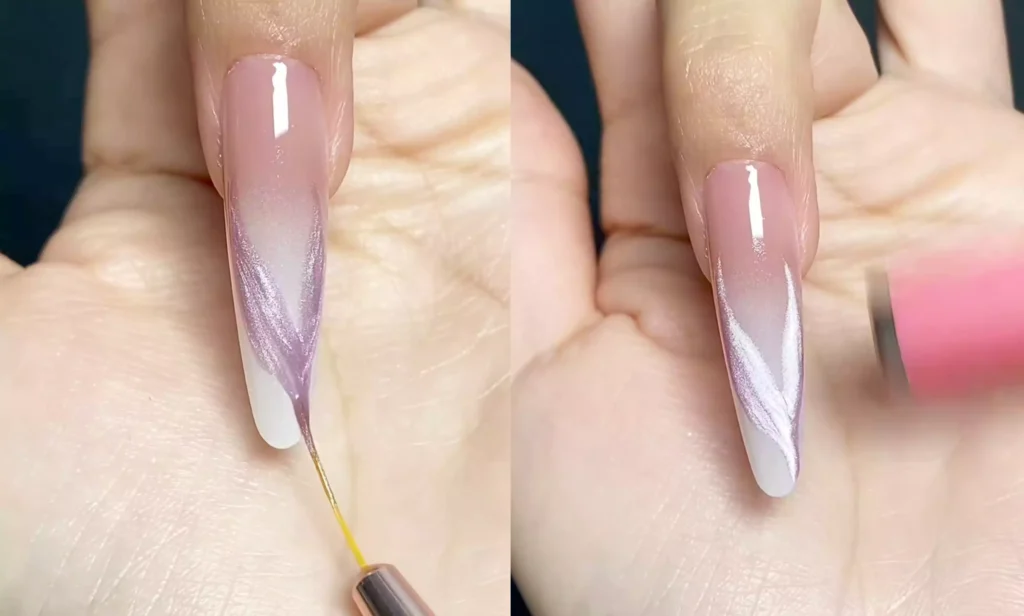
Fase 2: Contornare finemente con la colla per pittura bianca
Dopo che il colore di base si è asciugato, passare alla colla di vernice bianca per i contorni.
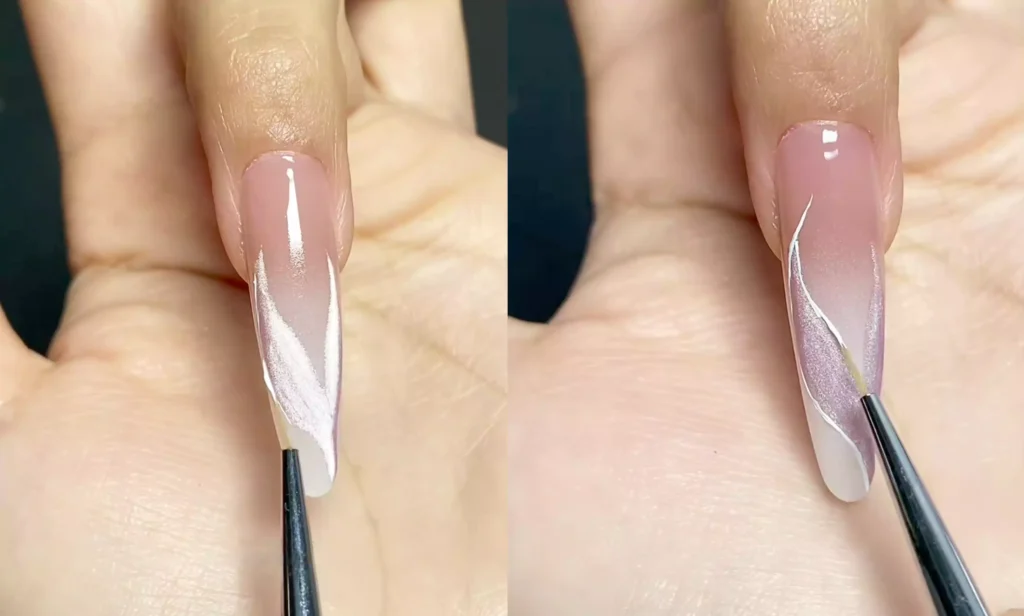
Questo passaggio mette alla prova la tua attenzione ai dettagli: traccia lentamente il contorno della coda della sirena, in particolare la punta. La fluidità delle linee determina direttamente la raffinatezza complessiva del disegno. Immagina di impreziosire la coda di pesce con un bordo argentato. Ogni tratto deve essere fermo, assicurandoti che le linee siano nitide e seguano naturalmente la curva della coda.
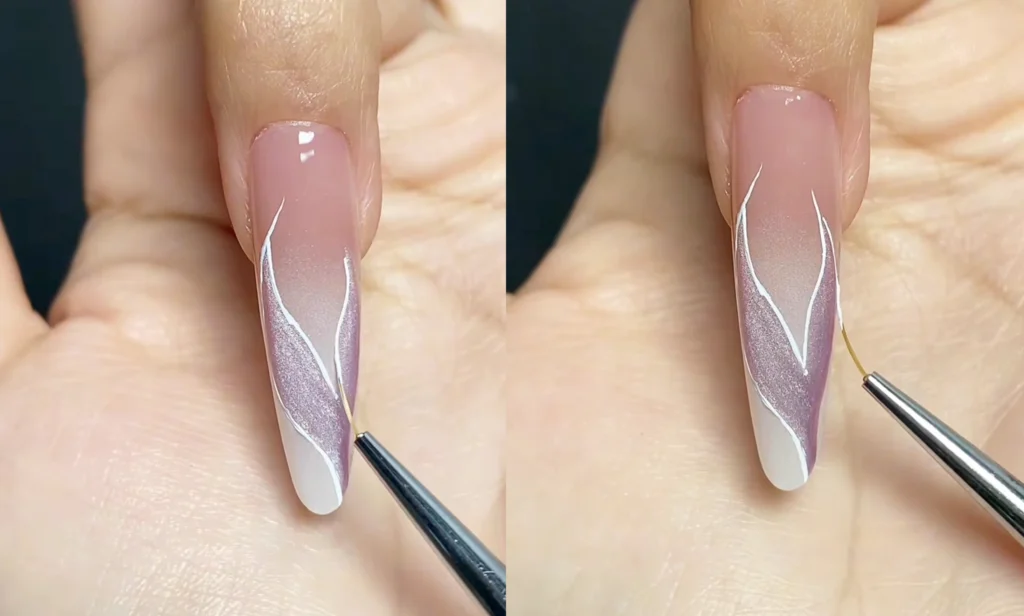
Fase 3: creare strati tridimensionali con il sigillante senza risciacquo
Scegliere un sigillante senza risciacquo ad alta viscosità per aggiungere tridimensionalità. Immergere la punta del pennello nella colla, quindi capovolgerlo per consentire alla colla di fluire naturalmente verso la punta.
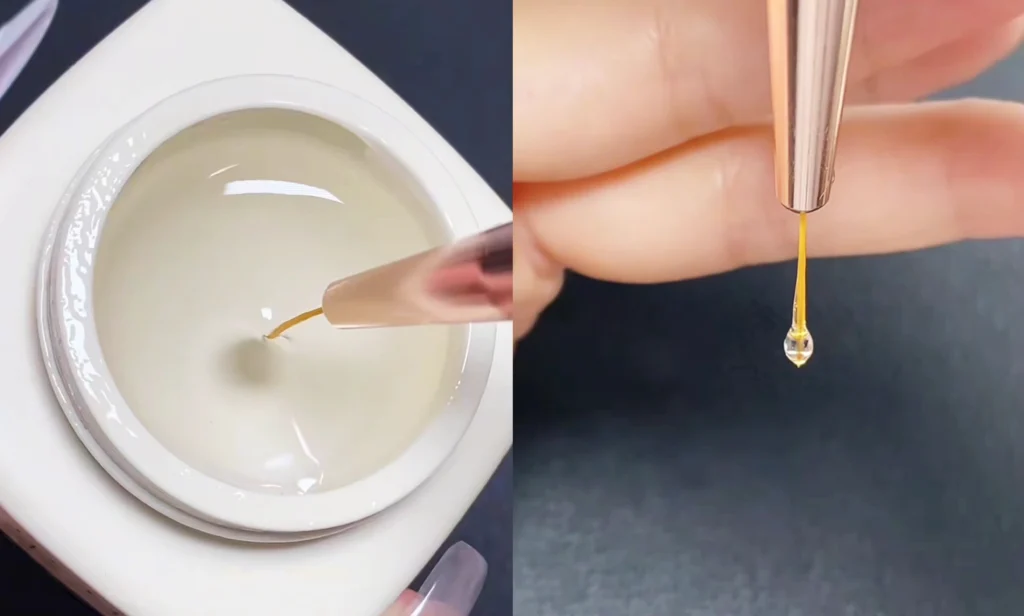
Quindi, "premere il cordone di colla con la punta della penna e trascinarlo verso il basso". Dopo aver trascinato ogni linea, usare una lampada per fissare la forma (per evitare che la colla si deformi).
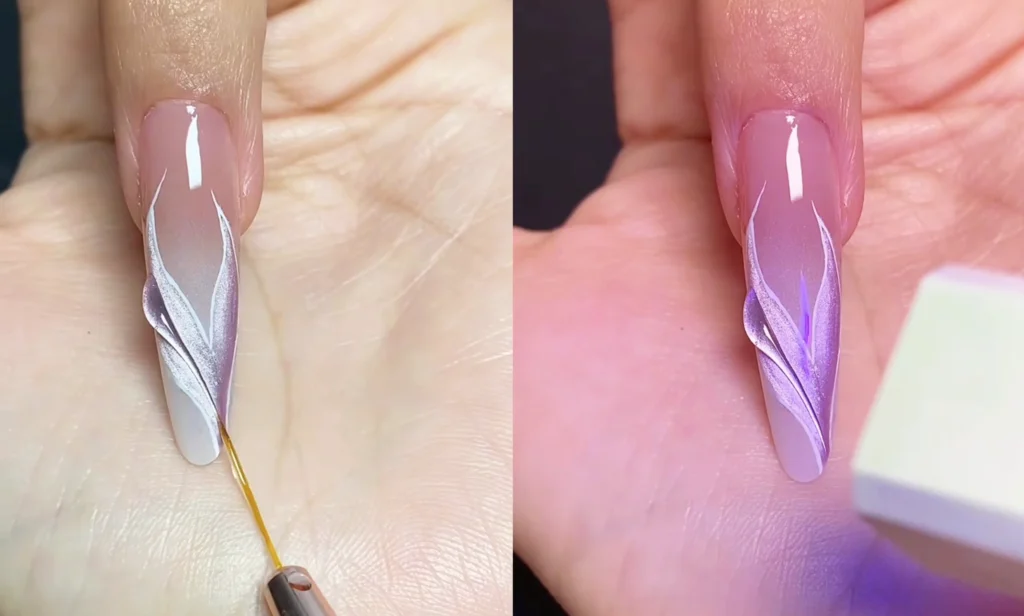
Se non si controlla correttamente la quantità di perline di gel durante il processo (come nell'esempio non riuscito), non fatevi prendere dal panico.
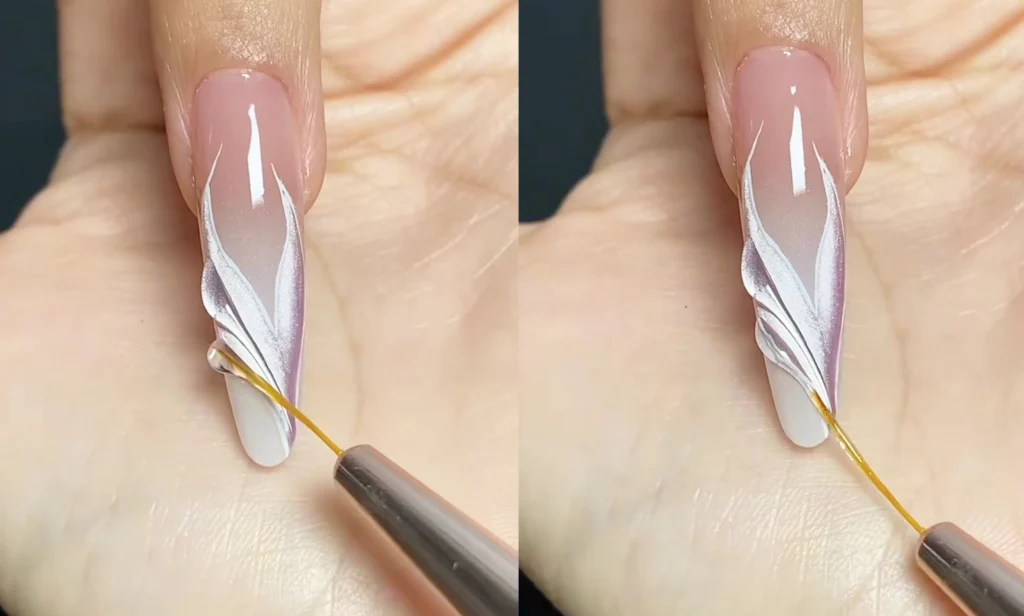
Dopo aver effettuato le regolazioni, continuare. Le leggere imperfezioni create a mano rendono la nail art più vivace.
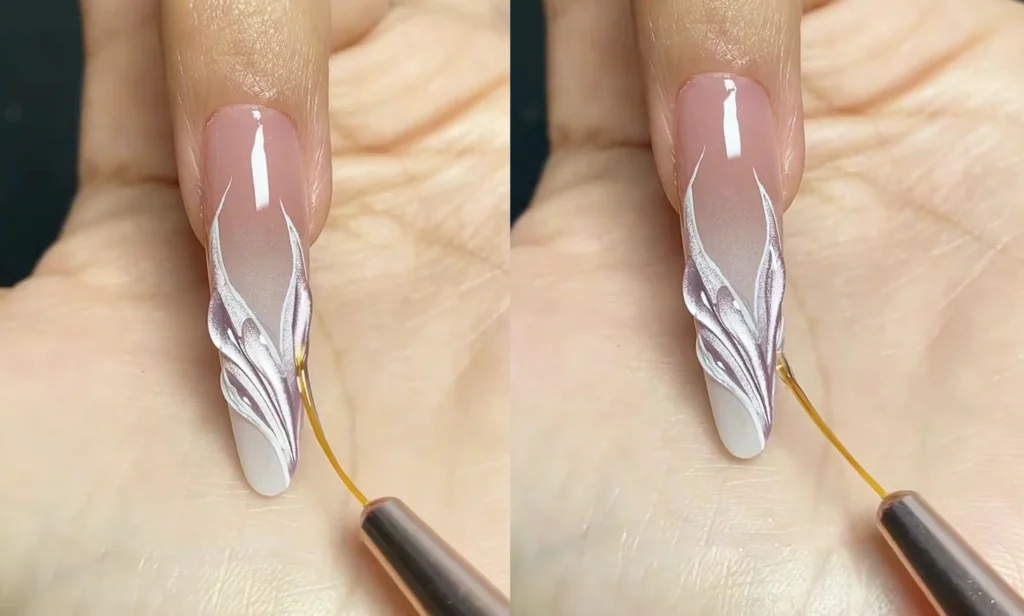
Fase 4: aggiungere tocchi decorativi per completare il look
Una volta che tutte le linee tridimensionali sono asciutte, aggiungere piccoli strass o perle: scegliere accessori delicati e piccoli e attaccarli delicatamente vicino alla coda del pesce, come stelle scintillanti nell'oceano. Infine, applicate un top coat per rinforzare il disegno, aumentare la durata della manicure e preservare l'esclusiva lucentezza traslucida della sirena.
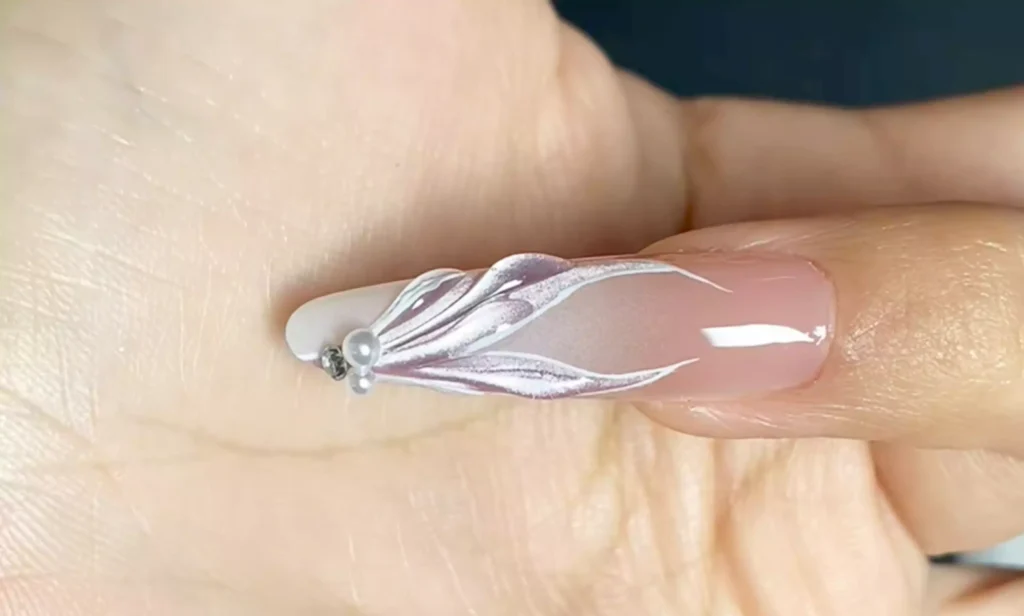
Dal colore di base sfumato al disegno tridimensionale a coda di pesce e alle decorazioni scintillanti, questa nail art cattura il romanticismo dell'oceano proprio a portata di mano. Seguite i passaggi e provate: anche voi potrete realizzare il vostro stile ispirato alle sirene.
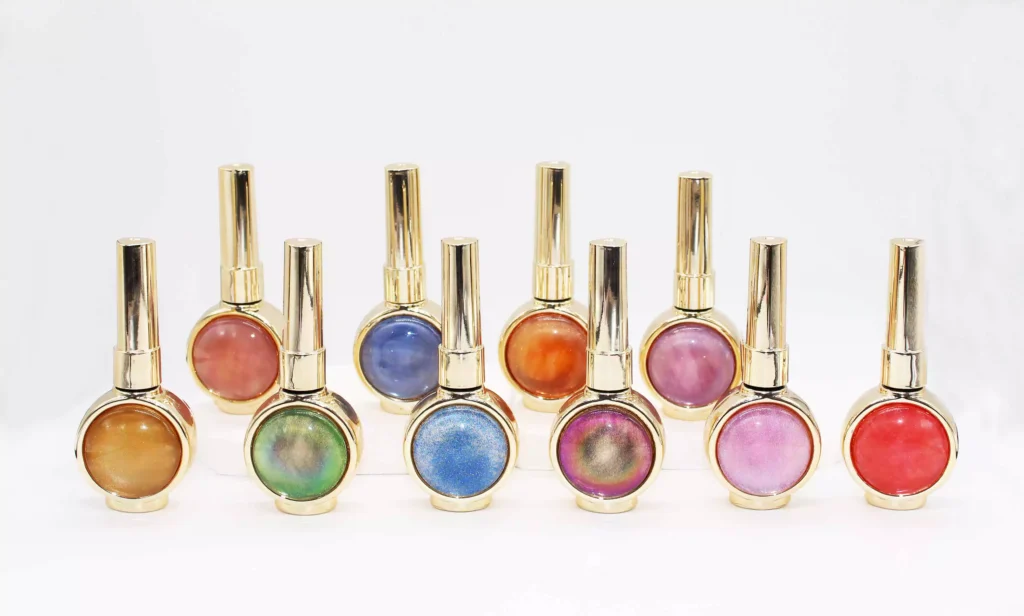
Nel tutorial ho utilizzato CHROMÉCLAIR Smalto gel senza HEMA. I loro prodotti sono noti per essere sicuri e ipoallergenici (senza HEMA e senza TPO), ecocompatibili e privi di ingredienti irritanti e dannosi, proteggendo la salute delle tue unghie. Offrono una vasta gamma di colori, una lunga durata (circa 21 giorni) e sono sempre al passo con le ultime tendenze, così puoi usarli con sicurezza e avere un look fantastico!
Se durante il processo avete domande, il video tutorial qui sotto fornisce risposte dettagliate. Se lo trovate utile, non dimenticate di mettere "Mi piace", salvarlo e iscrivervi al canale! Alla prossima!
 English
  Spanish
  German
  French
  Italian
  Dutch
Dutch